
Anshuman Khandual felt that there were a lot of devices with their own RAM in the world, and Linux should be able to allocate that memory to users as part of the general pool, rather than letting those devices hog it all for themselves.
It turns out to be hard to do this. Devices have to be initialized before they can be used, so the general pool of RAM would have to be grown by the kernel in a coherent way as new devices came online. Also, unlike regular system RAM, devices can removed from the system without warning, which poses its own set of problems.
There always are solutions to these sorts of problems, but they may involve unpleasant compromises, such as increased code complexity, speed reduction or using some areas of RAM in certain ways but not others.
Sometimes there also are unexpected opportunities for collaboration that emerge from these sorts of proposals. In this case, Anshuman found that Jerome Glisse's work on HMM (heterogeneous memory management) might be relevant, because it had the similar issue of RAM not always being available to the general pool. Jerome suggested they work together on finding a proper solution.
Dave Hansen also pointed out that the existing projects autonuma (automatic non-uniform memory architecture) and hugetlbfs were relevant to Anshuman's work, because they dealt with gathering up available RAM and adding it to the general memory pool as well.
But, not all projects can be merged in this way. Sometimes developers will make certain assumptions, or cut certain corners, because they don't see any other way to implement the thing they need. And, sometimes a developer on a similar project will need exactly the thing that the first developer had been trying to avoid. That's what happened here. David Nellans, who'd been working with Anshuman on his code, explained that, among other things, they wanted to avoid hugetlbfs support and concentrate on getting what they needed from THP (transparent huge tables) instead. But, Dave objected that this would force additional complexity into hugetlbfs—to special-case the RAM that Dave and Anshuman were working on.
There was quite a technical discussion, with no explicit resolution. This is the type of project that typically undergoes a wide-ranging discussion that gathers participants from all parts of the kernel. Eventually, various big-time kernel hackers may step in to adjust folks' direction and point out uncompromisable issues or extremely simple alternatives to complex debates.
A ret2dir attack is when a hostile user writes malicious code into kernel memory, hoping to trick the kernel into executing that code at a future date, like when a function call returns to that location. It's similar to the ret2usr attack, in which the same general thing occurs in user memory instead of kernel memory.
Juerg Haefliger recently wanted to implement eXclusive Page Frame Ownership (XPFO), which would prevent a user from modifying RAM that hadn't been allocated explicitly to that user. He posted some code to do this and had a bit of a technical discussion about it with Laura Abbott. There were no serious objections—just suggestions regarding portability and locking efficiency. It looks like Juerg's code will go into the kernel at some point.
Pavel Machek felt that certain Linux systems—particularly smartphones—didn't do a great job when battery power became low. The Nokia N900, he said, would run down the battery until it didn't have enough power left to do a clean shutdown. It would just crash. Pavel proposed adding code to detect when the battery was too low and doing a proper shutdown in that case.
He posted some code to do this, but initially walked it back when Tony Lindgren pointed out that a more configurable patch would really be better. Specifically, he said the exact voltage that would trigger a shutdown should depend on what would be best for any given system. To do this, Pavel replied that a good approach would be to create a battery object in the device tree and create configurable properties for those objects.
On second thought, however, Pavel said that maybe configurability wasn't really the thing in this case. The hardware had its own mechanism for alerting the operating system that the battery was low or dead, and Pavel felt that Linux simply should respect those messages. There was no need to second guess the hardware in this case.
The discussion ended inconclusively, but presumably, some kind of clean shutdown will replace the current crash behavior.
People who study the history of languages probably will look back at our current time and scratch their heads. We keep inventing verbs! First, Google became the verb we use for searching. Then, “Facebooking” someone became a viable way to contact them. Heck, I forgot about “texting” someone. It seems we just keep taking perfectly good nouns and making them verbs. We keep verbing all our nouns! But I digress.
Unfortunately, I've noticed a trend where people who want to do video chat are starting to say, “Facetime me.” The problem isn't with the terminology, it's with the proprietary technology. If you're an Android user, you can't “Facetime” someone. Google Hangouts sort of solves that problem, but it's not as user-friendly as Facetime on iOS is.

Google hopes to change that with its new Duo app. It's designed very much like Facetime, but it has native iOS and Android apps. In my trials, the video quality is fine, so it's really only adoption that needs to happen in order to become the standard across platforms. It's worth a try, but you'll have to convince your Apple friends to install a new app for video chatting. Also, “duo” doesn't really lend itself to verbification, so I'm a little worried Google has a non-starter on that note alone!
I listen to a lot of books. A lot. And honestly, although I've written about the “Listen” app for audiobooks, I tend to use Audible more than anything else anymore. Part of the reason is the Android app finally has more fine-grained speed settings. (I prefer around 1.4x speed.) iPhone people don't have that seemingly simple feature. Just saying.
The main reason I've been using Audible, however, is the pricing. Yes, I'm a Platinum subscriber, so I get two credits a month. But, it's the “add narration” feature on the Kindle store that really does it though. It's often cheaper to buy the Kindle version of a book and add Audible narration for less than the cost of the audiobook alone! That's not always the case, but it's always worth checking. Look at my example in the screenshots.
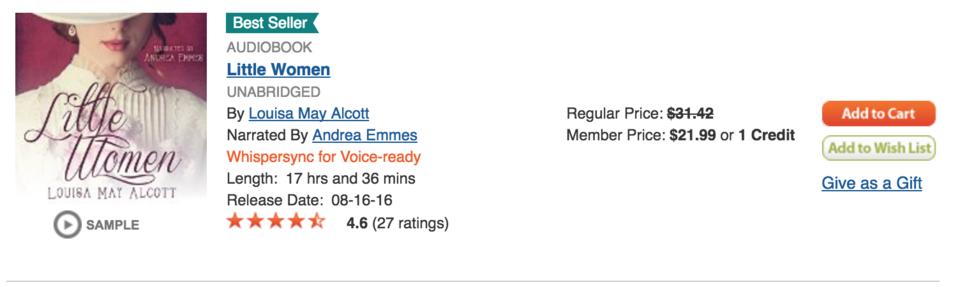
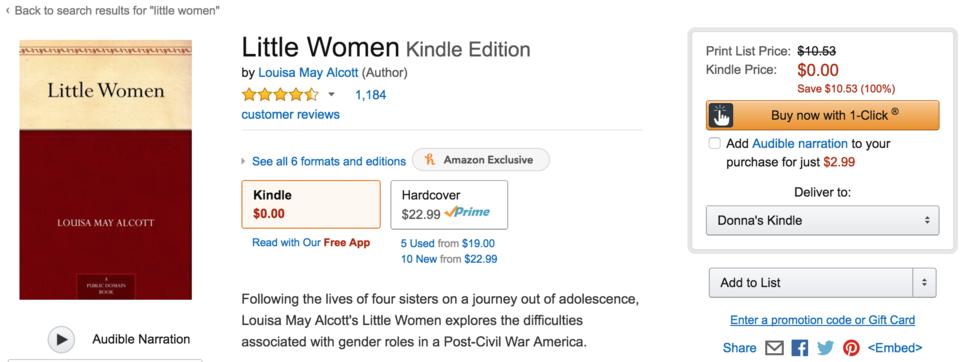
Yes, this book is free. But, you can add Audible Narration for $2.99. Notice how much it would cost to buy the book outright: $21.99! Not all books come with such a good deal, but many do. And if you add Audible narration, the book is added to your Audible account like any other book. You never have to read the Kindle version, but it's still nice to have both—especially when it's cheaper than just buying the audiobook!
Google Cardboard should be terrible. Really, it should. It's literally made of cardboard. I remember as a kid some cereal boxes came with spy glasses you had to cut out of the box itself—and they were terrible. But Google Cardboard is amazing. Granted, you need to add your $750 Android phone to it, but that's already in your pocket anyway.
The reason Google Cardboard can be so simple is that its only job is to let you focus on a phone that is two inches from your face. A couple plastic lenses held in place by a chunk of cardboard isn't terribly high tech. But once you have that technology in place, Google Cardboard lets you literally transport to another world. Using apps from the Google Play Store, the VR experience is shockingly good using nothing more than a modern Android cell phone.
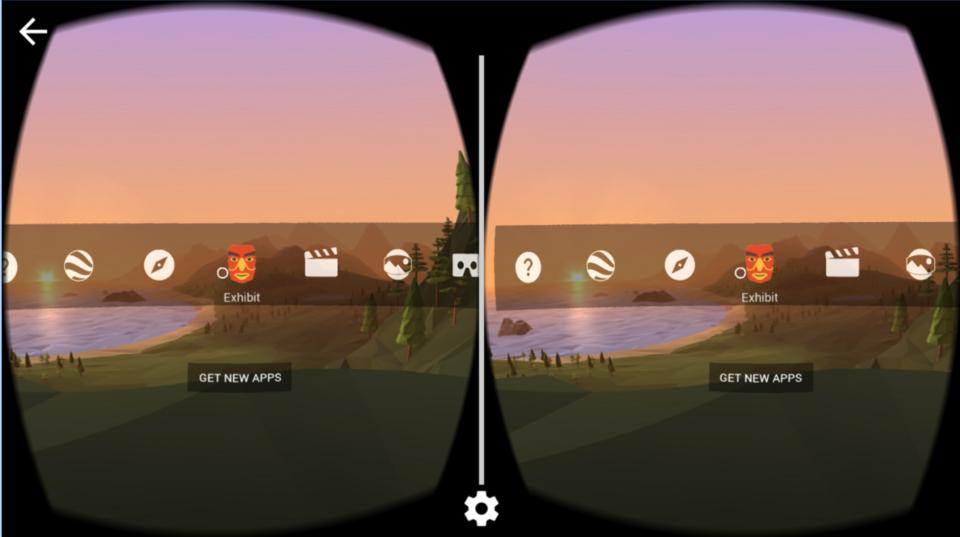
The truth is, it takes a lot of graphical power to render two separate dynamic videos on a screen at one time. (That's how it makes the experience 3D.) So whatever VR app you download will likely have a slightly blocky-looking world. The crazy part is, that doesn't detract from the experience. In fact, some blocky trees almost make the experience that much more surreal because it's obvious you're in a simulation. Yet, when you turn your head, it changes like you're actually there!
If you want to experience some pretty cool virtual reality, but don't want to invest in one of the expensive, Windows-centric systems like the HTC Vive, give Google Cardboard a try. You can get the actual cardboard goggles on Amazon, or you could spend a few more dollars to get a plastic set that is a little more sturdy. Either way, the experience is amazing! It's so amazing, in fact, that Google Cardboard gets the Editors' Choice award this month. Virtual reality using the same technology that transports pizza? Yes please!
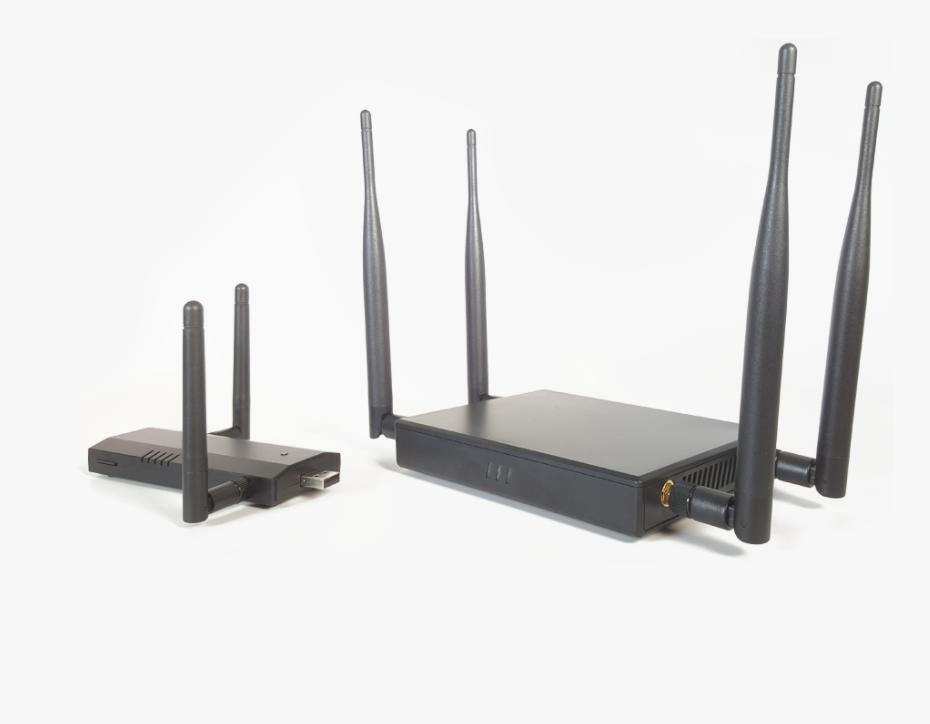
You've probably heard about the WiFi Pineapple from Hak5. It's a fascinating device that allows you to do some creepy pen testing. It's the sort of tool that could be used for evil, but it's also incredibly useful for securing networks.

The hardware is fairly basic and resembles an off-the-shelf router. The multiple network interfaces really shine, however, when paired with the operating system. The WiFi Pineapple software creates a rogue, hidden access point that purposefully tricks clients into connecting to it instead of the AP they're usually connected to.
It doesn't stop there, either. The software sniffs the wireless network for clients looking for APs they know, and then creates fake SSIDs that match what clients are looking for. Once the client associates with the SSID it thinks it already knows, the Pineapple provides internet service, but it also sniffs every packet along the way. Scary stuff.
There are many uses for the WiFi Pineapple, and many of them are white-hat sorts of things. Be warned though, because you might be connected to someone else's WiFi Pineapple right now! To get your own piece of dangerous awesomeness, head over to wifipineapple.com now. There is a 2.4GHz-only verison as well as a dual-frequency model.
Wait until it is night before saying that it has been a fine day.
—French Proverb
There's no such thing as quitting. Just sometimes there's a longer pause between relapses.
—Alan Moore
Self-confidence is the first requisite to great undertakings. —Samuel Johnson
A moment's insight is sometimes worth a lifetime's experience.
—Oliver Wendall Holmes Jr.
Our lives begin to end the day we become silent about things that matter.
—Martin Luther King Jr.
People's phones and all of the various sensors that may be built in to them is a source of scientific data logging that almost everyone carries around. Although the selection of sensors varies from phone to phone, they almost all have a camera. In this article, I take a look at a piece of software called Tracker that can be used to analyze videos you take of experiments.
You can download Tracker directly from the project page: physlets.org/tracker. A lot of good documentation is available at the main website, including examples of how you might be able to use it from the community of other users. Tracker is written in Java, however, so you also need to have a JVM installed on your system before you can use it. For example, on a Debian-based system, you can install a very good JVM with the command:
sudo apt-get install openjdk-8-jre
You then can download the relevant installer for your system and run it from a terminal window. You probably will need to make the installer executable with a command like this:
chmod +x Tracker-4.95-linux-64bit-installer.run
Don't forget to use the sudo command so that you have the correct permissions to do the installation.
Once it's installed, you should have a new entry in your applications menu system. Starting Tracker will give you a new empty project for beginning your video analysis.
Figure 1. When you start Tracker, you get a new empty project.
Although you could start analyzing your own videos immediately, you may want to use simpler videos while learning how Tracker works. When you ran the initial installer for Tracker, it should have asked you whether you also wanted to install example files. Assuming you said yes, you now can load one of those within Tracker. When you click on the menu item File→Open File, you'll see a new window where you can select either a movie file or a Tracker file.
Figure 2. The open file dialog box allows you to open movie files or Tracker files.
To begin with, let's look at one of the Tracker files from the experiments folder. In Figure 3, I have loaded the experiment file named BallToss.trk. The main window displays the movie that is being analyzed as part of the experiment. The pane in the bottom right-hand side shows a table of x and y coordinates for a series of time units. A similar table is generated for each tracked object within the movie. In this example experiment, the only tracked object is the ball. The top right-hand pane contains the associated plot for the data stored in the table. This way, you can have a visual representation of the tracked motion.
Figure 3. Loading a Tracker file opens all of the parts of a previous analysis.
So, what can Tracker actually track? At the bottom of the movie display is a set of controls. If you click on the green arrow, the movie will start to play. As it does, Tracker actually registers the movement of the tracked object and also updates the data panes on the right-hand side.
Figure 4. As the movie progresses, Tracker updates the data panes on the right-hand side for the tracked object.
Although these panes do give you lots of raw data, there really isn't any analysis being done yet. Clicking the View→Data Tool menu item pops open a new window where you can use this raw data to figure out what is happening in the video.
Figure 5. The Data Tool window provides a set of analysis tools to look at the raw data pulled from the video.
The Measure and Analyze buttons at the top of the plot window provide a set of different sections that you can display. This gives you several different analysis options for your data. Clicking the Measure button gives you the options Coordinates, Slope and Area. When you select one or more of those options, values are displayed at the bottom of the plot representing each of the selected options.
When you click the Analyze button, you get a drop-down with the Statistics, Curve Fits and Fourier Spectrum options. Each of those options actually opens a new pane in the Data Tool window. The exception is the Fourier Spectrum option. This option actually opens a new window where a Fourier analysis is done on the raw data from the tracked object.
Figure 6. Tracker also can do a Fourier analysis of the observed motion.
The Statistics option gives the data displayed in the top right pane. This is the set of descriptive statistics—that is, the maximum, minimum, mean and standard deviation, among other values.
Selecting the Curve Fits option gives you the pane at the bottom of the plot window. Here you can select what type of curve is being fitted to your raw data. You can use a number of default functions to try to fit your data. In this case, the linear function is the obvious choice for a fitting function. You can see the function being used, x=A*t+B in this case, along with the calculated values for the parameters A and B. If you are tracking an object that has a really odd motion, you can click the Fit Builder button to pop up a new window where you define a new fitting function.
Figure 7. You define your own fitting functions as part of the data analysis.
What do you do as part of a new project? Let's say you want to analyze the pendulum video from the sample video folder. You can set some calibration items within the video by either selecting the relevant buttons at the top of the window or selecting the items under the menu entry Track→New→Calibration Tools. You can set up items like a calibration stick or a reference set of axes.
Figure 8. You can set up calibration tools within your video to be analyzed.
One way to do the analysis is to step through the video, frame by frame, selecting the object to be tracked within each frame. This may be the only way to collect the raw data, but humans are lazy. If the object being tracked is relatively consistent across the duration of the video clip in question, you can try using the autotracker. Clicking the autotracker button will pop up a new window where you can control what is being tracked.
Figure 9. The autotracker tries to follow an object from frame to frame automatically.
Tracker helpfully displays reminder information on how to use the software. In this case, it reminds you that you need to press Ctrl, Shift and left-click the mouse button on the object of interest. If you then click the search button within the autotracker window, it will move through each frame, looking for the object in question. Once it is done, you should have a full set of data from the tracked object. From the plot in Figure 10, you can see right away that the pendulum follows the expected motion. You also can track multiple objects by creating a new track for each object.
Figure 10. The autotracker can generate all of your raw data automatically.
Now that you've taken a quick look at Tracker and the kind of analysis you can do with it, you should be comfortable enough to start experimenting with it. Don't forget to share any interesting ideas you come up with on the community page and add to a great resource for citizen science.
