
The OOM (out-of-memory) killer targets processes that seem to be responsible for zotzing a system due to taking too much RAM. It relies on various policies to make a best guess about which process to kill, and then it kills it, on the hope that the system will then be usable again. Sometimes it guesses right, and sometimes it doesn't. OOM policies always are under ongoing development and very difficult to get right.
Roman Gushchin recently wanted to address the fact that the OOM killer didn't recognize virtual systems as such. Instead of killing the whole container, it would kill only a single process inside the container, which might just render the entire container unusable. Roman posted some patches to allow the entire cluster of processes in a container to be considered one single “job”, which the OOM killer could kill or not, according to its policies. This way, containers wouldn't have to worry about possibly finding one of their processes mysteriously missing.
Michal Hocko and others didn't like this, because on an abstract level, it did represent a change to OOM killer policies. Instead of process A being killed, process B would be killed instead. If Roman was going to change OOM killer policy, Michal said, there needed to be a whole consideration of how these policies would affect various workloads.
Roman, joined by Johannes Weiner, argued that the patches were not related to policy, but simply redefined what was meant by a “job”, so that a whole container could be seen as a discrete entity and targeted appropriately. Johannes said, “all we want is the OOM policy, whatever it is, applied to cgroups.”
Ultimately, Roman may have some hurdles to jump over before any patch could be accepted. It's crucial that the OOM killer remain as useful as possible for the widest possible variety of use cases, so any change must be considered carefully. But it's also clear that cgroups will need to be handled properly by the OOM killer as well, or else we could start to see weird breakages in virtual systems, without a good way to address the problem.
Intel's Ross Zwisler recently said that it soon would be very common for a given device to have a variety of different types of memory installed, with different speeds and other characteristics. The kernel, and especially user code, would need to have some way of controlling, or at least suggesting, which type of memory they preferred to run on.
He said that the Intel folks were leaning toward a SysFS-based solution, in which various SysFS files would indicate ranges of memory, and the speed and other characteristics associated with those ranges. He wanted some guidance from the kernel people about how best to expose that information, and whether SysFS was the right approach, and so on.
No one had any problem with Ross' approach, at least not at that stage—although it wouldn't be utterly uncommon for Intel to put in a lot more work, only to have Linus Torvalds or some other high-level developer raise objections later.
In general, the thread had the feel of Intel simply alerting folks to a new hardware direction and making sure its future patches in the area would at least not come as a surprise to anyone. Mission accomplished.
There's a new security framework in town, and its name is SARA. Salvatore Mesoraca has begun implementing it as a general-purpose framework that can be used to put together a variety of security policies, according to the needs of any given system. One of its main claims to fame is that it's “stackable”, meaning it can interoperate cleanly with other security systems.
Stackability is useful because there are a bunch of people working in this area, and it would be nightmarish if they all had to coordinate their efforts before their patches could be deemed acceptable for inclusion in the main kernel tree. Although, of course, if any of them could be merged together, that would be seen as a benefit rather than a drawback.
That issue came up when Salvatore announced one of his SARA sub-modules as being a WX protection system—ensuring that a piece of memory could be either executable or writable, but not both. Mickaël Salaün also had implemented a similar security feature and suggested merging the two. Ultimately, the two systems seemed too different to merge, but their stackability meant that Mickaël could make use of SARA features to shore up the gaps in his own work.
In past articles, I've looked at several ways you could use Python to do scientific calculations, but I've never actually covered how to set up and use Python itself in a way that makes scientific work easier. So in this article, I explore Anaconda, a Python distribution that is targeted at scientific and data research.
The default installation includes a large number of Python modules that are useful when doing data science—or really any other type of scientific computing. Installation is relatively easy. You can find download links on the main Anaconda site (https://www.continuum.io) that will allow you to choose between Mac OS X, Windows and Linux.
For Linux, you can choose between Python 2.X and 3.X, as well as between 32-bit or 64-bit executables. Now that Python 3.X has matured more, my default suggestion has changed. Unless you have a specific reason to do something differently, I suggest that you default on downloading and using Python 3.X. Once it is downloaded, you can make the downloaded file executable or you can run it directly by using bash, like this:
bash ./Anaconda3-4.4.0-Linux-x86_64.sh
You'll need to accept the license agreement to finish the installation.
The installer will ask for an installation location, defaulting on the anaconda3 directory within your home directory. It will unpack everything there and then ask if you want its bin directory added to your PATH environment variable. It's important to remember this if you use Python scripts to do system administration tasks. If you just run the command python, it will default to the one installed by Anaconda.
One of the core technologies that makes Anaconda unique is the conda package management system. Conda can be used to manage all of the modules and other software installed when you installed Anaconda. To manage updates, simply run the following commands:
conda update --all
You also can update individual packages selectively by using their package names in the above command rather than the --all option. To install a new Python module, such as opencv, use the command:
conda install opencv
That command will check on all the requirements and make sure all the dependencies are correct.
If you can't remember (or don't know) what a particular module name might be in the conda packaging scheme, you can do a search with a command like the following:
conda search --names-only open
This will return a list of all of the conda package names that have the text “open” in them.
You always can check to see what already has been installed by using the list option to conda.
If you have finished with some experimental code and want to remove a particular package that you no longer need, you can uninstall them with the following command:
conda remove opencv
All of those commands have several more options that I haven't covered here, but you can find many more details by looking at their help pages.
Another really powerful tool, especially when working on multiple projects, is the enhanced management of virtual environments that is possible with Anaconda. When you are doing research computations, you often have to start with explorations into your problem area. You definitely don't want any of those exploratory tasks to interfere with any currently ongoing work. So the best option is to set up a separate, isolated, environment where it is safe to destroy things with no fear of losing earlier work. This is handled by virtual environments. Python has had virtual environments for some time, but managing them can be unintuitive for some people. Anaconda has included a set of tools to help simplify the process.
When you install Anaconda, you actually are operating within a default environment already. In order to create a new one, you would use the command:
conda create --name project1
In order to activate this new environment, run the command:
source activate project1
Now, everything you do, with regard to Python and conda, will take place within this environment. For example, if you run the command conda list within this environment, you'll see that there are no packages installed. If you now install a package, it will exist only within this environment. This way, you can have an isolated environment that will contain only the Python modules you need for that particular project.
If you already have an environment that you have been working with, but you want to extend it in some manner, you can clone this starting environment with the command:
conda create --name project2 --clone project1
As you work with this environment, conda keeps track of the history of changes that you have applied to it. You can get the list of those changes with:
conda list --revisions
This way, you always can revert back to some previous revision with the following command, where X is the revision number you want to revert to):
conda install --revision X
Once you are done with your work for the day, you can deactivate a given environment with:
source deactivate
When you are completely finished with a particular environment, you can permanently delete it with:
conda remove --name project2 --all
Just be sure that you are deleting the correct environment. You don't want to destroy all of your hard work accidentally.
You can get a list of all of the environments managed by conda with the command:
conda info --envs
If you are working on a project collaboratively, you probably don't want to have to send an entire environment to someone else, as that simply would take too much bandwidth. You also don't want to send a list of handwritten instructions on how to re-create it, as humans are famous for forgetting steps. Instead, conda includes the following command that you can use to create a descriptive file:
conda list --explicit >> project1.txt
You can send this file to your collaborators and have them run this:
conda create --name my_project1 --file ./project1.txt
That will allow them to re-create your project environment.
All of these commands have been managed on the command line, but not everyone is comfortable working that way. For those people, Anaconda includes the Anaconda Navigator. You can start it with the command anaconda-navigator.
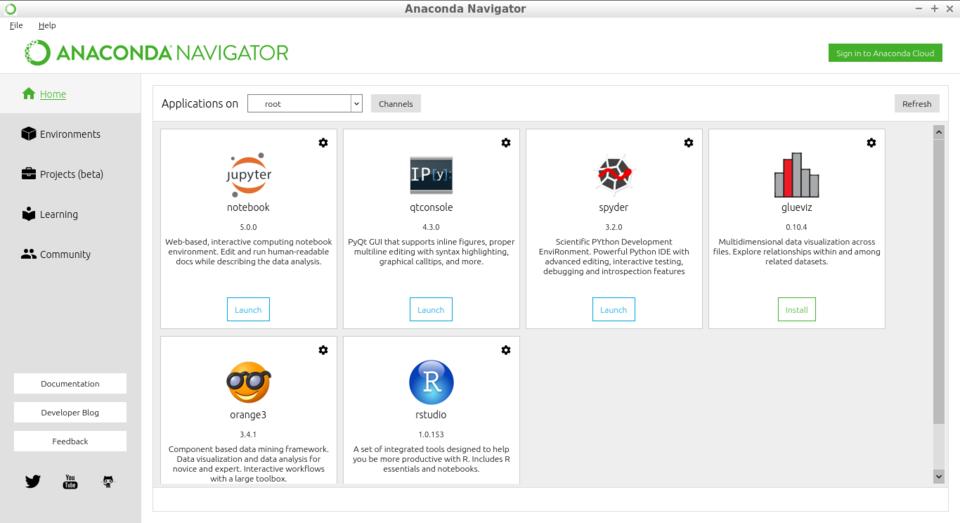
Figure 1. The Anaconda Navigator provides a graphical interface for interacting with your installation of Anaconda.
On the first page of the application, you'll see launchers for the major Python software that is available through Anaconda. This includes packages like spyder, orange3 and the jupyter notebook. If they haven't been installed yet, you'll see a button labelled “Install” rather than “Launch”.
The second page allows you to manage environments within your Anaconda installation. From here, you can manage the installed Python modules, create new environments or clone existing ones. You even can import projects from specification files to create a new copy of an environment. The right-hand side of the window displays Python modules, and you filter based on whether the list is those installed, update-able or yet to be installed.
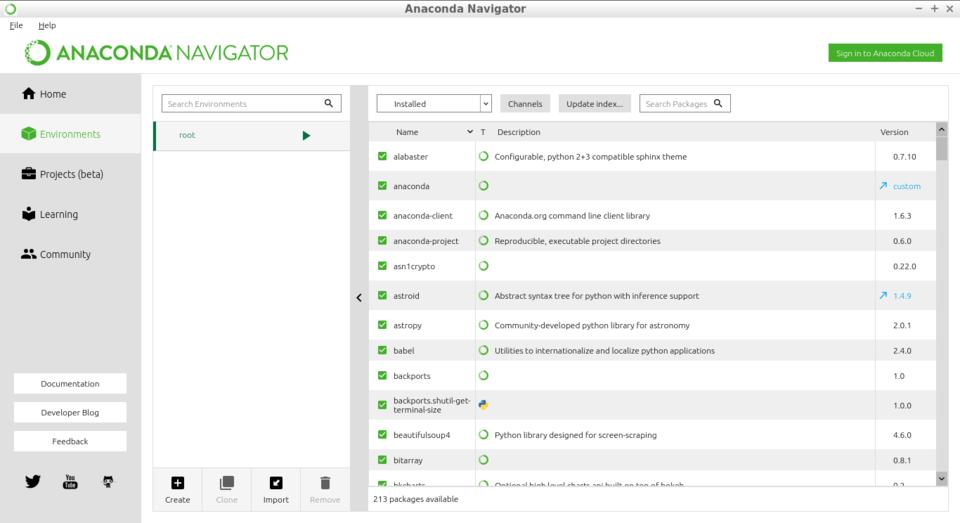
Figure 2. Anaconda allows for managing environments within your installation.
There is a third page, currently in beta, which manages projects. Projects are a way of organizing larger pieces of code and sharing them with others. Sharing is made easier with the Anaconda Cloud. Once you have an account on Anaconda Cloud, you can upload projects, environments, packages and jupyter notebooks. Once they have been uploaded, you can share them with other people around the globe much more easily. Although you can log in and work with the Anaconda Cloud in a web browser, the Anaconda Navigator allows you to log in directly from there and be able to interact with your materials stored online.
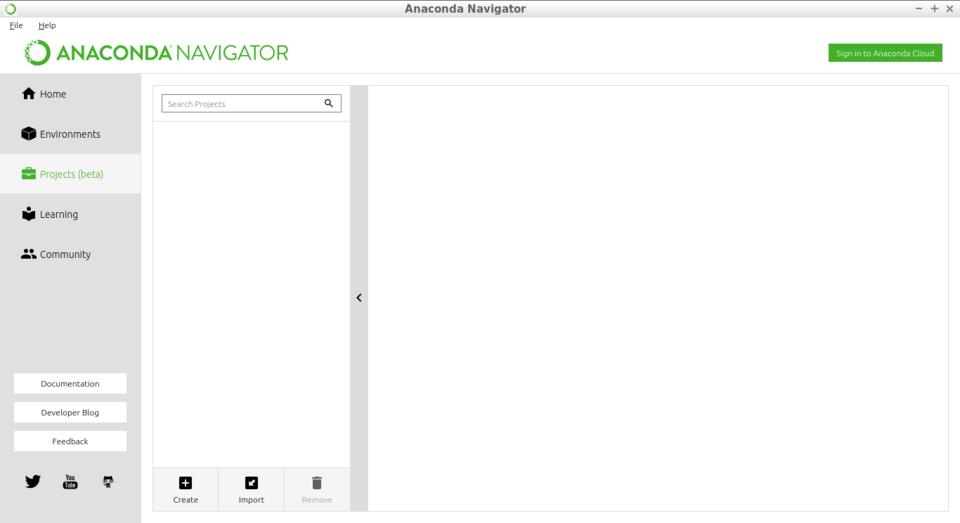
Figure 3. Anaconda also helps you manage larger projects, along with environments.
This was a short introduction, but hopefully I covered enough to help you better organize your scientific code. In future articles, I plan to dig a bit more into actually doing some scientific work with Python and taking advantage of these organizational tools.
I've mentioned the SmartThings home automation system I use in my house before, but I specifically wanted to highlight a free app that integrates with the Android SmartThings app to provide far more advanced features than most lock manufacturers include with their own systems.
Although it does require you to use the SmartThings system, all the apps and configurations are stored in the cloud, so you can control the system from any Android device. You can configure multiple users with multiple codes, allow certain codes to work during certain times, or even make “burner” codes that will work only once then disable themselves.

The Lock Manager application is incredibly powerful and fairly easy to install if you follow the directions at the website: https://github.com/ethayer/lock-manager. We recently had a situation at our house that required us to change the locks from afar, and I'm happy to say, Lock Manager did the trick! The only “gotcha” we found is that once you make a change, it's important to lock and unlock the door remotely manually (using SmartThings app) to make sure the new codes are uploaded properly. If you have a lock like we do (the Kwikset 910 Z-Wave deadbolt), be sure to get Lock Manager; it will change the way you think about digital key codes!
With my obsession—er, I mean hobby—regarding BirdCam, I've explored a great number of camera options. Whether that means trying to get Raspberry Pi cameras to focus for a macro shot of a feeder or adjusting depth of field to blur out the neighbor's shed, I've fiddled with just about every webcam setting there is. Unfortunately, when it comes to lens options, nothing beats a DSLR for quality. Thankfully, there's an app for that.
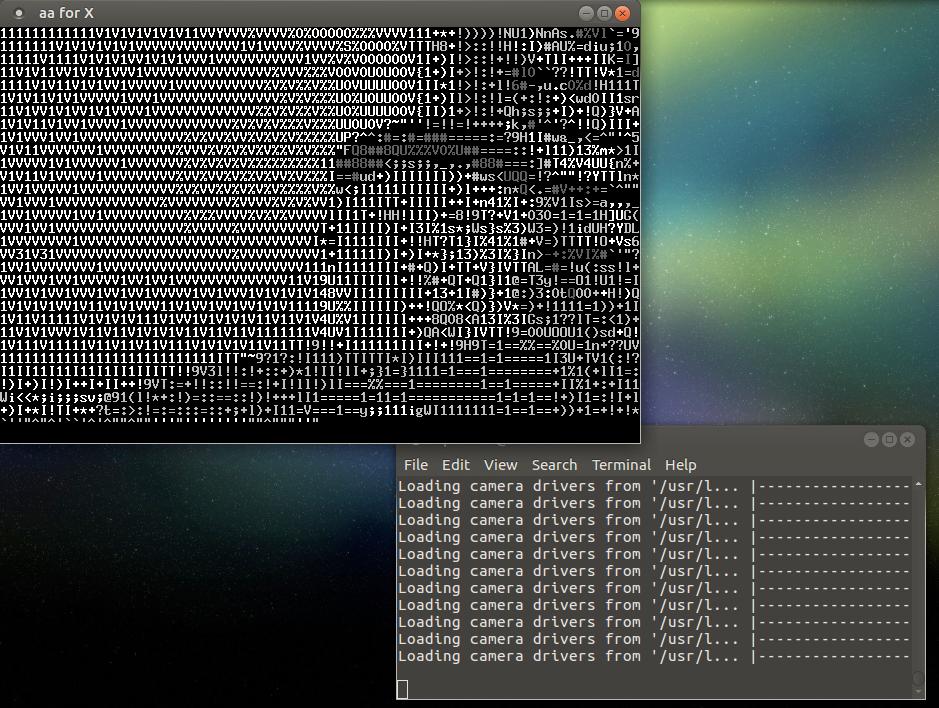
The gphoto2 suite of drivers and apps allows a huge list of DSLR cameras to function as image or video capture devices inside Linux. There's a compatibility list at gphoto.org/proj/libgphoto2/support.php, and even if your camera isn't listed, it's likely you'll be able to use it in some manner. For example, my Nikon Coolpix P610 isn't officially supported, but I'm able to get some images from it regardless. In fact, it even supports previewing a photo in ASCII art. That might not be a useful feature, but I found it incredibly fun to play with.
In all reality, if you want to automate taking pictures while using a real DSLR camera, gphoto2 is probably the tool you want. Whether it's a short-term setup on a tripod or a future super-high-def BirdCam (send me a link!), be sure to check it out. In fact, gphoto2 is so cool and powerful, I'm giving it this month's Editors' Choice award. And if I can get my wife to loan me her Canon DSLR with the 50mm prime lens, BirdCam might rise to a whole new level!
During my normal workday, I'm connected to various computers and phones. I used to have wired USB headsets for each computer, and I'd have to swap them on and off every few minutes. Recently, I've started using wireless headsets, because the audio quality is finally to the point where I can use them for meetings and even some recording without worrying I'll sound like someone talking in the subway on a Bluetooth headset.
To get to this point, I've purchased a shameful number of headsets. Two of them I'm happy to say are well worth their significant investment.
The Logitech H820e is a single earpiece (my preference, as you can see in the photo I wear multiples at once!) headset with a flexible boom for the microphone. The sound quality on this is great for listening and for speaking, and although the big fluffy earpiece does get a bit hot and sweaty, it's tolerable for a few hours at a time. Rather than Bluetooth, this headset uses DECT technology, which makes for great connectivity, even during trips to the bathroom. (I know this from experience.) My office tends to be quiet, so the noise-cancellation features aren't really something I take advantage of, but this Logitech unit indeed works in noisy environments too. I've used this headset all day and never had an issue with the charge running out. It's important to put it on the charger base every night, however, because I've come to work in the morning and found it dead on my desk when I forgot.

The other headset I regularly use is the Jabra Pro 935 for computers. This headset is a bit less expensive and a bit more comfortable (less ear sweat) than the Logitech. I find the audio quality to be a little less during recordings, however, so it's not one I normally use for business meetings or video recording. Still, it's the headset I tend to use more often for listening to things, because it's very comfortable, and I can wear it for hours without even noticing it's there. The Jabra uses a “2G4” wireless technology that I'm not really familiar with. It has close to the same range as the Logitech with DECT technology, however, and both headsets blow away even the best Bluetooth headsets when it comes to range and quality.
If you're like me and like to be connected without the need for wires draping all over, I'm happy to report the current line of wireless headsets is well worth the investment. Most use standard USB cables for connection to the computer, and wireless connectivity is handled simply by plugging the headset in to the charger/transmitter base. I don't necessarily recommend wearing three headsets at a time like I do (I always wear my Trekz Titanium bone conduction headset as well), but if you don't mind the Borg-like appearance, it's more than possible!
When it comes to networking devices in your house or office, nothing beats a solid Ethernet cable. During the past few years, Wi-Fi has gotten to the point that it can be a truly reliable second-place option for connecting devices, but is it really the second-best way?
My family is buying a farm (literally, not figuratively), and the barn is 200+ feet away from the house. I could get a wireless bridge pair to get Wi-Fi out there, but since the barn already is wired for power, I thought maybe a Powerline solution would make more sense. They're cheaper, and if reliable, far simpler to deploy. So I bought a TP-Link AV2000 pair of adapters, and I have to admit, I'm sold.
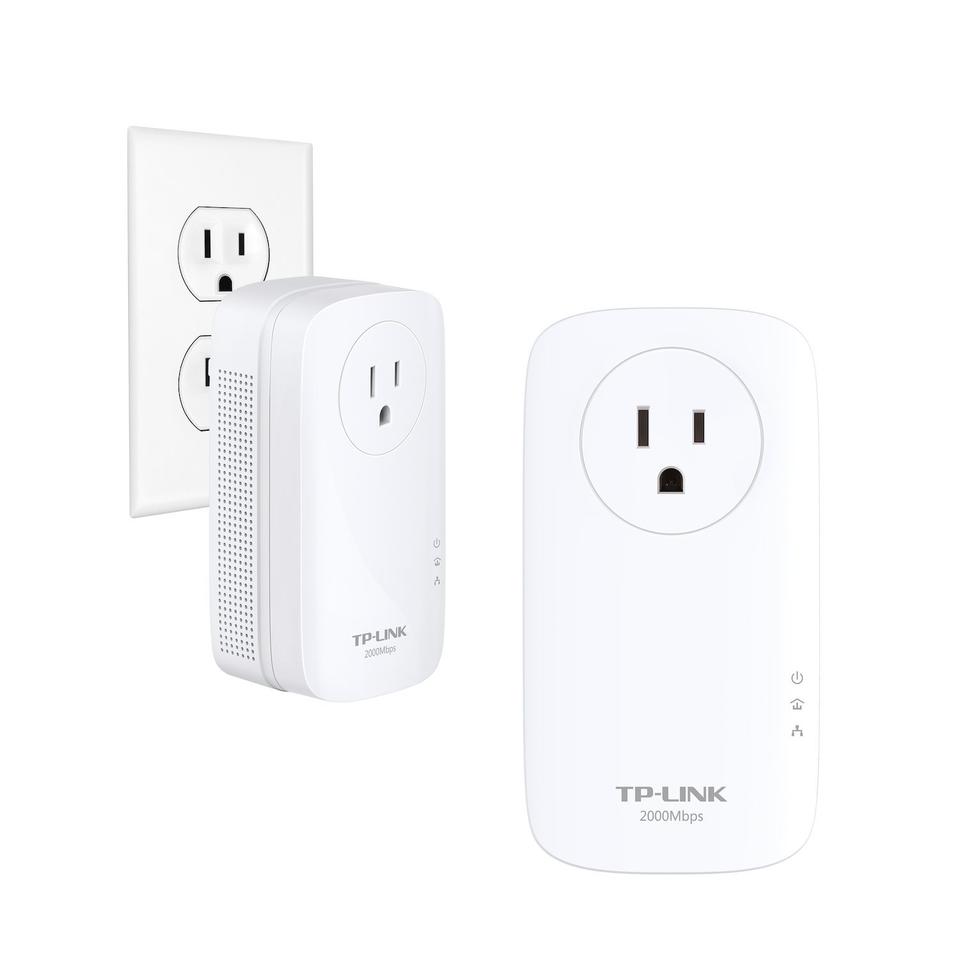
I won't talk about setting them up, because quite honestly, it's so simple it seems too simple. Once they're set up, it's like plugging a cable in to a network switch. Quite frankly, they just work! I haven't tested the claimed 2000Mbps bandwidth, because that's far more than I need anyway. As far as reliable connections go, however, the Powerline option is actually well worth checking out. It's possible your situation will prove to be a bad candidate, because things like vacuum cleaners, air conditioners or any other motorized device can introduce noise on the line that will disrupt or slow down the signal. My advice is to try it, but keep the package in good shape in case you need to return it.
Never continue in a job you don't enjoy. If you're happy in what you're doing, you'll like yourself, you'll have inner peace. And if you have that, along with physical health, you will have had more success than you could possibly have imagined.
—Johnny Carson
It is curious that physical courage should be so common in the world and moral courage so rare.
—Mark Twain
The secret of happiness is to make others believe they are the cause of it.
—Al Batt
Farming looks mighty easy when your plow is a pencil, and you're a thousand miles from the corn field.
—Dwight D. Eisenhower
