
From zero to Web-based database application in eight easy steps.
The LAMP combination of Linux, Apache, MySQL and a programming technology (typically Perl, Python or PHP) is a powerful one. Once you've built one Web-based database application, however, you've built them all. From a programmer's perspective, things become boring and repetitive pretty quickly.
I recently worked on my first Web application. I built it on Linux, of course, running through Apache and talking to MySQL. I used Perl as my glue language, with CGI figuring heavily. I created all the code to talk to a MySQL table, adding/editing/updating as need be. And it all worked, which was good. What was bad was, I was faced with repeating this activity (and effort) for each of the remaining tables in my database. In a time-honoured tradition among Perl programmers, I started to look for ways to be constructively lazy. There had to be a better way. After a few false starts and some searching, I found Maypole.
Initially created by Simon Cozens and maintained by Sebastian Riedel, Maypole is a rapid application development framework for Web applications. Maypole's home page promised a fully functioning application in about 20 lines of Perl code. This sounded too good not to try.
Having tried Maypole, I can confirm that Simon and Sebastian are not lying. Only a handful of lines of code is required to build a very functional application. Some setup is required, but—critically—this activity is not programming. Once the setup is complete, any number of applications can be created, each with a handful of lines of code. In the rest of this article, I step you through building an application with Maypole.
This step used to require an entire article to describe. Today, a single sentence summarizes. Pick your favourite distribution, and install it.
Having recently taken delivery of a new PC, I grabbed Fedora Core 3 and custom installed everything. If you don't have this luxury, be sure to install the following packages from your chosen distribution: httpd, httpd-devel, mod_perl, mod_perl-devel, mysql (client and server) and Perl.
Increasingly, modern distributions are shipping with release 2 of Apache and version 1.99 of mod_perl, as opposed to the entrenched 1.3.x release of Apache. Thankfully, Maypole can work with either release of Apache and also can be configured to use CGI (if mod_perl is not available). My Fedora installation shipped with release 2.0.52 of Apache and 1.99_16-3 of mod_perl, so that's what I use here. Users on the Maypole mailing list have reported successful installations on the vast majority of Linux platforms, including SuSE, Debian and Red Hat. Maypole also can be installed on Apple's Mac OS X and, with some extra effort, Microsoft's Windows.
As root, I edited Fedora's Apache configuration file at /etc/httpd/conf/httpd.conf and commented out the ServerTokens directive. I then arranged to start Apache automatically at boot time, and fired up the Web server using these commands:
chkconfig httpd on
service httpd start
The lynx text-based browser can be used to check the status of the server with this command:
lynx -head -dump http://localhost/
The results confirm that Apache and mod_perl are up and running, as shown on the third line of this output:
HTTP/1.1 403 Forbidden
Date: Wed, 17 Nov 2004 23:30:01 GMT
Server: Apache/2.0.52 (Fedora)
            mod_perl/1.99_16 Perl/v5.8.5 DAV/2
Accept-Ranges: bytes
Content-Length: 3931
Connection: close
Content-Type: text/html; charset=UTF-8
Happy that all was okay, I re-edited httpd.conf and uncommented the ServerTokens directive, as it is best not to give away too much about the internals of your Web server to potential attackers. While in httpd.conf, I changed the ServerAdmin directive to a more appropriate e-mail address, then set ServerName to the DNS name for my server. I also made a note of the value set for DocumentRoot, which was /var/www/html on my machine.
Depending on the distribution you are running, MySQL already may be installed. If MySQL is missing, download it from your distribution's download area, or go to the MySQL Web site. On my Fedora machine, I issued the usual commands to prepare MySQL for use, while logged in as root:
chkconfig mysqld on
service mysqld start
With MySQL running, I then set the MySQL administrator password:
mysqladmin -u root password 'passwordhere'
Maypole interacts directly with Apache through mod_perl. To work with Apache 2, a development library called libapreq2 needs to be fetched from the CPAN repository and installed into Perl. I downloaded libapreq2-2.04_03-dev.tar.gz from CPAN. Prior to installing the library, I upgraded the ExtUtils::XSBuilder module that ships with Perl. A single command, issued as root, suffices:
perl -MCPAN -e "install ExtUtils::XSBuilder"
If this is the first time the CPAN shell has executed, you'll be prompted to configure the local CPAN module. Be sure to select follow when asked about fetching prerequisite modules. With the module upgraded, I installed the libapreq2 library with the usual set of Perl module installation commands:
tar zxvf libapreq2-2.04_03-dev.tar.gz
cd libapreq2-2.04-dev/
perl Makefile.PL
make
make test
su
make install
<Ctrl-D>
The actual installation of Maypole starts by invoking the CPAN shell as root:
perl -MCPAN -e "shell"
As Maypole depends on a large collection of prerequisite CPAN modules, installation can take a while. Prior to actually asking the CPAN shell to install Maypole for you, issue the following commands to ensure that some of the more troublesome modules are dealt with:
cpan> install CGI::Untaint::date
cpan> force install Class::DBI::mysql
I had to force the installation of Class::DBI::mysql as a number of tests failed, effectively aborting the automatic installation. By forcing the install, the broken tests are ignored, allowing the install to proceed. With the prerequisites dealt with, install Maypole with this CPAN command:
cpan> install Maypole
A series of automated interactions with the CPAN repository begin after this step. Keep an eye on what's going on, because at certain points, you have to respond to some self-explanatory prompts. When all was done and dusted, the most recent release of Maypole—2.04 at the time of this writing—was installed on my machine.
Returning to MySQL, I logged in as administrator and issued these commands to remove any default accounts:
mysql -u root -p

mysql> use mysql;
mysql> delete from user where User = '';
mysql> flush privileges;
I then created a new database, together with a user to act as owner of the data:
mysql> create database CLUB;
mysql> grant all on CLUB.* to manager identified
           by 'passwordhere';
mysql> quit
These commands create the database, called CLUB, and add a user, called manager, to the database system. For the purposes of this article, this simple application manages data about an under-age soccer club. In addition to storing personal details about each player, the system maintains data on which players are in which squads, as well as any medical conditions players may have.
Here are the SQL files that I used to define the tables used within the CLUB database. The first file, create_player.sql, creates the player table:
create table player
(
    id                 int not null auto_increment
                           primary key,
    name               varchar (64) not null,
    date_of_birth      date,
    address            varchar (255),
    contact_tel_no     varchar (64),
    squad              int,
    medical_condition  int
);
The second file, create_squad.sql, creates the initial list of squads:
create table squad
(
    id    int not null auto_increment primary key,
    name  varchar (32) not null
);

insert into squad (name) values ('--');
insert into squad (name) values ('Under 8');
insert into squad (name) values ('Under 9');
insert into squad (name) values ('Under 10');
insert into squad (name) values ('Under 11');
insert into squad (name) values ('Under 12');
The squad table is initialized to a reasonable set of default values. The third and final file, create_condition.sql, creates a list of possible medical conditions:
create table condition
(
    id    int not null auto_increment primary key,
    name  varchar (64) not null
);

insert into condition (name) values ('--');
insert into condition (name) values ('Asthma');
insert into condition (name) values ('Epilepsy');
As with the squad table, the condition table is initialized with some default data. The data item in the squad and condition tables is called name. The significance of this point will be returned to later in this article.
Use the SQL files to create the tables within the database:
mysql -u manager -p CLUB < create_player.sql
mysql -u manager -p CLUB < create_squad.sql
mysql -u manager -p CLUB < create_condition.sql
As can be guessed, the CLUB database maintains data on players. Players belong to a squad and may have a medical condition.
With the database ready and Maypole installed, it's time to configure the application. A directive needs to be added into the Apache httpd.conf configuration file to set up a mod_perl handler for the Maypole application. I added the following to the end of the configuration file:
<Location /Club>
    SetHandler perl-script
    PerlHandler ClubDB
</Location>
These lines tell Apache that when a request is made for the /Club URL, it is to be handed off to the ClubDB Perl script, which we write in the next step. Use the following commands, as root, to set up the URL location:
mkdir /var/www/html/Club
cd /var/www/html/Club
cp -r ~/.cpan/build/Maypole-2.04/templates/* .
cp maypole.css ../club.css
Having first created a directory to contain my application's URL underneath Apache's root directory, I then copied the default templates that ship with Maypole into this location. I also copied Maypole's CSS file into my Web server's DocumentRoot, giving it a name that corresponds to my application.
One final setup activity involves creating a configuration file within Apache's /etc/httpd/conf directory to hold the application's MySQL user ID and password. Called ClubDB.conf, this file contains these lines:
[client]
user=manager
password=passwordhere
The code for the Soccer Club Database resides in the ClubDB.pm file. Every Maypole application starts with a package statement declaring a Perl namespace. Strictness is turned on, then the base Maypole module, called Apache::MVC, is used:
package ClubDB;

use strict;

use base 'Apache::MVC';
The code then establishes a connection to the database, using the user ID and password from the named configuration file:
ClubDB->setup( "dbi:mysql:CLUB;
    mysql_read_default_file=
        /etc/httpd/conf/ClubDB.conf" );
A few more lines of code inform Maypole of the base Web address for the application, as well as a list of tables in the database to which to provide access. For this simple application, it makes sense to provide access to all the tables:
ClubDB->config->{uri_base} =
    "http://webmason.itcarlow.ie/Club/";

ClubDB->config->{display_tables} =
    [ qw[ player squad condition ] ];
When it comes to squads, my application allows the user to view, edit or delete squad names. Specifying this takes a couple of lines of code, one of which sets up another namespace:
package ClubDB::Squad;

sub display_columns{ "name" };

ClubDB::Player->untaint_columns(
    printable => [ "name" ] );
The untaint_columns method identifies the type of data expected in the column, as well as indicates to Maypole that the column can be edited using the Web interface. Medical conditions are handled in the same way:
package ClubDB::Condition;

sub display_columns{ "name" };

ClubDB::Condition->untaint_columns(
    printable => [ "name" ] );
The code for the player table is more complex but not by much. After declaring another namespace, two calls to the has_a method establish the links between the player table and the others. The link is specified in terms of only the declared namespaces:
package ClubDB::Player;

ClubDB::Player->has_a(
    squad => "ClubDB::Squad" );

ClubDB::Player->has_a(
    medical_condition => "ClubDB::Condition" );
For players, we list the columns to display using the display_columns method. Doing so allows the programmer to control the order in which the columns appear within the Web interface. If display_columns is not used, Maypole displays the columns in alphabetical order, which may not always suit your needs. The invocation of untaint_columns identifies the types of data that can be edited within each of the columns. The code concludes with Perl's familiar 1;, which is required of all Perl modules:
sub display_columns{ qw( name address
    date_of_birth contact_tel_no
        squad medical_condition ) };

ClubDB::Player->untaint_columns(
    integer   =>
        [ "squad", "medical_condition" ],
    printable =>
        [ "name", "address", "contact_tel_no" ],
    date      =>
        [ "date_of_birth" ] );

1;
Count the semicolons. Bearing in mind that the presented code has been formatted to fit the printed page, there are only 18 lines of code in all. All that's left to do is copy the Perl module into a location where Apache and mod_perl can find it:
mkdir -p /etc/httpd/lib/perl/
cp ClubDB.pm /etc/httpd/lib/perl/
Restart Apache before accessing the Maypole application:
service httpd restart
I entered http://webmason.itcarlow.ie/Club/ into the Firefox location bar, and up popped Figure 1, which, although something, was not quite what I was expecting.
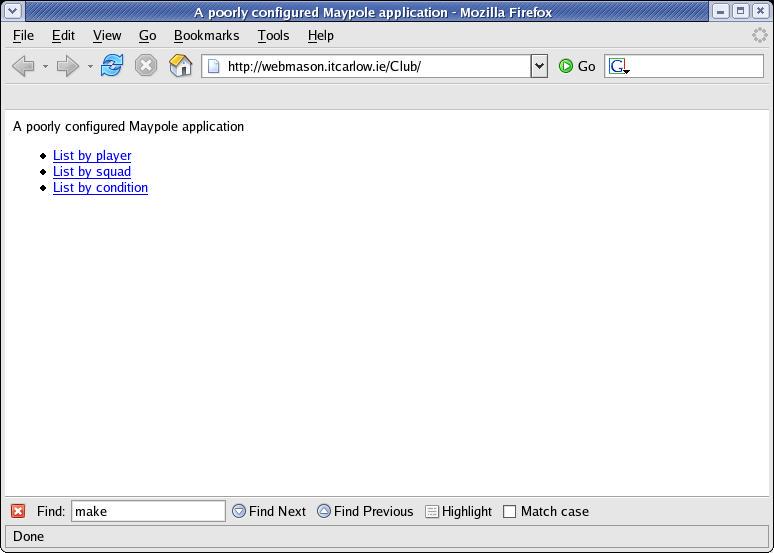
Figure 1. The Default Maypole Opening Screen
For starters, I was expecting to see some nice CSS output, not the plain HTML I was seeing. To fix this problem, I explored the default template files copied into the Web server during Step 6. By changing these, it is possible to alter the appearance of the application, without changing the source code to the application. The significance of that last sentence cannot be overstated. In essence, the way the application looks is controlled by the CSS templates. The way the application behaves is controlled by the code. The data used by the application is controlled by MySQL. All of this separation of duties makes for a very productive development environment, as changing one part of the application shouldn't adversely affect either of the others.
The templates live within a subdirectory called factory, located beneath the URL of the application, which is Club/ in this case. The factory templates are the Maypole defaults and are used unless overriding templates are found within another directory, called custom.
After creating the custom directory underneath the Club/ URL, I copied the header file from factory to custom and edited it with vi. I changed /maypole.css to read /club.css, in addition to replacing the “A poorly configured” message with a more appropriate description of the application. I also copied the frontpage file from factory to custom and edited it to use a better application description. Then, I changed the anchor tag within custom/frontpage to read “Work with the player data” as opposed to the default “List by player” text. With these changes made, I clicked the Reload button within Firefox, resulting in Figure 2, which—I think you'll agree—looks a whole lot better.
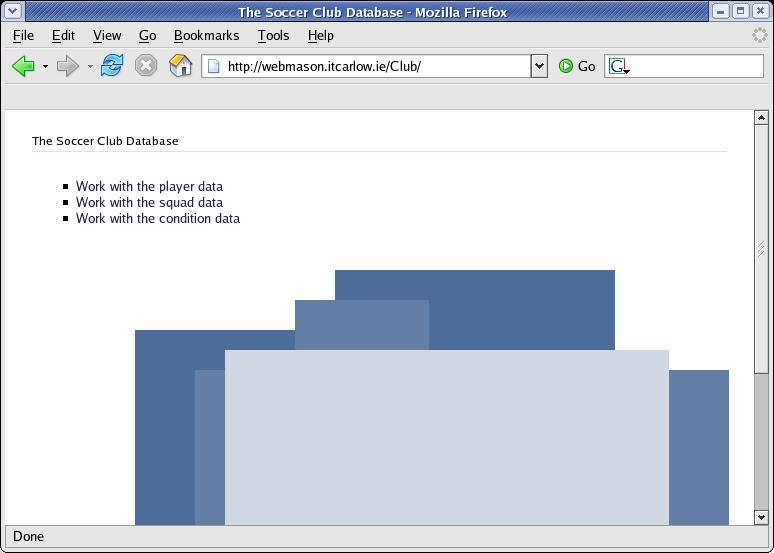
Figure 2. The Customized Soccer Club Opening Screen
Clicking on any of the menu options produces a beautifully formatted input screen, like those shown in Figures 3 and 4.
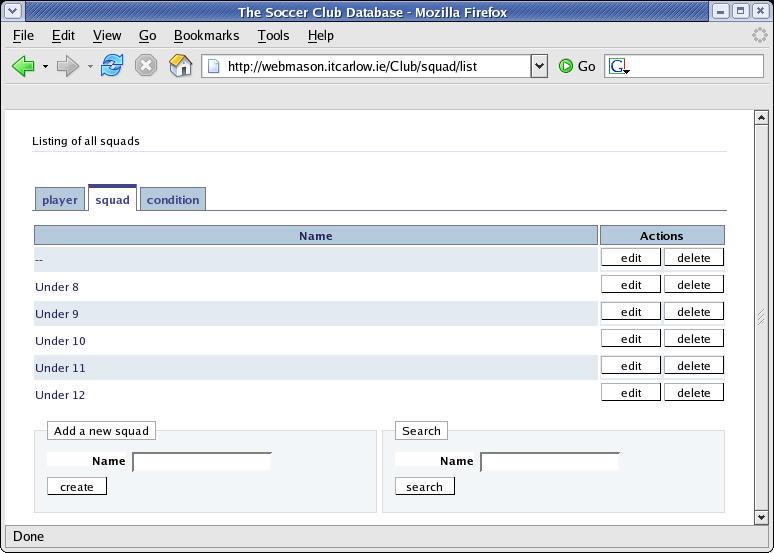
Figure 3. The Maypole Front End to the Squad Table
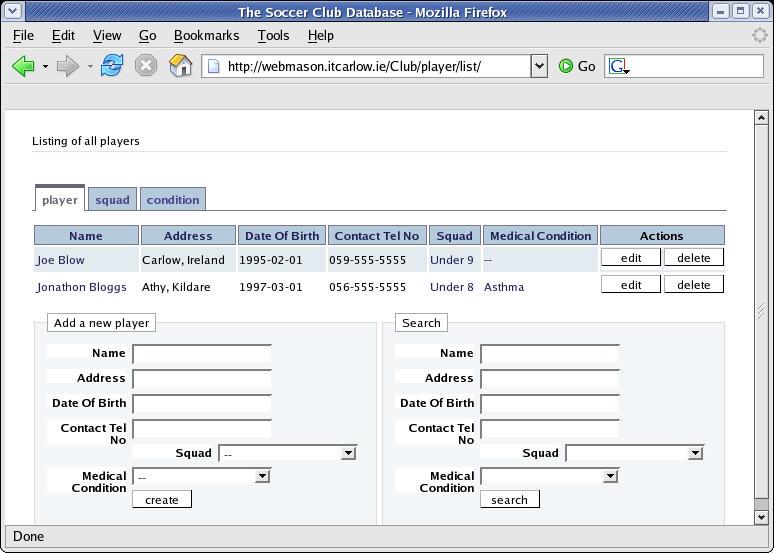
Figure 4. The Maypole Front End to the Player Table
Figure 4 shows the display after the entry of two fictitious players. Notice all the functionality provided for free. Tabs for each of the tables are located along the top of the display. Simply click on the tab to display that table's data. Each row of data has an associated edit and delete button. Click on any column heading to sort the display on the data in that column. Perform a search using the provided search form. Add more players using the add form. Notice the drop-down menus for the player's squad and medical condition. Click on the field and a drop-down box appears with the choices available to you. This bit of magic occurs because Maypole has been told that each player “has a” squad and “has a” condition. By default, Maypole uses the name data column in the referred to table to provide the data to these drop-down boxes.
And, that's it—a fully functioning Web interface to an underlying database, in eight easy steps.
Despite the fact that Maypole is quite new, an active community already has gathered around it. The mailing list recently split, one for developers and the other for users, and the Maypole Web site is now hosted by perl.org.
As I hope I've demonstrated, Maypole—once set up—is a breeze to use. Most of the guts of any Web application is provided for free. Adding additional functionality also is possible. Maypole is not stuck on MySQL either, as any SQL DBMS can be used. Refer to the articles and documentation referenced on the Maypole site for more details.
Resources for this article: /article/7964.
