Implementing a bridging-level firewall
The Drawbridge
Ralf Spenneberg
Implementing a bridging-level firewallThe DrawbridgeRalf Spenneberg |
|
Linux has earned a reputation as an excellent firewall platform. The kernel has a powerful Netfilter/IPtables-based packet filter. In a traditional firewall scenario, Netfilter resides on a router, where it subdivides the network into two or more subnets. But adding a firewall to an established network can involve changing the network infrastructure. This effort can result in IP address changes and modifications to access controls for internal services.
It is far simpler to add a bridge. Bridges reside in layer 2 of the OSI reference model and normally inspect MAC addresses rather than IP addresses (see the box titled "Building Bridges"). Linux can leverage this capability in a clever way to add transparent firewalling to a network. Of course, the bridge evaluates packets from the higher protocol layers (IP addresses, TCP ports) in its role as a firewall. But the hosts on the network will not notice a thing, unless they attempt to send illegal packets.

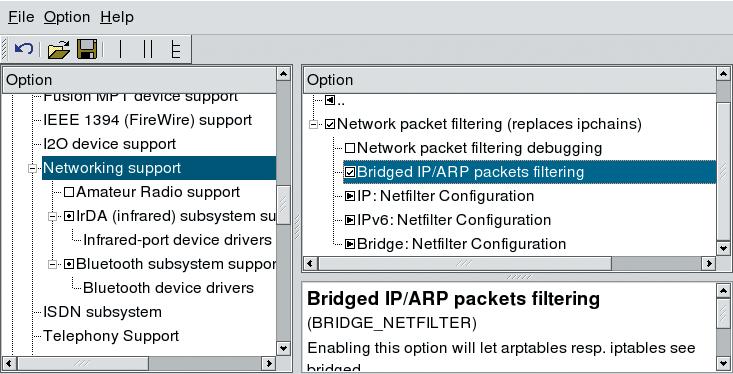
Lennert Buytenhek and Bart de Schuymer wrote a patch that adds bridging mode firewall functionality to Linux kernel 2.4. Kernel 2.6 adds the patch by default, and admins simply need to configure the kernel correctly (see Figures 1 and 2).
All the bridging options in the netfilter group are important, for example ARPtables support IP_NF_ARPTBLES, IP_NF_ARPFILTER and IP_NF_ARP_MANGLE. These functions can be implemented as modules or built into the kernel. Physdev match support is also important: IP_NF_MATCH_PHYSDEV. This option is required for kernel 2.6 or newer to check the physical interface when filtering packets on the bridge.
After successfully building and installing the new kernel, we just need a few userspace tools. Although most distributions have the iptables program, you will need to install the arptables and ebtables commands on most distros. If you are running the current 2.6 kernel or an older kernel, you may also need to install a newer version of the iptables command.
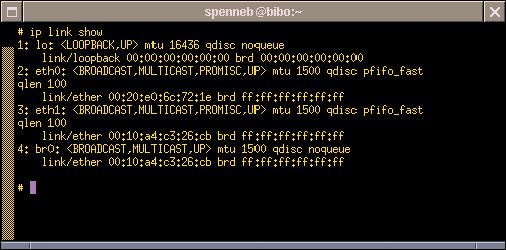
The bridge-utils packet [2] is required to configure the bridge. Modern distributions typically install this packet by default. The packet contains the brctl command, which is normally reserved for use by root. The command brctl addbr br0 creates a bridge called br0. The command ip link show br0 confirms that the bridge exists. As the bridge has a name, you can even run multiple virtual bridges on a single Linux machine.
Next, the bridge needs to know which Ethernet NICs it is responsible for. The brctl command allows you to assign interfaces to the bridge:
brctl addif br0 eth0
brctl addif br0 eth1
The network cards should not be configured at this point; that is, they should not be UP or have an IP address. The idea is to enable the cards after assigning them to the bridge:
ip link set eth0 up
ip link set eth1 up
ip link set br0 up
The bridge is now ready for action, as the ip link show command shows (Figure 3). The bridge forwards packets and maintains its own ARP cache; it uses the cache to record entries showing which MAC addresses it can reach via which interface (see box "Building Bridges").
Just like any other firewall, the bridge can have a ruleset that describes which packets it should allow, and which it should deny. There are three commands for creating bridgewalling specifications:
All the packets the bridge forwards pass through the netfilter FORWARD chain. There are a few things to watch out for when using the well-known iptables command on a bridge. If a rule specifies allowing packets to pass the bridge in one direction only, it is important to use the -m physdev match (see Table 1). This allows the policy to identify the bridge port by which the packet reached the bridge, or check if it was even handled by the bridge.
The following example is designed to allow SSH connections to the IP address 192.168.0.16 (TCP port 22) in one direction only. The SSH server is attached to eth1. Connections can only be established by clients attached to eth0. We need two iptables commands to define the policy:
iptables -A FORWARD -m physdev
  --physdev-in eth0 U
  --physdev-out eth1
  --dport 22 -d 192.168.0.16U
   -m state
  --state NEW -j ACCEPT
iptables -A FORWARD -m physdev
  --physdev-is-bridged -m state
  --state ESTABLISHED,RELATED U
  -j ACCEPT
The first command handles connection establishment, which is restricted to the desired direction. The second command allows any packets belonging to this connection to pass through the bridge.
Bridging firewalls are often used to add security to grown networks, removing the need to change the network infrastructure and IP addresses. One possible insertion point is immediately in front of a router that the admin cannot change or that does not provide firewall functionality. But bridgewalls are at their best when subdividing previously contiguous network areas.
In this case, the IP addresses on either side of the bridge cannot be assigned to specific address ranges because the addresses have been assigned arbitrarily. The ipset command gives admins a means of subdividing the network: ipset creates an address pool in which admins can collect arbitrary IP addresses. The following lines create an address pool called left and add three IP addresses to the pool:
ipset -F; ipset -X; ipset -N U
left iphash
ipset -A left 192.168.0.5
ipset -A left 192.168.0.17
ipset -A left 192.168.0.18
The new pool can be used in IPtables rules. The -m set> match handles this. --set>Name specifies the pool:
iptables -A FORWARD -m physdev
  --physdev-in eth0 U
  --physdev-out eth1
  --dport 22 -m set U
  --set left -m state
  --state NEW -j ACCEPT
Besides IP packets, ARP packets are worthwhile targets for firewall rules. Many attacks across internal networks are based on spoofing ARP requests and responses.
| Table 1: Physdev Match | |
| Option | Meaning |
| --physdev-in Name | Specifies the port by which the packet needs to reach the bridge to apply this rule. |
| --physdev-out Name | Specifies the port by which the packet needs to leave the bridge to apply this rule. |
| --physdev-is-in | Packet came from an interface attached to a bridge. |
| --physdev-is-out | Packet will leave the computer via an interface attached to a bridge. |
| --physdev-is-bridged | The packet travels through a bridge. |
The arptables command can filter ARP packets. Outside of bridging operations, the command only makes sense in the INPUT and OUTPUT chains, as routers do not forward ARP packets. But on a bridge, ARPtables can also filter ARP packets in the FORWARD chain. The command syntax is similar to iptables. ARPtables uses the ACCEPT and DROP targets; the REJECT option is meaningless here.
arptables -A FORWARD -s !U
 192.168.0.15
  --destination-mac U
   fe:fd:0:0:0:1 -j DROP
This syntax drops all ARP response packets sent to the computer with the MAC address fe:fd:0:0:0:1 that did not originate from the computer at IP 192.168.0.15. The ARP response packet tells a requesting entity the MAC address associated with the specified IP address. Here, the computer with the MAC address fe:fd:0:0:0:1, which lives in the network on the other side of the bridge, only gets to see the MAC address for the computer at IP address 192.168.0.15.
| Listing 1: MAC-NAT |
|
01 ebtables -t nat -A PREROUTING -p ARP --arp-ip-dst -j arpreply --arpreply-mac 0:ff:90:2b:a6:16 02 ebtables -t nat -A PREROUTING -p IPv4 -d 0:ff:90:2b:a6:16 --ip-dst 192.168.0.16 -j dnat --to-dst fe:fd:0:0:0:1 --dnat-target ACCEPT 03 ebtables -t nat -A POSTROUTING -p IPv4 -s fe:fd:0:0:0:1 -j snat --to-src 0:ff:90:2b:a6:16 --snat-target ACCEPT |
| Building Bridges |
|
The term bridge refers to a category of devices that handle directed network packet forwarding in OSI layer 2. (The popular device known as a switch is typically a form of bridge.) To forward layer 2 packets, the bridge needs to collect the MAC addresses on the local network and remember which interfaces and ports belong to which computer. When the bridge receives a packet with a known target MAC address, it simply forwards the packet to the right interface and thus avoids unnecessary traffic. If the bridge does not know the target MAC address, it has to broadcast the packet to all interfaces. The command brctl showmacs br0 lists all the MAC addresses known to a bridge. The command outputs a table of entries. The first column contains the port number for packet deliveries to the computer, and the second column has the MAC address. More columns with management information follow.
Forgetful TablesTo stay current, the bridge removes old MAC address entries from its forwarding database. Admins can specify how long an unused MAC should be kept in the database before the bridge drops it. The command for this is brctl setageingtime br0 seconds. The internal computational effort would be unnecessarily high if the bridge were to immediately forget unused MAC addresses. Instead, the bridge first tags unused entries as invalid and then removes them at regular intervals (known as garbage collection intervals). You can set the interval by entering this command: brctl setgcint br0 seconds. The default is 0 seconds.
Spanning Tree ProtocolModern switches use the spanning tree protocol to provide a high-availability configuration. If two or more switches connect two subnets, they discover all possible routes from one network to another. After electing a root switch, the root switch defines active and inactive paths across the network and propagates this information to all switches involved in the network. The switches then block the inactive paths and interfaces, thus preventing duplicate packets (that is, packets that have taken two different paths) from reaching the target network (see Figure 4). If a switch fails, the remaining switches again discover which paths are still available and detour around the faulty switch. Linux supports the spanning tree protocol, however, admins need to enter brctl stp br0 on to enable it. Bridges can be assigned a priority between 0 and 65535: brctl setbridgeprio br0 priority. The bridge with the lowest priority assumes the root function.
Function TestBridges check to see if their peers are alive by sending "hello" messages at regular intervals. Admins can set the "hello" message exchange interval by entering brctl sethello br0 seconds. The command brctl setmaxage br0 seconds specifies how long the other bridges should wait if they do not receive a "hello" message. The bridge network assumes that the unresponsive bridge is down after this interval. When a bridge is attached to a network, it has to wait for a specific period before starting to forward packets. It has to use this delay period to check if the network uses the STP protocol. The following command sets the startup delay: brctl setfd br0 seconds. STP should be completely disabled on a filtering bridge: brctl stp br0 off. The firewall has to rely on its own ruleset and must avoid being disabled by STP spoofing.
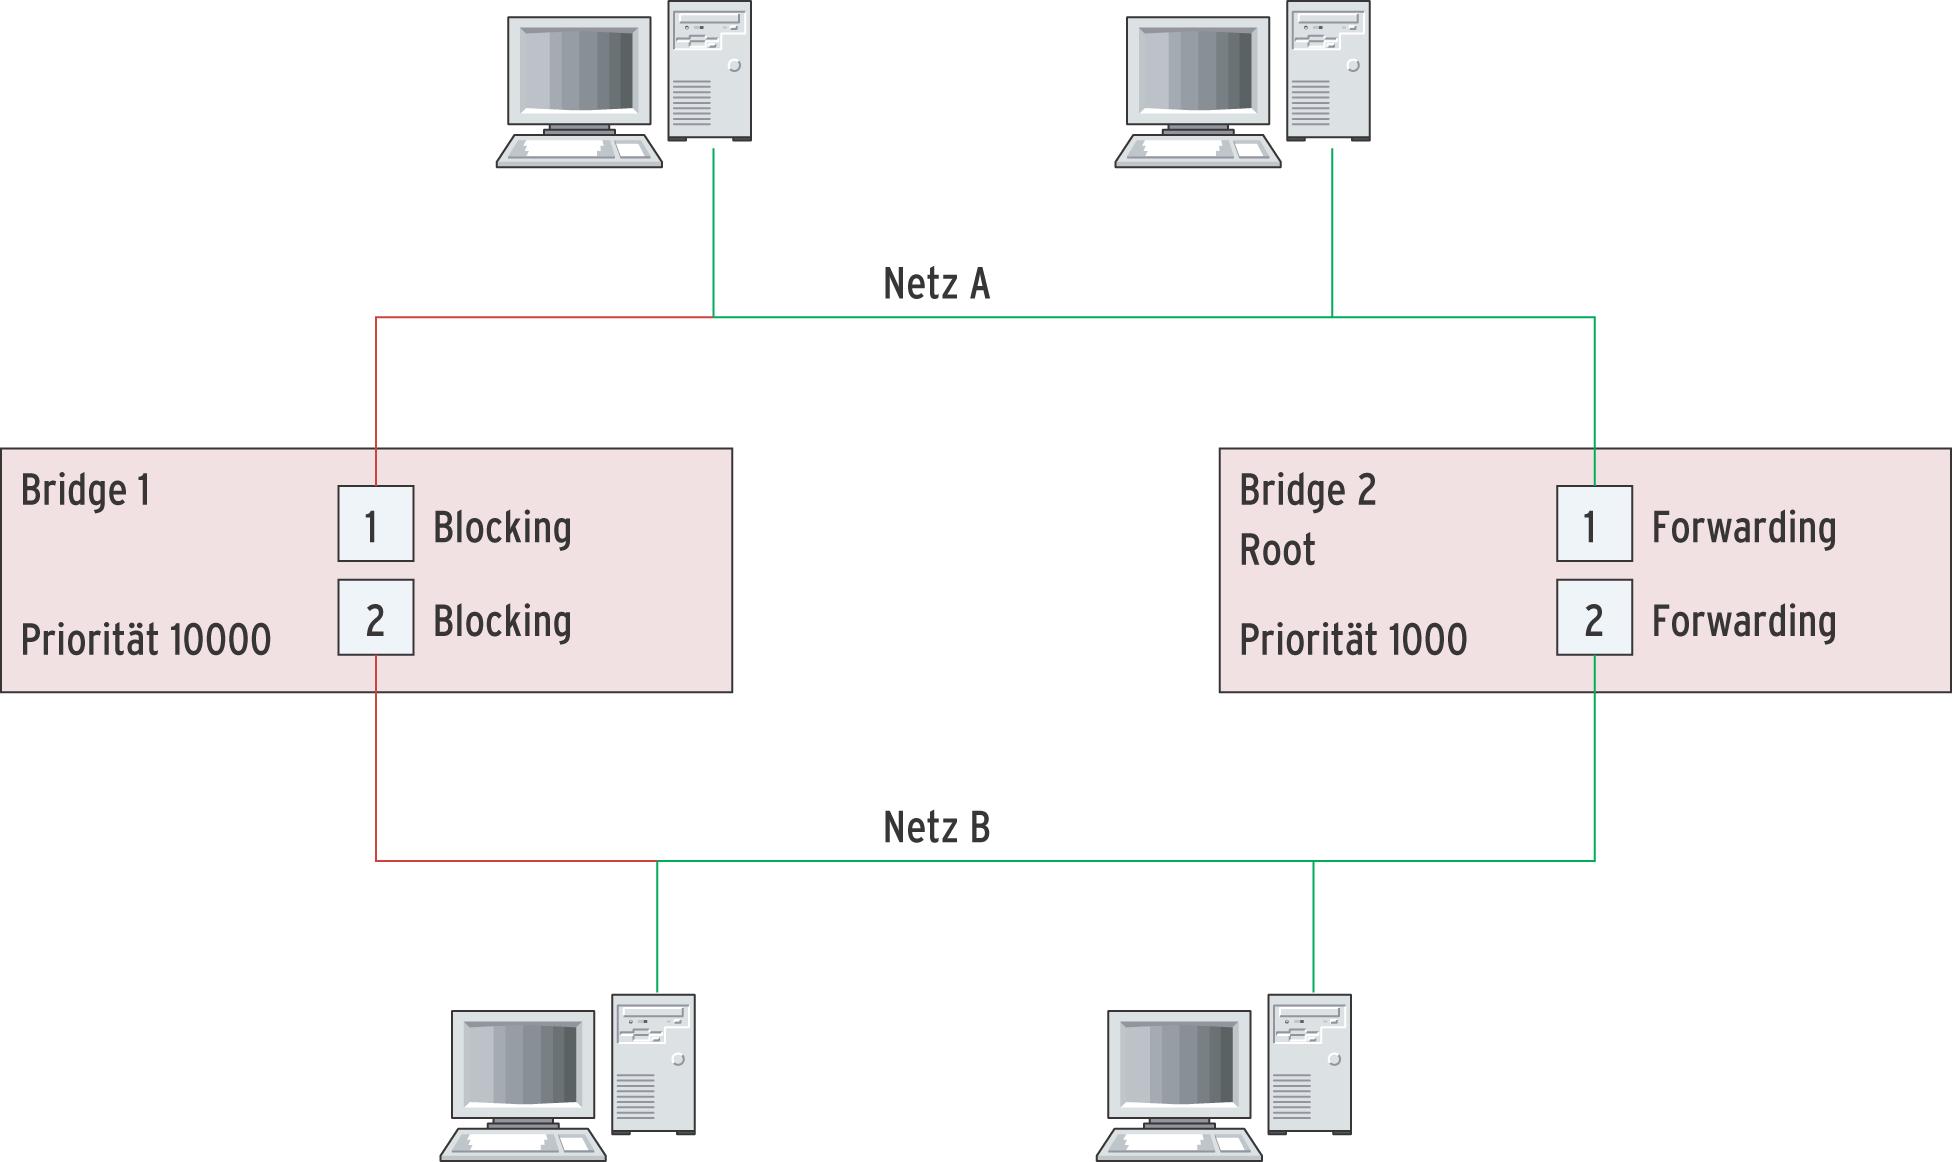
Figure 4: Bridges 1 and 2 connect networks A and B. The lowest priority bridge uses STP to define valid paths for packets sent from A to B. |
The ebtables command is far more powerful than ARPtables. The ebtables command even supports NAT for the MAC addresses on the bridge. The bridge can thus prevent attackers from learning the MAC address of a computer attached to another port. The bridge sends its own MAC address in response to ARP requests and provides MAC-NAT for all IP packets. The first command in Listing 1 tells the bridge to reply with its own MAC address (0:ff:90:2b:a6:16) to any ARP requests wanting to know the MAC address for IP 192.168.0.16.
The IP address of the computer you want to hide behind the bridge needs to follow this: --arp-ip-dst. --arpreply-mac is the MAC address of the bridge. For MAC-NAT of IP packets, you additionally need lines 2 and 3 from Listing 1. In our example 192.168.0.16 is the IP address of the computer we will be hiding behind the bridge, and its MAC address is fe:fd:0:0:0:1.
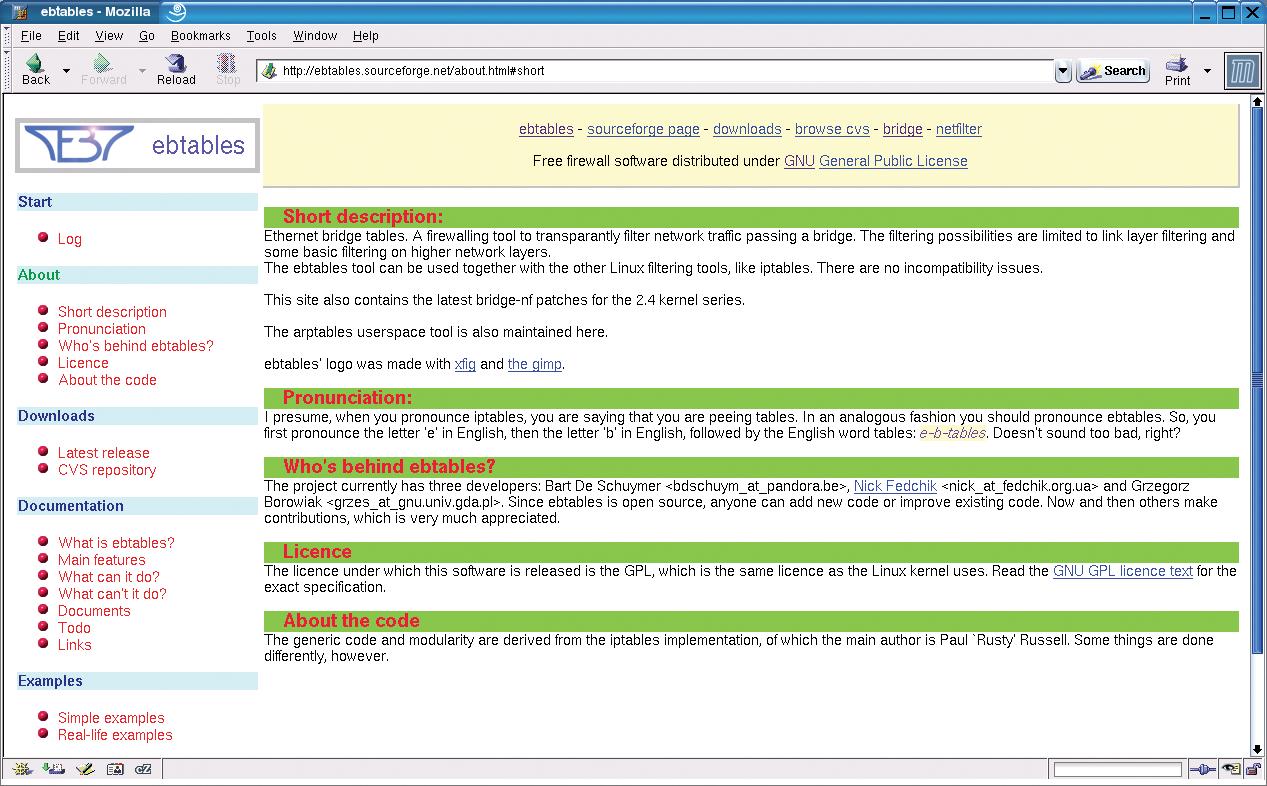
The excellent documentation on the EBtables homepage at [3] gives you more information on the capabilities of the ebtables command.
Bridgewalling gives network administrators a new class of packet filter that provides more control over layer 2. The really practical thing about bridging is that the bridging firewall can be added transparently to an existing network. The bridge simply replaces a hub, switch or cross-over cable on the network. And if you need to block a few suspicious looking computers behind the firewall, you can do so without reconfiguring your whole network by simply adding a bridgewall.
| Info |
|
[1] IPtables: http://www.iptables.org [2] Linux bridge: http://bridge.sf.net [3] EBtables: http://ebtables.sf.net |