More professional layout with Scribus
Typography and Text
Jason Walsh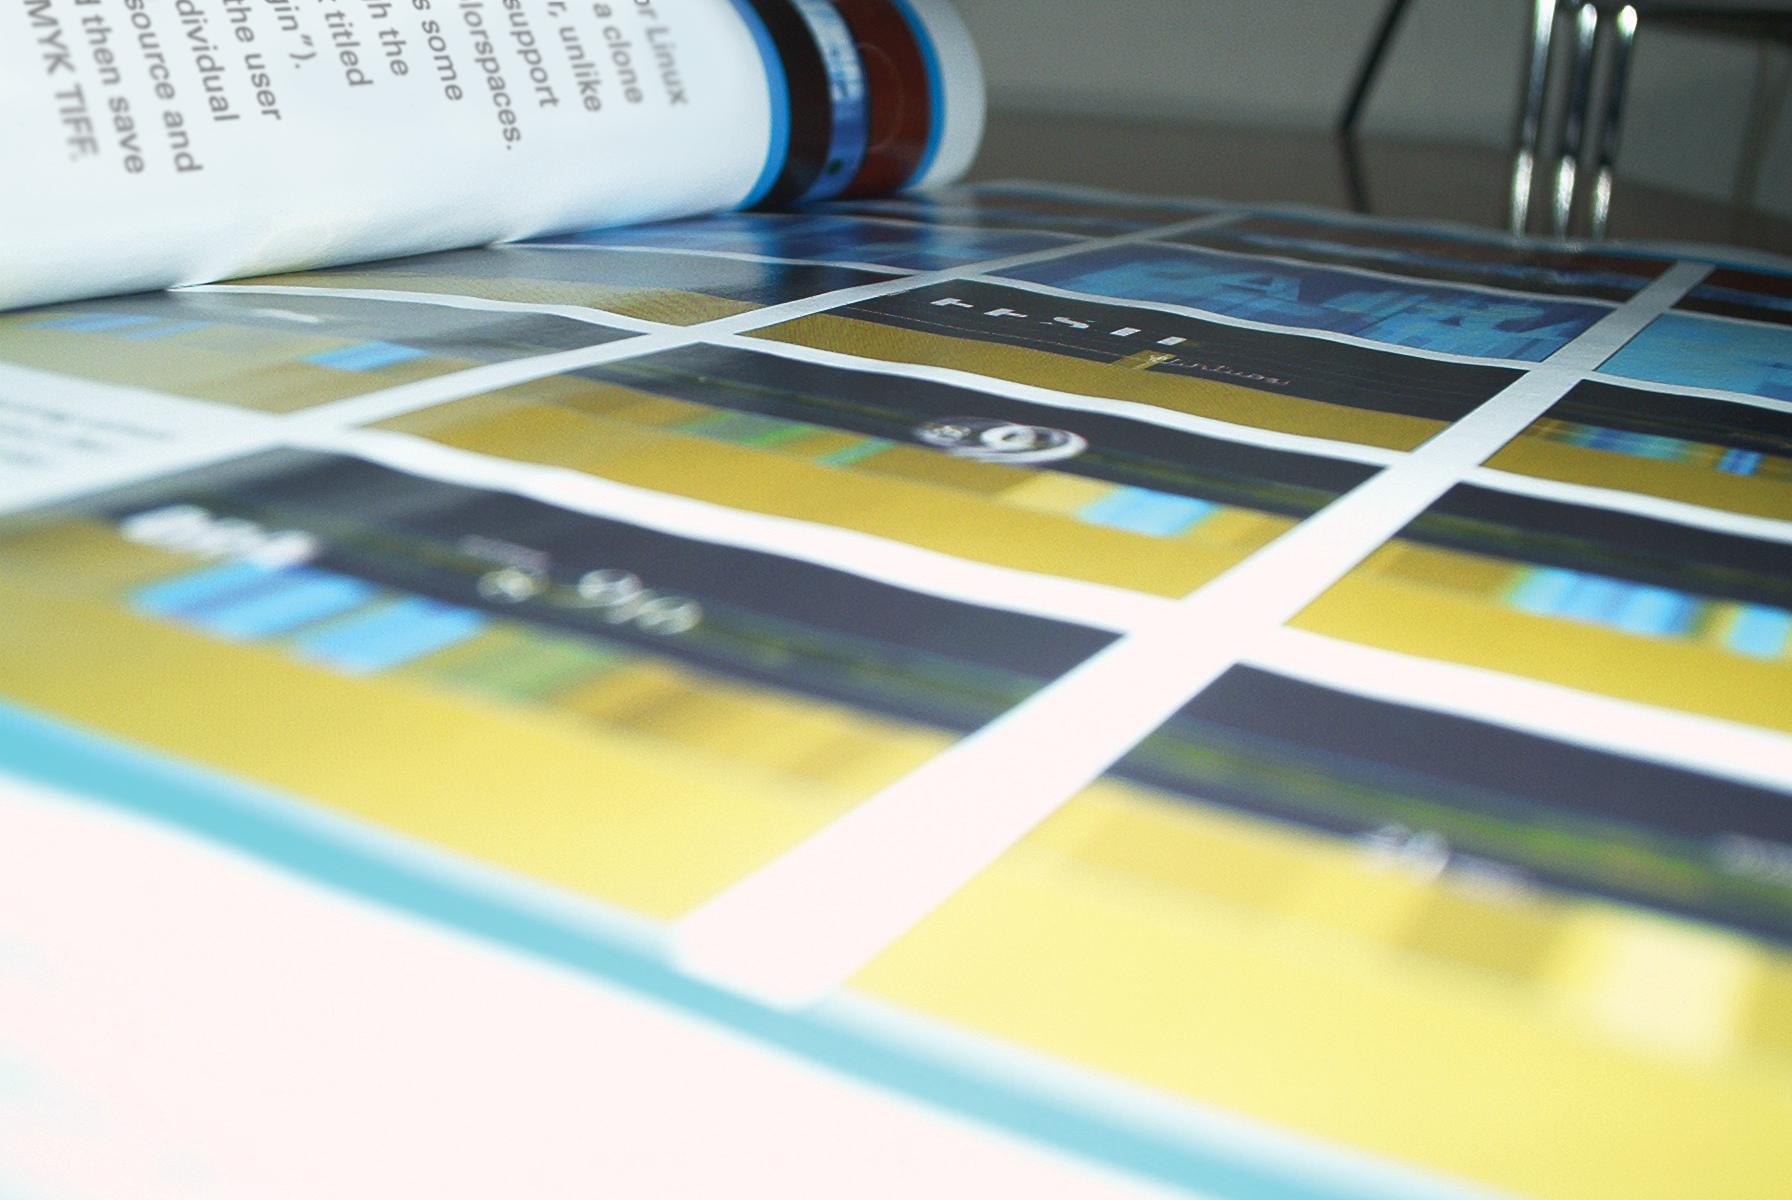
More professional layout with ScribusTypography and TextJason Walsh |
|
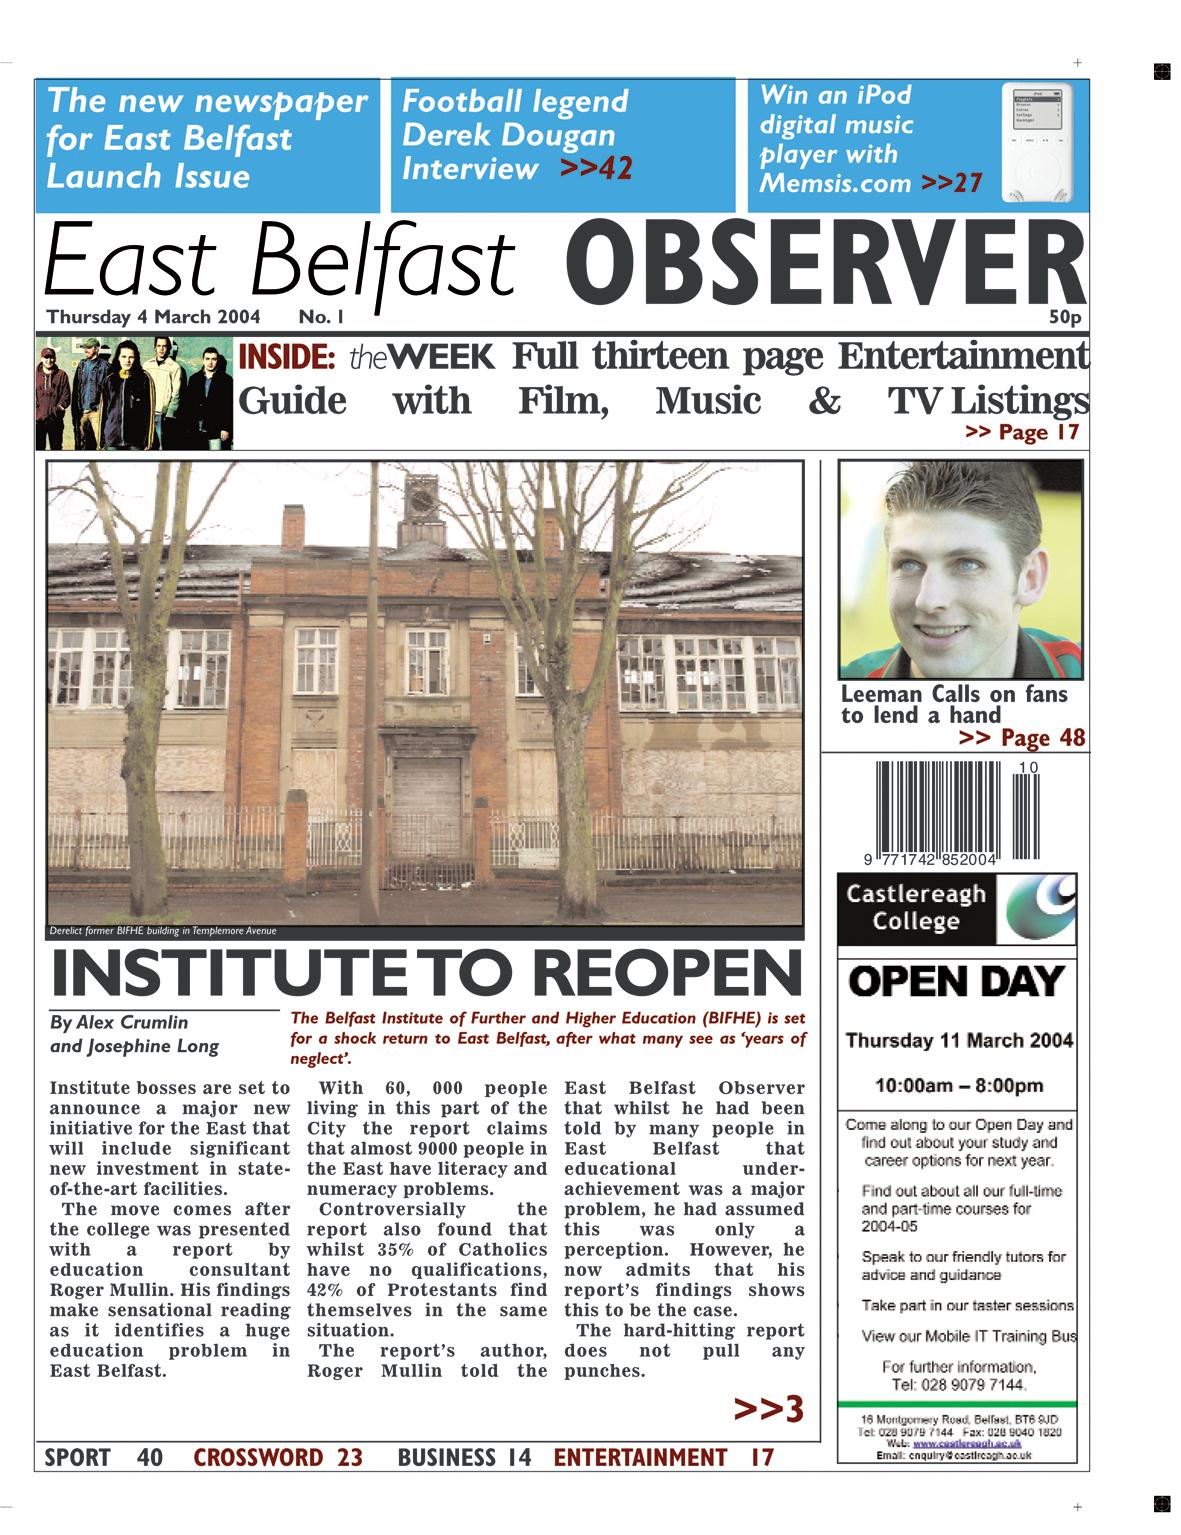
Last month, I showed how to create a desktop publishing project in Scribus, and I took the first steps for laying out our example newspaper by importing and inserting a nameplate. We also took a brief look at how to place text in a text frame. This month, we'll look closer at entering, adjusting, fitting, and highlighting text. But first, we'll start with the task of placing a leading photograph on the front page.
The leading image is a photo or other graphic image that accompanies an article and is positioned near the top of the page. The image file is created separately and then imported into Scribus. We will begin by placing a leading image on the first page of our Linux newspaper.
| The Author |
|
Jason Walsh was the art director on the East Belfast Observer from launch in January 2004, until July 2004, prior to which he was the art director for the Irish glossy magazines, Gorgeous and CityCraic. These days he works as a journalist and has contributed to Linux Magazine, Variant, Mute, the Guardian and many other newspapers and magazines on art, design and technology. |
One problem with importing a graphic image into Scribus is the general lack of support for CMYK colorspaces in Linux. As you learned last month, CMYK compositing is key to professional desktop publishing. Through this process, color images can be broken into their composite tones of cyan, magenta, yellow, and black. Although the range of colors, or gamut, that can be achieved in CMYK printing is smaller than the red, green, and blue gamut of a monitor, most tones can be successfully reproduced.
The preeminent bitmap editor for Linux is the GIMP, which is effectively a clone of Adobe Photoshop 3. However, unlike Photoshop, the GIMP does not support working on images in CMYK colorspaces. Thankfully GIMP 2.0 does offers some basic support for CMYK through the gimp-cmyk plugin (see the box titled "Installing the gimp-cmyk Plugin"). The gimp-cmyk plugin allows the user to convert an RGB image to individual CMYK layers (using specified source and destination Color Profiles) and then save this collection of layers as a CMYK TIFF.
| Installing the gimp-cmyk Plugin |
|
A binary version of the gimp-cmyk plugin is available, compiled for SuSE Linux 8.0 from the developer's site at: http://www.blackfiveservices.co.uk/separate.shtml If you want to compile your own version, or use a different Linux distribution, you will need to have relevant library files for GTK, GIMP, LibTIFF and LCMS installed. If you do, it's a simple case of:
make clean
make
Many Linux distributions include gimp-cmyk as part of their standard install of the GIMP. For example, this series was produced using SuSE Linux 9.1, and "gimp-cmyk" was installed as standard. If gimp-cmyk is installed on your system, you can convert an RGB image to CMYK format, by right-clicking on the photo and selecting "Image" from the menu. A GIMP plugin for CMYK is useful for our purposes, but CMYK in a non-color-managed workflow is still less than ideal. In the not-too-distant future, the GIMP's developers plan to move to a more generic graphics library called GEGL. This move should allow for native CMYK support. |
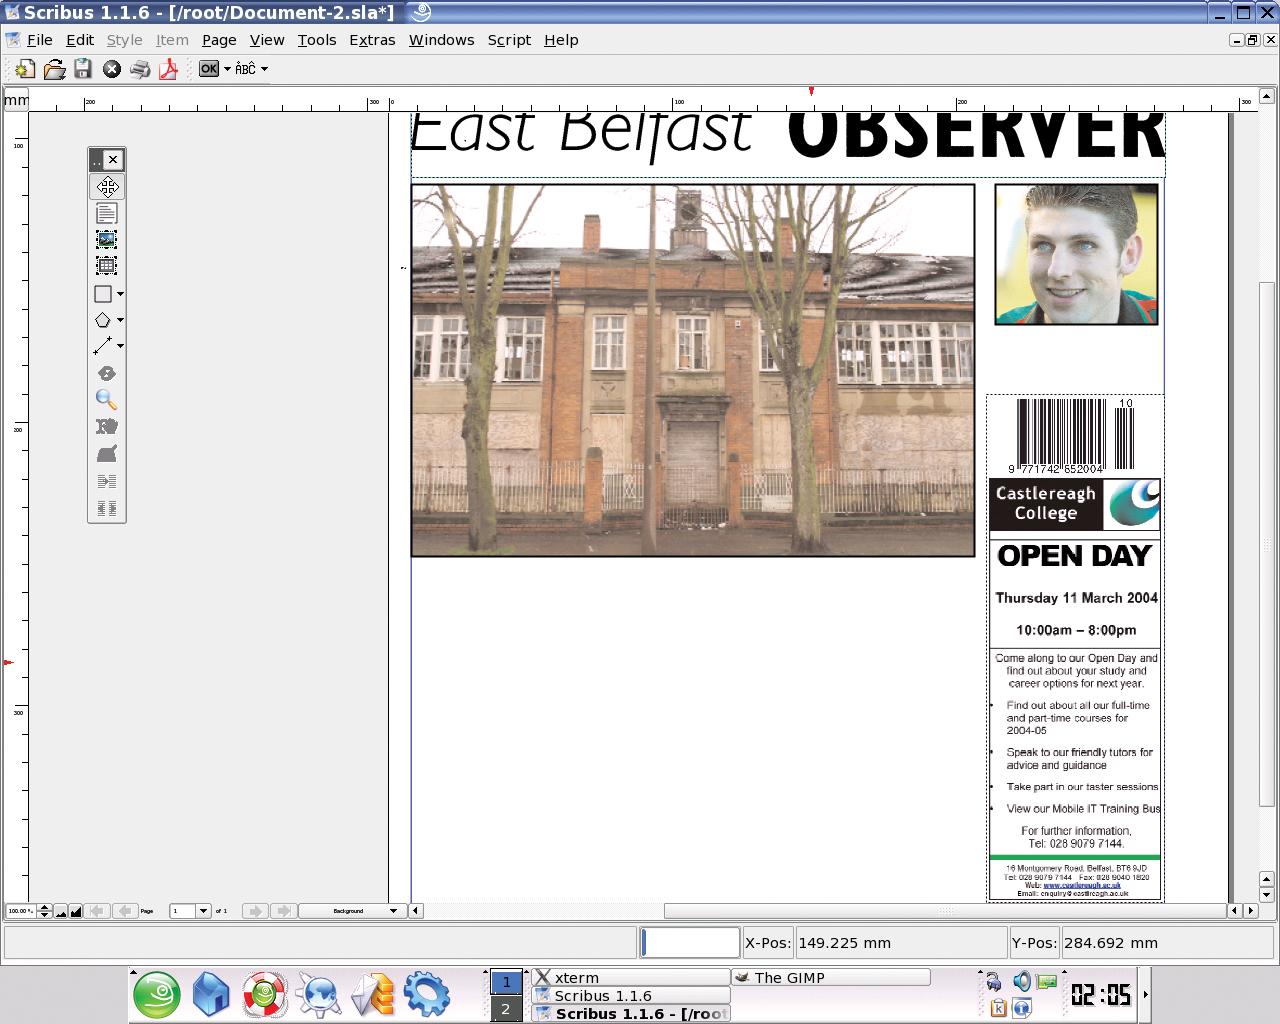
To import an image into Scribus, first select New Image Frame from the Scribus toolbar and click and drag the rectangular frame until it is roughly the correcet size.
Then import the image by choosing File>Import>Get Picture.
Once the picture is imported, position it exactly where you want it on the page and resize the image if necessary.
Every publication has its own style, and this is usually reflected in style guides. The East Belfast Observer calls for a black line, two points in width, to be drawn around every image. Not only does this create a classy look, it also serves a technical purpose. Many newspaper presses go "off-register" - this means that the four color plates used in printing become misaligned, the end result of which is that color images can look blurry and spread slightly outside of their boundary. A two-point line is twice the width of an ordinary line - it would be very unusual for one of the color plates to be misaligned by more than two points. Therefore, even if the press does go off-register, the black line will help to tidy the page up a bit.
As every photograph in our project will feature this line, it makes sense to create a style that can be applied to any image without having to manually re-create it every time.
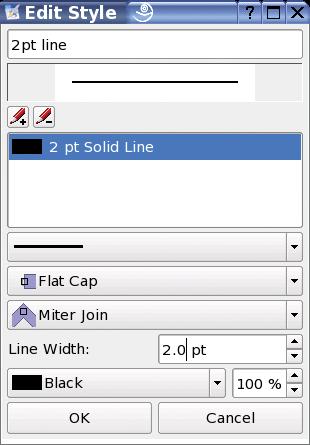
To create a style, choose Edit>Line Styles. In the dialog box that appears, select New. A window appears, in which we will define our line style (Figure 2).
At the top of window, enter a title for the style, such as 2pt line. Also in the window are options for adjusting the ends of lines and how they join together. For our project, leave these settings on the defaults: Flat Cap and Miter Join.
Next, set the line width to 2pt and the color to black. Finally, click OK and the style is defined.
To apply the style, right-click on the image and bring up the properties window by selecting Show Properties. Choose the Line option and select the newly created style from the list at the bottom of the window.
This process of defining a style and applying it to an image is the key to professional layout, as it lets the user create consistent layouts quickly and with confidence that they will remain the same throughout the document.
The process I just described is repeated for the small right-hand column: draw a frame, import a picture, adjust the size to fit, and apply the style.
A small headline relating to the photograph will go below this image. We'll ignore this headline for the moment but leave some space for it. Below this headline goes the ISSN barcode and an advertisement.
Advertisements are themselves images created in a layout package and exported as Encapsualted PostScript (EPS) files. They are imported in exactly the same way as photographs: draw a frame and select Import>Get Picture. Unlike editorial photographs, advertisements do not have a two-point line surrounding them. Instead, they feature a one-point border, which is part of the image itself before it is imported.
The barcode is exactly the same, another EPS file, although this time it is created in a specialist package. Again, no border is required.
| Resolution |
|
On-screen images such as you see on the web are traditionally at a resolution of 72 dots per inch - that means that every inch of the image is composed of 72 dots. If you attempt to print web images, they will be blocky and glitchy, as this resolution is much too low for print. When printing at home, most people create images with a resolution of 300dpi. This is a fairly safe resolution, high enough to be used for most purposes - in fact, it's unnecessarily high for a newspaper. In order to work out what resolution to use for our images, it's important to understand what is happening with them. Printed images consist of halftone dots. (If you scan a newspaper or magazine page you will see this halftone pattern - see Figure 1.) Halftones are measured not in dots per inch (dpi), but rather in lines per inch (lpi). This process is called screening. The higher the lpi value, the more halftone dots are squeezed in per inch; the end result is a higher resolution image. Newspapers are printed at 65-85 lpi, magazines at 100-150 lpi, and books between 150-300 lpi. Each halftone dot is itself made up of tiny dots measured in dpi. The effective dpi is the maximum number of these dots the printer can print in an inch. The ratio of dpi to lpi is usually between 150% and 200%; therefore, if your halftone screen is 85lpi, your images need to be a minimum resolution of between 127.5dpi and 170dpi. The relatively low resolution of the halftone screen, say 85lpi, is suitable for newspapers because the ink will spread out on the low-grade paper used to print them. Of course, it never hurts to have a slightly higher resolution than is absolutely necessary, so all of our images are safe at 200dpi. While this resolution is high enough for a newspaper and will allow images to be magnified slightly, if images of 200 dpi were printed in a magazine on high-grade paper, the result would be less than ideal.
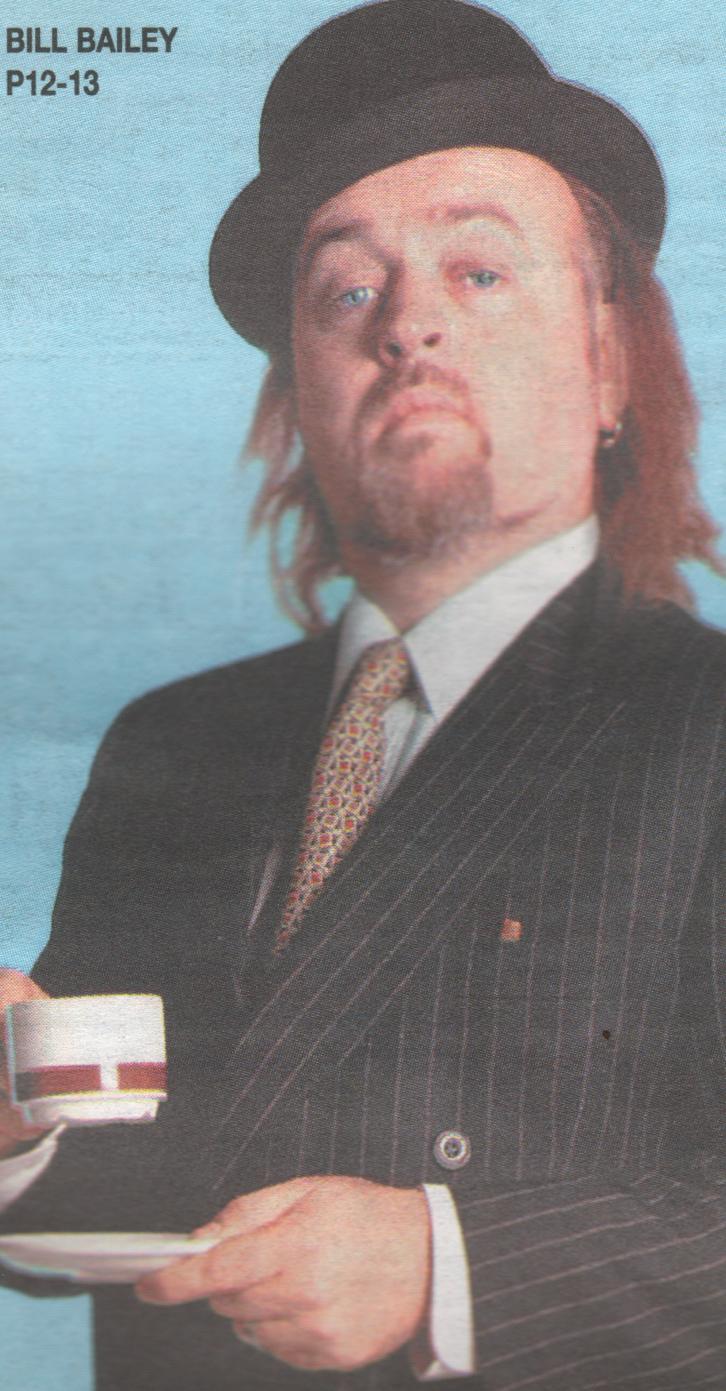
Figure 1: A publicity image of comedian Bill Bailey scanned from an Irish newspaper. Note the visible halftone dots manifested in a pattern across the image. |
Now that our lead image is in place, we will turn our attention to the text. The first step is to select a typeface. Many fonts have been designed specifically for newspapers. For serious newspaper design, it pays to do some research into type.
In the case of the East Belfast Observer, body text (that is, the text of the actual stories) is set in a font called News 701. News is a serif font, which is readable even at small sizes - perfect for newspapers. As I do not have a license to use this font in this project, I will substitute another serif font, Bauer Bodoni. Any well-designed serif font, such as Times, would be suitable for body text, but fonts such as News have spatial advantages by being developed specifically for newspaper use.
Ultimately, the key to good font usage is simple: choose as few fonts as possible and stick to them. This approach will offer consistency and clarity to the reader.
In our case, all headlines are bold variations of the Gill Sans typeface. In the case of the stories themselves, it's better to import them from text files, but for headlines, simply draw a text box, enter the text, and adjust the style.
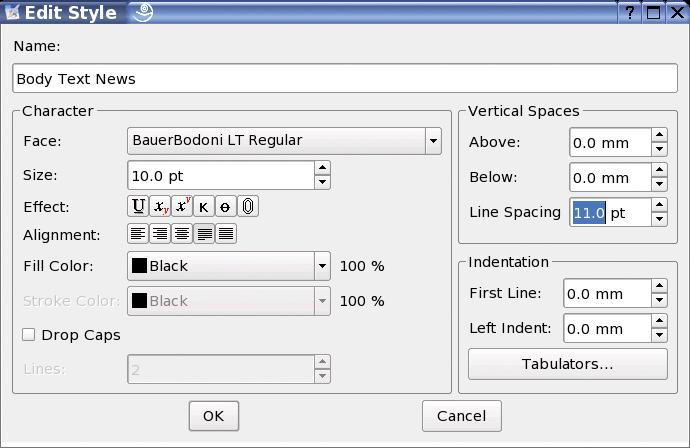
As with other elements in the page design, we're going to create a style for body text - the main text of the stories - and apply it. Choose Edit>Paragraph Styles and click New in the Edit Styles window. Name this new style Body Text News (Figure 4).
The options we're using are the following: The typeface is Bauer Bodoni Regular set at 10pt. What size you set for your type will depend on the individual metrics of the font. For example, a relatively large font like News 701 would be set at 8pt, whereas with Times, you may want to go as high as 12pt.
The Line spacing/leading is set at 110% of the face size - that is, if the face is set at 10pt, use 11pt, whereas with an 8pt face setting, use a line spacing value of 8.8pt, and so on. This is much tighter than the default setting and will give the text a dense and serious feel.
Much of the rest of the settings are a matter of opinion. In this case, a decision was taken to set news stories as fully-justified (text creating a hard line on both sides of the column). Again, this adds to the serious feel of the text. Avoid centered, flush-right, and forced at all costs: these settings are not useful in body text.
The rest of the settings can be left on the default values. Click OK and you will be returned to the Edit Styles window. Highlight Body Text News and select Duplicate. Change the name to Body Text Comment and change the alignment to Align Text Left. Click OK. Just as factual news stories benefit from justified text making them seem dense, comment, opinion, and entertainment stories benefit from flushed-left, as the ragged right-hand edge of the text makes them seem lighter. Close the Edit Styles window.
Take a close look at a newspaper and you will notice that, unlike many magazines, stories fit exactly into the allotted space with no white-space below the last line. This helps give a sober and professional feel to news pages, and obviously we want to replicate that in our dummy. Subtly adjusting the kerning and tracking will get you some of the way there, but the only way to perfect it is to edit, or "sub" the text and make it fit. This is one of the key reasons why pages are laid-out by sub-editors and not designers: an understanding of the rules of language and how to make a story flow well will go a long way.
Let's sub our front-page story. Draw a text frame underneath the headline of exactly the same width, but deep enough to almost reach the bottom - say about 1.5cm short of the margin.
Below, draw another similar frame to reach the bottom margin. This frame will contain information on what else is in the newspaper and will dictate how deep our main story can go.
Import the text in the normal manner. (Highlight the text frame and select File>Import>Get Text.) Next, apply the Body Text News style by choosing Tools>Properties. In the Properties dialog, select text and choose the appropriate style (Body Text News). Next, choose Shape and select 3 columns. Remember to make a space between the columns, say 2mm. This is done by editing the value of the Columns in the Shape section of Properties.
Dismiss the Properties dialog. Any reasonably lengthy text file will do - in this case, we're using a copy of the first few hundred words of this very article, as we do not have access to the actual story.
Now the best part (or the worst part - depending on your opinion): manually edit the text to fit the given space, just as you would in a text editor.
All that now remains is to finish off the page. In Figure 6, you can see the remaining elements that need to be added.
First, add the headline for the secondary story on the right side of the page. The headline font is set in Gill Sans Bold; adjust the size to fit.
Next, below the main story, add, again in Gill Sans Bold, the details of what's featured inside the newspaper. Remember, we've already created a frame for this.
Next, below the nameplate but above the main image is a highlight from the entertainment section. This highlight consists of an image frame and a text frame.
The final task is to finish the three main highlights at the top of the page.
Last month we wrote, "The new newspaper for East Belfast" on top of the leftmost box. We will now recap that and begin the process that adds the text and images to the other two boxes.
Draw a text frame over the leftmost box and add the words: "The new newspaper for East Belfast." Next, adjust the font, size, and line spacing. We've gone for values of 42pt text, set in Gill Sans Italic with a line spacing value of 36pt. Position the text frame so that it sits within the blue box.
Next, draw two image frames, one over each of the remaining boxes. Into these frames, we will be importing photographs, but first we need to path the images. This means, to draw a line around the outline of the aspect of the image that we want to use, allowing Scribus to discard the rest of the image.
Open your images in your image editor. Whether the image editor is PixelFX!, PhotoPaint, or GIMP on Linux or Photoshop on Mac/Windows, the process is similar, and we'll be explaining how to do this in next month's edition.
In our case we're using a publicity shot of the French actress Audrey Tautou and a high-resolution PR image of an iPod, downloaded from Apple's website.
| Type Definitions |
|
What do those terms mean?
Serif and Sans-serifThough there are many sub-categories, the basic division in fonts is that of serif and sans-serif faces. Serifs are small features at the end of strokes of letters, actually representing chisel marks made by Roman artisans. Serif fonts are considered more elegant, subdued, serious, and readable and are therefore commonly used to set large blocks of text - have a look at a novel or newspaper. A sans-serif (or, less commonly, Grotesque) font does not feature these details. Their modernist dynamic look makes them suitable for larger text items, such as headlines, poster text, and relentlessly trendy art books.
Leading and Line SpacingLine spacing, as it is known in Scribus, is properly referred to as leading - lead referring to the strips of lead used to create space between lines in the days of mechanical typesetting.
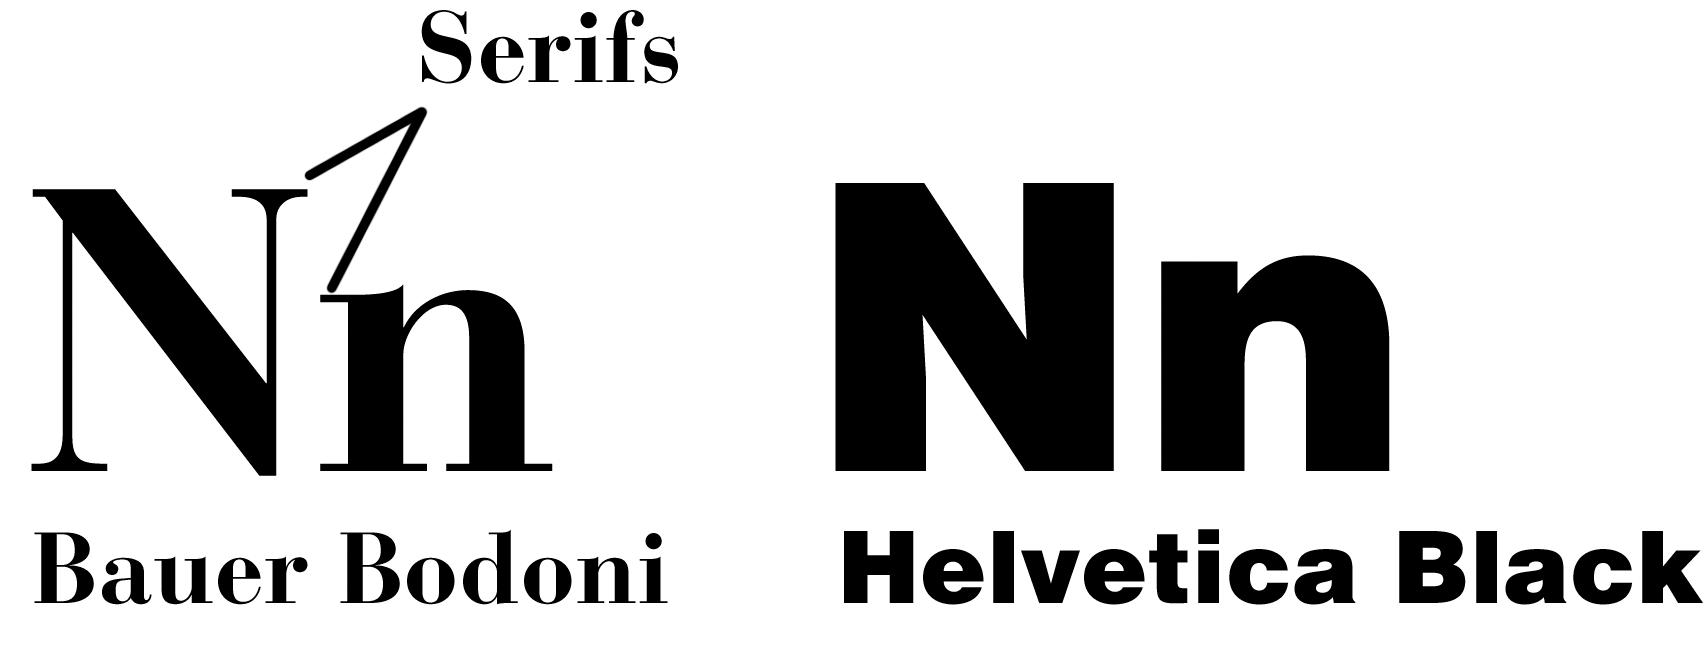
Figure 5: Serif and sans-serif faces.Leading allows the designer to alter the density of blocks of text. Newspapers are quite dense and as such use a tighter line spacing value than you would find in magazines, brochures, or posters.
Kerning and TrackingWhen a typeface is designed, the designer assigns each character a width, allowing for consecutive characters to be placed on a line without touching. However, the type designer's intentions may not be the same as your own. Kerning allows you to manually adjust the space between any two characters. Tracking allows the user to apply a form of universal spacing between all characters. As such, it is a powerful option, and once you've found a setting that you feel is suitable, you'd be well advised to leave it alone and adjust the kerning manually for further changes. |
Now that we've almost finished creating a front page, the process must be repeated for other pages. The back page is paired with the front page and, in the tradition of Anglophone newspapers, the back page is a sport page. The other two pages are the cover of the entertainment section and a news page. If you've followed the two parts of this tutorial so far, you should be able to create similar pages quite easily.
In the final installment of the series, we'll be putting the finishing touches on our newspaper pages, explaining how to use templates to create a multi-page document, and taking a close look at how to get our pages to press. We'll also have the finished newspaper appraised by a pre-press professional.
| Info |
|
[1] For the first part of the "Linux for Layout" series please see here: Jason Walsh: "A Linux Newspaper", Linux Magazine, Issue #49 / December 2004, p53. [2] Scribus: http://www.scribus.org.uk/ [3] News Page Designer: http://www.newspagedesigner.com/ [4] Society for News Design: http://www.snd.org/ [5] News Today: http://newstoday.com/ |