Building a Simple Game with Qt's QCanvas
A Different Canvas
George Wright
Building a Simple Game with Qt's QCanvasA Different CanvasGeorge Wright |
|
QCanvas is a very versatile widget that lets you add high performance 2D graphics to a Qt application. With features such as collision detection and sprite support, QCanvas is very much suited to 2D games. But QCanvas has also been used in diverse applications such as KTurtle, a logo interpreter. In this article, I will show you how to build a very simple game using QCanvas components.
The example game I'll discuss in this article, which I call Bricks, consists of a rectangular play area containing several rectangular objects. The rectangular objects are the bricks. A ball bounces around in the play area. If the ball strikes a brick, the brick disappears. A paddle, operated by the user, demonstrates how you can integrate user interaction into the game. To keep the game as simple as possible, the ball cannot leave the play area.
You can assemble this game very quickly and easily using QCanvas components. The steps for building this game are as follows:
The Bricks game is a very simple example, of course, but it will give you enough background to experiment with your own QCanvas programs if you're interested. This tutorial shows how you can write an effective 2D game using only the Qt libraries and very little "glue code."
| Listing 1: Calling setMainWidget() |
|
01 #include <qapplication.h>
02
03 #include "view.h"
04
05 int main(int argc, char **argv)
06 {
07  QApplication a(argc, argv);
08
09  View *view = new View();
10
11  a.setMainWidget(view);
12  view->show();
13
14  return a.exec();
15 }
|
When starting to develop the program, we begin at the application's entry point, usually contained in main.cpp. The format of main.cpp is exactly the same as for any other Qt application, starting with the inclusion of the QApplication header file, qapplication.h. This is the primary class for any Qt application that allows us to use the Qt classes for the program. The main function is very simple, only comprising code to load a Qt widget as the main window. To start with, a QApplication object is created that will represent the application. This is then followed by the main widget, called View, which is a class that will be written later. This widget will serve as the main window for the application, on which the canvas will be placed. As it is the main window, QApplication's setMainWidget() function is called to use this as the main window (see Listing 1).
The parameters that have been passed to the constructor for QApplication have been set to the values that were passed to the application upon execution, so that Qt itself can handle them. In order to display the widget, we must call the show() function for View, otherwise the object is created but nothing appears on the screen. Finally, the return function passes whether QApplication executed correctly.
Now that main.cpp is complete, it is time to progress to the main class for the game, View. This is the main window for the program, and it needs to be inherited from QWidget to be set as the main widget for QApplication. In this case, it is probably best to make the class inherit QMainWindow and base the entire application on that class. This is because QMainWindow has a very useful setCentralWidget() function that will allow us to add the main canvas widget to it using the default layout, and thus let it handle the layout and resize events for the application.
First, the class needs to be defined in view.h:
class View : public QMainWindow
{
 public:
  View(QWidget* parent = 0, U
  const char *name = 0);
  ~View();
};
This is a definition for a class called View that will inherit QMainWindow. This is going to be used as the main window for the application, and so widgets we create will use this as the parent. It is to this window that the QCanvas widgets for the game will be added. Now that there is a class definition, we can start writing the class constructor in view.cpp:
View::View(QWidget* parent, U
const char *name)
 : QMainWindow(parent, name)
{
}

View::~View()
{
}
This is the default constructor for the View class that passes its arguments to QMainWindow. However, an empty constructor is rather boring, as it doesn't actually do anything, so the next thing to do is to create some widgets to display on the window. QCanvas will need both a QCanvas and a QCanvasView widget so that the QCanvas classes can be used. In order to add these to the window, they will need to be declared in the class definition as private underneath the public class declarations:
private:
 QCanvas *m_canvas;
 QCanvasView *m_canvasView;
They can now be created in the constructor as class-wide objects and the QCanvasView can be set to be the central widget for the window. This will give us a QCanvas workspace on which 2D objects can be added for the game. To create the QCanvas and QCanvasView objects, we use the following code in the constructor:
m_canvas = new QCanvas(this);
m_canvas->resize(400, 300);

m_canvasView = new QCanvasViewU
(m_canvas, this);
m_canvasView->show();
The first line creates a canvas named m_canvas with the window as its parent; the second line resizes the canvas to a sensible size for the game. The third line creates a QCanvasView so that the user can view the canvas, setting the canvas m_canvas as its QCanvas object. Now that the main game objects have been created, it is possible to add the QCanvasView to the window as the central widget:
setCentralWidget(m_canvasView);
Before this will compile, you will need to include the relevant header files for these classes. All the QCanvas classes are in qcanvas.h and the QMainWindow class is defined in qmainwindow.h, so we simply need the following at the top of view.h:
#include <qcanvas.h>
#include <qmainwindow.h>
You will also need to tell view.cpp to include view.h, as it contains its class declaration:
#include "view.h"
This completes the View class for now.
| Box 1: Obtaining QCanvas |
|
QCanvas is included as standard with the Qt distribution from Trolltech's website. For commercial uses, you will need a commercial license. However, if you only plan to write software released under an appropriate free software license, you will only need to download the Qt Free Edition, which is licensed under the GPL. At the time of writing, the latest release of Qt Free Edition is 3.3.3. You can obtain Qt Free Edition from ftp://ftp.trolltech.com/qt/source/qt-x11-free-3.3.3.tar.bz2. Installation of the package follows the standard routine for source packages, although Qt is strange in that it will install the Qt libraries within its own directory. Therefore you will need to extract the tarball in a suitable directory (such as /usr/lib/qt) and compile using the following commands:
# cd /usr/lib/qt
# ./configure -system-zlib -qt-gif -system-libpng \
-system-libjpeg -plugin-imgfmt-mng -thread -no-stl \
-no-xinerama -no-g++-exceptions
# make
Qt will then be installed in /usr/lib/qt. You will need to set the environment variable QTDIR to point to this directory. There is no need to run make install, as the Qt libraries are installed automatically in the main source directory. However, the chances are that your distribution already includes Qt as a package and so it is often better to simply install the Qt development package from your original installation media. This is normally called qt-devel or similar. Your distribution will have a tool to install this package, such as Suse's YaST utility. |
| Listing 2: Declaring Ball |
|
01 #include <qcanvas.h>
02
03 class Ball : public QCanvasEllipse
04 {
05  public:
06   Ball(QCanvas *canvas);
07   ~Ball();
08  private:
09   double vx;
10   double vy;
11 };
|
Now that we have a class that defines the actual window, we can start writing the class that controls the ball's movement. This class will inherit QCanvasEllipse, as this is the QCanvasItem for circular and elliptical objects. Since this will be a moving object, we will need to use the system that QCanvas uses for moving objects. QCanvas defines the velocity as two components: the velocity in the horizontal direction (xVelocity) and the velocity in the vertical direction (yVelocity). Combined, these components can create a velocity in any direction required.
To declare the ball class, I'll use a short class declaration in ball.h that tells the class to inherit QCanvasEllipse (see Listing 2).
The two variables declared in the private section of the declaration are values to represent the x and y velocities of the ball. The functions that modify the velocity of the ball will make adjustments to these variables and then set the actual velocity afterwards. This will also keep an internal record of the current velocity. QCanvas uses two phases in the movement of an object. The first phase is phase 0, where the object should not move but instead performs checks around the canvas object to see whether any special cases (such as a collision) that will affect the velocity need to be applied. The second is phase 1, which tells the object to simply move by its velocity values (where gravity and drag can be applied if necessary). These phases are implemented in the advance() function, and so the Ball class needs to reimplement this to allow it to perform custom operations in the case of a collision. To overload the function, we add the following to the public section of the class declaration:
void advance(int phase);
It is also sensible to declare a separate function in which the collision detection code is called, as well as a function to perform the operations when a collision has taken place:
void collisionDetect();
void collide(QCanvasItem *item);
And finally, there should also be another function to update the velocity of the object from the internal variables vx and vy:
void updateVelocities();
Now that ball.h has been totally written, it is time to proceed to ball.cpp. First we need to tell ball.cpp to include ball.h and then to declare the various functions (see Listing 3).
Listing 3 is a very skeletal version of ball.cpp with all the functions. The third line tells QCanvasEllipse that it is an ellipse of width and height 10 pixels, and hence a circle. It also tells QCanvasEllipse that the parent canvas is the canvas that has been passed to the constructor.
QCanvasItem, from which QCanvasEllipse is inherited, automatically paints the item in white. However, this isn't a particularly good idea as the canvas itself is white, hence making the ball invisible. Because of this, we have to tell the QCanvasEllipse explicitly to paint in black in the class constructor. This also makes it a filled circle as opposed to a mere outline:
setBrush(Qt::black);
This is all that is needed in the class constructor. Everything else is implemented in the advance(), collisionDetect(), collide(), and updateVelocities() functions. QCanvas will take care of calling advance when necessary. As mentioned earlier, there are two phases for movement in the QCanvasItem classes, which are represented by the int phase argument that is passed to the advance() function. In phase 0 we need to check for collisions and in phase 1 we need to move the ball according to its defined velocities:
The advance() function
if (phase == 0) {
 collisionDetect();
} else {
 moveBy(xVelocity(), U
 yVelocity());
}
At the moment, the collisionDetect() doesn't actually do anything. However, QCanvas provides built-in collision detection functions that are very powerful. This is what the collisionDetect() is going to use to detect a possible collision. In QCanvas, they consist of two main functions: collisions() and collidesWith(). The former function returns a pointer to a QCanvasItemList of all the objects currently on the canvas that the current object will have collided with in total after it has moved by its current velocities. The latter function returns a boolean value stating whether the object has collided at that time with a certain object. We can therefore iterate through all the objects in the QCanvasItemList returned by collisions() and test them for a current collision using collidesWith() (see Listing 4).
| Listing 3: ball.cpp |
|
01 #include "ball.h"
02
03 Ball::Ball(QCanvas *canvas)
04  : QCanvasEllipse(10, 10, canvas)
05 {
06 }
07
08 Ball::~Ball()
09 {
10 }
11
12 void Ball::advance(int phase)
13 {
14 }
15
16 void Ball::collisionDetect()
17 {
18 }
19
20 void Ball::collide(QCanvasItem *item)
21 {
22 }
23
24 void Ball::updateVelocities()
25 {
26 }
|
The first two lines declare two doubles, which will be the new x and new y positions of the ball after the velocities have been applied. The code then proceeds to set the internal vx and vy values to the current x and y velocities of the ball. The two if statements do a check on the future position of the ball to see if it will be off the canvas altogether and reverse the velocity in the relevant direction if necessary. For example, if the ball will be off the canvas on the right hand side, it will reverse the velocity of the ball so that it will start moving from right to left instead of from left to right.
The updateVelocities() function simply assigns the actual velocity of the ball to the variables vx and vy using QCanvas' setVelocity() function. The function needs to only contain:
setVelocity(vx, vy);
The next part is the interesting part, as this is the internal QCanvas collision detection in action. First, a QCanvasItemList is created of all the canvas items that the ball could collide with. This is obtained through the collisions() function, which takes a boolean value as an argument. If the boolean value is set to false, then the collision detection isn't particularly accurate. On the other hand, if it is set to true, then QCanvas will perform accurate collision detection.
Now that we have a QCanvasItemList of all the possible collision candidates, it is possible to iterate through them using a QCanvasItemList::iterator and check each item individually for a collision using the function collidesWith(). This, again, takes a boolean argument, which chooses between accurate and inaccurate collision detection. This will then provide a pointer to the item that the ball has collided with, but with no indication of what the object is, so the collide() function is called.
| Listing 4: Testing for Collisions |
|
01 double nx = x() + xVelocity();
02 double ny = y() + yVelocity();
03
04 vx = xVelocity();
05 vy = yVelocity();
06
07 if ((nx - (width() / 2)) < 0 || (nx + (width() / 2)) > canvas()->width())
08  vx = -vx;
09 if ((ny - (height() / 2)) < 0 || (ny + (height() / 2)) > canvas()->height())
10  vy = -vy;
11
12 // Check for collisions
13 QCanvasItemList colList = collisions(true);
14
15 for (QCanvasItemList::Iterator it = colList.begin(); it != colList.end(); ++it) {
16  QCanvasItem *check = *it;
17
18  if ((check->collidesWith (this))) {
19   collide(check);
20  }
21 }
22
23 updateVelocities();
|
Although we now have a ball, it's not much use having just a ball and nothing for it to collide with. So now it is time to declare a new class in brick.h inherited from QCanvasRectangle, which will be the bricks that the ball will collide with and "break" (see Listing 5).
Listing 5 declares a class of name Brick, which inherits QCanvasRectangle. The constructor has two extra integer values, as they define the x and y coordinates of placement. The constructor and functions should be in brick.cpp. This is a very simple class because all it will do is create a rectangle of fixed size (see Listing 6).
Each and every QCanvasItem has a unique identification number, called the rtti value. Classes that you have derived from any of the QCanvas objects should return their own unique rtti values through re-implementing the rtti() function. The rtti values for the standard QCanvas items are defined in the enumerated type QCanvasItem::RttiValues (see Box 2: RttiValues).
| Listing 5: Declaring Brick |
|
01 #include <qcanvas.h>
02
03 class Brick : public QCanvasRectangle
04 {
05  public:
06   Brick(int x, int y, QCanvas *canvas);
07   ~Brick();
08 };
|
| Listing 6: Brick Constructor |
|
01 #include "brick.h"
02
03 Brick::Brick(int x, int y, QCanvas *canvas)
04  : QCanvasRectangle (x, y, 30, 10, canvas)
05 {
06
07 }
08
09 Brick::~Brick()
10 {
11 }
|
In order to get the rtti value for an object, you need to call the object's rtti() function, which will return an integer of the rtti value. For this application, it is best to define the rtti value for the Ball object (and any other objects) in a separate header file, rtti.h. Putting the rtti values in a header file makes it easier to add custom objects, such as a paddle. You just need to include this header file in each file that uses the rtti value:
enum Rtti {
 Rtti_Ball = 1001,
 Rtti_Brick = 1002
};
This will allow the ball to return Rtti_Ball as its rtti value. We can declare the prototype for the rtti() function in the public part of ball.h:
virtual int rtti() const;
And then implement the function in the source file:
int Ball::rtti() const
{
 return Rtti_Ball;
}
| Box 2: Rtti Values |
|
01 QCanvasItem::Rtti_Item 02 QCanvasItem::Rtti_Ellipse 03 QCanvasItem::Rtti_Line 04 QCanvasItem::Rtti_Polygon 05 QCanvasItem::Rtti_PolygonalItem 06 QCanvasItem::Rtti_Rectangle 07 QCanvasItem::Rtti_Spline 08 QCanvasItem::Rtti_Sprite 09 QCanvasItem::Rtti_Text |
You must take the same approach with the Brick class, with the same prototype as for Ball in brick.h. In brick.cpp, things are slightly different:
int Brick::rtti() const
{
 return Rtti_Brick;
}
Before this can work, however, the rtti.h header file needs to be included in the brick.cpp and ball.cpp source files:
#include "rtti.h"
Identifying objects by their rtti numbers works very nicely with collision detection, so that we can perform different operations on the ball depending on what type of object the ball collides with. This is implemented in the collide() function:
void Ball::collideU
(QCanvasItem *item)
{
 if (item->rtti() == U
 Rtti_Brick) {
  moveBy(0, vy);
  vy = -yVelocity();
  updateVelocities();
  delete item;
 }
}
First, the function needs to check what type of object this is, so the if statement checks whether the value returned by the object's rtti() function matches the rtti value assigned with a brick and executes the following code conditionally. Because the collision detection will return a collision before the ball has actually collided (in fact, it will return a collision if the next movement, according to the current velocities, will cause a collision), it is necessary to first move the object so that it has actually collided and doesn't make the ball look as though it has bounced before actually colliding with the brick. Then the vertical velocity is reversed by assigning vy to be the negative of the current vertical velocity, and the velocities are updated using the updateVelocities() function. Finally, the brick is deleted so that it disappears, as it has been "broken" by the colliding ball.
However, no bricks have actually been created yet in the view class constructor, which means that nothing much is going to happen. We will need a dynamic array so that the program can create any number of bricks on the canvas. For this, the QValueVector class is used. First, it is necessary to include the header file for QValueVector, as well as for the Brick and Ball classes, in view.h:
#include <qvaluevector.h>
#include "ball.h"
#include "brick.h"
Then a few class-wide declarations in the private section are needed for the ball, the bricks, and the brick arrays:
typedef QValueVector<Brick*> U
BrickArray;
BrickArray *m_bricks;
Ball *m_ball;
This code defines an array of Brick objects called BrickArray and then creates a pointer of type BrickArray called m_bricks. A Ball pointer is created named m_ball, which is the bouncing ball in the program.
Another function called generateTable() is required for creating the bricks on the canvas. The generateTable() function will create a line of bricks at the top of the game window. This function should be defined in the public declaration section:
void generateTable();
Then the code to create the bricks can be placed in generateTable() (see Listing 7), which will be called from the class constructor.
The first line creates a new array of bricks, through which the bricks will be created. The two integers define where the bricks should start being created from, as the function will simply create an arbitrary number of bricks (specified by the variable numOfBricks) from left to right starting at the initial value of xPos. The loop creates all the bricks required, changing the horizontal position of the bricks so that they are created in a line instead of on top of each other. The push_back function adds the newly created Brick object to the end of the array, and the last line of the loop calls the show() function for the newly added brick so that it is visible on the canvas.
This function needs to be called from the class constructor, View(), and the ball needs to be created and have its velocities assigned so that it can move around:
generateTable();
m_ball = new Ball(m_canvas);
m_ball->move(250, 50);
m_ball->setXVelocity(1);
m_ball->setYVelocity(-2);
m_ball->show();
This generates the bricks and creates a Ball object at x position 250 and y position 50 on the canvas. It then sets the ball's horizontal velocity to 1 pixel per frame and its vertical velocity to -2 pixels per frame, and calls its show() function. In order to make the object move, though, QCanvas' setAdvancePeriod() function will have to be called to set how long a frame is. A sensible time for this is 20ms:
m_canvas->setAdvancePeriod(20);
The simplest way to compile the program is to use Trolltech's qmake utility, which will automatically generate the makefiles. Its file format is very simple and a qmake file is designated by the file extension .pro. Listing 8 shows a qmake file for this game.
| Listing 7: generateTable() |
|
01 void View::generateTable()
02 {
03  m_bricks = new BrickArray(1);
04  int xPos = 1, yPos = 1;
05  int numOfBricks = 10;
06  for (int i = 0; i < numOfBricks; ++i) {
07   xPos = (i * 30) + 1;
08   m_bricks->push_back(new Brick (xPos, yPos, m_canvas));
09   m_bricks->last()->show();
10  }
11 }
|
All the .cpp files in the program are listed in the SOURCES list, all the .h files in the HEADERS list and the CONFIG line is fixed as shown. Then all that remains is to run qmake in the directory containing all these files, and qmake will generate the Makefile:
$ qmake
The program can now be compiled using GNU make.
$ make
| Listing 8: bricks.pro |
|
01 SOURCES = main.cpp ball.cpp view.cpp brick.cpp 02 HEADERS = ball.h view.h brick.h rtti.h 03 CONFIG += qt warn_on release |
And executed via the executable name, bricks:
$ ./bricks
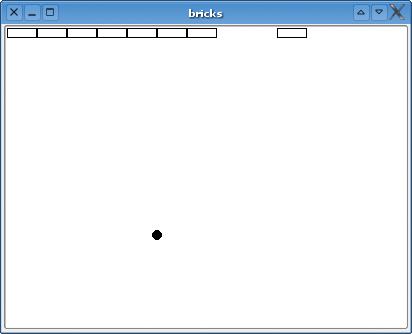
Hopefully, if everything has been done properly, you will see a small black ball bouncing around with 10 rectangles at the top of the window. When the ball collides with these rectangles, it should change direction and the rectangle will disappear. Figure 1 shows a screenshot of this scene.
A bouncing ball smashing bricks up isn't a particularly fun thing for a user to watch, so it is time to write another class to represent a paddle that the user can control to stop the ball from falling off the bottom of the screen. The following class declaration needs to be written in paddle.h:
#include <qcanvas.h>

class Paddle : public U
QCanvasRectangle
{
 public:
  Paddle(QCanvas *canvas);
  ~Paddle();
  virtual int rtti() const;
};
The class constructor for this is very simple. In keeping with the trend, this will be in paddle.cpp. All that is required is to set the brush that will paint the paddle so that it is a filled rectangle as opposed to simply an outline and to reimplement the rtti() function to return Rtti_Paddle (see Listing 9).
| Listing 8: bricks.pro |
|
01 SOURCES = main.cpp ball.cpp view.cpp brick.cpp 02 HEADERS = ball.h view.h brick.h rtti.h 03 CONFIG += qt warn_on release |
However, we need a new rtti value for the paddle, Rtti_Paddle, which is returned by the rtti() function:
int Paddle::rtti() const
{
 return Rtti_Paddle;
}
So, it is necessary to add this rtti to the enumerated type in rtti.h:
enum Rtti {
        Rtti_Ball = 1001,
        Rtti_Brick = 1002,
        Rtti_Paddle = 1003
};
As a new source and header file has been added to the project, these need to be added to the SOURCES and HEADERS lines in the qmake file so that the program will compile:
SOURCES = main.cpp ball.cpp U
view.cpp brick.cpp paddle.cpp
HEADERS = ball.h view.h U
brick.h rtti.h paddle.h
And qmake run again:
$ qmake
All that remains is to make the paddle respond to key presses and to add it to the collide() function to reverse the vertical velocity of the ball when a collision with the paddle takes place. To do so, we add the following to collide() after the closing brace on the first if statement:
else if (item->rtti() == U
Rtti_Paddle) {
  moveBy(0, vy);
  vy = -yVelocity();
  updateVelocities();
}
This simply sets the variable vy to the negative of the current y velocity, then calls updateVelocities() to set the velocity of the ball, hence reversing its direction in the vertical plane. For the paddle to exist, though, it needs to be created in the View class. So first we need to include paddle.h in view.h:
#include "paddle.h"
Then we need to declare the variable in the private section of the View class's declaration:
Paddle *m_paddle;
And we can then create the paddle in the View constructor, setting its position and calling its show() function:
m_paddle = new Paddle(m_canvas);
m_paddle->move(50, 250);
m_paddle->show();
In order to give the user keyboard control, Qt provides a function called keyPressEvent(), which is called automatically by Qt every time a key is pressed when the widget has focus. A QKeyEvent is passed to the function that represents the key that the user has pressed. Therefore, in order to perform an action, such as to move the paddle left when the left key is pressed, all that is needed is to reimplement the keyPressEvent() function and perform the necessary actions. First, the prototype for the function needs to be declared in the public section of the class declaration of the View class:
void keyPressEventU
(QKeyEvent *keyEvent);
| Listing 10: Keyboard Control |
|
01 void View::keyPressEvent(QKeyEvent *keyEvent)
02 {
03  switch (keyEvent->key()) {
04   case Key_Left:
05    m_paddle->moveBy(-5, 0);
06    break;
07   case Key_Right:
08    m_paddle->moveBy(5, 0);
09    break;
10   default:
11    break;
12  }
13 }
|
And we can use a switch statement inside the function to execute the necessary code, depending on which key the player has pressed (see Listing 10).
In this case, the switch statement checks whether the key pressed by the user is either the left key or the right key of the four directional keys. If the left key has been pressed, it will move the paddle 5 pixels to the left. If the right key has been pressed, it will move it 5 pixels to the right.
So that's the end of the Brick game. Figure 2 shows a screenshot of the completed game. Hopefully, this tutorial demonstrates how flexible and simple QCanvas is for 2D graphics. You don't have to be an expert to build your own game in QCanvas.
| INFO |
|
[1] Trolltech: http://www.trolltech.com [2] QCanvas API Documentation: http://doc.trolltech.com/3.3/canvas.html [3] The complete source code to bricks: http://www.gwright.org.uk/files/LinuxMag/bricks.tar.bz2 |