Managing databases on KDENicely SortedMarcel Hilzinger |
Last month you learned how to formulate queries for multiple tables in Knoda. This month, you’ll discover how to create tables, forms, and reports.
The workshop assumes you will be working with the Sqlite2 driver, although you should be able to follow the examples with any other database. For example, Box 1 shows you how to configure Knoda to interface with MySQL. Users with Suse Linux 9.1 may need to do some repair work. If you updated KDE to 3.3.2, YaST may have installed some older Knoda packages. In this case, you will need to reinstall Knoda.
Launch Knoda and select the Sqlite2 driver in the driver selection dialog. Now select File | New | Database and enter a name for the database. The database entry should now appear in Current database. If this is not the case, you need to select the new database in the pull-down first. To create a table in the new database, right click Tables and select New. If you prefer, you can use the File | New | Table menu item instead.
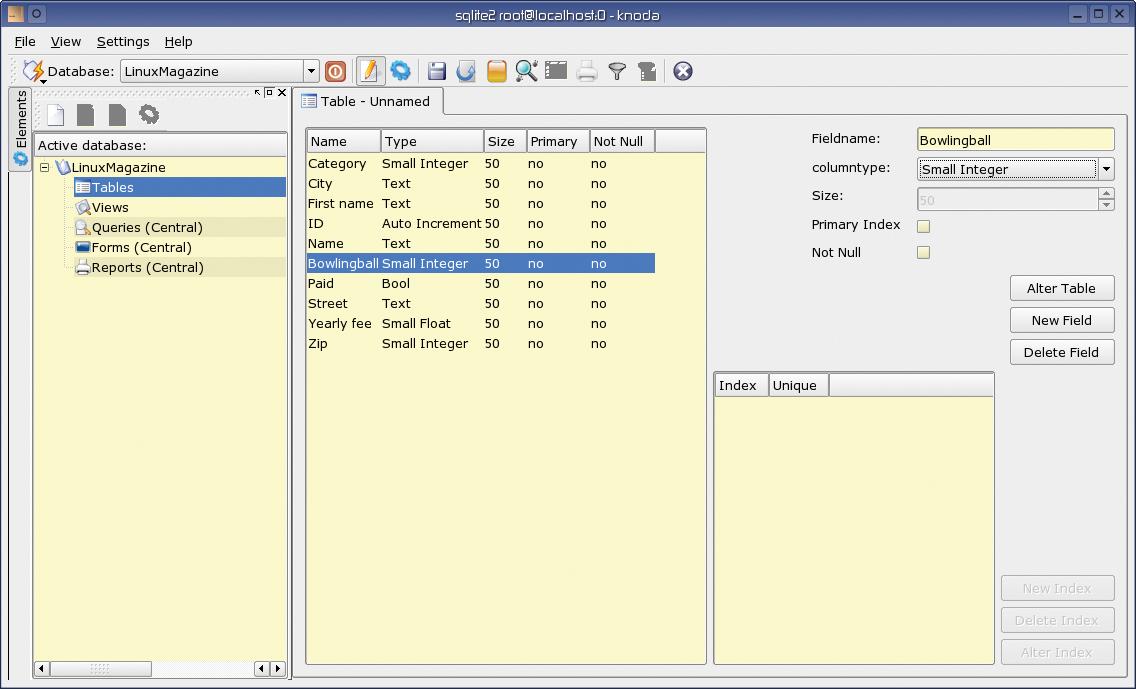
In the Table – Unamed tab (Figure 1), click on New Field to add the columns (fields) to the table. Describing the full range of field types in detail is beyond the scope of this workshop. Suffice to say, text, integer, and floating point will take you a long way. The bool field type is for yes/no or TRUE/FALSE type entries. MySQL and Postgres support three states for this field (for example, yes, no, don’t know).
In this workshop, we will be creating a database to manage membership in a local bowling club. To do so, add the fields listed in Table 1 to the first table starting with ID. As the field has an automatic counter, it cannot be zero. This will also be our primary index. After adding the fields, select Other Table, and save the table as Bowlers. Note that Sqlite does not support changes to the table structure at a later stage, so check carefully to ensure that the fields are to your liking.
Now add the categories (such as Juniors, Adults, Seniors, etc.) to a second table called Categories), and in a third, add the different kinds of bowling balls (LaneMasters, Roto-Grip, Ebonite, etc). Store this table as Bowlingballs. These two tables have two columns each: one for the ID and another for the Category/Bowlingball.
| Table 1: Sample Table Bowling Club | |
| Field name | Field type |
| ID | Auto Increment |
| Name | Text |
| First name | Text |
| Street | Text |
| Zip | Small Integer |
| City | Text |
| Category | Small Integer |
| Yearly fee | Small Float |
| Paid | Bool |
| Bowlingball | Small Integer |
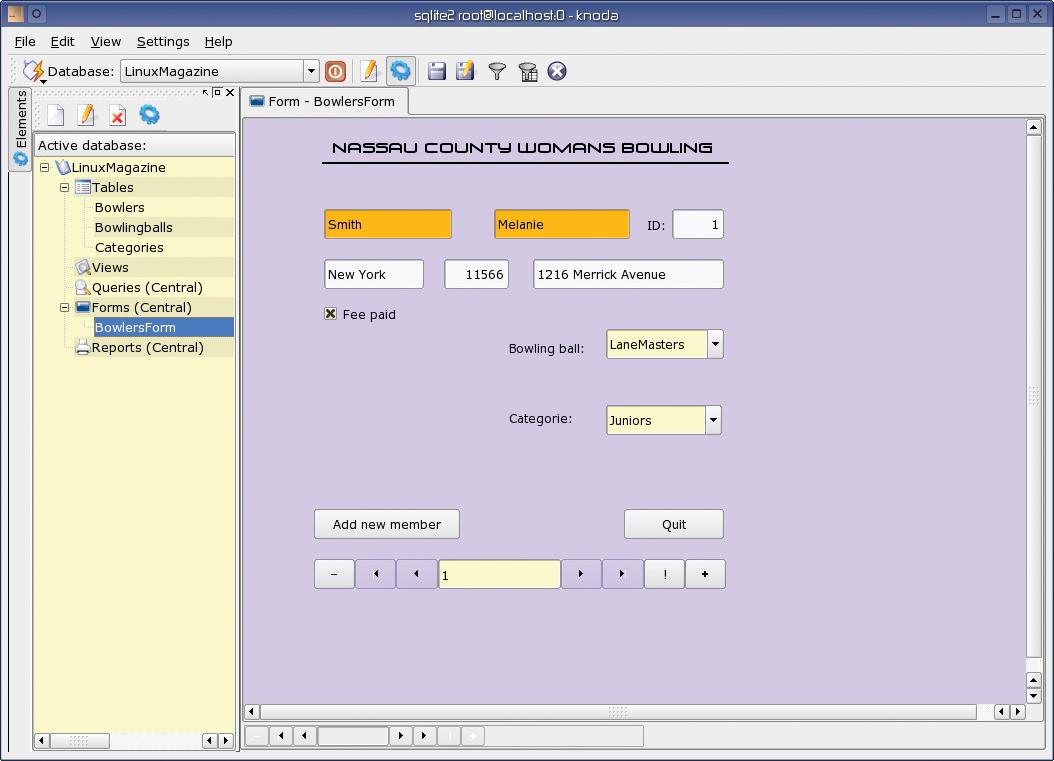
If you read Part 1 of our workshop, you will remember that Knoda supports two modes for each element. To populate the new table with data, simply change to view mode and enter the data as in a normal spreadsheet. Of course, if you are adding data to the main table, it is a lot more convenient to create a data entry form. The form will also allow you to link the three tables. That is, you do not need to know which ID stands for which category if you are adding entries for Category; instead you just select an entry from the pull-down menu.
To create a new form, right click on Forms or select File | New | Form in the main menu. After launching the form designer (Figure 2), you first need to select a data source. To do so, click on the icon with the three dots to the right of the Datasource drop-down. Select the three tables you created previously and add them as data sources. Then select the Bowlers table in the drop-down.
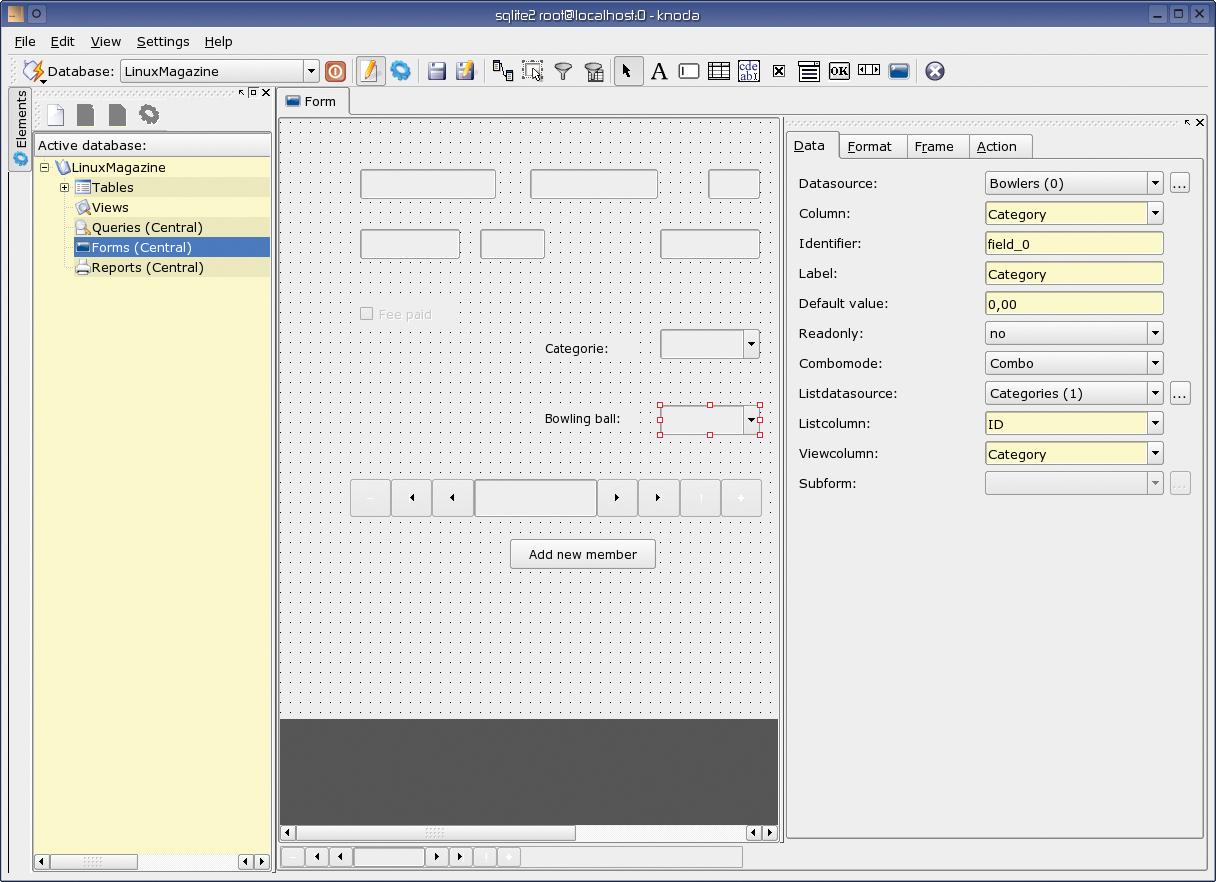
When you launch the form designer, Knoda automatically adds the elements required to create forms. If you are unsure as to what the icons do, simply hover with the mouse over an icon, and Knoda will display a useful tooltip. Now click on the icon for a Lineeditfield and then on the (empty) form. This tells Knoda to add a field to the form. You will need to tell Knoda what kind of data to expect in this field and how you would like to format the data. To do so, click on the Data, Format, Frame, and Actions tabs. Select the Bowlers table as the data source for the first field, and assign the Name field. Use the same steps to add the other fields, except for Category, Bowlingball, and Paid. Now switch to display mode to test your form.
| Box 1: Knoda and MySQL |
|
Knoda supports the MySQL and Postgresql databases in addition to Sqlite. Also, a generic ODBC interface supports access to any SQL-compatible database. To allow Knoda to recognize these databases, you need to install the developer packages for the databases you will be accessing before compiling hk_classes. This allows hk_classes to compile the required database drivers. Mysql needs the mysql-devel package, and Postgres requires postgres-devel, etc. After completing the hk_classes and Knoda build, the driver selection shows you for which databases hk_classes was able to locate developer packages. There should be an entry for MySQL. Working as root, type the following command to launch the MySQL database:
/etc/init.d/mysql start You should see at least one line with Done or OK when the database loads. Suse Linux additionally tells you to set the password for the MySQL root user. To do so, type mysqladmin -u root password new_password. If you do not set a password, you can log in to the MySQL server without having your credentials checked. To log in, select the MySQL entry in the Knoda driver selection dialog. Then in the next window enter root as the User and click OK. To access a remote MySQL server via Knoda, you also need to specify the IP address or hostname of the mysql server as the Host. You will normally need to supply a user name and password in this case. |
The Paid field is a Boolean field. Either the member has paid his or her yearly membership fee or not. Click on the icon for Booleanfield in the toolbox for this field, and link the field to the Paid field in the Bowlers table. Just to make sure you know what the check box does, enter Membership fee paid as the Label.
Select Combobox for Category and Bowlingball. You need to specify two data sources here. First, select the Category field, with Bowlers as the data source. Then select the Category table as the Listdatasource; select the ID as the Listcolumn and the Category as the display column. Repeat these steps to create a pull-down menu for the various types of bowling balls.
Finally, add a navigation bar to the form. The navigation bar makes it easier for users to move to the next record or to add new records (Figure 3). Although Knoda has a navigation bar for each form, there is no way of changing the default appearance.
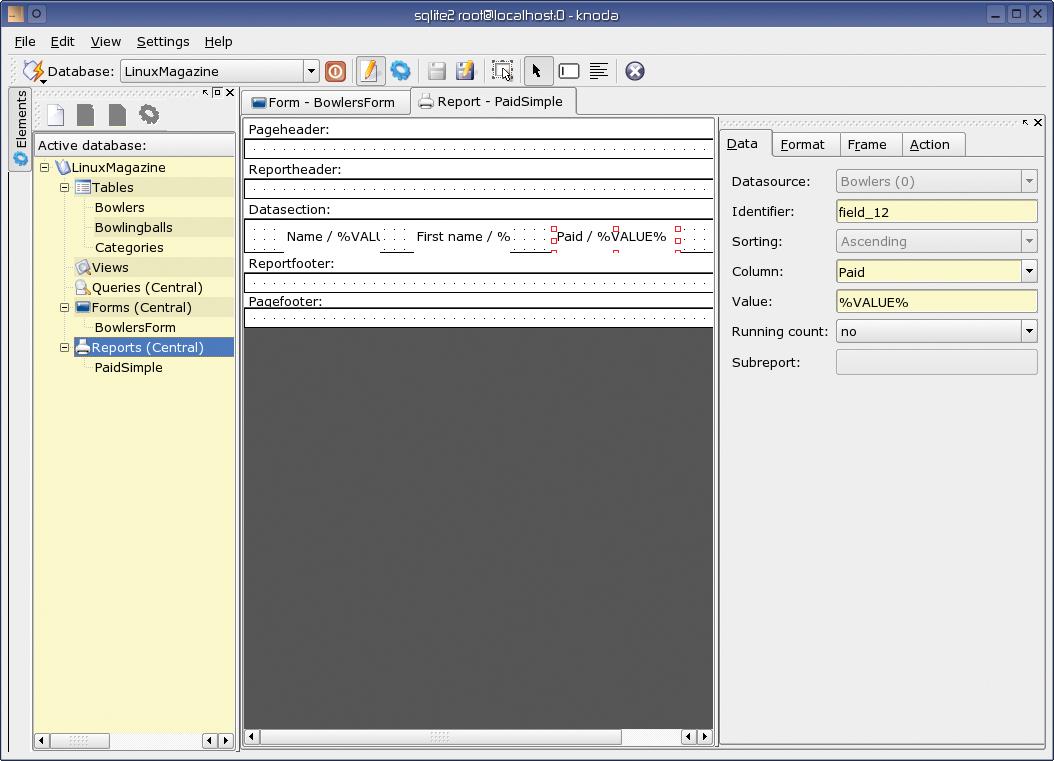
Understandably, the chairperson of the bowling club would like to know if everyone has paid their annual membership fee. You can use Knoda to generate a report that gives the chairperson this valuable information. To do so, select File | New | Report in the main menu or open a new report via the drop-down menu for the Report entry. For our first report we need to select the Bowlers table in the data source dialog.
Now, click on the New Field icon in the toolbox, and then on Datasection to add the field. Just like in the form designer, you can use the tabs in the right-hand panel of this window to define the report properties. As the first element, select the Name field. Repeat this step for the First name and Paid fields. Now change to view mode to view the rudimentary report, which simply gives you the family and first names of each member and displays the word TRUE if the member has paid his or her fee. FALSE tells you that the member has not paid up.
Of course, a longer list would look cluttered if you kept this simple format; so it makes sense to add a section for the Paid option. Knoda will display all the members who have not paid first, followed by the ones who have paid. To do this, click on the Sections icon in the toolbox. In the dialog that appears, add a new Paid section to the existing sections and click on Exit.
The report editor now has two new entries: Sectionheader:paid and Sectionfooter:paid. Add the Paid field to the section header, Name and First name can stay in the detail section – done!
But again, this list is not really suitable for the chairperson. To give the chairperson a report that only details the names of the people who have not paid up, you first need to create a query. You can then use the results of the query as a data source for the report. There is another advantage to this approach: you can sort the resulting list alphabetically.
To create the query, select File | New | Query, right click the empty data source field, and select Add datasource. In the dialog that follows, add the Bowlers table via the pull-down menu. Then drag and drop the following fields to the query matrix:
Add =0 as the criterion for the Paid column, and set the Display option to No. Then change to display mode to launch the query. If everything works as planned, Knoda displays a list with the family and first names of the members who have not paid their membership fee. To sort the entries alphabetically by Name, set the Sorting option to Ascending or Descending.
Now save the query and create a new report. In the data source dialog, select the query you just saved for Based on. You can then simply add the Name and First name fields to the data section, and you have a finished report for the chairperson.
If this workshop has whetted your appetite, check out the project homepage at [1], where the author runs a Wiki. The Knoda mailing list at [2] has useful tips if you run into problems. And the tutorials at [3]are useful for more in-depth information on Knoda.
| INFO |
|
[1] Knoda homepage: http://www.knoda.org [2] hk_classes and Knoda Mailing list: https://lists.sourceforge.net/lists/listinfo/hk-classes-discuss [3] Tutorial: http://hk-classes.sourceforge.net/tutorials/ |