Running Mac OS X under Linux
An Apple a Day...
By Oliver Frommel
Running Mac OS X under LinuxAn Apple a Day...By Oliver Frommel |
|
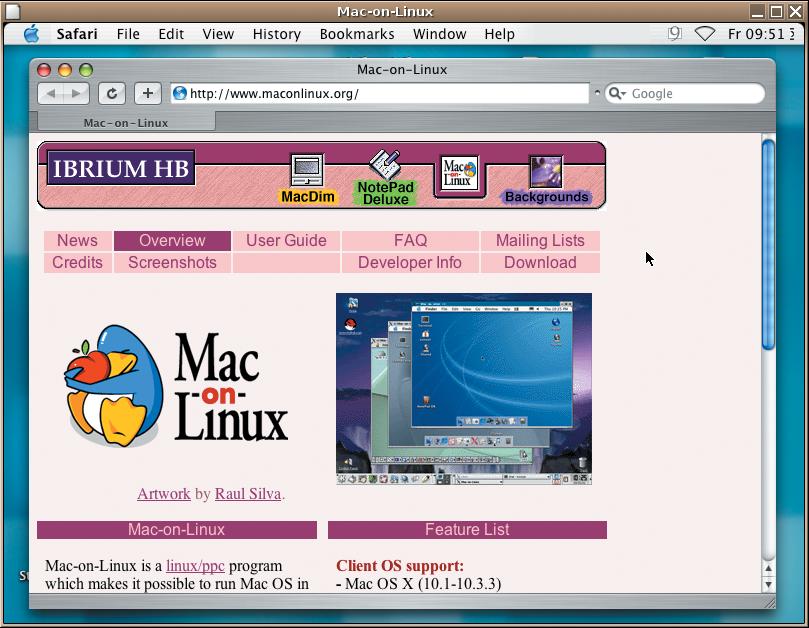
The easiest way to run Mac programs on Linux is the free Mac-on-Linux [1] software. Mac-on-Linux does not give you a hardware emulation and thus requires an Apple computer. The Mac-on-Linux package theoretically supports other PowerPC architectures [2], such as the Pegasos [3], but installing the Apple operating system, MacOS, on these architectures would contravene the license agreement.
You can use Mac-on-Linux with any Apple computer. Of course your Linux distribution needs to support the PowerPC processor [4]. The following distributions have this ability: Fedora Core 3 [5], Gentoo [6], Debian [7], Ubuntu [8], and Yellow Dog [9].
Mac-on-Linux does not emulate hardware; it passes commands to the CPU. It also gives you Linux device drivers that have been optimized for this application in an approach similar to Vmware's, which explains why Mac-on-Linux is quicker than an emulator.
Mac-on-Linux boots a standard Apple operating system as a Linux program. In our example, we'll use Mac OS X, but Mac-on-Linux also supports older variants, such as System 9, which is still fairly common.
Gentoo users can download and compile Mac-on-Linux in the typical Gentoo way using emerge mol. Yellow Dog actually includes the program by default.
| Box 1: Additions to /etc/apt/sources.list |
|
01 deb http://archive.ubuntu.com/ubuntu warty multiverse 02 deb-src http://archive.ubuntu.com/ubuntu warty multiverse |
We used the Ubuntu distribution for the PowerPC processor, as it proved impossible to get either Gentoo or the commercial Yellow Dog distribution to display a GUI on our iBook G4/800 with a Radeon Mobility 9200 graphics chip.
The Ubuntu installer works with the Debian apt-get package manager, which downloads files off the Internet. Mac-on-Linux needs a few kernel modules for PPC Linux, and you will need to compile these modules yourself. Compiling these modules means installing a few tools, if they are not already installed. The following command downloads the packages and installs them:
sudo apt-get install build-U
essential linux-headers-2.6-U
powerpc
If you are prompted for a password, type your normal user account password, as Ubuntu does not typically have an administrative (root) account (see [8]). Instead, users can run commands that typically need root privileges using sudo.
Unfortunately, the standard Ubuntu repository does not include the files, so you will first need to add the Multiverse repository, which includes packages that are not part of the standard Ubuntu distribution. To do so, add the lines in Box 1 to your /etc/apt/sources.list.
Now update the local cache with the new repository by typing sudo apt-get update. Then install the source code for the Mac-on-Linux kernel modules:
sudo apt-get install mol-
modules-source
Launch an editor to open a C header file of this package and remove an error that will otherwise prevent you from building the modules. If you prefer to use another editor rather than vi, replace vi with the name of your preferred editor.
sudo vi /usr/src/linux-U
headers-2.6.8.1-4-powerpc/U
include/asm/setup.h
Delete the line containing #include <asm-m68k/setup.h> and save the file again. Then change to the directory with the Linux source code and unpack the archive that apt-get has stored there.
cd /usr/src
sudo tar xzvf mol-modules.tar.gz
You need to set a few environmental variables to make sure the modules match your current kernel version:
export KVERS="$(uname -r)"
export KSRC="/usr/src/linux-
headers-$(uname -r)"
export KDREV="ubuntu0"
Now change to the Mac-on-Linux subdirectory and call the build script when you get there:
cd modules/mol
sudo debian/rules build
After a short delay, the build should complete; you can now create a Debian package with the files this step gave you:
sudo debian/rules binary-U
mol-modules
The final product should now be in /usr/src. Change to this directory and install it on your Ubuntu system:
sudo dpkg -i mol-modules-U
2.6.8.1-3-powerpc_0.9.70+U
ubuntu0_powerpc.deb
This finally completes the preparation work, and you can go on to install the remaining packages for Mac-on-Linux:
sudo apt-get install mol mol-U
drivers-macosx
| Box 2: /etc/mol/tunconfig |
|
01 #!/bin/bash 02 /sbin/ifconfig tun0 192.168.40.1 03 /sbin/iptables -D POSTROUTING -t nat -s 192.168.40.0/24 -d ! 192.168.40.0/24 -j MASQUERADE 04 /sbin/iptables -t nat -s 192.168.40.0/24 -d ! 192.168.40.0/24 -A POSTROUTING -j MASQUERADE 05 /sbin/iptables -t filter -P FORWARD ACCEPT 06 echo 1 > /proc/sys/net/ipv4/ip_forward |
The package manager resolves dependencies itself and additionally installs the mol and mol-drivers-macosx, and mol-drivers-linux, which you will only need if you want to run a PPC Linux version with Mac-On-Linux.
If you specify --loadonly<$> when launching the program, it tells you if the kernel module is loaded (Figure 1). The most common mistake is to have kernel and module versions that do not match. Although the parameter -a<$> allows different version numbers, you should not expect a configuration without matching numbers to work.
After loading the module, you can now turn to the video configuration. The sudo molvconfig command launches the required program, which either tries out the operating modes itself or allows you to set a mode manually. In our lab, both approaches worked out fine with the defaults.
startmol helps you organize the keyboard assignments. The --keyconfig<$> parameter launches an interactive program, which displays the name of the key (for example Return or Apple-Key) and prompts you to press that key.
After completing the configuration, you can launch Mac OS X in a window by typing sudo startmol -X. It automatically locates the installation on your hard disk and "boots" the system. Mac-on-Linux uses a terminal window to display messages that occur at boot time. These messages are stored permanently in a file below /var/log. This is where you should look if something goes wrong.

Setting up the network is a more diffi- cult proposal, and unfortunately, there is no smart helper to point us in the right direction. Start by enabling the tunnel interface in /etc/mol/molrc.net; this interface automatically loads the right kernel module and assigns an IP address. To enable the tunnel interface, remove the # in the line with netdev: tun0 -tun. Your boot messages should now include a line such as Ethernet Interface 'tun-<tun0>' @ 00:00:0D:EA:DB:EE.
A new disk appears in Mac OS X; you can open the disk by double clicking. It contains special drivers Mac OS X needs to access the network in emulation mode. To install the drivers, click on the Pkg package and follow the instructions.
You will probably want to use Mac-on-Linux to access both your local network and the Internet. To pass traffic to Mac-on-Linux, you need to edit the /etc/mol/tunconfig script, which is launched by startmol. The default version of tunconfig launches a DHCP server and uses the iptables command to map IP addresses.
In our lab we used an alternative tunconfig with a static IP address assignment (see Box 2). In Mac OS X, assign the IP address 192.168.40.2 to the network interface en3 and assign 192.168.40.1 as the router.
After you complete this complex configuration, Mac-on-Linux now has Internet access.
To launch Mac-on-Linux in full screen mode in X, you need to modify a file called /etc/mol/molrc.video. In the enable_xvideo: ... line, change the value from yes to no. This value makes Mac OS X run a lot more quickly, as it removes the need for a whole bunch of time-consuming graphics operations. You can achieve the same effect by launching Mac-on-Linux directly in a text console. For more details check out [10].
To enable changing CD ROMs you need to add a line similar to the following to the molrc.osx file:
blkdev: /dev/sg0 -cd
This assumes you are using the IDE-SCSI module to enable SCSI emulation for your IDE CD ROM.
If you do not have an Apple computer, but you would still like to take a look at this colorful operating system, you need to look around for an alternative approach. That is, you need a genuine emulator that fools Mac OS X into believing it is running on an Apple platform. It also helps if you enjoy experimenting, and of course you need a set of Mac OS X installation CDs.
PearPC [11] implements a PowerPC CPU and a set of peripherals. The installation is as easy as pie:
tar xfj pearpc-0.3.1.tar.bz2
cd pearpc-0.3.1
./configure --enable-ui=sdl U
--enable-cpu=jitc_x86
make
su -c 'make install'
In this example, PearPC is using the SDL library to draw a GUI desktop, although you can use --enable-ui=x11<$> as an alternative.
After completing the build, first create an empty file, which PearPC will use as a virtual disk. The following command creates a 3Gbyte file called macosx.img:
dd if=/dev/zero of=macosx.U
img bs=516096 seek=6241 count=0
Contrary to what the instructions in the PearPC documentation tell you, you can partition the virtual hard disk without Darwin OS. As a side note Darwin OS is is the free version of Mac OS X. However, it only includes the text-based components. The GUI desktop and other core components are missing.
To keep track of the files the PearPC emulator requires, you might like to create a new directory for the emulator, and call it ppc for example.
Then copy the sample configuration files to that directory:
cp pearpc-0.3.1/ppccfg.example U
ppc/ppccfg
To imitate the graphics adapter, PearPC also needs a video.x file, which you again need to copy to your working directory. Also, move the hard disk image, macosx.img, to the same directory to have all the files you need in the right place.
You can edit the ppccfg configuration file with a text editor. For the time being, the existing entries will be fine, but you need to modify the name of your hard disk image. To do so, change the line in the file as follows:
pci_ide0_master_image = U
"macosx.img"
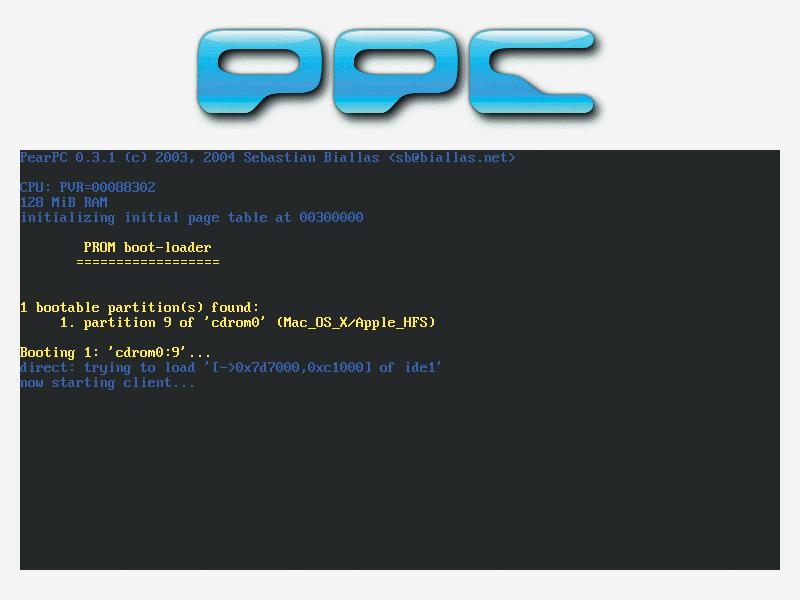
The prom_bootmethod entry specifies how PearPC boots. The preset value, auto, uses the first bootable partition. If you change this to select, the emulator will prompt you to select a partition (Figure 2).
Insert the first Mac OS X installation CD to launch into the install. If you are not already in the ppc directory, change to that directory and launch the emulator, specifying your configuration file as a parameter:
ppc ppccfg
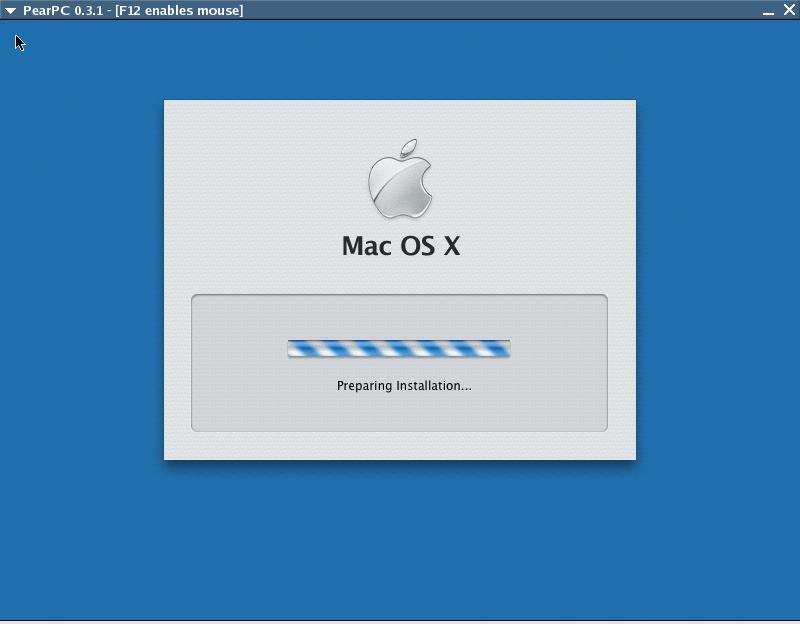
If you then select to boot from the CD, the Mac OS X start screen should appear, as shown in Figure 3. You can press [Alt-Enter] to toggle between full-screen and window display mode.
After a short while, the installation program appears. If you go through the required steps, you are prompted for a "target volume" at some point, but unfortunately, you do not have one at present. You first have to partition the virtual hard disk. Launch the partitioning tool with Installer | Hard disk tool.
In the hard disk tool click on the Partitioning tab and then select the 1 Partition option for Volume Schema. Click on Partition and confirm the dialog that then follows. The program partitions the virtual disk and formats the new partition. After quitting the tool, the partition should be visible in the Installer.
If the Installer complains about being low on disk space, you can de-select a few packages such as the Language packages and Additional voices. After completing the package selection, the Installer will then copy your packages to the virtual disk.
After completing this step, quit PearPC and insert the second installation CD. When you reboot, select the partition created earlier as your boot partition. The Installer will copy a few more files and complete the install. You can skip the questions about registering your user account.
To allow Mac OS X to use the network in a PearPC environment, you need to modify the entry for the network card in the configuration file:
pci_rtl8139_installed = 1
When you reboot, the emulator might complain about a missing network tunnel interface /dev/net/tun. If so, run modprobe tun as root to load the kernel module.
The virtual Ethernet card is automatically detected by Mac OS X; to locate the card, check the network configuration in your system settings. Assign the static IP address of 192.168.1.1, which PearPC configured in scripts/ifppc_up. The router address is 192.168.1.80. /etc/resolv.conf on the Linux system gives you a working nameserver.
Just like Mac-on-Linux, PearPC will configure the virtual network fairly autonomously in the background and even set up Network Address Translation. To do so, it needs a few files from the software directory. Simple copy the whole of the scripts subdirectory to the right place:
cp -R pearpc-0.3.1/scripts ppc
As the programs change the Linux network settings, you need root privileges for this step. In other words, you need to launch PearPC as the administrator or assign SUID root privileges to the ifppc_up.setuid and ifppc_down.setuid programs (chmod +s).
By default, PearPC creates a network interface called ppc and an address of 192.168.1.80 on the Linux system; you can call /sbin/ifconfig ppc to verify this.
Mac-on-Linux and PearPC impress by virtue of their feature richness, ease of use, and speed. The fact that Mac-on-Linux outpaces its competitor should be no surprise. After all, strictly speaking, Mac-on-Linux isn't an emulator but a program that runs Mac OS X (and other programs) on Linux. In fact, it is quick enough for you get down to some serious work on a modern computer.
Both programs have a fairly complicated network configuration, but this has more to do with the complexity of the functions that Linux needs to support the virtual network connection.
The QEMU package, which is comparable to the two, shows that emulated networking is possible without Network Address Translation. Both projects could benefit from the concepts the QEMU project puts to work.
| INFO |
|
[1] Mac-on-Linux: http://www.maconlinux.org [2] PowerPC processor: http://www.ibm.com/chips/products/powerpc [3] Pegasos Computer: http://www.pegasosppc.com [4] Linux-PPC homepage: http://www.penguinppc.org [5] Fedora Core 3 PPC: http://fedoraproject.org/fedorappc/FC-3 [6] Gentoo PPC: http://www.gentoo.org/doc/en/handbook/handbook-ppc.xml [7] Debian PPC: http://www.debian.org/ports/powerpc [8] Ubuntu: http://www.ubuntulinux.org [9] Yellow Dog: http://www.yellowdoglinux.com/ [10] Full-screen mode in Mac-on-Linux: http://www.maconlinux.org/userguide/cvideo.html [11] PearPC: http://pearpc.sourceforge.net |