
By Tim Schürmann
Search engines continuously crawl the Internet to find and catalog documents. When a user enters a search key, the search engine checks its index and displays a list of results. Much progress has been made in mapping the murky depths of the Internet, but search utilities for desktop computers are still primitive in comparison.
Today's hard disks are filled with miscellaneous information in the form of letters, messages, music, and photo collections, often stored in confusing and unintuitive directory structures. Anyone who has had to search this jungle for a long-lost document would be glad for a desktop search engine that is not limited to simply finding file by name or date.
The Beagle [1] developers decided to fill this search gap using Apple's MacOS X search function as basic material. What the Beagle developers are aiming for is quick and simple access to any kind of information. Development has just gotten underway, however, and the current version is still experimental. This said, we found it quite stable and were amazed by the results. In fact, the only thing that might prevent you from installing Beagle is an unsupported filesystem. Beagle does not support hard disks with Reiser4 at this time of writing.
| Formats |
|
At this time of writing, Beagle recognizes the following formats:
|
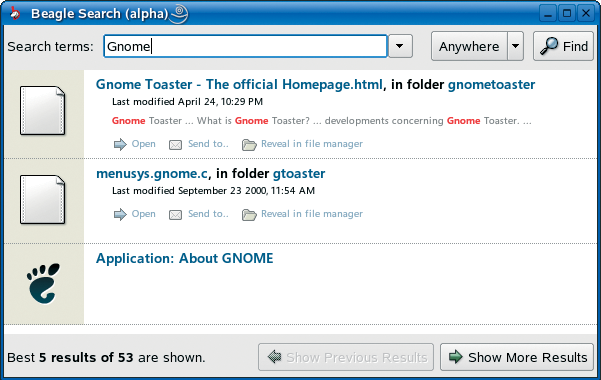
Beagle itself comprises three components. The Beagle daemon provides the search machine functionality. The daemon scours your hard disk in the background, looking for known document types. Under the hood, the daemon uses the tried and trusted Lucene search engine by the Apache project [2]. The daemon analyzes stored data and records its findings in its own database, the so-called index, for fast retrieval. After creating the index, the daemon sits back and waits for search requests. Requests come from the second application component, which gives the users a convenient search query mask and a neat display of the results. This application is known as the Beagle client. The developers deliberately chose this two-part design, which allows other applications to leverage the Beagle search service. For example, besides the simple Best search program (Figure 1), there is also an extension for the popular Firefox browser.
To allow a Beagle client application to pass a query to the Beagle daemon, older Beagle versions (such as the version that accompanies Suse 9.3) need another program. The so-called D-Bus provides an infrastructure for global communication between the various components on a Linux system [3]. So there are actually three steps to setting up and running Beagle:
Version 0.0.10 or later only specifies D-Bus as an optional extra, as the server and client use a different communication approach.
If you have a recent distribution (such as Fedora Core 3, Ubuntu, or Suse 9.3), D-Bus should already be running on your system. Suse Linux 9.3 includes the complete Beagle version 0.0.8 package and launches D-Bus automatically if you use Yast for the install.
The programmers have chosen C# as their preferred programming language (joining suit with Microsoft), and they use the Mono environment. Programs developed with these tools are run by an interpreter that is part of the Mono package. Users of Suse Linux 9.3 will need to select the mono-data package. In our lab, Yast forgot to install this critical component.
To check if D-Bus is already running on your system, enter the following in a terminal window:
ps x | grep dbus
The output should include a line with the dbus-daemon-1 string. If you need to launch D-Bus manually, type the following to do so:
eval `dbus-launch`
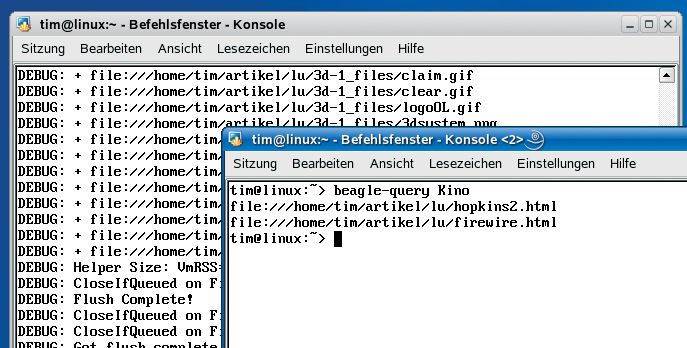
The next thing to do is to launch the Beagle daemon. To launch Beagle, pop up a terminal window and type
beagled --fg --debug
The --fg parameter tells beagled to run in the foreground, and --debug enables logging. If you prefer to have a less talkative daemon running in the background, just type beagled instead.
The output that follows allows you to monitor your tracker dog's progress. Beagle will sniff through the paths in your home directory, ignoring symbolic links. At present, you need to modify the source code to add more paths.
As a rule, Beagle adds any existing data to the index. To prevent this, you can place a .noindex text file to exclude a directory and any subdirectories below it from the Beagle search. For a more granular approach, add the files you want to exclude to the .noindex file. Beagle supports wildcards such as ? or *. .neverindex includes a list of files that Beagle will always ignore.
Depending on the number of files in your home directory, the search may take a while. If you enter a query while Beagle is indexing, you will get a response, but note that the results will only return those files that Beagle has already added to the index.
You need a Beagle client to pass a query to Beagle. The Beagle package includes the Best client, which Suse 9.3 users will find conveniently located in the Start menu. As an alternative, you can also run the best command line tool.
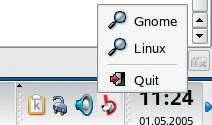
Right click the Best icon for a list of previous queries. Clicking on one of the entries opens the matching results window. You can left click to open a window like the one shown in Figure 1. The query mask uses a simple approach that is similar to Google: just enter a search key, select a document category on the right side of the window, and select Search. Best passes your query to the Beagle daemon, which then searches the index for matching documents and returns the results to Best. Clicking on one of the documents in the results list launches a program to read the document.
If you need to keep track of your documents, or if you continuously find yourself juggling files, it could be worth your while to take a look at Beagle. After you get used to the search function, you will not want to do without it.
| Building Beagle |
|
If your distribution does not include a Beagle package, you will need to build Beagle from the source code and install the application manually. This is not a trivial chore, as there are lots of dependencies, but the following overview should help you take the hurdles in stride. Beagle requires a number of packages: the Mono environment, gtk-sharp, gecko-sharp, gmime, the SQLite database, and libexif. Additionally, you need specific versions of these packages depending on your Beagle version. You need to build the components in the same order as you would launch the applications: first the D-Bus package (for Beagle versions prior to 0.0.10), then the Beagle deamon, and finally a Beagle client. All three are built and installed with the usual three commands; the Best and beagle-query clients are byproducts of the beagle daemon: ./configure make su -c "make install" When you configure the D-Bus package, you need to specifiy the --enable-mono parameter. After installing D-Bus, ensure that your kernel has the inotify function enabled. Note that this feature is not available for some filesystems. |
| INFO |
|
[1] Beagle homepage: http://www.gnome.org/projects/beagle/
[2] Apache Lucene search engine: http://lucene.apache.org/java/docs/index.html [3] "Hot Wired," an article on Linux hotplugging: Linux Magazine #53, April, 2005, pg. 91 [4] Gnome Dashboard: http://www.nat.org/dashboard |