
By Klaus Knopper
Knoppix is a full Linux system on a removable disk. You can plug your Knoppix disk into almost any Intel-compatible computer and boot Knoppix - regardless of what system is on the hard drive. But unlike many bootable Linux distros, Knoppix is not intended simply as a demo system or recovery disk. Knoppix is a real Linux distribution capable of many of the everyday chores you would commonly expect of a hard-disk Linux.
Of course, most people think of a live distro as a tool for troubleshooting and data recovery, and Knoppix is certainly used for these tasks, but Knoppix is also capable of some equally essential but less exotic assignments.
Slip your Knoppix disk into the CD or DVD drive, and start your computer. The system boots much the same as any other Linux system. (See the box titled "Booting Knoppix.") Once you have started the system, Knoppix looks pretty much like a "normal" and preconfigured Debian installation, apart from some automatic scripts that create Desktop icons for newly plugged-in USB devices and the automounter taking care of CD-ROMs. But is it the same?
The fact that the operating system is running from a read-only medium makes some tasks more difficult - but not as difficult as you might think. In this article, I'll describe how to use Knoppix for practical tasks such as:
These techniques give Knoppix a power and versatility you may not expect from a live distro, and once you master some of these tasks, you may find yourself discovering new ways to make Knoppix part of your everyday life with Linux.
| Booting Knoppix |
|
When you boot Knoppix, the following events take place:
|
With Knoppix 3.8, a new feature was introduced that made remastering Knoppix easier and added capabilities you would probably not expect in a system designed to run from a read-only medium: unionfs.
Basically, what unionfs does is to "simply" merge directories. Example: You can merge a read-only directory (like a mounted CD-ROM) at /KNOPPIX and a read-write but empty, writable ramdisk directory at /ramdisk, to create a read-write and pre-populated /UNIONFS directory that's fully writable.
In previous versions of Knoppix, there was a strict separation between read-only data and writable data, and symlinks were used to put files where they were expected in the individual directories. This system worked well, though it was complicated to maintain since, for every program added to Knoppix, you had to figure out which files were supposed to be written to and copy them to the ramdisk with a symlink on the read-only area.
Since unionfs now takes care of copying changed data to the ramdisk directory and also (seemingly) allow you to delete files on a read-only CD or DVD, you can just add your own stuff to the live system as if it were installed on a regular hard disk.
So, in theory, to install a new Debian package from the Debian mirrors listed in /etc/apt/sources.list, we would only need to run (as root)
apt-get update
apt-get install pingus
In fact, this should work on many Knoppix versions without major problems. However, unionfs is at an early stage of development, and while the basic file operations like create, copy, rename, delete on a joined file system work fine, there are some known bugs and issues when overwriting or locking files, which is unfortunately done A LOT by programs like update-menus that run automatically after a program is installed. So, should you see a unionfs-related Kernel "Oops" in the output of the dmesg command after installing new software or updating configuration files, this is probably caused by a bug in unionfs.
A workaround for the update-menus case could be just removing that command using the unionfs "delete a file from an originally read-only CD" feature by just doing a
sudo rm -f /usr/bin/update-menus
which will have the (in this case desirable) side effect of no longer automatically updating the KDE menus.
Also, minor bugs (like missing execute permissions for cdrecord in Knoppix 4.0.1) can be fixed on-the-fly without burning a new DVD by just modifying the unified live system with
sudo chmod 755 /usr/bin/cdrecord*
It almost makes you forget that you are working without a writable harddisk when running from a CD.
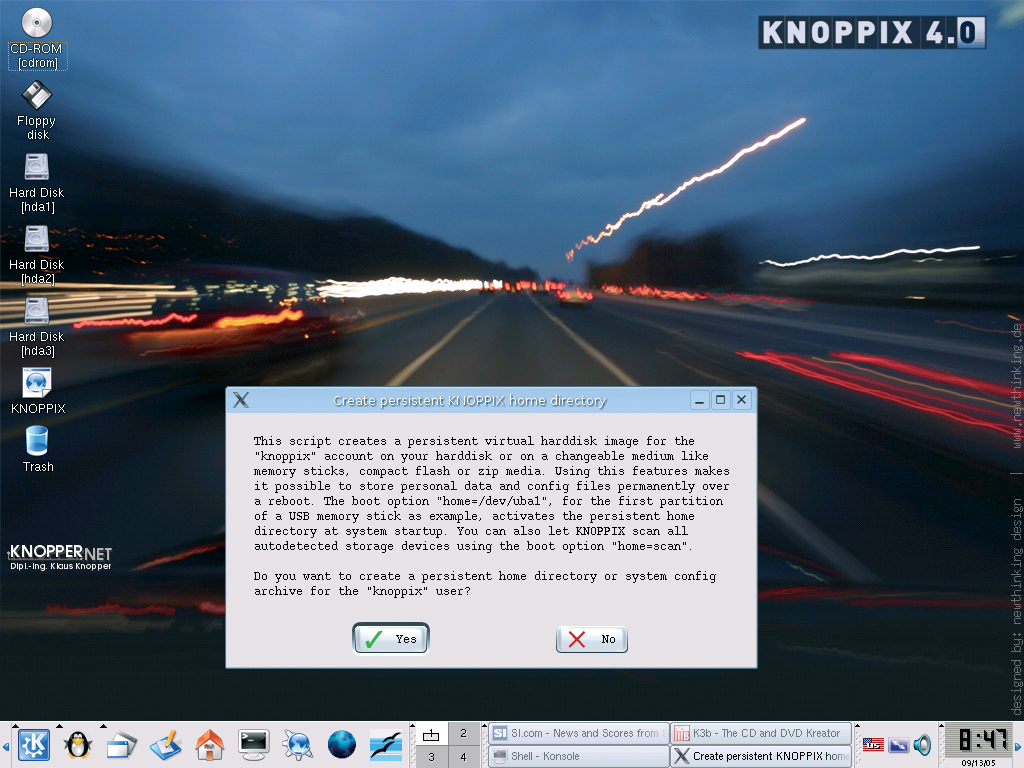
For large and lengthy program downloads and installations, the "persistent Knoppix image" feature comes in handy. The persistent image feature does the same thing the overlaid ramdisk does, just using an ext2 image on the hard disk instead of a ramdisk, and thus creating a persistent snapshot of the changes done to the CD or DVD system.
You can create this persistent image, containing all changes to the system, by calling mkimage-knoppix from the Knoppix menu under Create persistent Knoppix image. For the case of an NTFS partition, since we cannot directly write to NTFS with the Linux kernel driver, a small Windows program called mkimage.exe is provided inside the KNOPPIX directory on the uncompressed part of the CD or DVD.
Once the persistent image has beencreated, it has a constant size (like a virtual harddisk.) You should not make the image too small. The ideal size for the image depends on how much you intend to install or save to the writable part of the image. If you configure a printer, install one or two small programs, and execute OpenOffice once, you will already have used up 100MB or more.
Once you have created a persistent image on hard disk (or USB memory stick), the image is overlaid with the read-only DVD or CD on the next reboot, if you accept the boot option for using the image. Everything you change or save is automatically kept inside the reset-proof image.
One very important thing you need to remember about this procedure is that the image should be cleanly unmounted. In other words, a regular shutdown is required to make sure that the data from Linux's ramcache really is written. In case of emergency, a sync command would possibly work in this situation as well, if you need a really quick reboot using the computer's power or reset button. But this alternative solution should be an exception.
| Copying a Data CD or DVD for Burning |
|
Just copying a data CD or DVD into an ISO file for later burning is easy: cp /dev/cdrom /mnt/hda2/copy-of-cd.iso To obtain a copy of a non copy-protected audio CD, you would do the following. Of course, you alone must decide if this is consistent with applicable copyright laws of the nation where you reside: cd /mnt/hda2 cdrdao read-cd --device /dev/hdc --driver generic-mmc-raw --eject my-cd.toc You can burn the CD later with: cdrdao write --device /dev/hdc --driver generic-mmc-raw --eject my-cd.toc Of course, fans of the graphical environment could just as well use k3b for this purpose (which will call cdrecord/growisofs anyway). You just have to find the right buttons and switches. |
Burning a CD can be difficult if you have only One CD- or DVD-writer that is already used by Knoppix. However, you can try to free the device by copying the contents of the Knoppix-CD or DVD to the hard disk, and just loading the kernel and initrd from the DVD drive, while running the rest from the copy on the hard drive. As of this writing, NTFS partitions are not supported for this way of booting. However, using a FAT32 or ext2 partition, you can do this by typing (for the second partition on the first hard disk on your IDE controller):
knoppix tohd=/dev/hda2 dma
at the boot prompt. This command tells Knoppix to copy all the required files to the hard disk partition and run from there. In the next session, use:
knoppix fromhd=/dev/hda2 dma
to just reuse the previously copied Knoppix instead of copying everything again. The dma option speeds up hard disk access by about a factor of five for most boards. If you have a board that does not support DMA, however, you should not use this option, since it can corrupt data. (The possibility of data corruption is the reason this option is not the default in Knoppix, even though very few boards have this problem.)
You can also boot a completely diskless Knoppix over the network. Just launch the knoppix terminalserver on one computer on your LAN, and boot another system via PXE or a network boot disk that you can fetch from www.rom-o-matic.net for your specific network card. For Knoppix 4.0.1, you will need to fix the knoppix-terminalserver scripts, though, with a hotfix patch available on the DVD mirrors.
Now that the DVD or CD writer is free for burning CDs or DVDs, you can start to burn stuff right away. (See the box titled "cderecord Permissions.")
You can just burn any directory that appears in Konqueror by hitting the right mouse button over the directory icon and selecting burn data CD with k3b. Professional users who prefer the command line may want to issue the following command in order to create a bootable Knoppix DVD from a modified copy on hard disk:
growisofs -dvd-compat -Z /dev/hdc -no-emul-boot -boot-load-size 4 -boot-info-table -b boot/isolinux/isolinux.bin -c boot/isolinux/boot.cat -l -r -J /mnt/hda2/copy-of-knoppix-dvd-content
The preceding command assumes you have a writable partition /mnt/hda2 containing a copy of the Knoppix DVD (the files, not the ISO) in the "copy-of-knoppix-dvd-content" directory.

| cdrecord Permissions |
|
Remember the problem with wrong cdrecord permissions in Knoppix 4.0.1 that I mentioned above? To avoid unpleasant surprises, you should double-check that all /usr/bin/cdrecord* instances are executable by the Knoppix user (well, just run "cdrecord" in the shell), and fix the programs permissions in case they are wrong, using sudo chmod a+x /usr/bin/cdrecord* /usr/bin/growisofs Now we should be able to burn with all programs that use cdrecord (for CDs) or growisofs (for DVDs), such as k3b, which is integrated in the KDE menus. |
| Troubleshooting the Knoppix Boot Process |
|
Now, we all know that hardware is evil, incompatible, and badly designed - nothing works as it should. RAM either misbehaves or is overclocked, interrupts run amok, and the I/O address scheme from the computer stone age is still alive and kicking in the 21st century. What can we do if the Linux kernel encounters broken hardware or badly configured firmware? For example, what if the system comes across a BIOS version that is simply non-functional unless you add a proprietary "system board" driver that exists only for proprietary operating systems? Luckily, the Linux kernel already contains many automatic workarounds for BIOS software and broken hardware (remember the first Pentium CPUs that returned wrong results for certain arithmetic operations?), so in most cases, Linux will just print a warning message about activating a workaround and continue. This is not possible in all cases - sometimes everything seems to be detected, but, for example, the network card is not working, or USB devices are not recognized, or even worse, if PCMCIA devices freeze the entire system when initialized. The following boot command line works with most broken BIOSes: knoppix nosmp acpi=off noapic pnpbios=off pci=bios The command line options have the following effects:
There are more options for the boot command line: some are direct switches for the Linux kernel, and some are just used within the Knoppix hardware detection scripts. For example, if a graphics card incorrectly identifies itself as a SCSI controller (yes, I have seen this...), thus causing a system freeze when the "matching" SCSI driver is loaded by Knoppix, and you are confident that there is really no SCSI controller in your computer that you would need, try booting with knoppix noscsi Also, you may have to change the screen resolution if your display (as it is the case for most notebooks) does not support DDC autodetection of the "favorite" resolution modes. The following command should work for a 75Hz 1280x1024 TFT display: knoppix screen=1280x1024 vsync=75 hsync=90 Note that the "text" resolution is always set to 1024x768 by Knoppix, unless you add the vga=normal option or just the vga=<mode number> options from the table shown in /usr/src/linux/Documentation/fb/vesafb.txt. If you are going to use a video projector for a presentation, and (did I mention that hardware was evil?) the video port on your laptop isn't working, try the framebuffer-only mode of Knoppix: fb1024x768 Note that this boot command line is typed WITHOUT the prefix knoppix that you have seen in the example before, mostly because it REPLACES options from the default line. For some notebooks, you still have to manually activate the video port with some function key combination, but if you are in framebuffer mode, once you get textmode to display on the video projector, X/KDE will work as well. If you are in the mood to investigate more of the options that were put into the Knoppix autoconfiguration when they were needed for a special case, see the KNOPPIX/knoppix-cheatcodes.txt file on your Knoppix CD. |
As you may have read, support for NTFS partitions is more-or-less limited to read operations, due to patents, licensing issues, and last but not least, the lack of usable vendor specifications. The existing open source NTFS read support in the kernel, created by a lot of work-intensive reverse engineering, works pretty well and is good for rescue tasks, such as copying data from a non-booting system to a safe place.

The only write operation the kernel ntfs driver supports at this point is overwriting files without changing their length. (This option is used by Knoppix for the persistent Knoppix image, as described earlier in this article.)
But recently, the Open Source linux-ntfs library (not the kernel-driver, which is derived from it) has advanced to allow limited write operations on an NTFS partition. Using the current CVS snapshot of libntfs, you can now:
These options are sufficient for many things that were not possible before.
Since it would be complicated to recompile every program to use libntfs for write operations (remember, the kernel module is about half a year behind libntfs), we can use the FUSE kernel module and an utility called ntfsmount to actually mount an NTFS partition.
Following is a small HOWTO from the current Knoppix DVD, which explains how to use FUSE and libntfs for mounting an NTFS partition read/write, so you can delete or add files with the limitations mentioned above. Check out KNOPPIX/linux-ntfs/FOR-DEVELOPERS.txt on your Knoppix CD or DVD for this. Please keep in mind that this is still an experimental feature, so make sure you have a backup of all your important data before attempting this:
After Step 4, you should also be able to access and browse the NTFS partition from KDE with konqueror $HOME/ntfs/ Be very careful not to mount the same partition twice, once with the kernel module and again with ntfsmount; otherwise your kernel may get confused.
In this article, I described how to install a program, free the CD-ROM drive, and write to NTFS partitions in Knoppix. I hope these techniques bring you a world of new possibilities for using Knoppix in practical situations.