
By Frank Wieduwilt
The KBarcode program [1] not only helps you design labels of various shapes and sizes, it can also generate and print barcodes for pricing and billing purposes. And if you like, the program will retrieve article and customer data from a MySQL server.
The current version of KBarcode, version 1.8.1, needs a working KDE environment, version 3.3 or newer, and the Qt SQL driver. An SQL server is not required for occasional printing of labels, DVD labels, or business cards. The program will run quite happily without a back-end database.
To install KBarcode you need both the application source code and a back-end to generate bar codes. GNU Barcode, which is available from [2], is a free back-end that will generate most major bar code types. You need to install the back-end first; this will be GNU Barcode in our example.
The next step is to install the program itself: users with Suse Linux 9.1 and KDE 3.2 will discover ready-to-run RPM packages on the project homepage. Working as root, give the command rpm -Uvh kbarcode-1.8.0-1SuSE91.i586.rpm to install the package. If you use any other distribution, you will need to build the program from the source code. The install follows the same steps as the GNU Barcode install, but the source code archive is titled kbarcode-1.8.1.tar.gz in this case.
After completing the installation, simply type kbarcode & in a terminal window to launch the program. The first time you launch the program, it displays an overview of the bar code back-ends it has discovered and offers to set up a database connection (Figure 1).
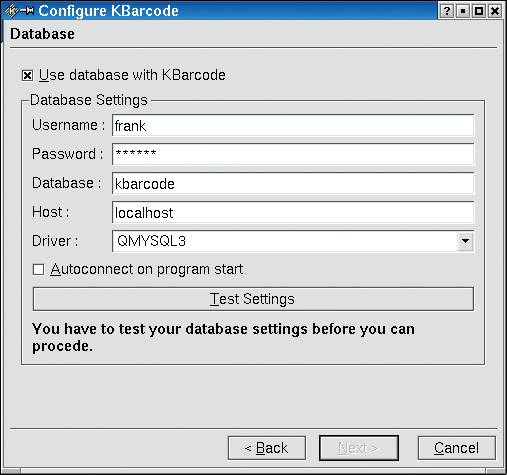
Enter the credentials for a database user with table create privileges in the Username and Password fields. If the user does not have the required privileges, KBarcode will exit with an error message when testing the database connection. The program will automatically enter kbarcode in Database; this is the database that KBarcode uses.
Select the MySQL database driver from the Driver list; QMYSQL3 is the right choice here. You might also like to check the Autoconnect on program start box to tell KBarcode to automatically connect to the database when launched. The alternative is to select the Settings | Database connection entry.
Clicking on Test settings tells KBarcode to connect to the database and run a few tests. Unfortunately, when we asked the program to talk to the database server, the feature turned out to be very unstable. We had to repeat the test four times before it completed - a reproducible bug that occurred on three other computers.
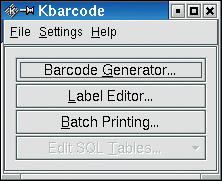
If everything works, KBarcode should offer to set up the required tables in the database and to populate the database with sample data. The program returns you to the main KBarcode window (Figure 2) when finished. You can change the database settings later by selecting Settings | Start configuration wizard.
You need an external program such as PHPMyAdmin [3] to manage your article and customer data and modify the database records. KBarcode does not have a tool to help you with this.
To create a label, click Label Editor... in the main window. KBarcode loads all known formating information, and you can then select the required label.
KBarcode supports a wide selection of label formats. If the label you need is not supported, simply click Add own label definition to pop up the Add Label Definition window.
When you select or add a label format, the Label Editor appears on screen (Figure 3). The Label Editor is a kind of drawing program that has standard tools for opening, storing, and printing labels, as well as a formating toolbox. Figure 4 shows what the individual buttons do.

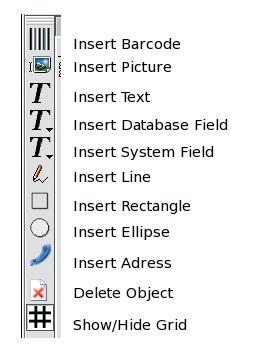
To position an object on a label, select the object in the toolbox and click the position on the label where you would like to insert the element. Double clicking the object opens a dialog box where you can modify the object's properties. The context menu allows you to set up the position and order of the objects.
If you have set up database access, you can use the Insert database field item to add information from your database to the label. Database fields can be formated and aligned just like text fields. The Insert System Field tool allows you to add fields with time and date values: various formats are available.
To add a single barcode to the label, first click Insert Barcode to pop up the Barcode Editor (Figure 5); this is where you design the barcode format and content. Unfortunately, the barcode generator also turned out to be unstable.
The selection of barcode formats depends on the back-end you have installed. You can use the Rotation list to rotate the barcode in 90 degree steps. If the value you enter for the barcode is invalid, the program displays an error message. In theory, you could put the barcode anywhere you like on the label, but our tests revealed that the program had some difficulty inserting rotated barcodes. In fact, the program crashed when we attempted to insert a barcode rotated through 90 or 270 degrees.
For a single label, a database is overkill, but if you need to batch label printing, a database with customer data is required.
You probably set up the database when you first launched the program. If not, select Settings | Start Configuration Wizard and then specify the settings for your MySQL server connection.
For batch printing, click the button in the main window to pop up the Batch Printing dialog, and then connect the labels you designed or selected in the Label Editor with your customer database (Figure 6).
Type the name of an available label in the Label field; you will be inserting your database information into this label. Then select the required customer information for Customer name and no. You can then click on Edit to pop up a dialog where you can select the required article information (Figure 7).
Use the Number of Labels field to enter the number of labels you will be printing for this article. Specify the article itself in the Article list. The Group field allows you to enter a key for printing groups of labels. This might be useful if you want to send a number of articles to a specific customer, for example. Clicking on Add closes the dialog and adds the article to the list.
KBarcode does not provide online help. The PDF formated manual is a useful guide to running the program, although some of the screen shots seem to be in German. The manual covers version 1.4 of the program, which is fine, as very little has changed with the exception of the way some dialog elements are organized.
The software is useful for batch label and barcode printing, and the GUI is uncluttered, giving users easy access to the program functions.
On the downside, the program turned out to be unstable in parts, and there is some risk of data loss, all of which detracts from the good general impression. At present, the developers are working on a new version that promises improvements, especially to the batch printing feature.
| INFO |
|
[1] KBarcode homepage: http://www.kbarcode.net.
[2] GNU Barcode: http://prdownloads.sourceforge.net/kbarcode/barcode-0.98.tar.gz?download. [3] PHPMyAdmin homepage: http://www.phpmyadmin.net. |