
By Hagen Höpfner
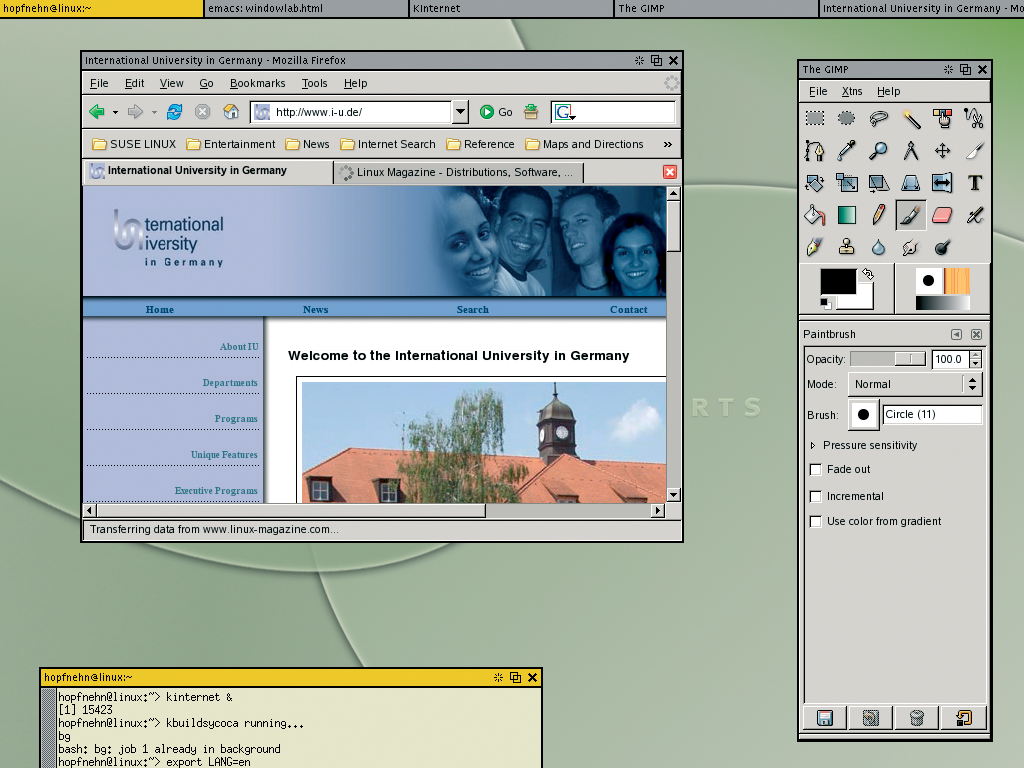
Working in a lab means keeping track of everything. Superfluous functionality can produce incorrect or inconsistent results. WindowLab [1] (Figure 1) concentrates on the core function of a window manager - organizing application windows on the desktop - and avoids unnecessary complications that can lead to errors.
WindowLab is based on the aewm [2] source code. You can use the source code archive from the project homepage to build the window manager. You do not need to run a configure script for WindowLab. Just run the make and su -c "make install" commands in the source code directory and copy the program files to directories below /usr/local. The program is frugal in its use of resources, and you only need gcc, along with the GUI developer packages, to build the manager. The package for Suse Linux 9.3 is titled xorg-x11-devel.
To launch your new window manager when you log on, you need to add WindowLab to your display manager selection menu. The box titled "WindowLab on Suse Linux 9.3" tells you what else you need to watch out for if you have Suse Linux 9.3. If you just want to test WindowLab, select the Failsafe session type in the KDM menu. This option tells the display manager to launch just the X server and a terminal window. You can then type windowlab in the window to open WindowLab. You will not notice a whole lot of difference. The background will stay the same, and you won't get a start menu or desktop icon. However, WindowLab does add a frame to the terminal window, and it puts a taskbar at the top edge of the screen.
The window list (Figure 2) just displays the window title and three buttons on the right hand side. From left to right, you can left click the buttons to iconize the window, move the current window to the background, or close the window. Keyboard shortcuts are also available for window navigation. [Alt]+[Q] moves the windows to the foreground in the order shown in the taskbar. [Alt]+[Tab] toggles in the opposite direction. The [Alt]+[F12] shortcut moves the active window to the background. [Alt]+[F11] toggles between normal and full screen mode.
![]()
Right clicking either the desktop or the taskbar converts it into a start menu (Figure 3). The menu provides a (Quit) entry, an (About) entry, and a number of entries for launching applications. To enable an entry, you can simply release the right mouse button while hovering the mouse over an item. The Edit Menu entry does not take you to a GUI-based setup dialog, as you might expect, but to a text editor, defaulting to gvim, which you can use to edit the WindowLab configuration file.
![]()
There is one thing to watch out for when you are moving windows. The window frames must be entirely on the desktop and are not allowed to cover the taskbar. This makes it impossible to move a window outside of the desktop area.
To scale a window, hold down the [Alt] key and left click on the window frame. In this mode, WindowLab does not show you the window content but simply displays a stylized window frame. You can then drag the mouse to scale the window.
| WindowLab on Suse Linux 9.3 |
|
To add WindowLab to the KDM selection menu on Suse Linux 9.3, simply create a /opt/kde3/share/apps/kdm/sessions/windovwlab.desktop file and populate the file with the following contents: [Desktop Entry] Encoding=UTF-8 Type=XSession Exec=windowlab TryExec=windowlab Name=WindowLab Comment[en]=My WindowLab To display a background image on launching the window manager, you could use a script such as start_windowlab.sh. #!/bin/bash xv -quit -root /opt/kde3/share/wallpapers/SuSE-Desktop_1024.png & windowlab Make the script executable and add the full path to the script to the Exec= entry in your windowlab.desktop file. |
You can use the WindowLab configuration file to modify the start menu. To avoid changing the settings for all users, you might like to create a ~/.windowlab directory first and copy the /etc/X11/windowlab/menurc template to this folder. Even if you have never edited a configuration file previously, the buildup of the menurc file should not pose too much of a problem. Each line that does not start with a pound sign (#) contains a menu entry with the general syntax of menuitem:program. menuitem stands for the text that WindowLab will display in the menu. The program name follows the colon. For example, XEmacs:xemacs means that your start menu will have an entry for XEmacs after relaunching WindowLab, and that this entry will launch the text editor. The entry with menurc appears on the far left of the menu.
WindowLab only gives you one desktop by default. If you enjoy working with virtual desktops, you will need to add an external tool such as vdesk to include this functionality. You can download this command line program from [3] and follow normal procedure for the build: ./configure && make && make install. The tool runs in the background, giving users the impression of working with virtual desktops.
To add four virtual desktops to WindowLab, add the following lines to the ~/.windowlab/menurc file:
Desk1:vdesk 1
Desk2:vdesk 2
Desk3:vdesk 3
Desk4:vdesk 4
After relaunching, WindowLab will display four additional menu entries, which you can use to move to the different desktops. If you would also like the ability to move application windows to other virtual desktops, you can use a script to ascertain the internal window ID and pass the ID to a vdesk instance.
First, add the following lines to your menurc file to create the buttons that will allow you to move a window to one of the four desktops:
ToDesk1:/path/to/to.sh 1
ToDesk2:/path/to/to.sh 2
ToDesk3:/path/to/to.sh 3
ToDesk4:/path/to/to.sh 4
Then use a text editor to create a script titled to.sh with the following content:
#!/bin/bash
vdesk $1 `xwininfo | grep "Window id:" | cut -d" " -f4`
and make the script executable.
Now, when you select one of the four menu entries, the xwininfo | grep "Window id:" | cut -d" " -f4 command will return the window ID of a window when clicked.
The script passes the ID to vdesk, which then moves the window to a desktop of your choice. Additionally, vdesk can optionally display a window on all virtual desktops at the same time. For a universal window display, you need to move the window to desktop 0. The menu entry might look like this:
Sticky:/path/to/to.sh 0
A number of external tools allow you to add more functionality. To display wallpaper, you could use a tool such as Esetroot or the xv image viewer. The xv -quit -root /opt/kde3/share/wallpapers/SuSE-Desktop_1024.png command, run on Suse Linux 9.3, enhances the desktop with a default background image. You can also paint the desktop in a single single color using xsetroot: xsetroot -solid blue paints your desktop blue.
WindowLab is a lean window manager that combines the taskbar and start menu in a single element to save space. The tool is interesting for minimalists and also for any users interested in assembling their own customized desktop environment. Of course, all of this tinkering can have side effects, as not all add-in programs will work perfectly with WindowLab. For example, using the taskbar to toggle between windows really confuses vdesk.
| INFO |
|
[1] WindowLab: http://www.nickgravgaard.com/windowlab/
[2] aewm: http://www.red-bean.com/~decklin/aewm/ [3] vdesk: http://offog.org/code/ |