
By Martin Loschwitz
Technology that supports the easy exchange of audio data across the Internet offers many benefits. Voice quality over Internet connections is often better than the quality of landline connections, despite rumors to the contrary. Additionally, Voice over IP (or VoIP for short) makes transatlantic telephone calls, which formerly cost a small fortune, free. Reason enough to take a closer look at the technology involved.
If you decide to start using the Internet as your telephone service, you will soon discover that you can't simply pick up a phone and talk. Instead, you first need to register with a VoIP service provider, who will give you the necessary login credentials to let you use your Internet connection to log on to the provider's SIP server. SIP is the name of the protocol that supports VoIP telephony. After completing this step, you also need a VoIP phone (a softphone - that is, telephone software - will do as an alternative) before you can start.
Once you start working with VoIP technology, you might ask yourself if installing VoIP throughout your house makes sense. Of course, a single machine with VoIP access may not provide you with enough telephones. The good news is that the VoIP phone system used by most professionals is available on the Internet. Its name is Asterisk [1], and the name has long become synonymous with telephony software. Asterisk offers many useful options, including the ability to act as a complete home phone system.
Let's imagine you want to let your children use the phone, but you are stuck with POTS and don't intend to move to a faster system such as ISDN. VoIP is a good choice in this case: it supports calls to PST networks, and depending on your choice of VoIP provider, you might even get an official landline-type number with an area code in the bargain.
After setting out to convert your run-of-the-mill workhorse PC into a telephony server, you can expect your mileage to vary. The more complex an application is, the sharper the learning curve - and Asterisk is no exception to this general rule. You need to install and configure Asterisk, and to add a few bits and bobs; besides being a telephony server, we will be asking the program to act as a virtual answering machine.
This article does not show you how to set up Asterisk as a full-fledged VoIP server, so don't expect to be able to compete with Freenet or Sipgate by the time you finish reading. To set up Asterisk in the way described by this article, you need a VoIP account with a regular provider. The advantage of the configuration in this article compared to the "normal" VoIP scenario is that you will be using Asterisk as your central phone system for your home users, and thus, a number of PCs will have access to VoIP via the Asterisk server.
An Asterisk setup is useful for a local network with a number of hosts. In this kind of situation, Internet access typically relies on NAT and a firewall. The presence of a firewall complicates the Asterisk configuration. SIP is not NAT aware, so you will need to drill a few holes in your firewall to enable SIP. The ports you need to allow depend on your choice of provider, and most providers now have comprehensive FAQs to field most queries on firewalling.
As a basic rule, you can assume you will need to allow port 5060/tcp, as this is the main SIP port. Asterisk will handle the NAT issues for you. Check out your VoIP service provider's documentation for more detailed instructions on firewalling.
Installing Asterisk is not exactly rocket science, as the configuration phase follows at a later stage. Most distributions now include an Asterisk package that you can drop on your system using your distributor's packet installation tool. Debian simply calls the package asterisk, and you can run apt-get or aptitude to launch into a smooth and simple install.
Asterisk integrates well with Debian, I will assume you have Debian for the remainder of this article, but the Asterisk configuration for sip.conf and extensions.conf is identical, no matter which distribution you have. Those who prefer to build Asterisk from source code can check out the "Building Asterisk" box for a HOWTO.
After installing Asterisk on Debian, you should see a number of .conf files below the /etc/asterisk directory. Asterisk is a minimalist application: it comprises just a dozen small modules, which are loaded on the fly as required. The Asterisk kernel - a compact program - holds the core functions for the various modules. There is a configuration file dedicated to each module and only to that module. This avoids the need for a giant global configuration file, although it does tend to clutter up the /etc/asterisk directory.
Most files are of no interest to us, as they belong to parts of Asterisk that mere mortal users never typically get to see. The two files you may need to modify are sip.conf and extensions.conf.
| Building Asterisk |
|
If you decide to build Asterisk from source code, the commands for installing the PC telephony system are the same no matter what distribution you use. Download the source code archive first, and give the tar cvfz command to unpack. Then use cd to change to the source code directory, and launch into the build by typing make. Finally, type make install to put Asterisk on your filesystem. Caution: The files are not placed in the normal /usr directory but are instead in the root directory, /. To change this behavior, open the Makefile in an editor, and modify the line that starts with INSTALL_PREFIX= by typing /usr/local after the equals sign. This avoids inadvertently damaging system files and lets you later remove Asterisk from your system without too much effort. |
Most VoIP providers, such as GMX and Freenet, use the SIP protocol. But there are other protocols, such as IAX2 and SCCP. This example will be focusing on SIP; the module we need is chan_sip, and the matching configuration file is sip.conf.
On the one hand, the settings in sip.conf let Asterisk log on to your local VoIP provider's server as a phone; and on the other, the settings let users on the local network log onto the Asterisk server as "phones."
Asterisk works very much like a proxy server for a normal web site. It forwards local connections to the Internet and incoming connections to the right local phone (multiple phones can exist). Before you can consider using Asterisk, you first need to set up sip.conf. Make sure you have your provider's VoIP data handy to avoid wasting time looking.
Asterisk configuration files are organized in various sections that govern various properties of the module in question. The first section in sip.conf is titled [general], as is the case for every module configuration file, and this section is populated by default.
We need to make a few changes here. Open /etc/asterisk/sip.conf with your favorite editor and scroll down to the line containing disallow=all. Remove the semicolon (";") at the start of the line. (The semicolon tags the line as a comment.) Repeat this for the two following lines, which start with language, and add a line that says allow=alaw.
If your Asterisk machine uses a NAT gateway to access the Internet, you will additionally need to uncomment the nat=no line and change no to yes: this tells Asterisk how to handle incoming and outgoing connections.
Asterisk logs on to your VoIP service provider's SIP server as a simple phone. The configuration for this is also stored in sip.conf. Each line that contains a VoIP server configuration starts with the register keyword and follows this general syntax:
register => username:password@SIP server/extension
Add a line for your SIP provider. If you have accounts with multiple providers, you will need a register line for each one.
Let's leave out the Extension line for the time being; later on, it will tell Asterisk which subscribers to put phone calls from the various SIP servers through to. You need to configure the subscribers in a separate file; so just type your user account name as the Extension.
The next step is to modify sip.conf to allow your VoIP provider to send commands to Asterisk. Asterisk also uses peer entries to organize outgoing calls. An entry to handle this might look like the following line:
[VoIP Provider]
type=peer
secret=secret_password
username=username
host=VoIP server
fromuser=username
fromdomain=VoIP server
insecure=very
You need a similar entry to this, but with different names (the bits in the square brackets), for each register line in sip.conf at the end of the file. Make sure the entries in the fields match the entries in the register line.
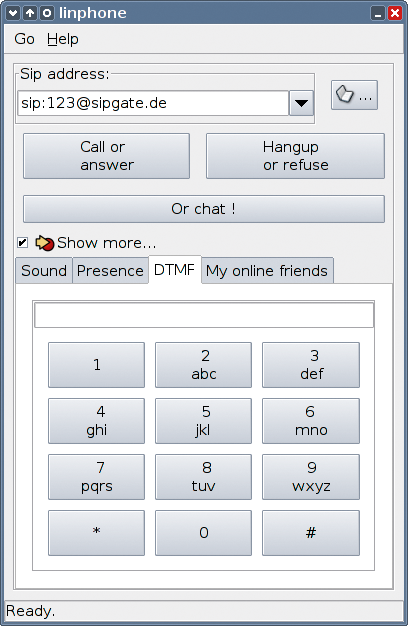
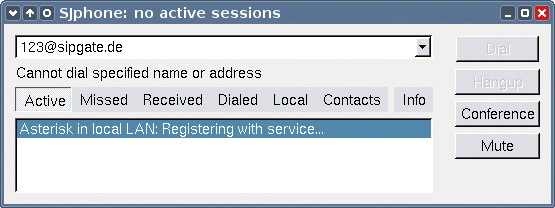
The next, and final, step is to add lines to sip.conf to allow SIP phones on the local network to log on. These can be hardware VoIP phones (Figure 1) or softphones (Figure 2). At the end of the file, first add a title for the new context like thus: [Name]. You can choose more or less any name; usernames can contain letters and figures. A complete entry might look like this:
[2000]
type=friend
secret=password
mailbox=100
canreinvite=yes
context=default
insecure=very
host=dynamic
The approach for configuring additional phones is similar. Specify a username and password for each entry and change the number for the mailbox. You can use numeric usernames and just increment the name and the mailbox number if you like (2001, 2002, ... and 101, 102, ...).
After configuring the [general] directive, and creating accounts for the VoIP server and at least one phone client, save sip.conf. Listing 1 gives an example of a sip.conf file.

| Listing 1: sip.conf sample (Sipgate) |
01 nonumber 02 [general] 03 port = 5060 04 bindaddr = 0.0.0.0 05 disallow=all 06 allow=ulaw 07 allow=alaw 08 maxexpirey=3600 09 defaultexpirey=120 10 context=default 11 language=de 12 13 register => 5552XXX:PASSWORD@sipgate.de/5552XXX 14 15 [sipgate] 16 type=peer 17 secret=PASSWORT 18 username=5552XXX 19 host=sipgate.de 20 fromuser=5552XXX 21 fromdomain=sipgate.de 22 insecure=very 23 24 [2000] 25 type=friend 26 secret=Password 27 mailbox=100 28 canreinvite=yes 29 context=default 30 insecure=very 31 host=dynamic |
The Asterisk dialplan is your switchboard for Asterisk-based connections. The dialplan states where to route incoming and outgoing calls. A dialplan is complex by nature, but manageable for most users.
The dialplan is stored in /etc/asterisk/extensions.conf. As the default file in Debian has a lot of fairly useless examples, you might like to rename the file extensions.conf.old, and then use your editor to create a new extensions.conf. Again, this configuration file needs a [general] section, which will always begin as follows:
[general]
static=yes
writeprotect=no
The standard command in extensions.conf is exten. The command is called by incoming and outgoing calls and routes the call to a phone on the local network or out onto the Internet. The command syntax is as follows:
exten => called_number,priority,action
The priority field is not used to state how important the caller is, here, but to define the order in which the commands in action are executed.
The first thing we need to do is to create a [default] section in extensions.conf: Asterisk will use the default to handle any otherwise undefined calls. Theoretically, you could split extensions.conf into any number of sections, but we will be restricting this to the essentials to keep things simple.
The first part of the [default] configuration is generic, and this section is required. It contains the so-called echo test, which we will need later to check the connection between Asterisk and the phone:
[default]
exten => 600,1,Playback(demo-echotest)
exten => 600,2,Echo
exten => 600,3,Playback(demo-echodone)
exten => 600,4,Goto(s,6)
[default] is also the place where you specify what to do with outgoing calls. It makes sense to use a number to get an outside line: this allows you to use Asterisk for internal calls. The following line tells Asterisk to route outgoing calls that start with a 0 via the VoIP provider VoIP Provider:
exten => _0.,1,Dial(SIP/${EXTEN:1}@VoIP Provider)
The command looks more cryptic than it is: _0. says that this command governs all calls that start with a 0. 1 indicates the priority (1 in this case, because there is very little you can do with an outgoing call, apart from routing it out.)
Dial(SIP/${EXTEN:1}@VoIP Provider) tells dial to call the internal Asterisk dialing command. SIP tells Asterisk to use SIP to log the call with the server. The string that follows / is the number to dial, with the ${EXTEN} variable representing the number itself. Adding :1 to the number removes the first digit (the 0 we pressed to get an outside line) before dialing. The string that follows @ specifies the VoIP provider.
You can repeat this for any number of VoIP providers. Use different numbers to get an outside line in each case, and insert the name of the VoIP provider as specified in the sip.conf entry for that provider.
If you were to launch Asterisk at this point, you would be able to place external calls (Figure 3), but nobody would be able to call you. To allow calls, we need to tackle the final obstacle.
In the register lines in sip.conf, the last value you entered in each line was the name that Asterisk uses to reference incoming calls from this server. If you followed the example, the name will be your VoIP provider user account name.
If you additionally entered "2000" as the username for the first phone, you can use these lines as is in your file - just replace Name with your VoIP provider account name (that is, the last bit in the register line:)
exten => Name,1,Dial(SIP/2000,15,tTr)
exten => Name,2,VoiceMail,u2000
exten => Name,102,VoiceMail,b2000
exten => Name,103,Hangup
The first line forwards incoming calls to the user and phone with the username 2000. Lines 2 and 3 launch the voice mailbox (that is, Asterisk's own virtual telephone answering machine) if extension 2000 is busy or down. Finally, line four hangs up when Asterisk has completed the three preceding steps.
Repeat the last step for all the register lines in your sip.conf. If you need to forward calls to another extension besides "2000", just change the numbers that follow SIP/.
When you are happy with the settings in extensions.conf, don't forget to save the file. Listing 2 gives an example of a extensions.conf configured in this way.
| Listing 2: extensions.conf sample file |
01 nonumber
02 [general]
03 static=yes
04 writeprotect=no
05
06 [default]
07 exten => 600,1,Playback(demo-echotest)
08 exten => 600,2,Echo
09 exten => 600,3,Playback(demo-echodone)
10 exten => 600,4,Goto(s,6)
11
12 exten => 2999,1,Ringing
13 exten => 2999,2,VoicemailMain,s2000
14
15 exten => _0.,1,Dial(SIP/${EXTEN:1}<\@>sipgate)
16
17 exten => 5552XXX,1,Dial(SIP/2000,15,tTr)
18 exten => 5552XXX,2,VoiceMail,u2000
19 exten => 5552XXX,102,VoiceMail,b2000
20 exten => 5552XXX,103,Hangup
|
We would be done if the Debian developers hadn't added an extra hurdle. You can't launch Asterisk directly after completing the install. To change this behavior, you need to open /etc/default/asterisk with your favorite editor, and change the no entry for RUNASTERISK= to yes. After you enable this setting, you can then launch Asterisk by giving the /etc/init.d/asterisk start command.
Asterisk has a full-fledged virtual answering machine that you also need to enable for each subscriber. The addmailbox program will help you do so. Just make a note of the username you want to assign a mailbox to (this is 2000 in our example).
In sip.conf, we assigned mailbox 100 to this user (mailbox=100). Working as root, run addmailbox at the command line. If the program asks you for the context, just say default. When you are prompted for the mailbox number, type 100. The script will set up all the required files.
You can use apt-get install to install an asterisk-prompt-xx file for recorded messages in a language of your own choice. English messages are played by default. Completing this step gives you an Asterisk-based voice mail system.
Finally, you still need a way of telling Asterisk to play back your voice mail messages. To enable playback on your voicemail messages, need to make the necessary changes to extensions.conf. Add the following lines:
exten => 2999,1,Ringing
exten => 2999,2,VoicemailMain,s2000
Now, when you dial 2999 from an internal phone, you are automatically connected to user 2000's voice mailbox. The first time you log in, you will need to specify an access password, but you will be given direct access to your mailbox later.
If you have set up a VPN for remote access to your network, you can use a softphone and the VPN tunnel to access the Asterisk server.
| INFO |
|
[1] Asterisk: http://www.asterisk.org
|