By Peter Kreußel
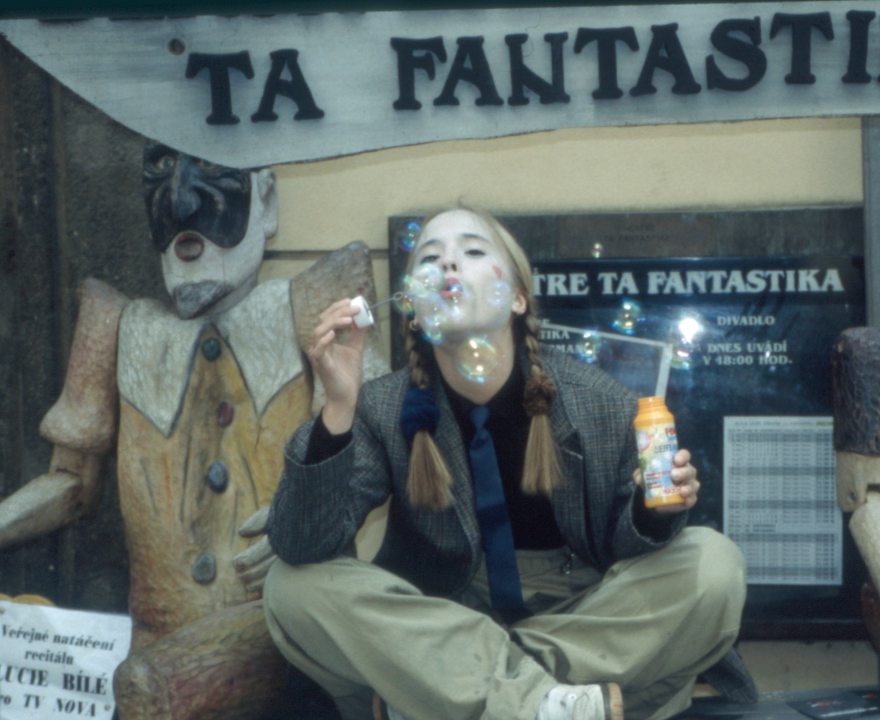
The subject of your photo is slightly off-center, and the exposure isn't quite what you expected. The flash caused some undesirable reflections, and the colors give away the less-than-perfect weather (Figure 1). But you had a great time on your last vacation, and you would like your photos to be as perfect as your memories. Gimp can help bring out the best in your imperfect images.
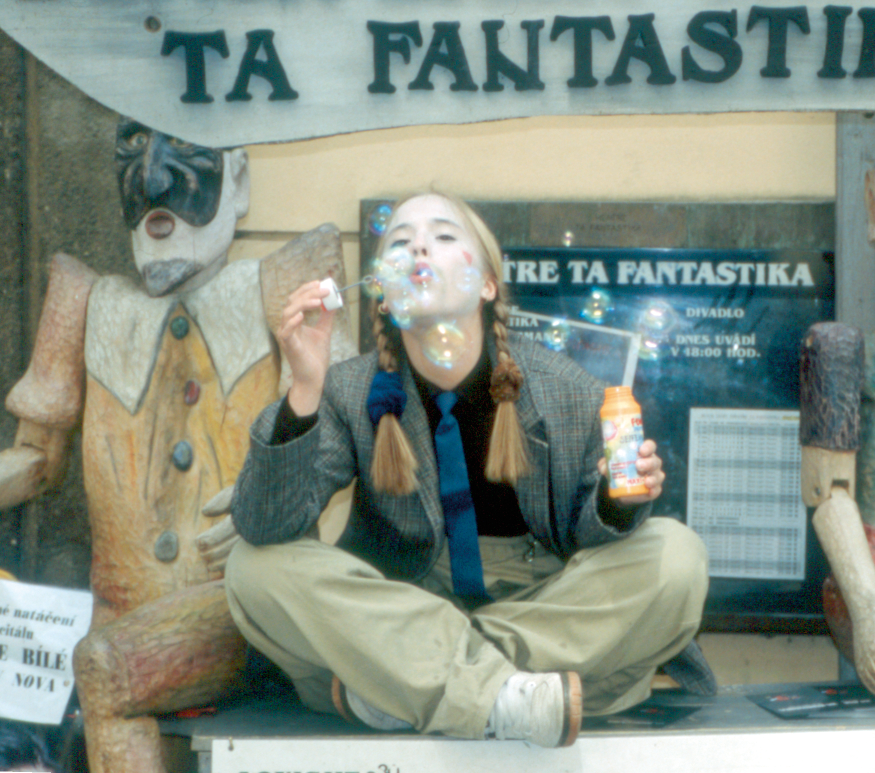
One of the most obvious mistakes in a photo is caused by the photographer not holding the camera straight. Gimp can correct this using the rotation tool (Rotate the layer or selection). Keep the default of Transform layer for Affect:, and select Cubic (best) for Interpolation to keep as much image data as possible. Now drag the mouse to rotate the image until the edges are straight.
You can then use the cropping tool to remove the blank spaces at the edges of the image caused by rotating. To do so, first click on the image, and then drag the handles at the top left and lower right of the selection until it covers the image.
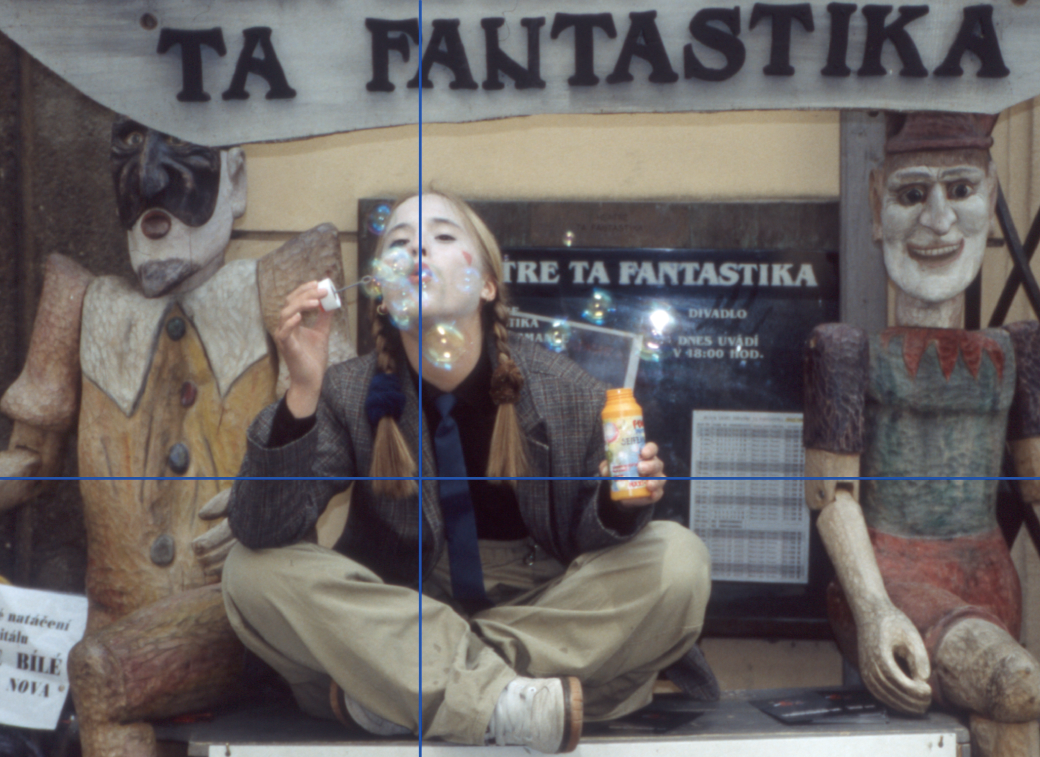
In our example, we not only removed the empty border but also cut the borders to create a golden section (Figure 3). The golden section is an artistic concept that has been around for a long while, and it simply means that an image looks its most harmonious when the main motif is at the geometric center rather than at the optical center. To find the golden section, divide each side of the image into two sections so that the relationship between the longer section and the smaller section is roughly the same as the relationship between the sum of both sections to the larger section. This is a ration of about 1.618:1. The point of intersection is the perfect position for the motif.
Our sample photo is slightly underexposed and scanning has given the colors a blue/green cast; this is not an accurate representation of the variety of colors that exist in real life.
The Layer | Colors | Levels tool removes this kind of imperfection. In the graphic, the values on the left are for dark hues, and the ones on the right are for lighter hues. Gaps indicate a color cast that might be caused by the scanner, but might equally be caused by the sensor in your digital camera or poor lighting (Figure 4). In the Channel drop-down, select red, green, and blue one after another, clicking the Auto button each time to fill the gaps.
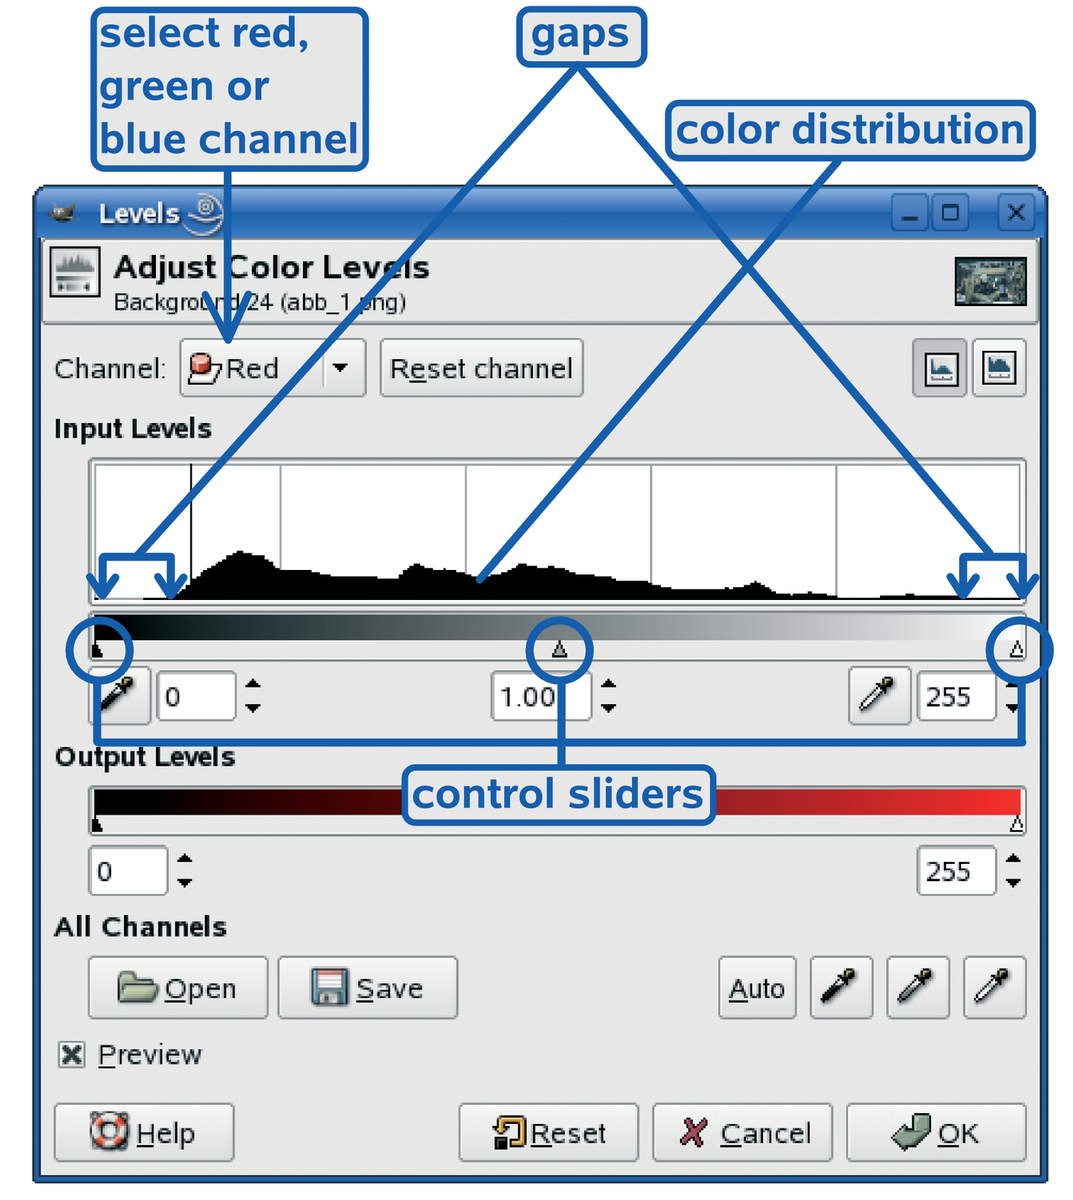
The brightness distribution control helps you compensate for underexposure. To allow the control to modify all three channels at the same time, unselect the last color channel you selected, setting the Channel to Value. Then, to lighten up the image, use the mouse to drag the brightness control to the left, or type a positive value greater than 1 in the middle box and click OK. A value of less than 1 will darken the image.
Note that this tool will also remove natural hues, such as the red in a sunset scene. Monochrome areas and a lack of shading will also affect the results. In this case, the Layer | Colors | Color balance tool is preferable.
The changes we have made thus far have simply made a more realistic photo out of a less-than-perfect original shot. But do you really want to keep an authentic record of a rainy day? The Layer | Colors | Hue-Saturation tool lets you increase the saturation values, resulting in more intense colors. And by pushing the hues into the negative range, you can increase the red spectrum for warmer colors. Adding more brightness will even make a photo of a rainy day look as though you took it while the sun was shining.
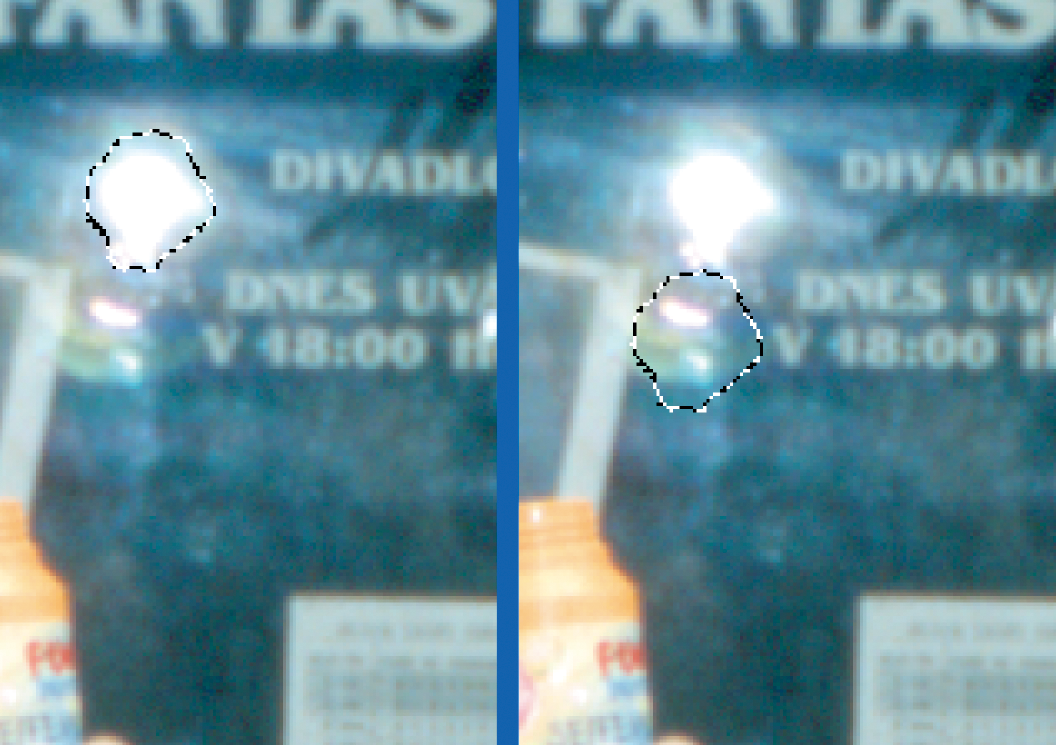
Reflections in flash photography are undesirable. Gimp can remove reflections by painting the areas with image data from neighboring areas. To do this, select the area you want to remove using the wand tool (Select contiguous regions).
In the tool options, enable Feather edges and enter a radius of 10. The Threshold: field allows you to specify a threshold value for hues that the function should treat as similar. A value of 30 is fine for our example. Now click on the center of the reflection to select the region you would like to remove. If needed, press the [+] and [-] keys to zoom in or out.
To reuse this selection, store it using the Select | Save to channel menu option. Select the move tool and set Affect: to the option in the center Transform selection. Move the selection to an area with a similar color, as shown in Figure 5; press [Ctrl]+[C] to create a copy.
Press [Ctrl]+[L] to open the layers dialog and create a new layer. Change to the channel dialog (Dialogs | Channels), right click on Selection mask, and select Channel to selection. This moves the selection back to its original position.
In the layers dialog, select the layer you just created, and then press [Ctrl]+[V] to insert the clipboard contents into the selection. You can now use the slider to adjust the opacity to match the surrounding region. Disabling View | Show selection and View | Show layer boundary gives you a better view of the image.
The paint stamp tool might give you better results with some images. To experiment, select a brush with a soft edge (Circle Fuzzy, choose a suitable size), and set the opacity to 50% or less at first. Hold down [Ctrl] and right click to tell Gimp to use the color values in this region. You can then press the mouse button to paint the target area using these values.
Portraits are often spoiled by redeye, which is caused by the flash reflection in the subject's eyes. To remove redeye, use the wand tool to select the affected region, enable Feather edges, and set a value of about 10, depending on the size of the eye you are working on.
If clicking on the redeye region with the wand tool selects too big an area, you can reduce the Threshold value; if the selected area is too small, increase this value instead. [Ctrl]+[Z] takes you back if your experiments go wrong.
When the selection is to your liking, remove the redeye effect by clicking on Layer | Colors | Desaturate. Additionally, change the brightness in the Layer | Colors | Levels dialog by moving the left brightness control a fair distance to the right.
The techniques discussed in this article show how to enhance photos in just a few simple steps. Of course, only you can decide if the improved image is closer to your memories.