
By Dmitri Popov
MySQL is a powerful tool that lets you build virtually any database application. However, this power comes at a price: it takes a long time to master MySQL's many features. What if you just want to create a simple database for keeping notes and addresses?
For a very simple application, you won't want to spend time reading thick books on database theory. Luckily, there is a tool that can help you create a simple database in minutes: Mudbag.
Mudbag is a web-based, multi-user database system for quick and simple applications. You can install Mudbag on your own server, or you can use the official Mudbag server at www.mudbag.com. The Mudbag server is a good tool for experimenting, but you may not want to use it for storing crucial data. On the other hand, the server is ideal if you don't want to expend the effort on managing your own server, and you want the data to be accessible from the Internet.
According to the Mudbag website, the Mudbag server is available for free for small databases (10 or more tables with 100K of data), and after that limit, there is a charge. (The details are still getting worked out, but according to the Mudbag website "the costs are very low.")
If you want to create a small database on the fly, Mudbag may be exactly what you need.
You have two options for how to install and use Mudbag. If you run your own server with Apache, and MySQL and PHP are installed on it, you can set up your own Mudbag solution. Installing Mudbag is as easy as it gets. Download the latest version of the application from http://sourceforge.net/projects/mudbag and unpack it. Locate the setup-missing.php file, open it in your favorite editor, and remove the preamble (the first 18 lines). In the database access section, replace the default values with the actual information. Rename the file to setup.php, and move it into the localsite folder. Now copy the entire mudbag folder into your server's document root and point your browser to http://myserver/mudbag/install.php. The installation script will take care of the rest.
Mudbag installs several sample databases you can tinker with. However, a better way to discover Mudbag's features is to create a simple yet useful real-world database application, like a recipe database, for example.
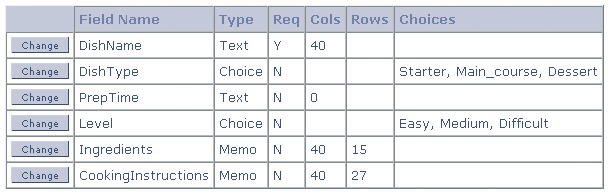
First, you must create a new table for your recipe database. Press the Add Table button and give it a name. Next, populate the table with fields. Let's start with adding a field that will store names of dishes. Press the Add Fields button, give the field a name, select Text from the Type drop-down list, tick the Required check box, and press Save. In a similar way, you can add other fields for dish type, ingredients, cooking instructions, difficulty level, date added, etc. While adding fields, remember to assign the correct type to each field. For example, the Ingredients and CookingInstructions fields should be set to Memo, while the Date field must be of the DateTime type. Mudbag also allows you to add the field type Choice, which you can use for adding drop-down lists to your database. You can, for example, add a field for difficulty level that consists of three items: Easy, Intermediate, Difficult. When you are done adding fields, press the Back to Table button. Remember that the database design is not set in stone, and you can at any time add changes to it by clicking on the Design button.
Now you can fill your recipe database with data. Obviously, you can add records manually one-by-one. To do this, click on the database and press the Add Records button. However, if you already have recipes in, say, an OpenOffice.org Calc spreadsheet, you can easily import them into your recipe database. First off, you must export the data from the spreadsheet in CSV format. Before you export the data, though, you might want to make sure that the structure of the spreadsheet is similar to the structure of the recipe database (that is, each column in the spreadsheet has a respective field in the database). Preferably, the columns should also be in the same order as the field in the database. This preparatory work will make the import procedure less complicated. However, Mudbag includes tools necessary for importing data into the proper fields, so you can export the data as they are and do the tweaking later.
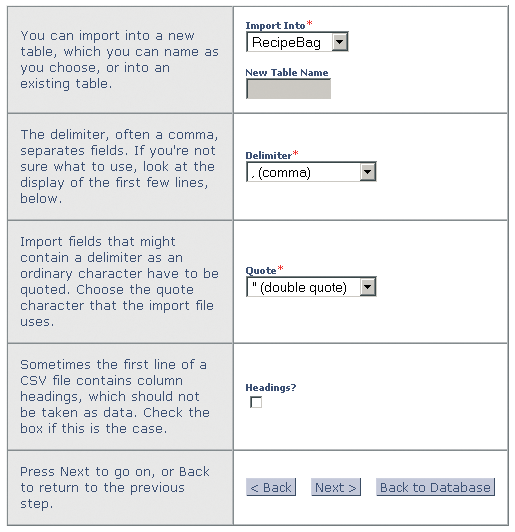
Once the data are exported to CSV format, go to the Mudbag main page and press the Import button. Select the path to the CSV file, and press Next. Choose your recipe database table from the Import Into list, and make sure the Delimiter and Quote fields are set to comma and double quote, respectively. If the first row in your original spreadsheet contained headings (the names of the fields, in Mudbag's terminology), tick the Headings check box. When you press Next, you can adjust other import settings, such as which columns should be skipped during the import. Finally, review the import settings and decide whether you want to save them as a specification for future use.
Mudbag also allows you to design views, which comes in handy when you want to view a subset of records or only certain fields sorted according to user-defined criteria. For example, you can create a view that contains records, where the DishType field is Breakfast, so you don't have to trawl through all of the records to find a recipe for a good breakfast. You can also create a view that contains only the names of the dishes and ingredients; this view can be handy for putting a shopping list together.
Creating a view is easy. In the Mudbag Home screen, click the Add View button, select the table you want, and press Continue. Give the view a name, and tick the Public check box if you want the view to be visible to others. Use the arrow buttons to add the desired fields to the view. If you want to sort the records in the view, you can add up to three sort criteria. Finally, you can specify up to two filters. If you want to use the view to quickly display all breakfast dishes, create a filter where DishType is equal to Breakfast. Using the second filter, you can further refine your view. For example, create a filter where PretTime is less than or equal to 15 minutes and set the logical operator to AND. The view will then display all breakfast dishes that take 15 minutes or less to prepare.
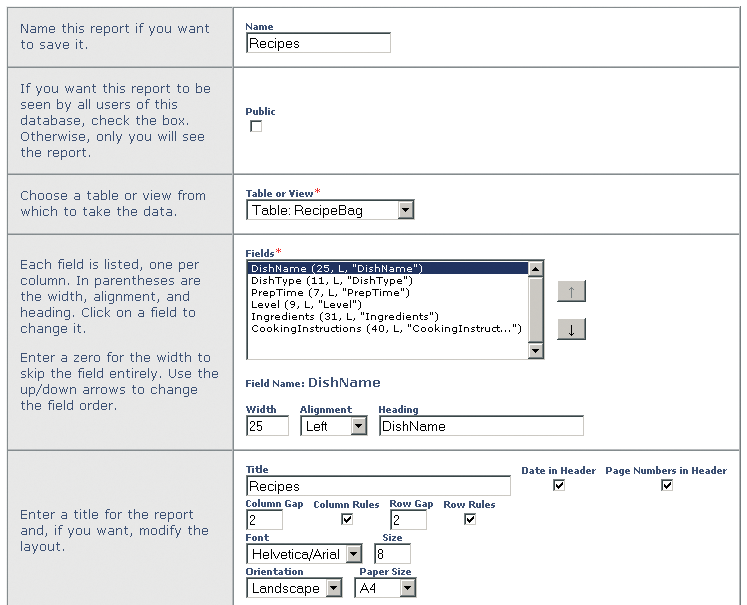
Reporting capabilities are an essential part of any database system, and Mudbag has some nifty reporting features. Mudbag allows you to create four different types of reports: Tabular, Record, Label, and Email. The Tabular type can be used to create a simple list of all records or subsets. Using the Record type, you can generate reports, where the records are grouped according to user-defined criteria. As the name implies, the Label type is suited for creating label sheets, which is a boon if you keep your contacts in a Mudbag-based address book. The Label type also offers a wide range of label formats based on Avery codes, so you can create print-ready labels with a minimum effort. When you run a report, Mudbag generates a PDF file that you can save and print.
The Email type is perfect for sending emails to multiple recipients whose addresses are stored in a Mudbag database. Let's say you want to keep your friends and family abreast of changes in your recipe database. Assuming you have their email addresses and contact info in the AddressBook database, create a new Report by clicking on the Add Report button, choose the Email report type, select the AddressBook table, and adjust the template to your liking. When you are satisfied with the result, press the Send button to send the email (you can also use the Test Send button to make sure that everything works properly).
Mudbag also includes user management capabilities, which you can use to invite and share your databases with other Mudbag users. If the person you want to invite is already a registered Mudbag user, and you know his or her login name, you can simply add him or her to your user list. Each user on the list can have either a see (view only) or edit (can modify data and table) role. This is not a particularly sophisticated feature, but don't forget that the goal of Mudbag is to make it easy for non-experts to create and share databases. If the person you want to share the database with is not a registered user, you can send an email invitation directly from within Mudbag.
For many experienced users, the instructions provided in this article may seem overly simple, but they are a testament to how easy Mudbag really is. Admittedly, Mudbag doesn't support some advanced features, such as binary and other MySQL field types. However, Mudbag was designed with one goal: to let ordinary users build simple yet useful databases that they can share with others. While Mudbag is not suited for serious database developers, it can be a killer application for the rest of us.