
By Kristian Kißling
Stellarium [1] is a virtual planetarium application that simulates the night sky and shows you constellations and celestial bodies. The goal of Stellarium is to provide users with a clear, annotated view of what they would see in the night sky with eyes, binoculars, or a small telescope. Like a real planetarium, the Stellarium virtual planetarium can display a view of the sky from other locations on the Earth or other points in history.
To use Stellarium's full feature scope, you will need to download the latest version of the program from the CVS. The cvs program, which you can install using YaST or Apt-get, is required for this. Another essential requirement is 3D drivers for your graphics adapter, as the program needs a fair amount of graphics performance. First log in to the Stellarium CVS at the command line, and press [Enter] when you are prompted for a password:
cvs -d:pserver:anonymous@cvs.sourceforge.net:/cvsroot/stellarium login
If this is the first time you have used the CVS, just repeat these steps if an error message appears. CVS needs a .cvs folder in your home directory, but instead of just setting up the folder, it just acts surprised if the folder isn't there. Now change to an empty directory and start to download:
cvs -z3 -d:pserver:anonymous@cvs.sourceforge.net:/cvsroot/stellarium co stellarium
In the new stellarium subdirectory, run the ./autogen.sh command to create the configure file, and then follow the normal steps to build and install Stellarium: ./configure, make and make install with root privileges. Stellarium needs a few developer packages. Suse Linux requires the SDL-devel and xorg-x11-Mesa-devel packages. The latter can be an issue: if you used YaST to install the Nvidia driver, xorg-x11-Mesa-devel will destroy the required kernel module.
You need to reinstall Nvidia, preferably following the steps described on the Nvidia page. "Debian Etch" users need the SDL packages, libsdl1.2-dev, libsdl-mixer1.2-dev, libsdl-gfx1.2-dev, or libsdl1.2-sound-dev, as well as packages for OpenGL, such as xlibmesa-gl-dev, and a couple of other packages, such as zlib1g-dev and libpng12-dev. The CVS version may be up to date, but it is often buggy. If this is the case, you can download and build the stable version, stellarium-0.7.1.tar.gz, off the Web [2]. Note that some of the features described in this article are missing in the stable version.
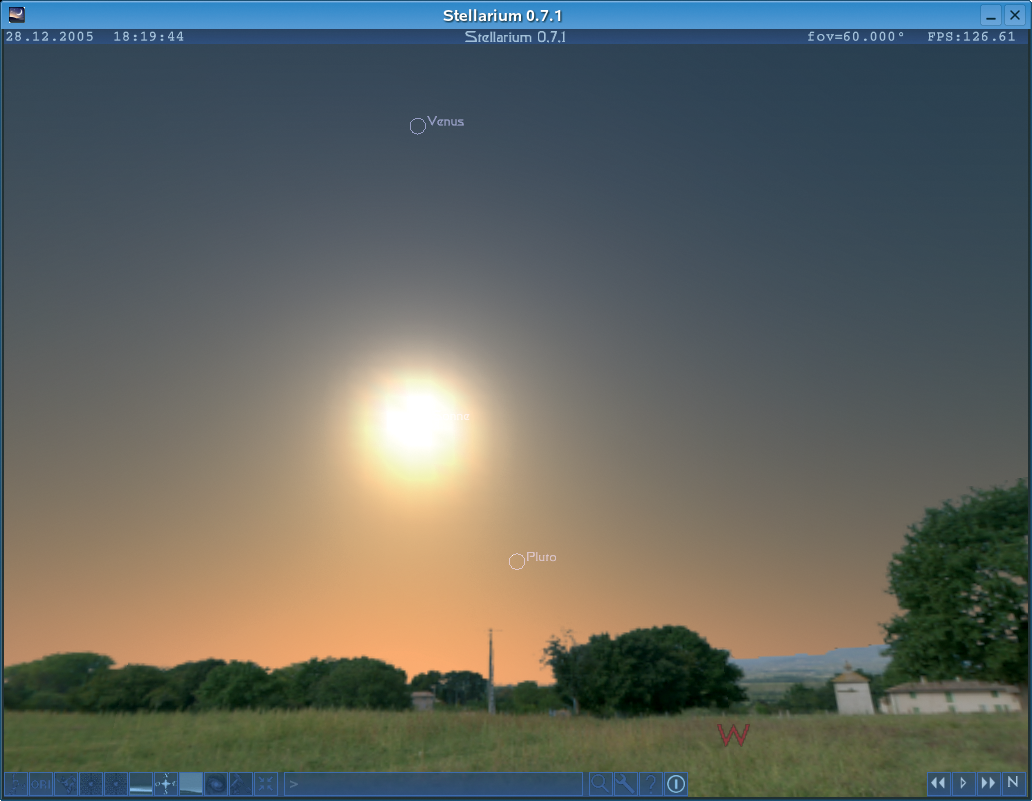
Open a console window and type stellarium. The program comes up with a picturesque scene and the sky above it (Figure 1). Depending on the time of day, you may be able to see the stars. The view depends on the program launch time - Stellarium synchronizes with your computer's internal clock. There is a status bar with a variety of information at the top of the screen. The current date and time are shown on the left, followed by the name and program version. On the far right, there are two values that need some explaining: fov is short for "Field of view"; you can extend or restrict the field of view by pressing [PgUp] and [PgDn]. 100 degrees gives you a fish-eye view; you can restrict the field of view to a minimum of 0.001, which is what happens when you zoom into a remote planet. Gamers will probably have guessed that FPS means "Frames per second." If this value is too low, the display will be jerky.
On the lower left, you can see the various options that Stellarium offers in the form of a row of switches that you can enable or disable. The four icons on the lower right let you manipulate the time. Stellarium normally comes up in full-screen mode; pressing [F1] gives you a normal window. You can control the program by pressing keyboard shortcuts. There is a list of shortcuts on the Web at [3], or you can click the question mark icon to display the internal list.
If the graphics performance is not good enough when you press the left mouse button to take a look around, you will need to tweak the video settings. To do so, click the screwdriver icon to go to the menu with the basic settings. Change to the Video tab, and reduce the Screen Resolution. The two options below Projection distort the viewer's perspective; you then see your environment through a fish-eye or a telescope. Save as default lets you store these settings. The Rendering tab lets you specify the level of detail in Stellarium, and this is where you enable and disable options, although most features can be modified via the icons on the lower left. Star Names, Up to mag means that the names are displayed up to a certain luminosity, and this makes sense if you zoom into space. Cardinal Points lets you display letters for north, south, east, and west in the sky.
The most impressive thing about Stellarium is that it gives you command over time - just like the Celestia planetarium. You can go back to any point in history - to view the night sky in the year 0, for example, or to watch future eclipses. You can define the Current Time in Date & Time. Below this there is a display that indicates how fast time is elapsing: the number 1.0 indicates realtime mode. You can accelerate and slow down the pace of time by pressing [L] or [J], and [K] takes you back to realtime.
The icons at the bottom right give you a graphical approach to changing the time. The double triangles take you forward and back through time, and the triangle in the center takes you back to realtime mode. In the Location tab, you can define the location of the planetarium. In the CVS version, you can even use the mouse wheel, or press [PgUp] and [PgDn] to zoom into the map and specify the location.
As an alternative, just discover the coordinates of your current location and enter them. Wikipedia might help you track down the correct coordinates for your location.
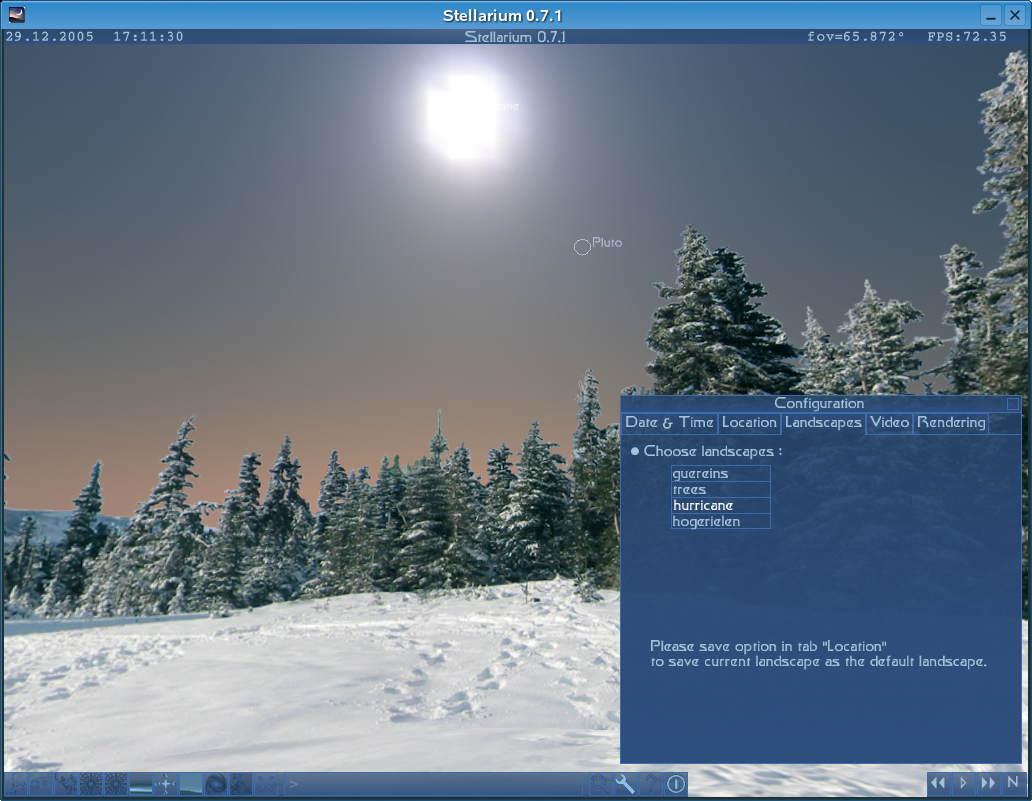
This just leaves the Landscapes tab, which lets you change the landscapes displayed by the program. Your options are green meadows, forests, or a snow-capped mountain - all of them are quite breathtaking (Figure 2).
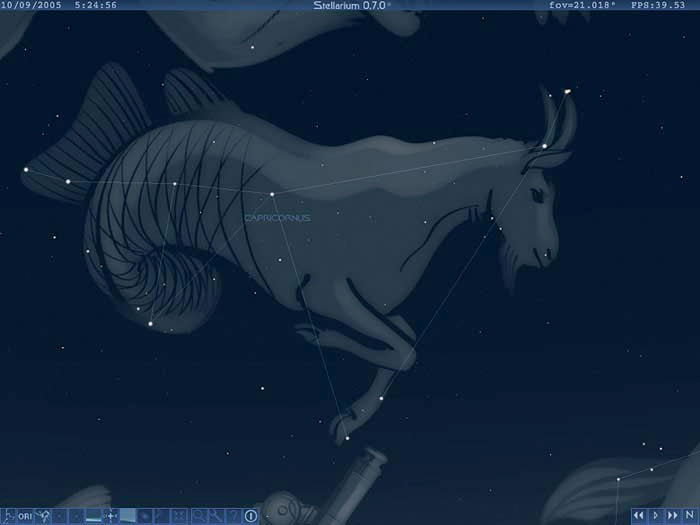
Time to test the small icons in the lower left corner of the screen. The first three fields from the left relate to constellations. You can click on the leftmost icon to draw lines between groups of stars to give you a clearer view of the constellation. The next box gives you the names of the constellations. And when you click the third box, artist's impressions show less imaginative users why these constellations are known by their mythical names (Figure 3). The next two icons let you drop coordinate systems over the imaginary celestial sphere, an Azimuthal Grid and an Equatorial Grid, both of which are coordinate systems for defining the position of a celestial body (see the Coordinate Systems box).
If you like the idea of floating silently through space, you can just switch off the landscape and the atmosphere by clicking the next button, and the one two places to the right. The compass icon between these two lets you enable the Cardinal Points; the button to the right adds nebulae to the galaxy. Astronomic nebulae (interstellar clouds of dust and gas that either emit or reflect light) first appear as flashing yellow dots in space and reveal interesting forms when you zoom in.
When you left click a specific object, the celestial body is surrounded by a flashing cursor: clicking on the arrow icon focuses on the selected plant. [PgUp] and [PgDn] then let you zoom in or out.
| Coordinate Systems |
|
Viewed from the earth, planets rotate about a fixed point known as the celestial pole. The celestial pole actually comprises two poles. If you are at the North Pole, the celestial pole is located directly at the zenith. The same thing applies to the South Pole, but in this case, the zenith is known as the nadir. In other words, the celestial poles are south and north viewed from the equator. The imaginary celestial sphere connects these two poles, thus creating a celestial coordinate system. The celestial equator resides in a plane that is at right angles to the celestial poles - just like the Earth's equator - but the celestial poles are not identical to the North and South Poles. Azimuthal Grid (Altitude/Azimuth coordinate system) A positioning method for celestial bodies. Locate a fixed star and imagine an angle that points straight down from the star to the horizon from the viewer's perspective. This angle determines the altitude. The horizontal distance from north to the point where the altitude line crosses the horizon (an arc) is referred to as the azimuth (Figure 4). This coordinate system is fairly simple, and it is not suitable for determining the exact position of an object such as a planet that is highly dependent on the position of the viewer and the motion of the Earth. Equatorial Grid (Right Ascension/Declination (RA/Dec) coordinate system) This coordinate system also uses the Hipparcos Star Catalog. Starting at the celestial equator, it measures the exact position of a star in the coordinate system. Starting at the vernal equinox point, a fixed star, the first angle, or right ascension, is determined along the celestial equator, and the second angle, or declination, is determined by reference to the north pole to pinpoint the position of a celestial body in the coordinate system (Figure 5). The RA/Dec coordinate system has the advantage of allowing exact positioning, as the celestial equator is static. |


Let's take a closer look at the moon. To get a better view of the moon, select the magnifying glass icon, or press [Ctrl]+[F], then open the Planets & Moons tab, and enter Moon in the text box. When you press [Enter] to confirm, Stellarium searches for and focuses on the planet. You can then use the zoom functions for a close-up view of the moon, or follow its orbit by pressing [T] and speeding up the pace of time. This technique also works for constellations, nebulae, or stars, which you can also locate via the search function. You can access stars by entering their names or their Hipparcos Catalog number. Nebulae are located based on the Messier Catalog conventions. (See the box labeled "Catalogs.")
| Catalogs |
|
Hipparcos Catalog: Based on data for the locations and movements of 118,000 stars collected by the Hipparcos satelite. Messier Catalog: Lists astronomic objects, mainly galaxies, nebulae and star clusters; named for its editor Charles Messier. |
Stellarium has a few tricks up its sleeve; you need a /.stellarium/config.ini file in your home directory to use them.
Thanks to this file, the planetarium is located in Paris by default, but you can replace this with the value for your favorite town. The entry for the German city Munich is as follows:
[init_location]
name = Munich
latitude = +48 08'24.00\"
longitude = +11 34'30.00\"
altitude = 0
The longitude and latitude values follow the name, however, the altitude you enter does not make any difference. If you set the flag_show_script_bar option to true, an additional input box appears in the lower menu, allowing you to control Stellarium by entering various commands. There is a command reference on the web at [4].
Stellarium also supports scripting. You can press [Ctrl]+[R] to record your actions in Stellarium. The program stores the recorded actions in a file titled stellarium0.sts below your home directory. Pressing [Ctrl]+[R] stops the recording.
Launching a script is a fairly convoluted process: first, copy the stellarium0.sts file to the /usr/local/stellarium/data/scripts/startup.sts directory, then relaunch Stellarium, and press [M] to go to the text menu.
Repeatedly press [Down-Arrow] to go to item 6. Scripts, and then press [Right-Arrow] to move to 6.1 Local Scripts: Select and exit to run.
You can then browse the existing scripts by pressing [Up-Arrow] and [Down-Arrow] and pressing [Enter] when your script appears. Press [M] to quit the menu; this automatically launches the script. You can then press [7] to stop the script.
[Ctrl]+[S] grabs a screenshot, which the program stores below your home directory. With the right software, you can even create your own panorama photo of a garden or park to use as a landscape for your private planetarium [5].
| INFO |
|
[1] Stellarium project homepage: http://stellarium.sourceforge.net
[2] Stellarium source code: http://prdownloads.sourceforge.net/stellarium/stellarium-0.7.1.tar.gz?download [3] Keyboard shortcuts in Stellarium: http://porpoisehead.net/mysw/stellarium_user_guide_html/node20.html [4] Command reference: http://cvs.sourceforge.net/viewcvs.py/*checkout*/stellarium/stellarium/doc/commands.html?rev=1.16 [5] "Panoramas with Hugin, Enblend and Autopano-SIFT," by Oliver Frommel; Linux Magazine February, 2005, pg. 48. [6] Creating your own landscape: http://porpoisehead.net/mysw/stellarium_user_guide_html/node39.html |