
By Kevin Donnelly
You've had enough of writing code in a garret, and now you've decided to make some REAL money by writing a novel. But how do you keep track of the storyline, the characters, the settings, etc? A word-processor, no matter how advanced, is just not built for this sort of thing, even if it has a good outline function. You could use something like a wiki or KDissert [1], but with these it can still be difficult to keep things organized? They are good for building trees of data, but in a story, part of the attraction is that these trees overlap and interact.
Enter StoryLines, part of Writer's Cafe [2], a software toolkit designed especially for fiction writers. StoryLines will not generate story ideas or plot outlines for you, but it is rather a collection of tools that will help you to turn your ideas into a properly-structured and well-written narrative. Julian Smart of Anthemion software [3] developed Writer's Cafe with input from his wife Harriet, a published novelist, and in using the application, it is clear that its design flows from practical experience with the writing process.
Writer's Cafe is a cross-platform application running on Linux, Windows, and MacOSX, thanks to the use of Smart's own wxWidgets [4]. The first step is to download the appropriate version from the website. There are versions for Red Hat, Fedora, Suse, and Debian. These versions reference older versions of the distro, but the most recent 1.22 version for Suse 9.2 ran fine on Suse 9.3 and Suse 10.0. Move the download to a temporary location and uncompress it. Run the install script ./installwc in a terminal, and you will be asked to select a directory for installation and another to hold the launch scripts - I chose the default /home/kevin/Writer's Cafe-1.22 for both.
Select option (1) to install Writer's Cafe, and the tarball contents will be copied to your install location. Type 0 to exit the install, and you can now launch Writer's Cafe by going to the install directory and typing ./Writer's Cafe. I found it useful first to open the Writer's Cafe script and add the line export BROWSER="konqueror". This step enables a browser to be launched from within Writer's Cafe when necessary. You can, of course, set up an icon on the desktop to run Writer's Cafe automatically.
Writer's Cafe (Figure 1) is designed as a virtual version of a real cafe, so it opens a desktop that acts as a portal for the other elements of the package, which include various little goodies that may not be directly related to the writing process but are intended to put you in the mood for writing. So you get a song called "Untie my Tongue" by Jay Goldmark, a collection of "cookies" (short quotations on the theory and practice of fiction-writing), and a patience game called Forty Thieves.
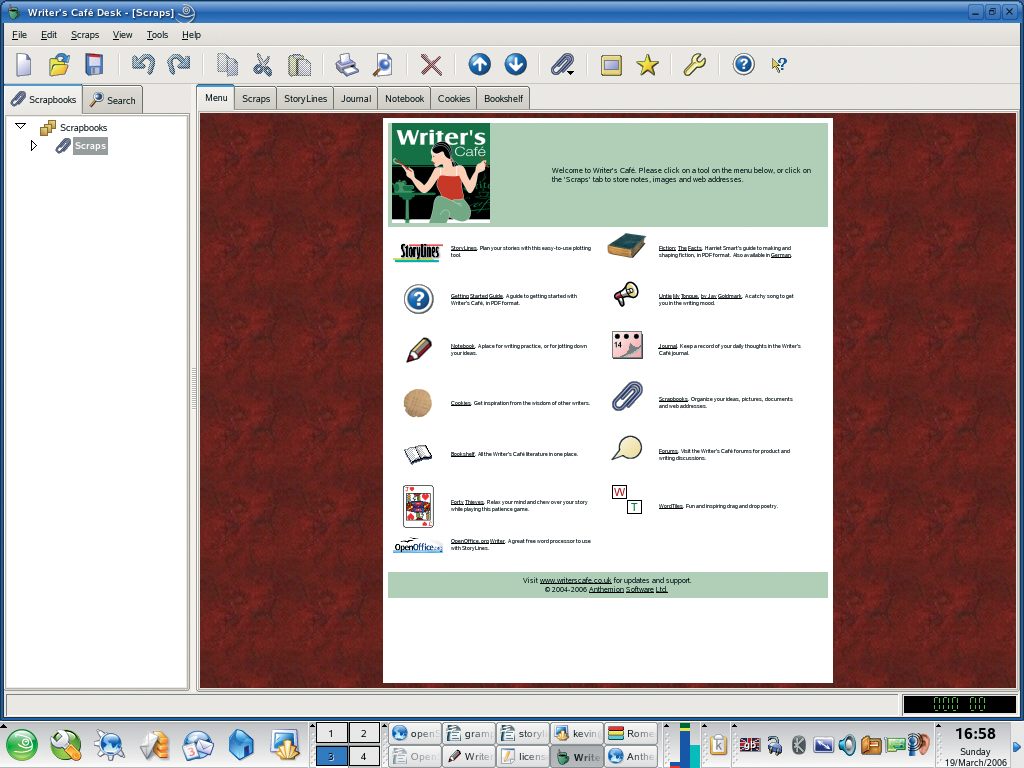
A sizable 10-page Getting Started guide introduces the various applications in the Writer's Cafe package, and there are also detailed guides on program features available from the Bookshelf tab.
On Suse, the text display for this desktop is very small, but all the items can be accessed directly via the Tools menu. You can make the working font for most of the applications bigger by going to View | Settings... | Aesthetics. This font option allows more comfortable input of text in the three main helper applications: Scraps, Journal, and Notebook.
Notebook is simply a space to type in -- it allows you to scribble down whatever ideas have come to you with the minimum of fuss. You don't have to save individual files.
You can start new pages at the click of an icon, and you can see a list of all pages by going to the contents page (note that this window stays open on top of all other applications unless you click the Close link at the top).
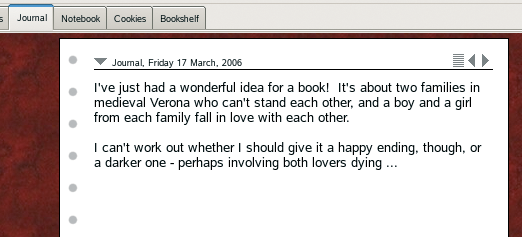
Journal (Figure 2) implements an often-recommended exercise for the aspiring writer, intended to get you into the habit of writing something - anything - every day by keeping a record of your thoughts and feelings. Journal is similar to Notebook, but the contents page lists entries by date instead of by page. Text entered into both of these applications can be spellchecked using a built-in spellchecker View | Settings | Spelling.
Scraps offers a way of imposing a bit more structure on the free-form things you might have entered in Notebook or Journal by keeping collections of related materials (e.g., research items, character sketches, etc.) in one place. Scraps are filed in scrapbooks. You can create as many scrapbooks as you like, and they can contain text, images, and web or file links. A basic set of drawing tools allows you to color and link different elements, so that you can start playing around with story structures, interactions, and other elements.
You will also find a slideshow function (View | Slideshow) that allows you to view images in a scrapbook. Note that the slideshow window does not open to its full extent, and you have to manually extend the window in order to see the controls and the whole of the slide image.
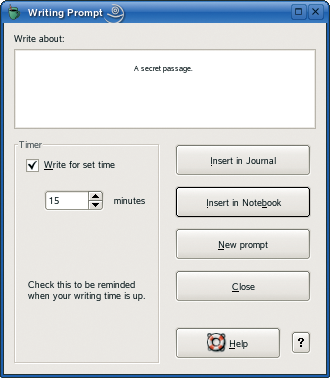
By going to Help | Writing Prompt... (or the star icon on the toolbar), you can access another useful tool (Figure 3). This pops up a window with a suggested topic and starts a 15-minute timer (adjustable as desired). You then write as much as you can on that topic in the time given (which counts down on an onscreen clock), and the output can be stored in either the Notebook or the Journal. This is a good warmup exercise. You can also use the timer facility more generally by going to View | Timer... and setting a specific period. Once the time has counted down to zero, you get a popup telling you that your time is up.
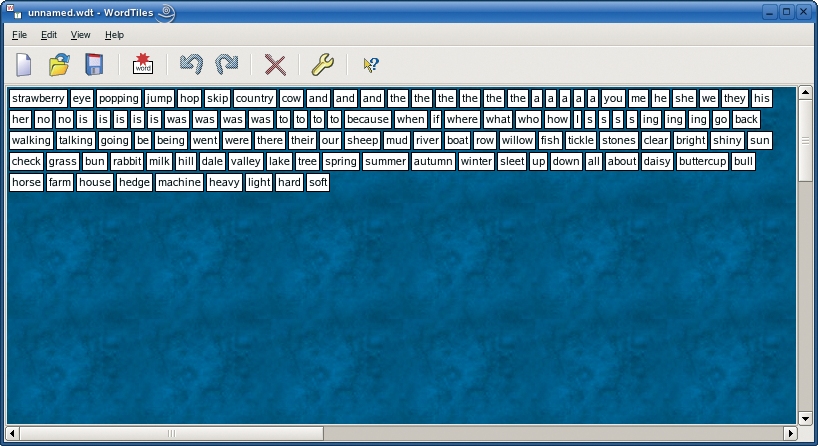
One final tool, again intended to get you up to speed before a writing session, is Word Tiles. This tool gives you a set of words that you can move around on a launched, you choose a set of words (such as circus or romance), and then experiment with putting them together in different ways. You can add your own words to the given list (either through Edit | New Word, or by using the icon on the toolbar), or you can create a totally new list of your own (View | Preferences | Word Lists). There appears to be a slight bug here, in that new lists are all named WritersCafe-1 the next time you open the application, even if you originally chose a different name or if you rename them. This is less serious than it might be because the lower half of the dialog gives a view into the contents.
The interface only allows you to enter one word at a time, but since the lists (located in installdir/WordTiles/WordLists) are simple text files containing one word to a line, you can create one in your favorite text editor and place it in the directory. However, note that in order for WordTiles to be able to see and use this list, you must click on Open in the WordLists dialog, select your new list, and then click Open. WordTiles subsequently sees such lists with the correct title.
I personally find moving the words around in WordTiles too time-consuming - it is easier to scribble things down in Notebook - but seeing unconnected words sitting side by side can indeed give rise to new ideas and associations. With that in mind, a useful feature for the future might be an option to "shuffle" the words. Brian Eno used to use a related technique to write words for his songs. This would allow the user to create snatches of text that might be the basis for more detailed work.
WordTiles seems to be less integrated into Writer's Cafe than the other helper applications. Its font size has to be adjusted separately (in View | Preferences | Aesthetics), and there is no option to export pieces directly to Notebook or Journal.
All of the above applications are useful in their own right, but the centerpiece of Writer's Cafe, the place where all the real work gets done, is StoryLines. StoryLines is very cleverly put together to enable you to develop plot, characters, content, and settings simultaneously. It is based on cards that hold snippets of the plot, and onto which you can enter virtually anything. These cards can be moved around on a plotline to allow you to experiment with different plot developments by altering the sequence of incidents. Most importantly, you can have more than one plotline, so you can have a set of incidents relating to each of the protagonists in your fiction and see at a glance how what is happening to them on that plotline meshes with what is happening to other characters at the same point in the book. The ability to shuffle the cards around independently on each plotline means that you can experiment with different plot devices without having to rewrite large sections each time.
StoryLines gives you a happy medium between the "work out the plot before you begin to write" school and the "just start writing and hope that everything falls into place" school. You can work on the plotlines, and write the occasional scene out in full as you feel the urge, or you can write multiple scenes and juggle them about on the plotline to build up a more organized structure for the story.
Let's try using StoryLines to work on a brand new idea I've just had - a little piece about a family feud, which I'm going to call Romeo and Juliet. First start a new project (File | New Project...), and enter a name for it. The default is to create a blank project, but you can also import a template if you have one. You then input up to three storyline names (e.g., Romeo, Juliet, family feud) - these can be changed or deleted later (Figure 5).
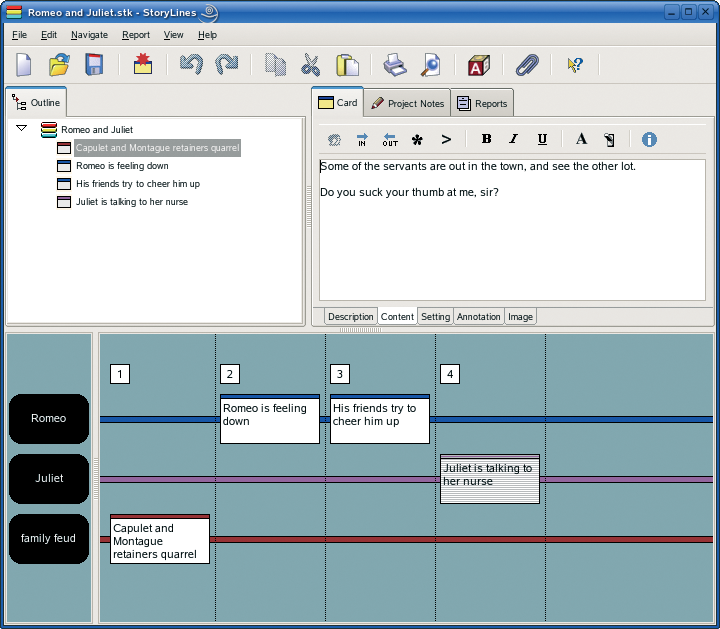
StoryLines will open with the storylines you specified in the bottom half of the screen, each with a different default color (which you can customize by double-clicking on the plotline heading at the left and clicking the color box) to enable you to keep track of which cards belong to which plotline. The top half of the screen has a project outline on the left, showing the cards in column (timeline) and plotline order, and an editor pane on the right, where a large number of attributes for each card can be edited.
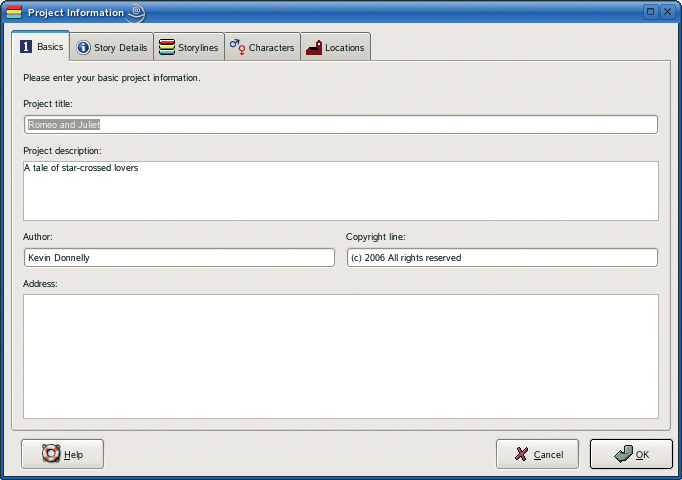
The first task is to go to Edit | Project Information... and enter some information about the project and yourself in the Basics tab (Figure 6). On the Story Details tab, you can put some summary information about what sort of fiction piece you are writing (concept, genre), the intended audience, and so on. In the ory, this is quite straightforward, but in practice it can actually help you to sharpen up your ideas about the aims of the piece. The Storylines tab allows you to add, edit, and delete plotlines, and move them up and down the list. On the Characters tab, you can enter background information about your characters (appearance, personality, strengths, desires, etc.) in order to give them greater realism when you come to write about them. You can enter information on locations in the Locations tab.
Adding new cards is as simple as pressing Ctrl+N, or clicking the new card button on the toolbar. The size of the card can be changed via View | Preferences | Aesthetics. The card will get added to the plotline, showing in the dropdown list at the top right of the screen. You can either change the plotline there or by clicking on the desired plotline at the bottom of the screen. The card will be placed in a column, which enables the plotlines to be tied together, and you can move the card to another plotline or to a new column simply by dragging it.
Several cards can be selected by using Ctrl+left-click, and cards can be dele-ted by using Alt+Del. You can label columns by clicking on the column number and entering some text, and you can also group columns together into sections to reflect chapters or acts in your story.
To start entering information on the card, use the Card tab in the top-right pane. Enter a short summary of this plot incident on the Description tab, and then go to the Content tab, where you can enter actual text for the scene or incident. As well as basic text-formatting effects, this tab has buttons to allow basic formatting for theater or film/TV scripts, which will be preserved if the project is exported to a word processor. You can also set (via View | Preferences | Content Highlighting) specific colors for individual elements such as cue, dialog, action, etc., that may make it easier to navigate through the script.
On the Setting tab, you can specify where this incident is taking place; you can either select from a list of the locations you entered earlier, or add a new one. An Annotation tab allows you to add general notes on the incident, and you can also attach images (e.g., a magazine picture of the sort of dress you imagine the heroine wearing, or a photo of the type of house the hero might covet) using the Image tab.
The top-right pane also has tabs for general project notes and reports. The Project Notes tab offers a quick way to import existing text into cards - simply copy-and-paste it into this tab, highlight sections of it, and press Ctrl+N. This gives you a new card with the relevant text on it. A slight drawback to this is that the text ends up on the description tab of the card, when it might be more appropriate in the case of longer passages to place it on the Content tab.
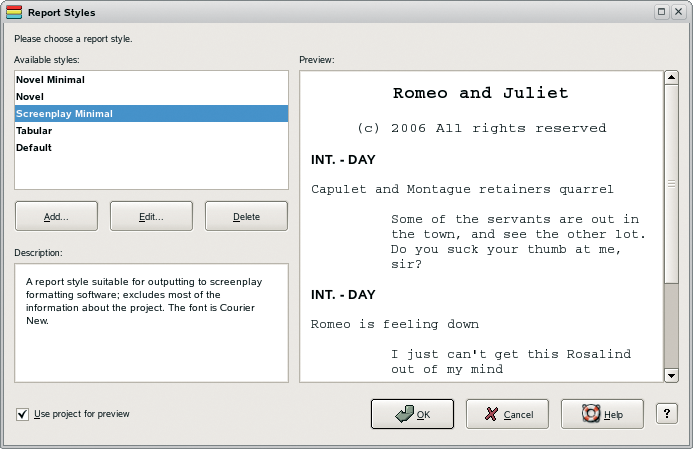
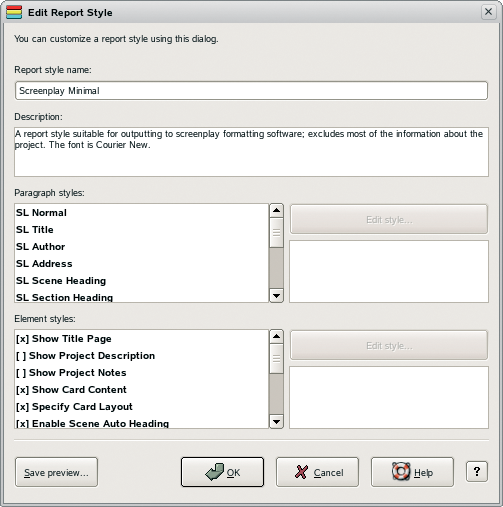
Reports are basically all the information on the cards laid out in linear format to form a connected narrative or script. Five different report styles are available (Figure 7), from tabular (reflecting the card layout), to novel (straight text) and screenplay (formatted to reflect the script conventions used in the Card | Content tab). These styles can be customized, and new ones can be added by going to Report | Report Preferences | Choose | Add, entering a name for the report and clicking OK, and then adjusting the various paragraph styles to suit your needs.
Once you are satisfied with your story, and with the layout of the report, you can export the report (via Report | Export Report) to a more traditional format. You can export to HTML, plain text, OpenOffice.org Writer, or Anthemion's own HelpView format. This allows you to make regular backups of work-in-progress in a readily-accessible format.
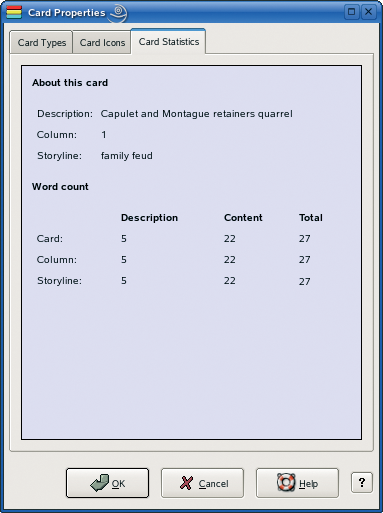
Right-clicking on any card and selecting Card Properties... | Card Statistics will give you the word count for that particular card, as well as the total for the column and plotline the card belongs to (Figure 9). However, there seems to be no way of getting a word-count for all plotlines in the piece, other than adding up the total for each plotline manually.
Card Icons, in the same dialog, allows you to add visual clues about the card contents, e.g., you can add a ToDo icon to remind you that more work needs to be done on that card. You can also import your own icons to this list.
If you have written some cards and are unclear as yet about which plotline they should be assigned to, you can store the cards temporarily in pockets. Each project has a default pocket called Scraps, but you can add more if you wish. A single card or groups of cards can be easily moved to and fro between plotlines and pockets.
Writer's Cafe addresses a niche task very effectively. It is well-maintained, with new versions coming out every 2-3 months (the most recent 1.22 version adds Unicode support, for example). The only drawback to Writer's Cafe is that it is not available under a free license. The registered version, which costs US$ 45 (37 Euros), removes the limit of 5 storylines and 30 cards in the free download and allows access to a short book on fiction-writing by Harriet Smart, which contains some good advice. Anyway, enough talking - I must go and finish my smash hit novel!
| INFO |
|
[1] Kdissert: http://freehackers.org/~tnagy/kdissert
[2] Writer's Cafe: http://www.writerscafe.co.uk [3] Anthemion: http://www.anthemion.co.uk [4] wxWidgets: http://www.wxwidgets.org |