By Gaurav Nawani
Part 1 of this two-part series on image manipulation with GIMP looked at correcting your washed out or underexposed images and white balance. Part 2 covers correcting perspective, cropping photos, and simulating depth of field with GIMP tools.
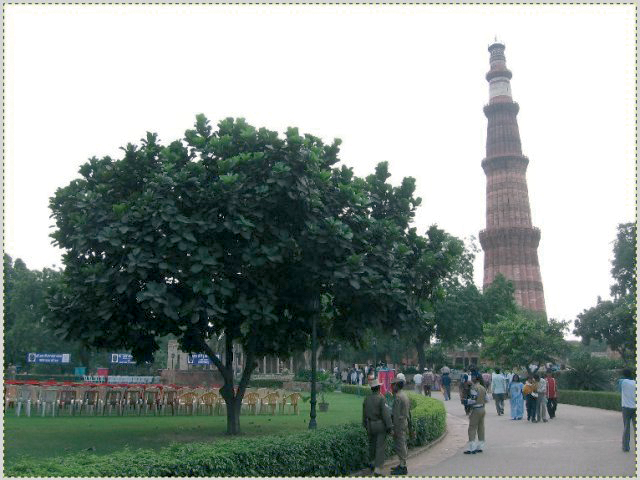
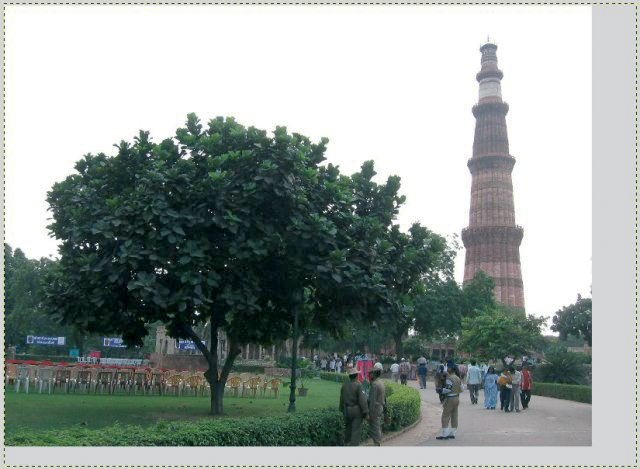
Perspective can sometimes be a problem (when photographing large monuments or buildings, for example). A tower in a photograph will appear to be tilting towards one side, or if you were standing closer to the monument itself, you would need to tilt the camera angle to accommodate the complete structure in the composition, creating the distortion of perspective.
This distortion occurs due to the larger viewing angle involved in photographing the full height of the monument.
GIMP's tool set, however, can improve the photograph. The Perspective tool from the Transform tool set allows you to correct perspective distortions in the picture.
Figure 1 shows an example of how the perspective distortion affects the photograph. The Kutub Minar appears to be leaning to the left. Luckily, you can use the Perspective transform tool to correct this distortion. First, load the image into GIMP and then select Tools | Transform Tools | Perspective to enable the tool.
Next, left click the image once. If the Perspective tool has never been used before, you will see four square points (called control points) appear on each corner of the image and a big dot will be in the center.
By default, this view will allow you to see changes interactively as you correct the perspective of the image.
Additionally, I recommend that you enable grid lines for this mode. To make the grid lines visible, go to Tool Options (see Figure 5) just below the Toolbox. In the options menu, you can set Preview to Image + Grid instead of Image and adjust the number of grid lines.
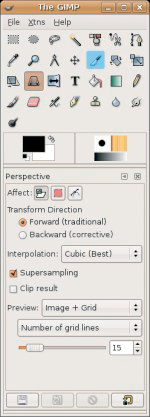
Also, change the Interpolation type to Cubic (Best) and also enable supersampling. Changing the Interpolation type will instruct the GIMP to use a better interpolation algorithm for the stretching the perspective tool will apply on the image.
To use this Perspective tool, you must first reduce the image zoom so that you can comfortably view the image inside the canvas.
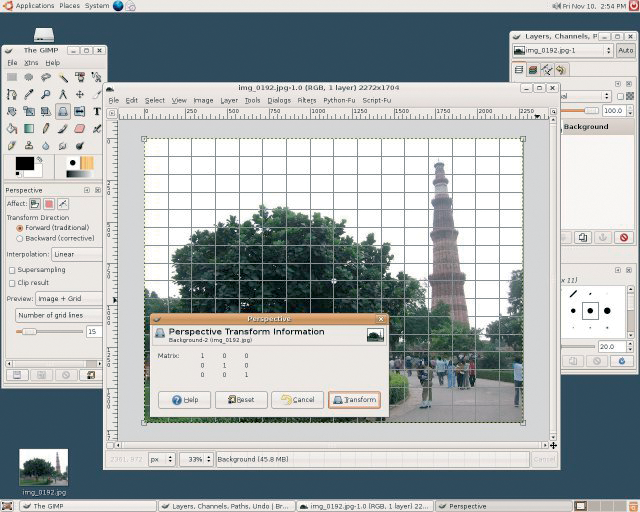
Also, stretch the canvas a little by dragging the image window corner outward, so that you can have a good border available around the image. See Figure 2 for an example screen.
You can now move the control points to improve or correct the perspective distortion. Since all four control points are independent of each other, this allows you to have good control over the image manipulation.
In the example image (see Figure 3), the two right control points (highlighted in orange) have been shifted out.

After you have adjusted the control points so that you are able to get the required correction, press the Transform button in the pop-up dialog to commit the changes.
After the perspective correction, you can see the difference between the initial and final image (see Figure 1 and Figure 4).
You will also notice that, by default, GIMP keeps the full layer size, even though some portion of it has gone out of the image border (Figure 4).
If you want GIMP to clip the part outside the image border, then you will need to enable Clip Result in the Tool Options box before using the perspective correction.
Alternatively, you can select Layer | Layer to Image Size.
Of course, all this matters only if you are going to save the image in GIMP's own image format, called the XCF, as most other common formats will lose the layer size information anyway.
Often, photographs are ruined by some unwanted elements that creep into the composition along with the main subject, or a photograph could be better if you had zoomed in on only a part of the image subject.
You can use GIMP's Crop tool to get these desired changes.
In the example image (see Figure 6), a group of ducks is central to the subject, but there is also an extraneous element - the beak of a duck, seen in the left side of the photograph.
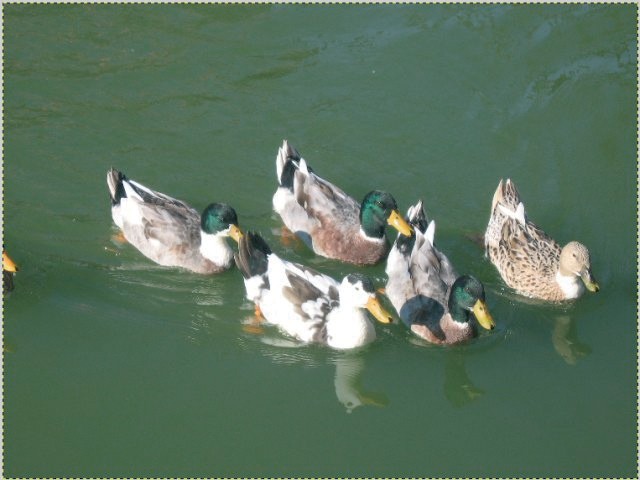
To crop out the unwanted element (in this case, the duck's beak), go to the Toolbox and click the icon that looks like an paper cutter.
The Crop tool is located before the Transform tool buttons (in Figure 5, it is highlighted in blue).
After selecting the Crop tool, left-click on the image once, which will draw out the cropping box.
The cropping box selection can be modified by moving the top-left and bottom-right points.
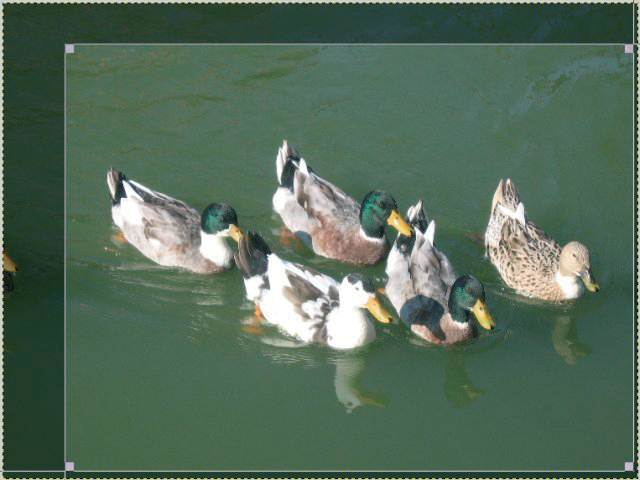
You are also able to move the cropping box by clicking and dragging the top-right and the bottom-left points. Double click inside the cropping box to crop the image, or just press the crop button in the pop-up dialog. For example, in the image shown in Figure 7, the unwanted parts have been chopped off by drawing the box over the area you want to save in the image.
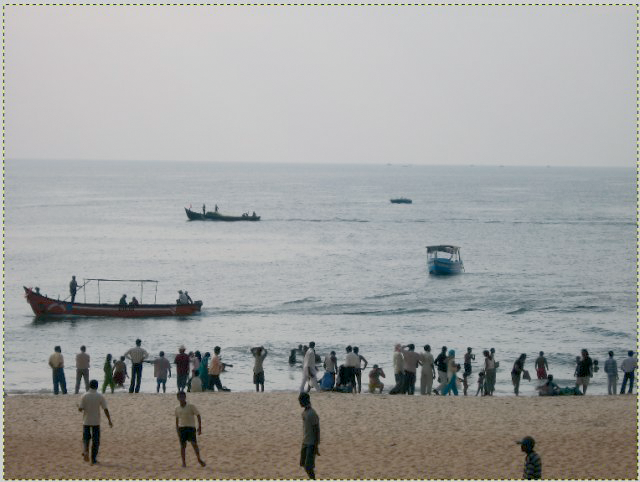
You can also partially achieve the telephoto effect by using the Crop tool to alter your photograph.
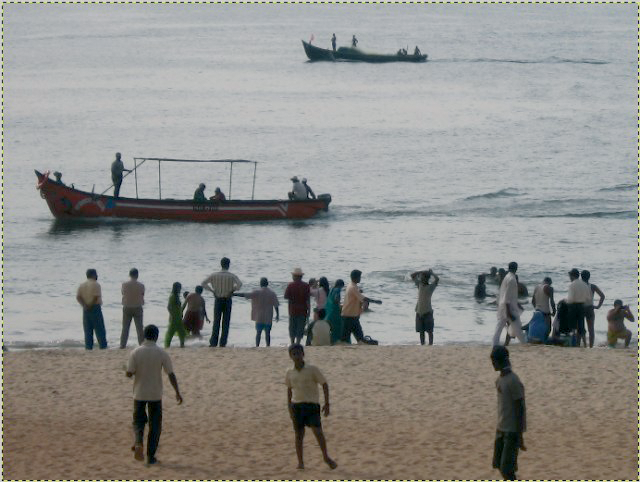
The example image in Figure 8 shows a mostly uninteresting subject area. If you zoom in to the bottom left part of the photograph, you'll notice a more interesting composition (see Figure 9). You can then select the interesting part of the image and crop it away from the original photograph.
One side effect of cropping images is that the cropped part of the photograph often loses its ability to be printed at bigger sizes. This is because the cropped area is now small. Therefore, the higher the resolution of your camera, the better the chances are that you'll be able to print the improved cropped image at larger sizes later.
| Cropping Tip |
|
The Crop & Resize dialog box allows you to keep the aspect ratio the same as that of the original image when you are cropping. You can enter the values manually, and then adjust the box position by moving it across. Draw an approximate box and then use the aspect ratio spinner buttons to increase or decrease the aspect ratio. In the example image, I kept the cropped part to the aspect ratio of 1:33 (Figure 9). |
The DOF (Depth of Field) feature, which is commonly found in high-end cameras, is a feature that allows you to focus in on one subject while the other elements in the composition that are farther or nearer than the subject get gradually blurred out.
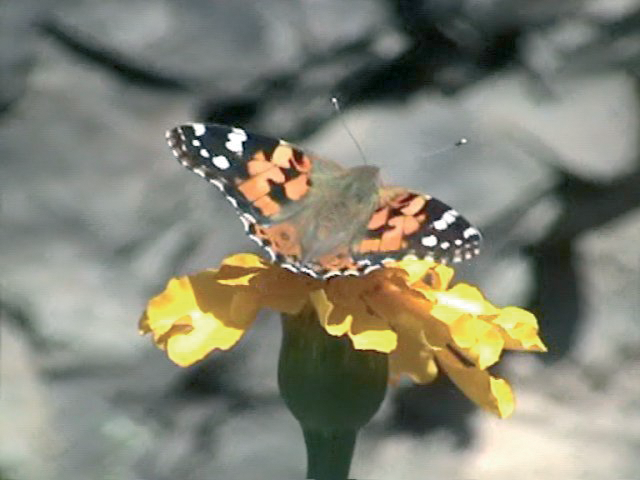
In the example image shown in Figure 10, the butterfly and the flower are in good focus, while the background is more blurred.
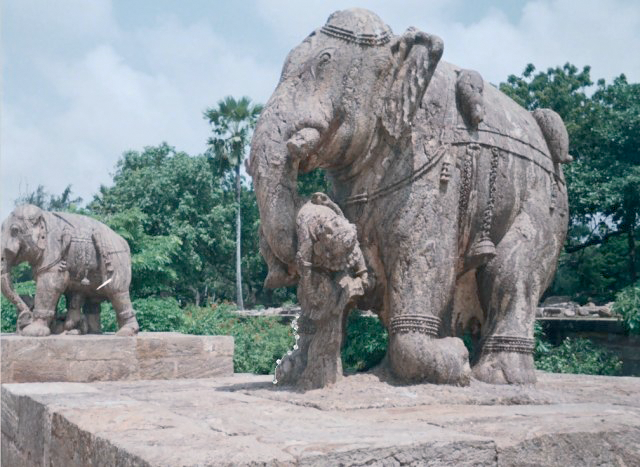
You can achieve a similar blurred background result by faking depth of field. The image before applying the DOF is shown in Figure 11.
Step 1: Using Intelligent Scissors
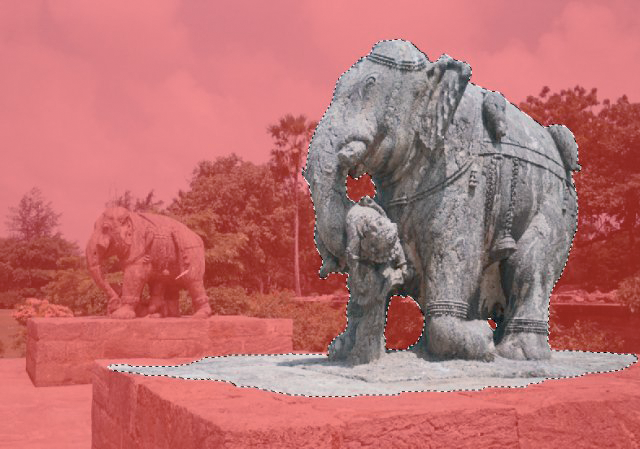
You can create depth of field on the front elephant statue by keeping it sharp, while also blurring the foreground and the background.
Start by making a selection of the front elephant statue in the photograph (see Figure 11).
Use the Intelligent Scissors tool, which can be found in Tools | Selection Tools | Intelligent Scissors. Before using the Intelligent Scissors tool, zoom in closer to the front elephant statue so that you are able to clearly make out all of the elephant's edges.
Next, make the selection by placing the first control point at the base of the left foot of the elephant statue.
Since the elephant statue and the background in the image do not have much contrast between their edges, we are going to use many close control points for the selection outline to get accurate results.
Step 2:
As you reach the end of the selection outline, close the selection outline by left-clicking the first control point while also holding down the shift key.
Then immediately left-click inside the selection outline to the activate the marching ants outline in place of the original selection outline. This confirms the active selection.
Figure 12 shows the completed outline and the number of control points needed in the example image. Depending on the object and the object's contrast with the background in the image, you might be able to make the selection by using fewer control points.
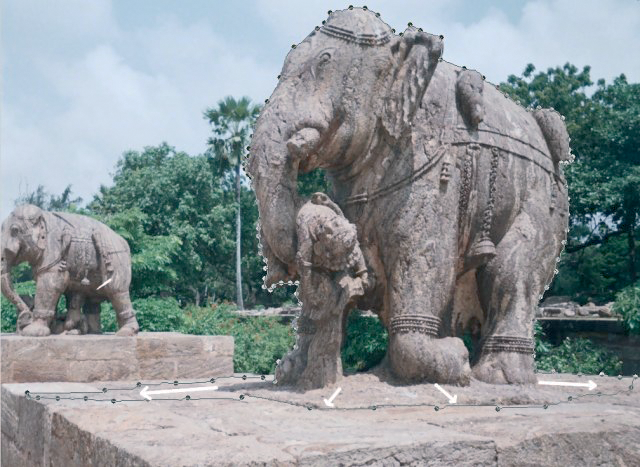
The number of control points needed for the top of the head of the statue in the photograph is fewer because of the stronger contrast. What's important when placing control points is to place them almost at the edge of the object you are selecting.
You will also notice that in Figure 12, we have actually increased the object outline (marked by white arrows) at the bottom of the statue. This was done to get a realistic depth of field effect, as the DOF will apply to all areas of the scene in the same depth of field range.
Step 3: Introduction to Quickmask
As you can see in the first image in Figure 13, the selection area (shown in red) is not perfect. It is difficult to get perfect edge detection with the scissors selection, so you can also rely on help from Quickmask.
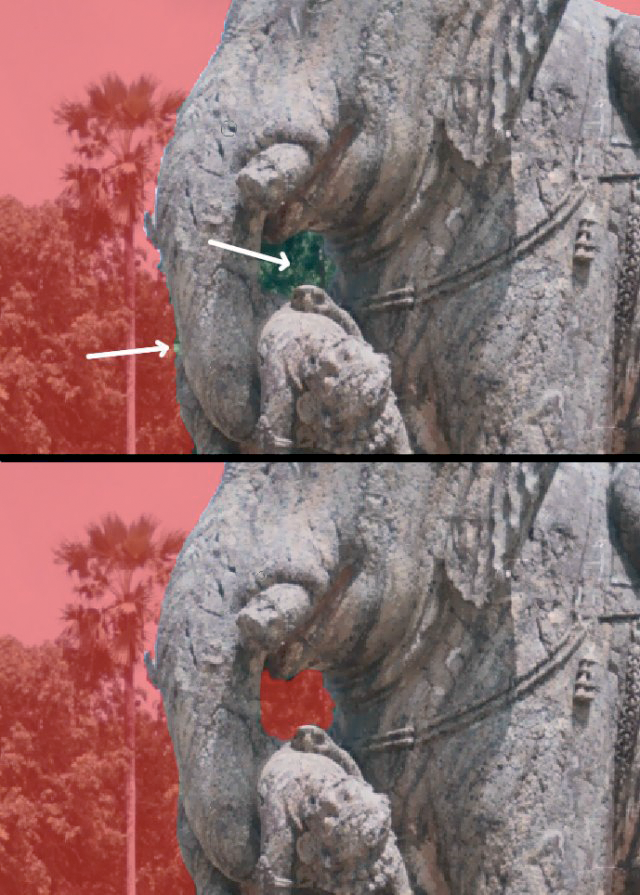
When you identify the active selection with marching ants, go to Select | Toggle Quickmask to apply a red mask to cover your selection.
The quick mask allows you to tweak the selection manually, so that you can correct imperfect edges as well as the area that was not selected previously (see Figure 13).
Step 4: Using Quickmask
To edit the selection, make sure you have selected the colors black and white colors in the color palette in the Toolbox.
Select the paint brush (the P key) and start painting over the rough edge to cover the edge in the selection.
If you make a mistake when painting the rough edge, you can use the eraser tool to erase the selection.
The second image shown in Figure 13 is after editing the selection. Note that I have also painted over the green background part, which was visible between the elephant's trunk and body in the example photograph.
Similarly, the other parts were also painted red to cover the background. See Figure 14 for the completed quick mask.
Step 4: Blurring
After you are satisfied with the Quickmask selection, return to Select | Toggle Quickmask to restore the selection. Then go to Select | Feather and enter 10 into the pop-up menu.
Because you don't want to blur the selected object (in this case, the elephant statue), go to Select | Invert to invert the selection so that you choose the background. Select Filters | Blur | Gaussian Blur and enter 10 in the radius box, then press OK.
Compare the final image that is shown in Figure 15 to the initial image, which is shown in Figure 11. You have now successfully achieved fake, but also realistic depth of field. You may be able to achieve better results by blurring multiple overlapping selections.

| Intelligent Scissors |
|
Intelligent Scissors is a semi-automated selection tool in GIMP, which significantly increases the speed of selection of objects in an image. You simply instruct the GIMP about the outline in between, and the program automatically does the edge selection. Left-click near the edge of the object to place control points. See Figure 11. Intelligent scissors will automatically generate a selection border between the control points. Keep doing this until you have completely covered the object. When you are close to the starting control point, hold the shift key and left-click the starting point to close the selection border. Immediately left click inside the selection border to grab the selection. If you click outside the border, you will lose the selection and will then have to start over. Remember that objects that have strong contrast to the background or foreground can be selected more easily. For example, you can more easily select the butterfly and flower in Figure 10 than the elephant in Figure 11. Also, for objects with little contrast, you would have to insert more edge points near the edge to guide the selection tool, as we have done in the example image. |
Editing images in GIMP is a fun, quick, and easy way to improve your less-than-perfect digital photographs. With a few simple tools and tricks, you can turn a useless image into the picture you originally envisioned.
| THE AUTHOR |
|
Gaurav Nawani is a graphic artist at IronCode Software. He is an open source enthusiast and loves writing articles as a freelance writer. Nawani is the editor and designer of Blenderart Magazine (http://blenderart.org). Apart from his usual hobbies of photgraphy and traveling, he also dabbles in cooking. |