By Michael Schilli
Regular readers will recall that last month's Perl column relied on X10 technology to transmit switching signals over normal power lines at home. In this article, I will extend the scenario to include three new devices with X10 receivers: my DSL modem (Figure 1), my DSL router, and my TiVo digital video recorder. The lights in the bedroom and living room are already connected to X10 boxes.
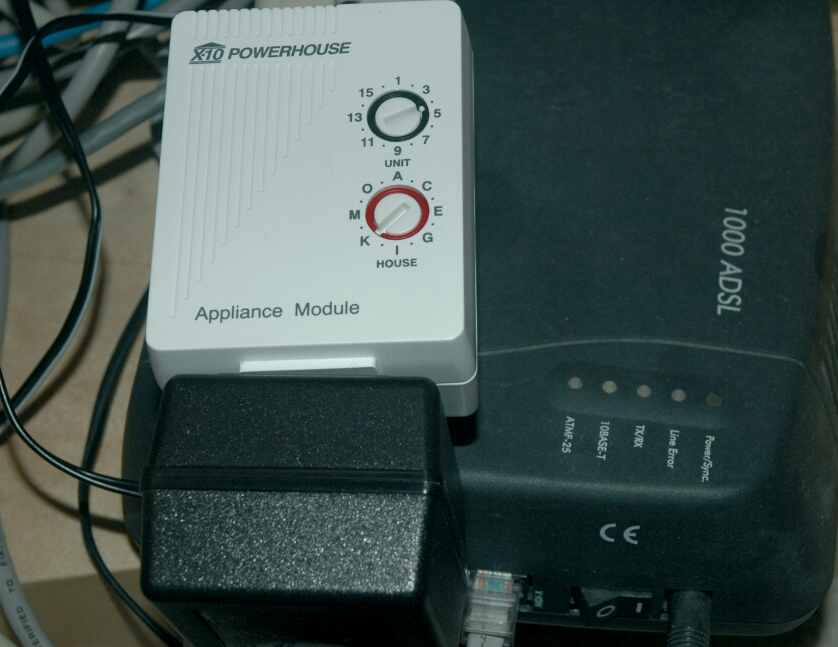
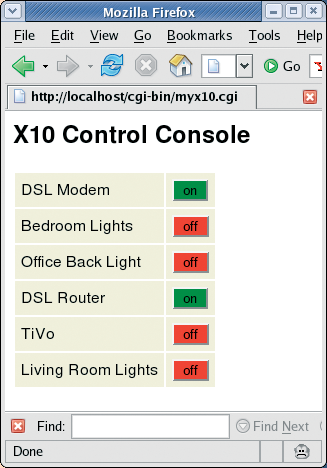
Figure 2 shows the results of running the scripts in this article. As you can see, the browser displays intuitive names for the devices in question, and a button in the right-hand column of the table for each row lights up green or red, depending on the current device status. Clicking the button toggles the device state. This all relies on state-of-the-art Ajax technology - the browser does not need to reload the whole web page, just single fields that have changed.
Every X10 device is set to a unique house and unit code that I can use to address the device via the power line. Users normally prefer to avoid having to memorize cryptic combinations of letters and numbers, which is why the /etc/x10.conf file (Listing 1) defines the accessible X10 devices in YAML format ("YAML Ain't Markup Language," a data serialization language modeled on XML).
| Listing 1: x10.conf |
01 # x10.conf Configuration File 02 03 - device: dslmodem 04 code: K4 05 name: DSL Modem 06 07 - device: bedroom 08 code: K9 09 name: Bedroom Lights 10 11 - device: office 12 code: K10 13 name: Office Back Light 14 15 - device: dslrouter 16 code: K14 17 name: DSL Router 18 19 - device: tivo 20 code: K13 21 name: TiVo 22 23 - device: livingroom 24 code: K1 25 name: Living Room Lights |
A dash at the start of a name in YAML means "this is an array element." In contrast, the colon notation separates the key/value pairs in a hash.
The configuration that is detailed in Listing 1 thus defines an array of devices wherein each device is represented by a hash that specifies values for the device name, the house/unit code, and an intuitive name in the device, code, and name keys, respectively.
The script in Listing 2 allows us to address specific devices at the command line via their mnemonic names - that is, to switch the devices on or off or to query their status:
# myx10 dslmodem on
# myx10 dslmodem status
on
| Listing 2: myx10 |
01 #!/usr/bin/perl -w 02 use strict; 03 use MyX10; 04 my($device, $command) = @ARGV; 05 my $x10 = MyX10->new(); 06 $x10->send($device, $command); |
Unfortunately, low-budget X10 modules only support unidirectional communications. You can control them, but you can not query their status. However, if you exclusively use the script to control the modem, the script will use a persistent DBM file to remember whether the receiver is switched on or off.
Of course, this can be confusing if you manually switch the device on or off without using the software, but you can easily resolve this issue by using the web GUI to switch the device on or off again, thereby returning everything back to a known state.
In Listing 3, myx10 relies on the MyX10.pm module, which then starts by first setting the baud rate and the serial interface for communications with the X10 transceiver, just as in last month's column. It then uses dbmopen() to set up a persistent DB_File-type DBM file in /var/local/myx10.db to store the assumed switching status of the device with the matching device key.
The DESTROY() method shown in line 56 closes the DBM file when the MyX10 object is destroyed.
| Listing 3: MyX10.pm |
001 #############################
002 package MyX10;
003 #############################
004 use strict;
005 use warnings;
006 use Device::SerialPort;
007 use ControlX10::CM11;
008 use YAML qw(LoadFile);
009 use Log::Log4perl qw(:easy);
010 use DB_File;
011
012 #############################
013 sub new {
014 #############################
015  my ($class, %options) = @_;
016
017  LOGDIE "You must be root"
018    if $> != 0;
019
020  my $self = {
021   serial   => "/dev/ttyS0",
022   baudrate => 4800,
023   devices  => LoadFile(
024    "/etc/x10.conf"),
025   commands => {
026    on     => "J",
027    off    => "K",
028    status => undef,
029   },
030   dbm     => {},
031   dbmfile =>
032     "/var/local/myx10.db",
033   %options,
034  };
035
036  $self->{devhash} =
037    { map { $_->{device} => $_
038    } @{ $self->{devices} } };
039
040  dbmopen(%{ $self->{dbm} },
041   $self->{dbmfile}, 0644)
042    or LOGDIE
043 "Cant open $self->{dbmfile}";
044
045  for (
046   keys %{ $self->{devhash} })
047  {
048   $self->{dbm}->{$_} ||=
049     "off";
050  }
051
052  bless $self, $class;
053 }
054
055 #############################
056 sub DESTROY {
057 #############################
058  my ($self) = @_;
059  dbmclose(%{ $self->{dbm} });
060 }
061
062 #############################
063 sub send {
064 #############################
065  my ($self, $device, $cmd) =
066    @_;
067
068  LOGDIE(
069   "No device specified")
070    if !defined $device;
071
072  LOGDIE("Unknown device")
073    if !
074    exists $self->{devhash}
075    ->{$device};
076
077  LOGDIE(
078   "No command specified")
079    if !defined $cmd;
080
081  LOGDIE("Unknown command")
082    if !
083    exists $self->{commands}
084    ->{$cmd};
085
086  if ($cmd eq "status") {
087   print $self->status(
088    $device), "\n";
089   return 1;
090  }
091
092  my $serial =
093    Device::SerialPort->new(
094   $self->{serial}, undef);
095
096  $serial->baudrate(
097   $self->{baudrate});
098
099  my ($house_code, $unit_code)
100    = split //,
101    $self->{devhash}
102    ->{$device}->{code}, 2;
103
104  sleep(1);
105
106  # Address unit
107  DEBUG "Addressing ",
108  " HC=$house_code",
109  " UC=$unit_code";
110  ControlX10::CM11::send(
111   $serial,
112   $house_code . $unit_code);
113
114  DEBUG
115  "Sending command $cmd ",
116  "$self->{commands}->{$cmd}";
117  ControlX10::CM11::send(
118   $serial,
119   $house_code
120     . $self->{commands}
121     ->{$cmd}
122  );
123
124  $self->{dbm}->{$device} =
125    $cmd;
126 }
127
128 #############################
129 sub status {
130 #############################
131  my ($self, $device) = @_;
132  return $self->{dbm}
133    ->{$device};
134 }
135
136 1;
|
If you simply wanted to test whether a specified device exists or to access the house/unit code via the device mnemonic, it would make sense to store /etc/x10.conf in a hash. However, a hash will not keep the order we originally defined, and this order is important for rendering the device list in the browser.
Therefore, lines 36-38 in Listing 3 convert the YAML array into a hash with keys that represent the device names, which have the YAML device hashes as values. The instance variable devhash stores a reference to this data structure for quick lookups. Lines 45-50 iterate over all the entries and set the persistent states for any previously untouched devices to off. This needn't be true, but if not, the next state change will bring the X10 receiver back in line with the then newly saved state.
The send() method talks to the X10 transceiver attached to my Linux box to transmit a command to the X10 receiver specified by the device name. Valid commands are on and off. On a status command, line 86 will jump to the status() method defined further down to pull the assumed status of the X10 receiver out of the hat, er, data store.
Between initializing the serial port and calling X10, MyX10.pm sleeps for a second with sleep(1). The need for this is unknown, but before I put the break in, strange X10 timing-control problems kept occurring.
Only the root user is permitted to send X10 signals via the serial port, which is why myx10 has to run as root. If you intend to control devices via a web GUI, security concerns call for the web server to run as nobody, instead of root, which is asking for trouble.
The following entry in /etc/sudoers gives you a workaround, opening up a small hole that lets the web server run the myx10 script as root via sudo without requiring a password:
# /etc/sudoers
nobody ALL= NOPASSWD:/usr/bin/myx10
The ALL keyword to the left of the equals sign specifies no restriction to specific host names. The command following the colon restricts permitted activities to the specified script. This means that, should an attacker manage to compromise your web server, they would be able to switch X10 devices on and off, but they would not be able to compromise the root account on the Linux machine. As an alternative, you could avoid the sudo trick by running chmod a+rw /dev/ttyS0 to let everyone on the machine use the serial port.
The myx10.cgi CGI (Listing 4) simply calls the myx10 command-line script and sends the script's output back to the web client. To do so, myx10.cgi uses the tap function from the Sysadm::Install CPAN module, which basically gives us a convenient way of capturing the output from a command.
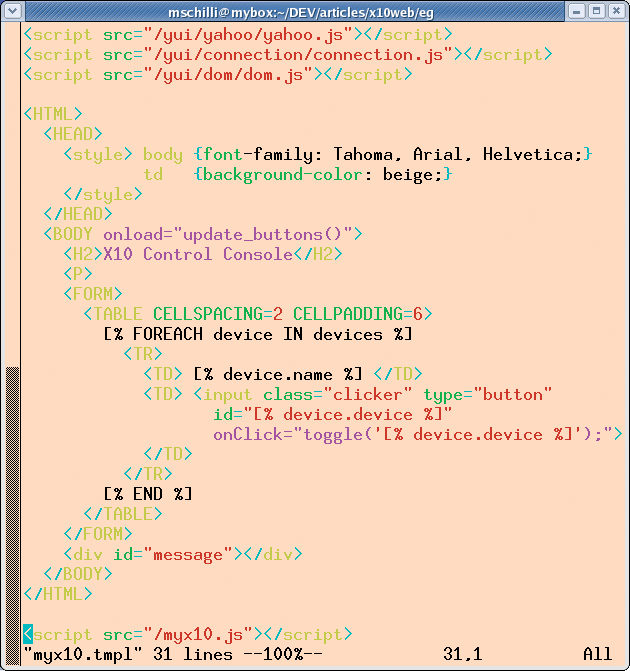
However, if the browser calls myx10.cgi without passing in any device parameters, the web client will want to see the overview shown in Figure 2. To allow this to happen, myx10.cgi loads the X10 configuration file and then calls the template toolkit processor to render the myx10.tmpl template (Figure 3). At this point, a foreach loop ensures that a column with a button is drawn for every configured device.
The onClick action for each button calls the toggle() Javascript function defined later in myx10.js, not only to handle server communications, but also to change the button color to match the results. The id for each button is set to the device name, and class is set to "clicker" to allow a Javascript function to iterate over all elements tagged in this way later.
| Listing 4: myx10.cgi |
01 #!/usr/bin/perl -w
02 use strict;
03 use CGI qw(:all);
04 use Log::Log4perl qw(:easy);
05 use YAML qw(LoadFile);
06 use Template;
07
08 print header();
09
10 my $action = param("action");
11 my $device = param("device");
12
13 if (!defined $device) {
14  my $devices =
15    LoadFile("/etc/x10.conf");
16
17  my $tpl = Template->new();
18  $tpl->process("myx10.tmpl",
19   { devices => $devices, })
20    or die $tpl->error();
21  exit 0;
22 }
23
24 if (!defined $action
25  or $action !~
26  /^(on|off|status)$/)
27 {
28  print
29 "Error: No/Invalid action\n";
30  exit 0;
31 }
32
33 if (!defined $device
34  or $device =~ /\W/)
35 {
36  print
37 "Error: use proper device\n";
38  exit 0;
39 }
40
41 system "sudo",
42   "/usr/bin/myx10", $device,
43   param("action");
|
Modern web applications no longer reload whole pages when a user presses a button. Instead, web server communications are handled asynchronously via Ajax, and only those elements that have changed are redrawn. Because Ajax is fairly difficult to program and excessive use of Javascript can cause hair loss, a number of Javascript libraries simplify this task and guarantee browser compatibility at the same time. One example of this is the YUI library by my employer, Yahoo, which is available free of charge and without registration. A zip file [2] contains all the Javascript files you will need in its build directory.
After completing the download, just unpack the zip archive and copy the build directory to, for example, htdocs/yui on the local web server. From now on, Javascript applications can load .js files, such as src=/yui/yahoo/yahoo.js, for example.
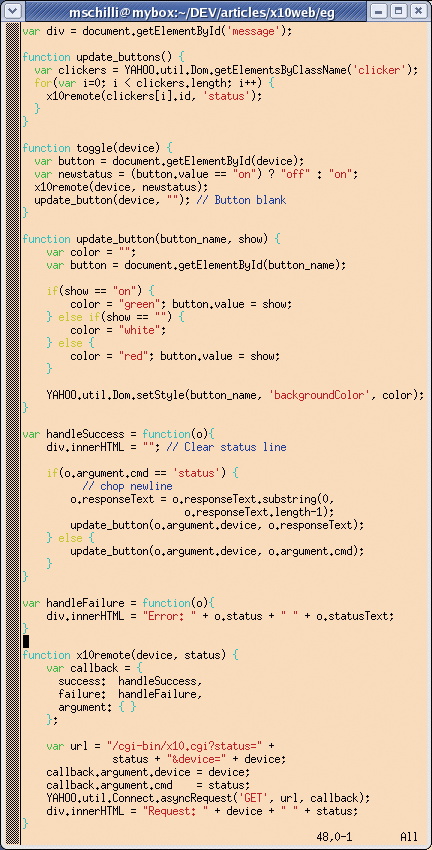
The myx10.js file (Figure 4), pulled in at the end of myx10.tmpl, defines the update_buttons() function, which the browser calls after loading the document. This ensures that the browser calls the server to obtain the status of every configured device at page load time:
x10remote(device, 'status');
To do this, the Javascript code uses YAHOO.util.Dom.getElementsByClassName() from YUI, which is called to return any DOM nodes tagged with the class="clicker" attribute.
To query the status of an X10 receiver configured in /etc/x10.conf, the browser asynchronously calls the CGI script for each defined button passing in the device=mnemonic and action=status parameters. myx10.cgi then checks its DBM file on the server and returns the last known state of the specified X10 device as on or off.
The Javascript file myx10.js displays the buttons for actuated X10 receivers in green and de-actuated receivers in red.
This action is handled by the Yahoo.dom class's setStyle method, which accepts a browser DOM object name, searches for the object, and modifies the BackgroundColor attribute of the CSS style sheet. The first time the HTML page generated by the CGI script is loaded, the buttons do not have a color assignment, but update_buttons() sends an Ajax request for each button to the server, which then checks the DBM file to query the status of the device that is in question.
When a response to an asynchronous request arrives, the button is checked to see whether it is on or off, and the button in question is painted accordingly.
The YUI Connection Manager is used here to keep the Javascript code manageable despite dozens of simultaneous requests.
When a user clicks one of the buttons, the browser jumps to the OnClick() routine for the button, which first refreshes the status line with a message such as Request: device on before going on to send an Ajax request to the server via the Connection Manager.
For example, the request for switching on the DSL modem looks like this:
/cgi-bin/myx10.cgi?device=dslmodem&action=on
The only interesting thing about the asynchronous response that arrives later is the HTTP status code.
If the status code is 200 (OK), the browser jumps to the Javascript handleSuccess() routine, where it first deletes the status line before calling update_button() to change the color assignment for the button because a state change has occurred.
After querying the status with action=status, the server will respond with either on or off on the page it returns. Because the response is terminated by a newline character, the Javascript code first removes the newline before passing it on to the update_button() function.
If an error occurs on handling the asynchronous request, the YUI connection manager will jump to handleFailure().
The function prints the status code and a legible error message on the status line to alert the user.
This logic is provided by a callback object that is defined in myx10.js. Besides the two jump points for the error and success cases, myx10.js also defines arguments to pass to the callback functions at the end of a request.
The following lines
callback.argument.device= device;
callback.argument.cmd= action;
set the mnemonic for the device that has just been modified (conveniently used as the id setting for the corresponding button as well) and the command to be transmitted. This helps handleSuccess() link the response to one of the many asynchronous requests that might have been sent.
The first time the page is loaded, half a dozen Ajax requests can occur simultaneously, and it can take a while for the buttons to change to reflect the assumed device status.
Users can also trigger multiple quasi-simultaneous requests by clicking buttons in quick succession.
The Connection Manager makes it easy to keep track of and to process responses one after another without mixing up the requests.
Because the server-side X10 command takes a couple of seconds to execute, a button will typically not have a color assignment for a couple of seconds after you click it.
The nice thing about asynchronous requests is that you can carry on using the GUI (clicking buttons, that is), and the GUI will keep responding happily.
Store the myx10 script in /usr/bin and make the script executable. Make sure the script is owned by root and that it cannot be modified by anyone else. Then store the MyX10.pm Perl module in your Perl path (for example, /usr/lib/perl5/site_perl).
Add the names and data for your local devices to your /etc/x10.conf configuration file, not forgetting the house and unit codes for the X10 receivers.
You need to make the myx10.cgi CGI script executable and drop it into your web server's cgi-bin directory, which is also where you will need the myx10.tmpl template so that myx10.cgi can find it.
You need the myx10.js Javascript file in your web server's htdocs directory because the browser will look for it at this location (last line of myx10.tmpl).
After completing all of these tasks, you can sit back, relax, and press the buttons on the web interface to switch the corresponding devices on and off.
If you are near enough, you will even hear the relays on the X10 appliance modules clicking. Now that's what I call convenient!
| INFO |
|
[1] Listings for this article: http://www.linux-magazine.com/Magazine/Downloads
[2] Yahoo YUI library: http://developer.yahoo.com/yui |