By Dmitri Popov
What to eat for dinner is one of the many decisions we make each day. Unfortunately, you can't just get your favorite food every day if you want to eat a balanced diet and stay healthy. You may need to spend time trawling cookbooks and the web for nutritious dinner ideas.
However, with a nifty KDE-based application, you maintain a recipe database, quickly find a particular dish, find recipes based on one or more ingredients, manage your diet, compile shopping lists, and much more. This wonder application - Krecipes - is available with most KDE-based distributions, like Kubuntu and PCLinuxOS [1].
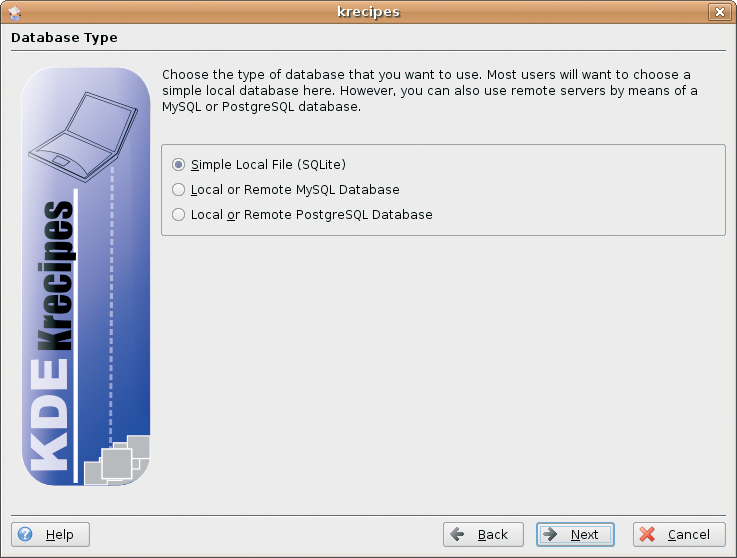
When you run Krecipes for the first time, it launches a configuration wizard that guides you through the entire setup process. The first thing you have to decide is what database to use. Krecipes supports three database engines: SQLite, MySQL, and PostgreSQL. SQLite is the default engine, and it allows you to store your recipe database on your hard disk. The MySQL and PostgreSQL databases are more difficult to set up, but they allow you to store your recipes in a remote database that you can access from multiple computers.
Setting up these databases requires some technical knowledge, and you might want to choose SQLite to keep things simple. Next, you must decide whether you want Krecipes to include sample recipes and USDA nutrient data. The latter provides useful information about more than 400 food items. Each item in the database contains 43 properties such as energy, fat, vitamin C, etc. It takes Krecipes a bit longer to install and configure the data, but it's well worth the waiting.
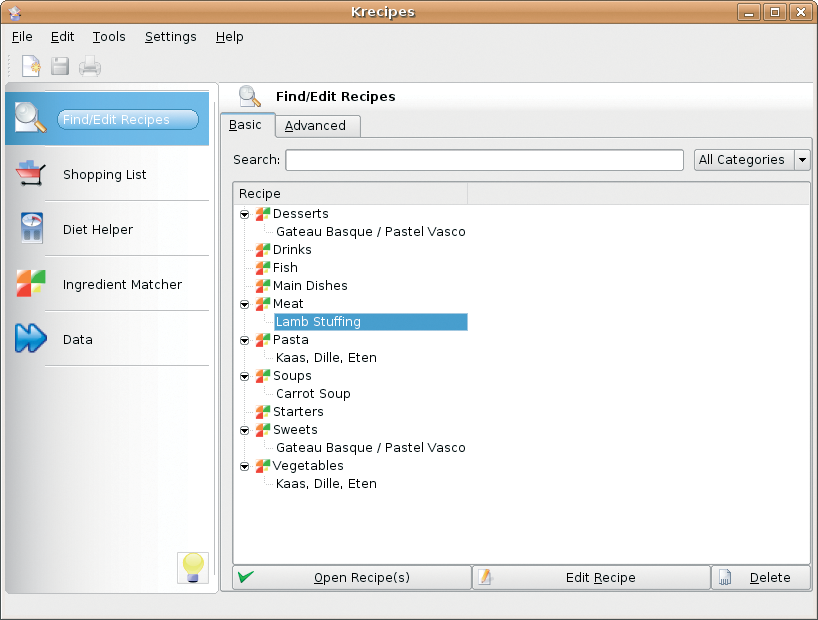
Before you start using Krecipes, I'll take a closer look at its interface. Krecipes' main window is divided into two panes. The left pane contains shortcuts to the application's main sections: Find/Edit Recipes, Shopping List, Diet Helper, Ingredient Matcher, and Data. The right pane contains the interface to the currently selected section.
As the name suggests, the Find/Edit Recipes section allows you to quickly find and edit recipes. The Find window has two tabs: Basic and Advanced. If you only have a few recipes in your database, you can quickly locate the one you want by browsing categories under the Basic tab. Once you've found the recipe, you can double-click on it (or press the Open Recipe(s) button) to view its detailed description. You can use the Find section not only to search for recipes, but also to perform different actions on them. For example, right-click on the selected recipe and you will see a list of available actions. The actions allow you to delete, export and edit, or add the recipe to the shopping list.
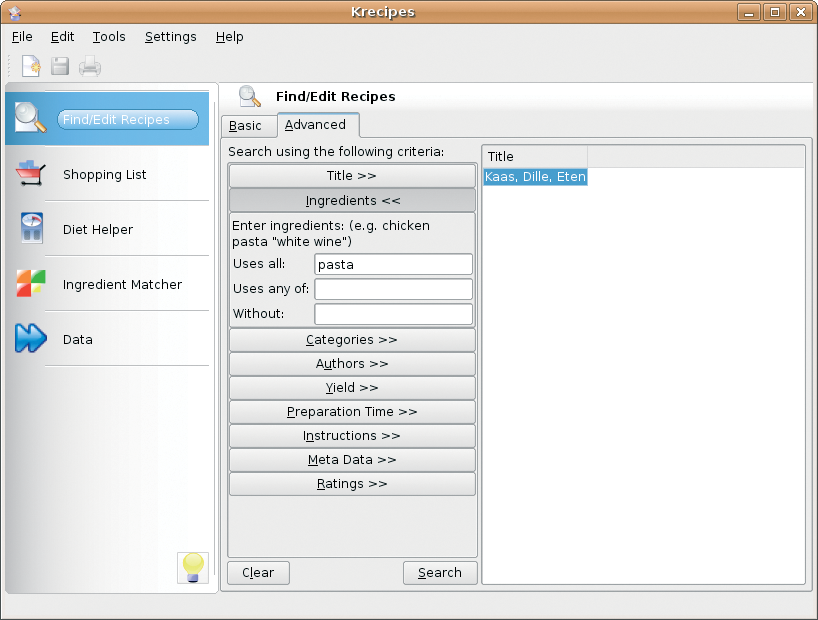
The Advanced tab contains more powerful search features that can be helpful when you want to search for recipes by specified ingredients, title, author, and preparation time. You can also put this feature to some creative use. For example, if you can't come up with a good dinner idea, you can take a look at what ingredients you have in the fridge. Under the Advanced tab, the Ingredients button allows you to type the ingredients you've found in your fridge into the "Uses all" or "Uses any of" field to find recipes you can use. If you are too hungry (or tired) to spend more than half an hour cooking dinner, you can press the Preparation Time button and specify the desired preparation time.
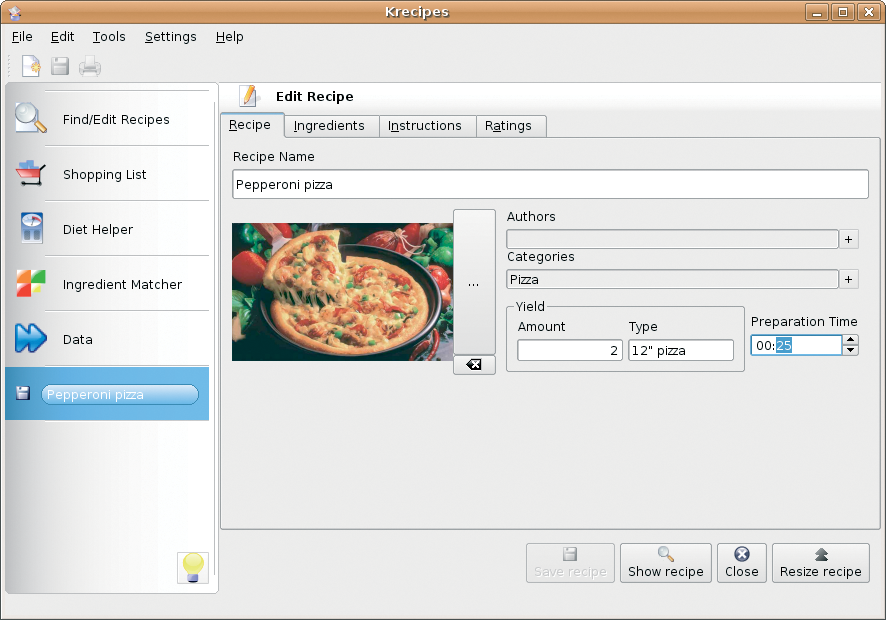
Of course, before you can make use of Krecipes' search capabilities, you have to populate it with recipes. Adding a recipe to the database is pretty straightforward. The New Recipe button in the main toolbar causes a new blank recipe to appear in the right pane. Under the Recipe tab, you can give your recipe a name and fill out the Category, Yield, an Preparation Time fields. Most of these fields are optional, but it's a good idea to fill them out anyway so you can find the recipe quickly with different search criteria. To make your recipe more appealing, you can also add a picture to it. Next, you have to add the required ingredients under the Ingredients tab. To enter a new ingredient, you use the Ingredient, Amount, Unit, and Preparation fields: for example, Pepperoni, 4, oz, sliced, respectively. Pressing the Add ingredient button adds it to the list. Krecipes is clever enough to remember all the entered data, so next time you need to add pepperoni, you can simply choose it from the list. The same is true for other fields as well. Better yet, instead of selecting the ingredient from the list, you can start typing its name, and Krecipes completes it for you as you type.
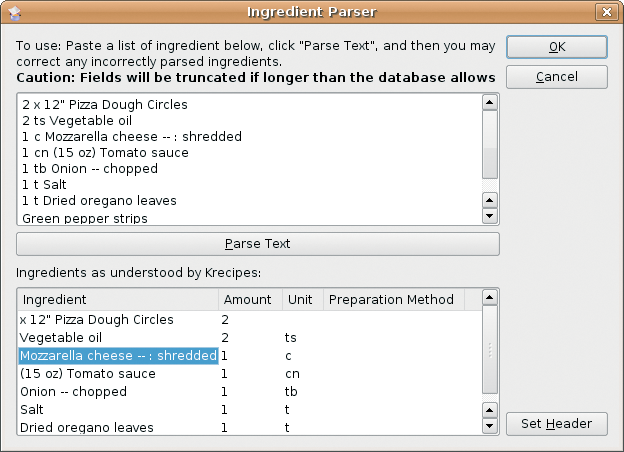
If you've found a recipe on the web or it was sent to you via email, you can use another Krecipes feature to get ingredients into the database by selecting the text containing the ingredients and copying it into the Clipboard (Ctrl+C). Under the Ingredients tab, press the Paste ingredients button opens the Ingredient Parser with the selected text inserted in the upper window. Now you can press the Parse Text button, and with a bit of luck, Krecipe puts the data into the appropriate fields. A press of the OK button inserts the ingredients. This feature works surprisingly well, and it can be quite a timesaver.
Next, you click on the Instructions tab to enter the cooking instructions (you can also check spelling by pressing the Spellchecker button). Finally, to add a rating for the recipe, you click on the Ratings tab, and press the Add Rating button to create a rating. The dialog window can be used to rate the recipe.
Krecipes allows you to add multiple ratings from different users, which can come in handy if you want your friends and family to rate the recipes in your database. Once you've filled out all the necessary fields, you can press the Save recipe button.
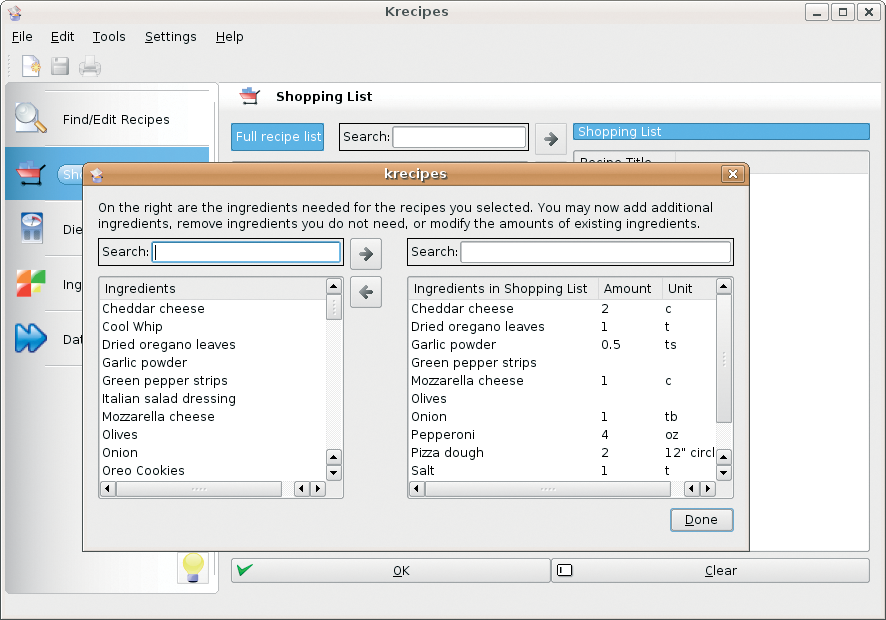
One of Krecipes' most useful features is its ability to generate shopping lists. Krecipes can create a shopping list in two ways. The fastest and easiest way is to locate the recipe you like in the Find/Edit Recipes section, right-click on the recipe, and select Add to Shopping List. If you switch to the Shopping List section, you will see the recipe in the Shopping List window. Alternatively, you can locate the desired recipe directly in the Shopping List section and add it to the Shopping List window by pressing the right arrow button. You can add as many recipes to your shopping list as you like. When you are done, the OK button opens a separate dialog window, in which you can add other items to your shopping list (e. g., you can add tomatoes and onions, even though they are not included in the selected recipes). When you press Done, Krecipes generates a print-ready shopping list.
Sometimes you might want to share recipes with your friends and family, or perhaps you already have a recipe collection in another application. Krecipes supports several recipe formats, so you can easily share your recipes with other cooks, even if they use different applications. The easiest way to export a recipe is to locate it in the Krecipes database, right-click on it, and select Export. However, you should be careful about which export format you choose.
If the recipient also uses Krecipes, then you can use one of the application's native formats: kre or kreml. If you are not sure what program the recipient uses, then your best bet is to select either the RecipeML or the plain-text formats. Krecipes can also export the recipe as an HTML file, which can come in handy if you want to publish the recipe on your website.
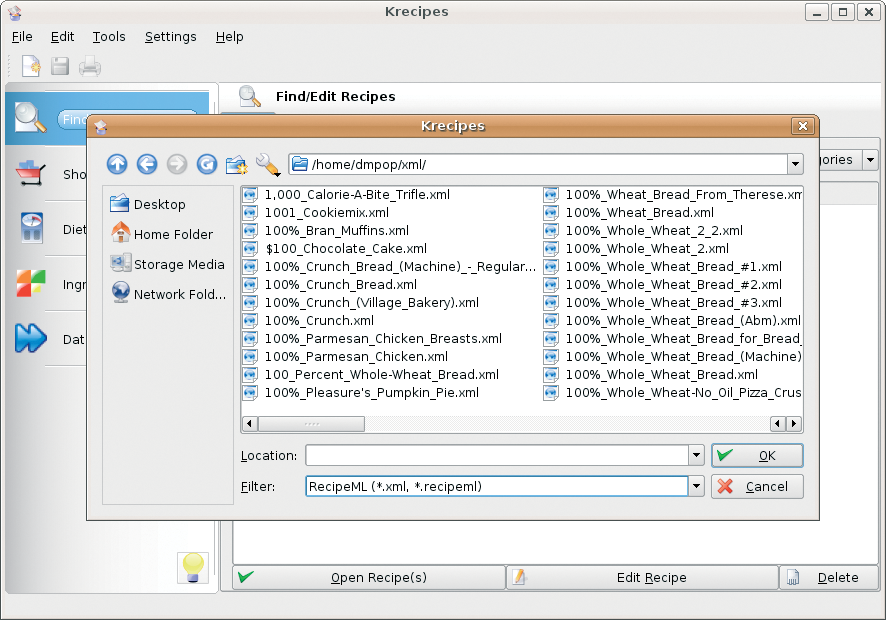
Krecipes can also import recipes in several different formats. If you want to give the Import feature a try, you might want to take a look at Squirrel's RecipeML Archive, which contains an impressive collection of recipes in the RecipeML format [2]. Start by downloading a zipped archive and unpacking it. In Krecipes, choose the File | Import menu item, and point to the recipe you want to import. Make sure that Krecipes has picked up the correct categories for the recipe before pressing OK. That's it!
These are just a few of the many useful features Krecipes has to offer, and the application is much more than meets the eye. Krecipes' official manual contains some more tips, so check it out to get the most out of this great application [1]. Happy cooking!
| INFO |
|
[1] The Krecipes handbook: http://docs.kde.org/development/en/extragear-utils/krecipes/
[2] Squirrel's RecipeML Archive: http://dsquirrel.tripod.com/recipeml/indexrecipes2.html |