
By Tim Schürmann
Thanks to the abundant sunshine, this year's winter break was more a time for strolling in the park than for skiing. Of course Linux users always have something to do on a rainy day, and one of my favorites is reliving memories with a free (as in beer and freedom) video-editing tool.
If you think Kino is too spartan and Cinelerra is too overloaded, LiVES (LiVES is a Video Editing System) is an interesting alternative [1].
Most current distributions do not include LiVES, and that leaves amateur movie makers no alternative but to go for the source code archive; I used version 0.9.8.2 [2]. To convert the archive to an executable, you first have to resolve a whole bunch of dependencies (see the "Dependencies" box for details). Don't forget to install the developer packages in each case.
Most of the developer packages are easily identified thanks to the -devel or -dev suffix in their names (but you can't rely on there being a developer version for each package).
If you don't have all of these packages, LiVES will disable a couple of functions, but you might not realize this has happened until it's too late. For example, the last three packages mentioned in the box are required to access digital cameras. If you forget them, it's up to you to transport your video material to disk in some other way.
Also, LiVES refused to cooperate with the Jack version included with SUSE Linux 10.0. You need to replace the Jack package with a later version, or do without a real-time video preview.
You definitely need MPlayer - without it, LiVES simply refuses to run. Unfortunately, some distributions do not include MPlayer for licensing reasons.
If this is true of your distribution, you need to download MPlayer off the Internet [3]. To compile the package, you need the X11 developer packages.
Next, you'll need to unpack the MPlayer source code archive in a directory of your choice, pop up a terminal window and build MPlayer with the commands ./configure, make, and sudo make install.
Ubuntu users can simply enable the Universe repository in their /etc/apt/sources.list file and add an entry for multiverse to the existing universe entry. After updating the package list, you should have MPlayer.
As a SUSE user, just add the Packman repository as an additional install source for YaST by entering the address ftp://packman.iu-bremen.de/suse/10.X, replacing the X with your distribution's version number, then installing the required packages using YaST.
After resolving all dependencies, you can unpack the LiVES archive and create the video editing program by entering ./configure, make, and sudo make install.
| Dependencies |
|
Fasten your seat belts - here comes the list of packages that you need to compile LiVES:
The following packages are recommended but not mandatory:
|
To launch the editing software, you just need to enter lives in a terminal window. Then a message box appears, telling you to take a look at the preferences before you move forward.
Acknowledge the message, and select Tools | Preferences to comply. The Themes and Directories tabs are the first you need to pay attention to. You can use the Themes tab to modify the appearance of LiVES, which is purely cosmetic and does not affect functionality in any way, then use the latter to specify a couple of important directories (see Figure 1).
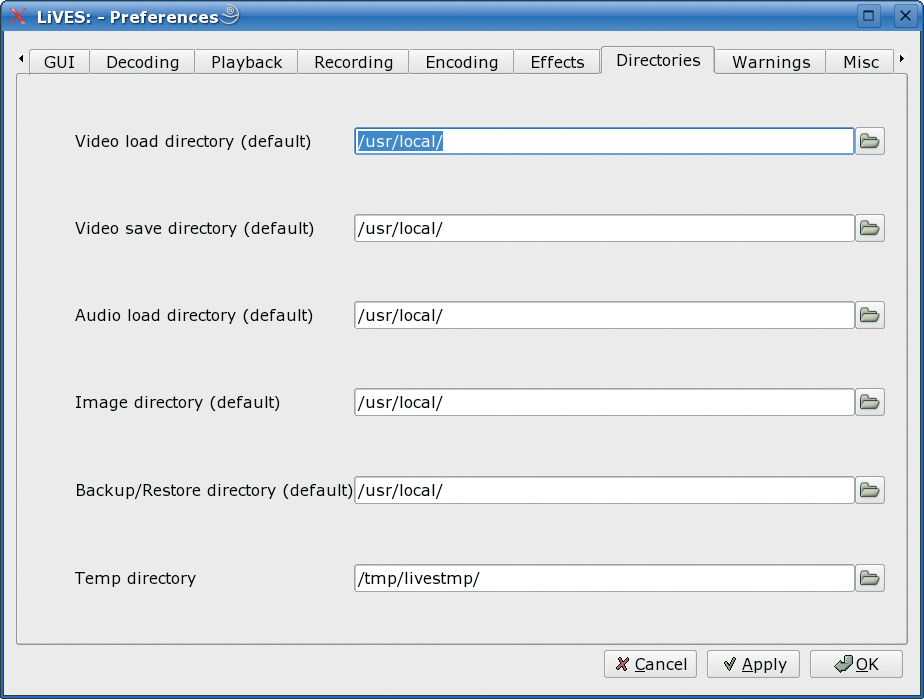
The Temp directory is a working directory, and should be on a fast disk with as much free space as you can muster. Give LiVES at least twice as much disk space as the total volume of raw video material.
The other directory entries are just defaults that LiVES will use in dialog boxes later on. Click OK to return to the main window when you're done.
Before you start editing, you need to get your movie material onto your disk somehow. LiVES supports digital cameras with a firewire interface (also known as iLink or IEEE1394), and any fairly recent amateur camera should have one.
All you need to do is wire your camera up to the matching connector on your PC and switch to play mode. If your PC does not have a firewire interface, you'll need to buy a firewire extension board.
In the main menu of LiVES, select File | Import from Device | Import from Firewire Device (dv). The dialog box shown in Figure 2 appears.
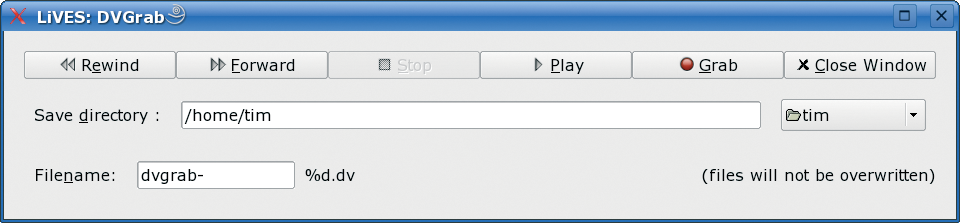
Press the buttons at the top right of the toolbar to Play, Forward, or Rewind. Note that LiVES will not display a preview. You need to follow events in the viewer or LC display on your camera.
After locating the start of the first scene you need for the finished video, click Grab and press Stop after grabbing the scene. The video material is stored in a file named after the entry in the Filename box.
The movie will be located in the directory named in the Save directory box. Make sure the directory has enough free space; a single minute of digital video takes up 200MB of disk space.
Unfortunately, LiVES does not auto-detect scenes. You will need to repeat the whole thing for the next scene, but at least the software appends a three-digit serial number and a .dv suffix to the filename. After grabbing all the scenes you need, you can click Close Window to return to the main window.
Now that you have the raw material on your disk, you can load the first scene using the File | Open File/Directory menu item. In the dialog box that appears, select the video file you need. As an alternative, you can select File | Open File Selection, which allows you to load a excerpt from the file.
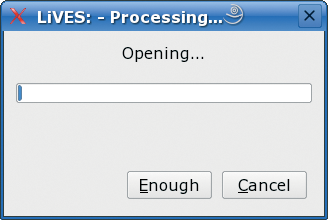
In both cases, LiVES will convert the video material to its own proprietary format when you click OK. Depending on the file type and compression level, converting a snippet of movie material can take a couple of minutes.
LiVES does not give you a preview while this is happening, and the progress indicator hangs around in the low percentages. The only way you can tell your computer is still alive is by the hard-disk activity. If this takes too long for your liking, you can either Cancel completely or say that you have Enough converted material for the time being (Figure 3).
After converting, LiVES will always work with a copy created by a background operation, which protects the original file against manipulation.
At the same time, you can apply and calculate video effects more quickly, at least in theory. In real life, calculating some video effects takes far longer than comparable applications.
After loading a video file, you should have something like the results in Figure 4. You can edit the video to your heart's content in this view, and you can apply effects to match.
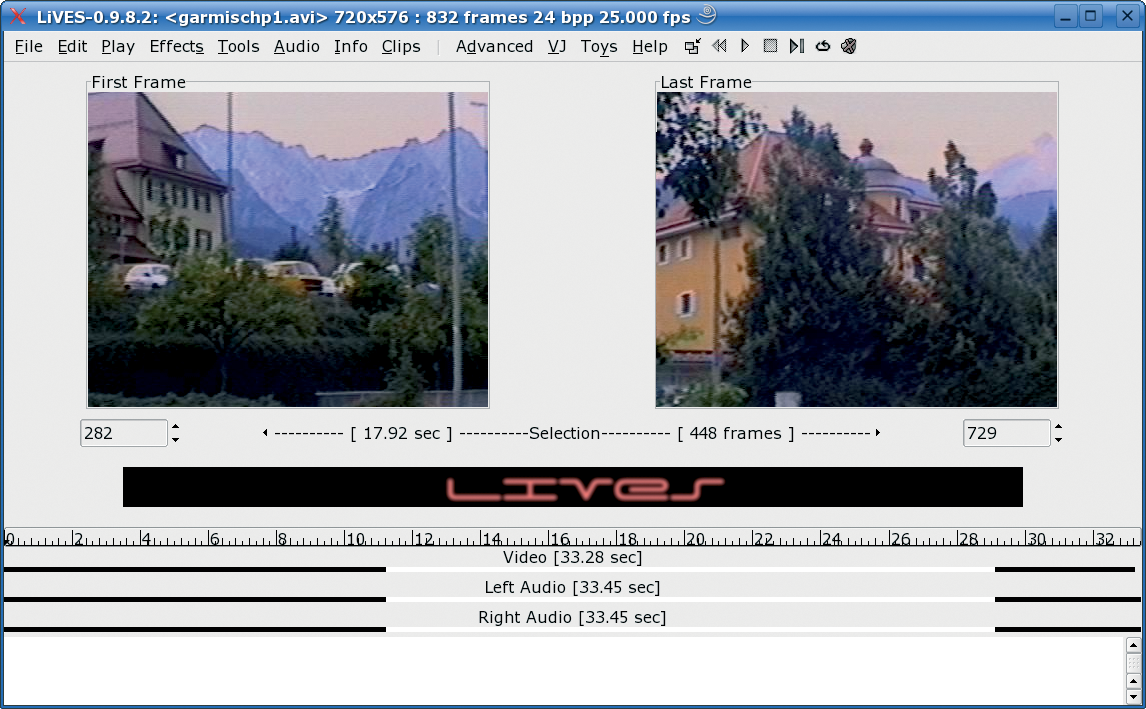
The icons in the top right of the menu bar let you play, stop, or rewind the movie. You can see two previews below the menu bar, and a timeline below the previews that tells you the total length of the video in seconds. In the white area at the bottom of the screen, LiVES occasionally displays text information.
In my sample video, a car just happened to drive through the picture right at the start, and that sort of spoiled the panoramic view of the surrounding hillside. The first thing I would like to do is get rid of the car. To do so, I need to select the section where the car is visible.
The left preview shows what is currently the first frame in the movie, and the second preview shows the last frame. Below this are two input boxes with the frame numbers. Between them, the two values in square brackets next to Selection tell the number of frames in the current selection and the corresponding seconds of video. Right now, the whole video is selected, and that means that any ensuing actions will affect the whole scene. Because I just need to cut the section with the car, I move the end of the selected area down in the right input box until the car disappears from the screen.
While you are making changes, it makes sense to keep an eye on the lines below the timeline. The narrow black bars illustrate that the video comprises a Video track and two audio tracks (Left Audio for the left channel and Right Audio for the right channel).
The black sections outside the two white bars show you which part of the timeline you are now editing. At the same time, the white bars speed up the selection process: you can click anywhere to the left or right of the white bars, hold the mouse button down, and drag the mouse slowly in the required direction to move the start or end of the selected area.
To check your selection, press Play | Selection. You should only see the part of the video that you want to cut. Then press Edit | Delete Selection to get rid of the scene with that pesky car.
After removing the ballast from your video, you might want to improve the results. A collection of effects in the Effects menu helps you to do so. For example, there is a Colour Filter, and hidden down at the bottom is a simple title generator (Text Overlay).
After deciding on an effect, a new window pops up, as shown in Figure 5. On the left side, you will see the parameters that you can use for granular control of the effect.
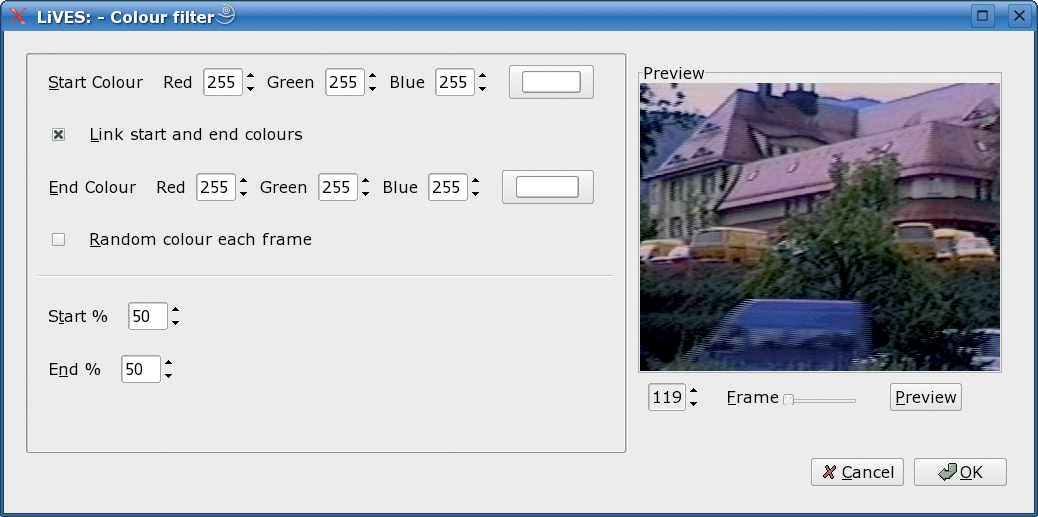
On clicking Preview, you see the results of the current settings in the small window on the right. You can expect some delays here, and at times, it might seem as if the program has crashed.
After tweaking the video to achieve the effects you want, go on to load the next video file for editing.
You can easily toggle between the videos you have loaded and modified from the Clips menu. After putting together all the scenes you need for your vacation video, you can complete your masterpiece at the next step, but first save all that hard work.
Unfortunately, LiVES discards any changes you have made to the video when you quit the program. To prevent this, you need to save your work by selecting File | Backup as .lv1.
Because LiVES not only stores all your settings, but also all your movie material in the file, it will use a fair amount of disk space.
Before you opt to save, make sure you enable File | Save/Load/Backup with Sound in the menu to avoid losing your soundtrack.
After saving a backup, you can load it again via the File | Restore Clip from .lv1 menu item.
LiVES' standard operating mode is known as Clip Mode. To compile a movie from video snippets, you first need to change to multitrack mode. This mode is hidden in the Edit | MULTITRACK mode menu item. LiVES will open a new dialog box which prompts you for the characteristics of the complete movie.
If you are working with a digital video camera, you might need to select a video standard, such as PAL, depending on your location. After clicking OK, LiVES switches to multitrack mode (Figure 6).
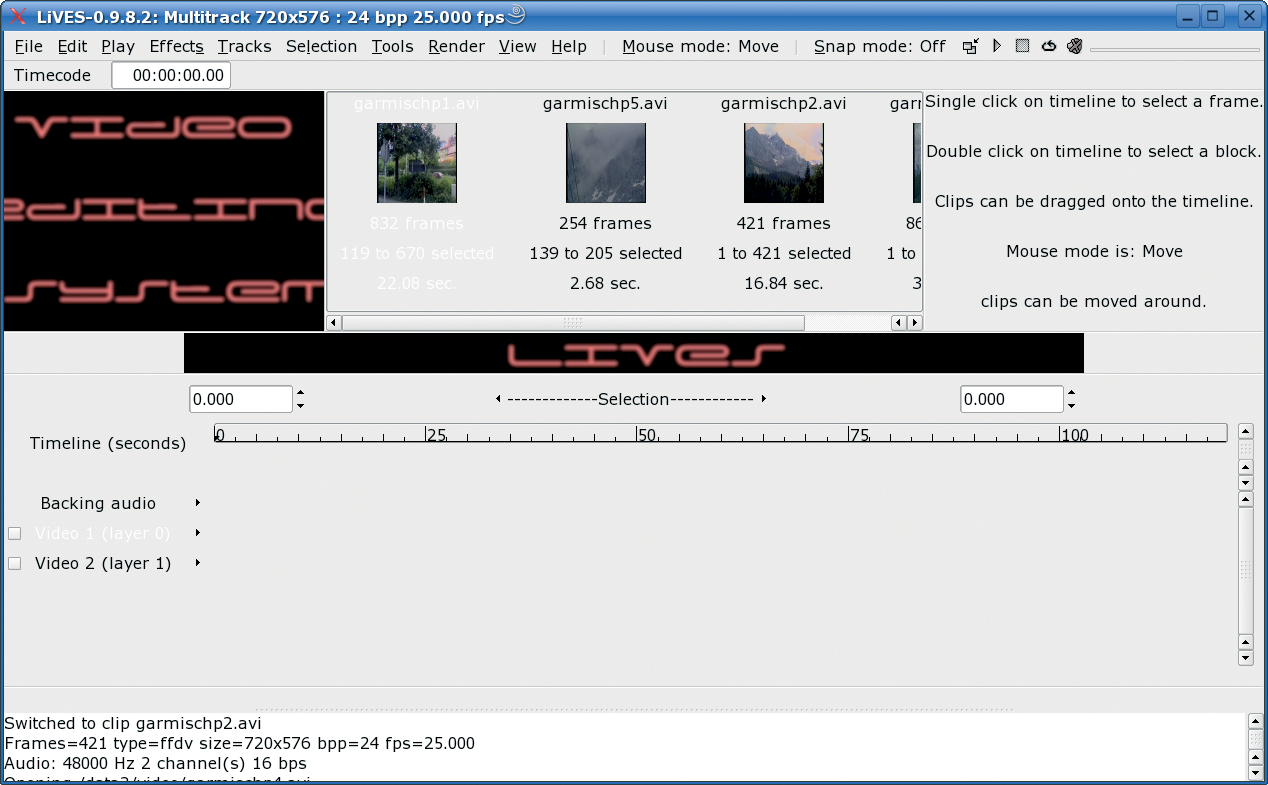
In the new view, the preview window moves to the left edge of the screen, and the scenes you have loaded are displayed in the center screen. On the far right, an information box completes the top half of the window.
The bottom half of the window is occupied by a souped-up timeline. Directly below the ruler, you will see two tracks by default: Video 1 and Video 2, where you can line up your videos, just like reels of film on a cutting table.
To do so, select one of the clips from the top center area. If this area is missing, just press C to view it. Hold down the left mouse button, and drag the film clip to the required position on the timeline. The clip will appear as a bar with a length that reflects the airtime. To help you keep track, LiVES fills the bar with stills from the scene. If this layout is too cluttered for your liking, you can use the View menu to zoom in and out.
All you need to set up your videos in the right order is the top track. The Snap function will help you align the clips; you can enable Snap mode by clicking the icon in the menu bar. If it reads On, LiVES will always align any movies you drop onto the timeline with the other scenes (Figure 7).
That takes care of the video material - all we need now is sound. The Backing audio track handles this. To fill the track, simply drag a movie sequence to the track. Its sound material appears as a block, which you can move using the same approach as for video.
To apply an effect to a video, double-click the clip. The sequence is then shown as a gray, crossed-out box to indicate that it is selected. At the top of the screen, two preview windows again appear to replace the list of video films. This new view works just like the one I introduced you to in Clip Mode; you can use the two input boxes below the previews to specify the start and end points.
In the Effects menu, select Apply effect to block, and choose one of the available effects. You have a different selection than in Clip Mode. For example, I selected a colour correction in Figure 8. The settings are shown as sliders at the center of the top panel, with a small preview in the left-hand window.
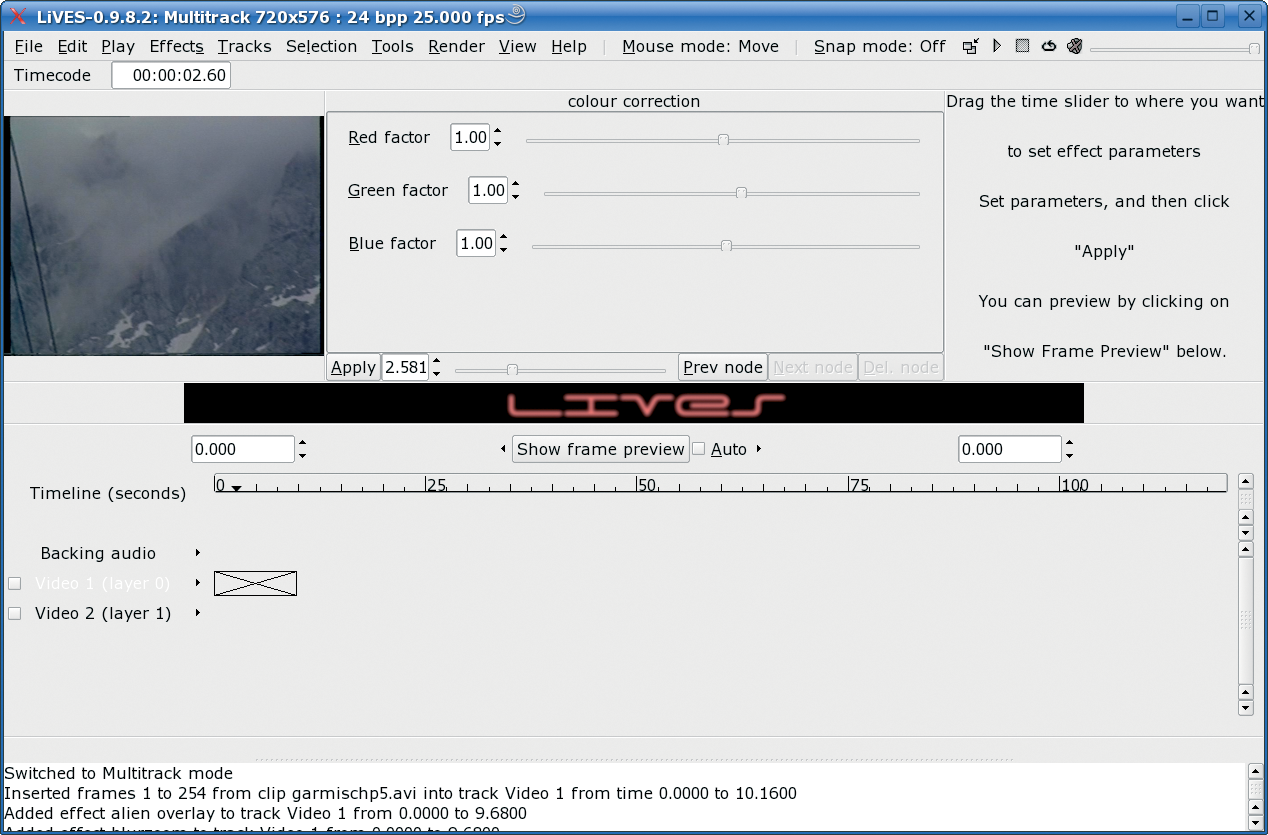
The settings always apply to a specific point in time. The number next to Apply tells you when this is. You can use the slider to the right for fast selection. Just to practice this, move to the end of the scene by pushing the slider to the right. Now drag all the sliders for the effect settings to the left (to 0). Click the Apply button to apply the settings to this point in time, and then click Show frame preview to update the preview. The screen turns black to reflect the settings.
Now drag the slider next to the Apply button backward and forward. Note the settings for the effect - it is a downhill slope from the start to the end. The effect slowly fades the video out. Although this might seem slightly strange, the effect is intended. To remove the need to set the effect for every single frame, LiVES automatically calculates all the intermediate values you require.
For more granular control of the course of an effect, you can assign new settings at specific points in time. Prev node and Next node let you navigate between the individual nodes.
To remove an effect, first select Effects | List/Edit effects at current time/track and then click the required effect with the mouse. Clicking Effects | Delete selected effect will remove the effect.
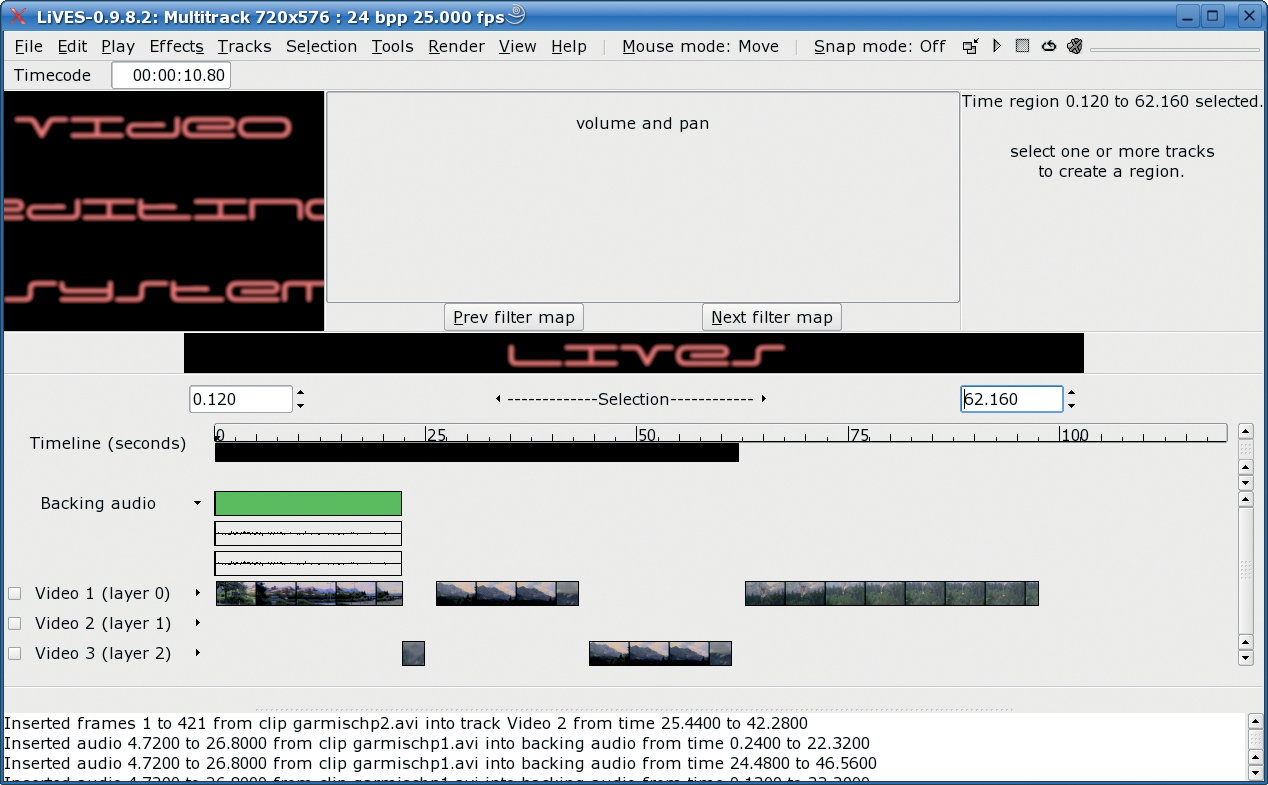
Thus far, the second video track has been unused. Let's change this now by adding spectacular transitions between two scenes. We need two videos for this. Let's put the first video on the top track, and the second one on the bottom track with a slight skew. The videos need to overlap as shown in Figure 9. For your next step, select the two tracks in question in the small box at the left edge of the screen, then enable Selection | Snap to Overlap to facilitate the following selections.
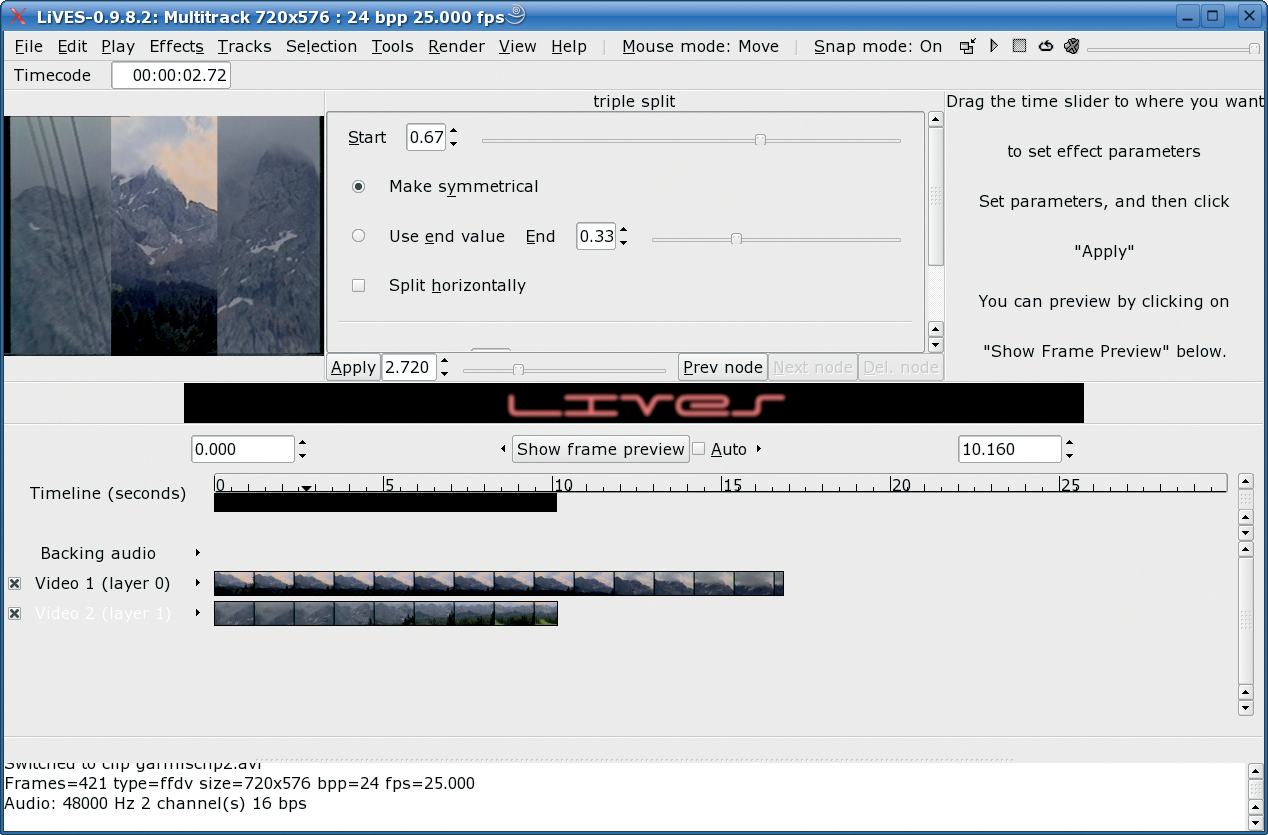
To display a black bar like the one shown in Figure 9, click directly above the overlay and slightly below the timeline, hold down the left mouse button, and move the mouse pointer slightly. You can specify the duration of the transition and the video tracks to which it applies. Now you can finally select a transition from the Effects | Apply effect to region | Transitions menu. Figure 9 uses triple split as an example.
A settings dialog box now appears, with controls to match those of the effects. In our example, first you need to drag the slider next to Apply to the far left and do the same with the Start slider, click on Apply, push both sliders to the right, and click on Apply again. These actions tell the program to begin the transition at the start of the selected area with an image from the Video 1 track and then fully fade in the video from Video 2 by the end of the transition.
After completing your layout, first save by selecting File | Save layout as, which simply saves the layout in the timeline, but not the clips or the whole movie.
To output your composition as a movie, you now need to select Render | Render all to new Clip, which tells LiVES to create the finished movie. Again, your mileage may vary. LiVES automatically opens the results in Clip Mode.
The File | Encode Clip As menu exports a movie. In the window, first select the tool for converting your movie as your Target Encoder. The encoder for DV format is encodedv_encoder. For MPEG files, which you need for DVDs, you will need multi_encoder.
Next, select the Output format - for a DV file to European TV standards, this would be dv_pal_hi. At the same time, set the sound format in Audio format, then click OK to store the movie as a separate file.
LiVES confuses amateur movie makers with a feature scope that it is hard to keep track of and by hiding its features behind a disastrous user interface. Add to this, the two different program modes, the lack of documentation, and unprovoked crashes despite a purportedly "stable kernel." As a newcomer, you have to be prepared to suffer to work with LiVES.
On the up side, the program has an impressive collection of interfaces to additional effect packages, more than Cinelerra even. With some programming skills, you can even develop your own RFX effects. The tools you will need are hidden away in the Advanced menu.
LiVES does not support direct burning of edited movies onto disk. As the collection of tips online [4] tells you, you need more tools, and a long chain of commands at the command line to create a DVD.
| INFO |
|
[1] LiVES: http://lives.sourceforge.net/
[2] LiVES source: http://lives.sourceforge.net/index.php?do=downloads [3] MPlayer: http://www.mplayerhq.hu [4] Tips and tricks for LiVES: http://www.reimeika.ca/lives/advanced_tips.html |