
By Jon Masters
Communication has revolutionized our world. It's hard to recall just how many phone calls I've made so far today, or this week, let alone stop to think about how often I use some form of telephony device to keep in touch with friends and colleagues around the world. It certainly wasn't always so easy to keep in touch. In fact, until 1956, calling my parents across the Atlantic using a telephone would have indirectly involved an unreliable long distance radio transmission at the fantastic rate of US$ 6 per minute.
We are truly fortunate to have modern day telecommunications, shiny iPhones, and similar devices at our fingertips. We now take it for granted that, when we pick up the phone, we will be able to call hundreds of countries around the world. The entire modern world is utterly dependent upon such technology to keep it from grinding to a halt. In spite of this, we are too often subject to the whims of the large telecommunications providers who tell us how much we should pay and commit us to expensive contracts.
Phone providers used to have near monopoly-like control because they owned the network(s) through which the calls had to pass. Now, Voice-over-IP (VoIP) technology has been breathing new life into a stagnant industry. Upstart new VoIP providers such as Vonage offer all manner of cheap (or free) calls for low monthly rates, using your regular Internet connection as the transmission medium for the call traffic. They take care of bridging calls between those who use VoIP and those who are still using the POTS (Plain Old Telephone System). Many of these providers offer attractive services that are well worth considering, especially if you're just looking to get something running quickly. But you can go one step further: You can run the entire phone operation for yourself, cheaply and relatively easily, thanks to the power of open source software such as Asterisk.
| VoIP and SIP |
|
VoIP is a family of different telecommunications standards for encoding voice calls and routing them over the Internet, rather than routing them over a conventional telephone network. A number of historical efforts at standardization have largely now given way to something known as Session Initialization Protocol (SIP). SIP is not itself an encoding standard for converting the human voice into IP datagrams. Instead, SIP is a session protocol that handles the call routing, connection, transfer, and forwarding. SIP, which is used by software such as Asterisk, as well as by many other VoIP providers and gateways, is quickly becoming a de facto standard for VoIP communication. |
Asterisk [1] is a complete open source PBX telephone exchange server. The Asterisk server is released by Digium [2] - makers of VoIP hardware solutions. Think of those expensive beige boxes that sit in a closet somewhere in your office building, humming away and managing all of the phones on all those desks. Asterisk can do the same thing using standard PC equipment and TCP/IP networking, and often the Asterisk solution costs far less than installing a complex office exchange system. Asterisk is used by many well-known companies as a corporate-grade telephony tool, and many home users employ Asterisk as a low-cost gateway for calling friends. The Asterisk server is flexible enough for an extremely wide range of uses.
In this article, I describe how to set up a cheap VoIP service with Asterisk for a home office or small office environment. In this scenario, a variety of Asterisk extensions (such as physical handsets or VoIP software phones running on computers and PDAs) connect to an Asterisk server that bridges calls through to other extensions, provides voicemail, and takes call diversions for unavailable cellular phones. I'll use a commercial VoIP gateway service so that I can maintain a regular telephone number and receive calls from ordinary phones, but your can also install your own hardware to handle the same task. See the Asterisk Digium websites for information on available VoIP hardware [1] [2].
Fundamentally, Aserisk is simply a software package, like any other application on your Linux system, so you can add Asterisk to any existing Linux system (and also to some other operating systems) via a package or by building it from the source code. Building Asterisk is non-trivial, but you might need to work with the source code if you decide to use some of the more advanced features. One thing you will want is a computer with sufficient hardware resources: something with enough RAM so that it won't spend all day swapping to/from disk and ruining your call quality with pops and clicks.
The example system described in this article included:
To avoid having to physically host any of the equipment involved in running the service, I decided to use Xen virtual machines - it simply exists on a machine somewhere and is managed remotely - but you can easily skip that step and install Asterisk on your home Linux server.
Installing Asterisk is usually a simple matter of typing a command such as (depending on your Linux distribution and your local configuration):
$ apt-get install asterisk
This command will pull down and install the binary Asterisk packages on a Debian or Ubuntu GNU/Linux system. If you'd like some funky voices and messages to play to your callers, you could install some of the additional asterisk-sounds packages.
Like any other Linux server software, Asterisk keeps its configuration files in a designated directory in the /etc namespace, usually in a directory called /etc/asterisk. A typical Asterisk installation will include many default configuration files, but the following files are most important from the viewpoint of getting started:
The asterisk.conf file simply defines a range of other configuration files, and you can typically leave it with the default configuration entries. You will want to customize the sip.conf file first, to define the physical or software phones that you have available. The file is divided into two parts: first is a general configuration section, which you can largely leave with default values, and later are individual phone entries for each "handset." Listing 1 shows an example phone definition section.
| Listing 1: sip.conf Phone Definitions |
01 [john] 02 type=friend 03 secret=PASSWORD 04 host=dynamic 05 context=internal 06 auth=md5 07 nat=yes 08 reinvite=no 09 canreinvite=no 10 ;qualify=yes 11 12 [doe] 13 type=friend 14 secret=PASSWORD 15 host=dynamic 16 context=internal 17 auth=md5 18 nat=yes 19 reinvite=no 20 canreinvite=no 21 ;qualify=yes |
The entries in Listing 1 define two phones, called john and doe, that need the password PASSWORD (obviously, you'd use a genuine password here) to connect to the Asterisk server. The host entry tells Asterisk that the phone might be connecting from a variety of different addresses rather than using a specific, hard-coded source IP address. The context entry instructs Asterisk that this phone is internal - a default context defined in the extensions.conf file. Marking the phone as a friend allows it to make and receive calls, and this generally means Asterisk will try to trust it to not go crazy.
Before you can call either phone, you must add extensions in the extensions.conf file. Within the internal section of extensions.conf, you can add lines such as the following:
[internal]
...
exten => 1001,1,Dial(SIP/john)

exten => 1002,1,Dial(SIP,doe)
...
These rules instruct Asterisk that the first action upon dialing 1001 or 1002 is to call the appropriate phone handset, defined in the sip.conf file. You can specify much more complex rulesets, but for now, you should be able to configure two different softphones, hardware IP phones, ATAs, or other SIP devices to connect to your Asterisk server and be able to call each phone from the other phone's extension.
| ATAs and Softphones, Oh My! |
|
One thing you'll quickly find with VoIP service is that it comes with a fundamentally new set of nomenclature for you to learn - terms that are, like others we encounter in life, seemingly designed to make outsiders seem like idiots until they have learned the right magic words to use in every conversation. You will hear terms like "ATA" used quite a bit. An Analog Telephone Adapter is typically a small box with a couple of jacks on the back. The ATA connects to your network and allows you to connect any old phone handset to your Asterisk server. Getting a low-cost (US$40) ATA such as the Linksys PAP-2NA is highly recommended. Note that many of these units are sold pre-configured to use commercial services, such as Vonage, which is why you want the unconfigured units (that generally aren't subsidized and cost a little more in stores), such as the NA version of the Linksys PAP-2. You can also use a softphone, such as the Linux Sparkle, Linphone, or the (commercial, proprietary, free as in beer) X-Lite. I admit to using the X-Lite softphone from Counterpath because of the additional features not yet well covered by the Free Linux clients - for example, three way calling and multiple "lines" allowing for many simultaneous calls. Whether it is better to use a softphone or invest in an ATA is generally a function of how often you will use the service. If you're going to replace your primary phone with an Asterisk extension, get an ATA. |
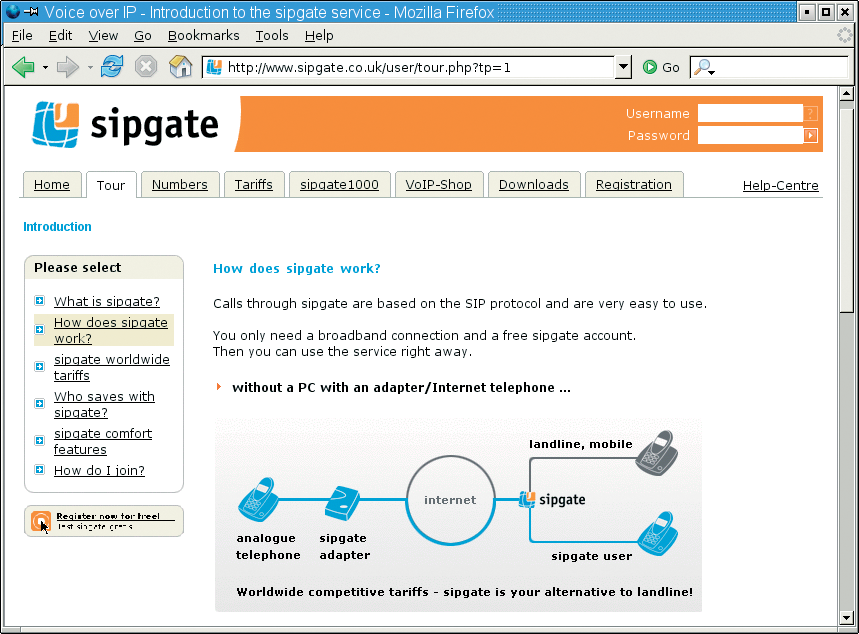
Once you have a basic Asterisk configuration, you'll want to set up a gateway to reach those using the old-fashioned telephone networks of yesterday. To do this, you can install additional telephone lines and add specialist adapter cards to your machine, but at this point, you will probably find it easier to sign up with one of the many low-cost online SIP gateway providers. There are many SIP gateway providers to choose from - each with its own benefits - but I use Junction Networks [3] in the USA and Sipgate [4] in the UK.
The provider will give you a telephone number that callers can use to reach your exchange. The service also lets you make calls out to the conventional phone system.
To make use of an external SIP gateway, you need to register with it when your Asterisk server starts up. Many of the providers will now actually tell you the best settings to use for Asterisk - since it's becoming much more common to see Asterisk servers connecting to their services - but you'll end up with a [general] section for the sip.conf file similar to the following:
[general]
register =>myuser: mypassword@sip.jnctn.net/ 18005551234
This instructs Asterisk that it is to attempt to register with the SIP gateway service, for extension 18005551234, which will be the incoming phone number and the number shown in caller ID to whoever you call through this provider's network. In addition to registering with the provider, you'll want to add a regular entry for the SIP provider in the sip.conf file:
[jnctn]
type=friend
username=myuser
secret=mypassword
host=sip.jnctn.net
fromdomain=jnctn.net
nat=yes
context=incomingjnctn
insecure=very
Notice that the context for this "device" is set to incomingjnctn. This setting corresponds with a special section in the extensions.conf file that handles incoming calls, as shown in Listing 2.
Notice that this ruleset is slighly more complex, with additional commands to first try dialing an extension, then falling back on VoiceMail() if that doesn't work out.
| Listing 2: Handling Incoming Calls |
01 [incomingjnctn] 02 03 exten => _18005551234,1,Answer() 04 exten => _18005551234,2,Dial(john) 05 exten => _18005551234,3,VoiceMail(u1001) 06 exten => _18005551234,4,HangUp() |
Voicemail is pretty easy to configure with Asterisk. All you need to do is add an entry to your voicemail.conf file, as shown in the following example:
1001 => 1234, Tux the penguin,tux@linuxmagazine.com
This configures voicemail extension 1001 (recall that this was passed in the previous rulesets with the VoiceMail() command in Listing 2) with password 1234, as belonging to Tux the penguin at the email given. By default, when an email address is provided, Asterisk will automatically encode the voice mail and - along with a cover message stating who CallerID identifies as the caller, the call duration, and various other configurable information items - email it as an attachment to that address.
To enable easy retrieval of your voicemail, you can add an extension that will enable you to call up your voicemail. In the extensions.conf file, add the following to the [internal] section:
[internal]

exten => 121,1,VoiceMailMain(1001)
exten => 121,2,HangUp()
Now, calling extension 121 from one of your pre-configured Asterisk phones will take you to your personal voicemail menu, once the correct password has been entered (if a password has been set for this particular voicemail box).
If you decide to share your Asterisk server with other users, you can leave out the extension number from the VoiceMailMain() setting and Asterisk will prompt for the extension.
In this article, I described some quick and easy steps for getting started with the Asterisk VoIP exchange server. As a full PBX telephone exchange, Asterisk is full featured and able to provide many advanced functions not discussed in this article. Fortunately, there are many good books available now, as well as online Asterisk tutorials and user communities willing to help you move beyond the basics.
| INFO |
|
[1] Asterisk: http://www.asterisk.org
[2] Digium: http://www.digium.com [3] Junction Networks: www.jnctn.net [4] Sipgate: http://www.sipgate.co.uk |
| THE AUTHOR |
|
Jon Masters is a UK-based embedded Linux developer, writer, and consultant. He has been actively involved with the Linux community since starting his first degree at age 13. |