
By Tim Schürmann
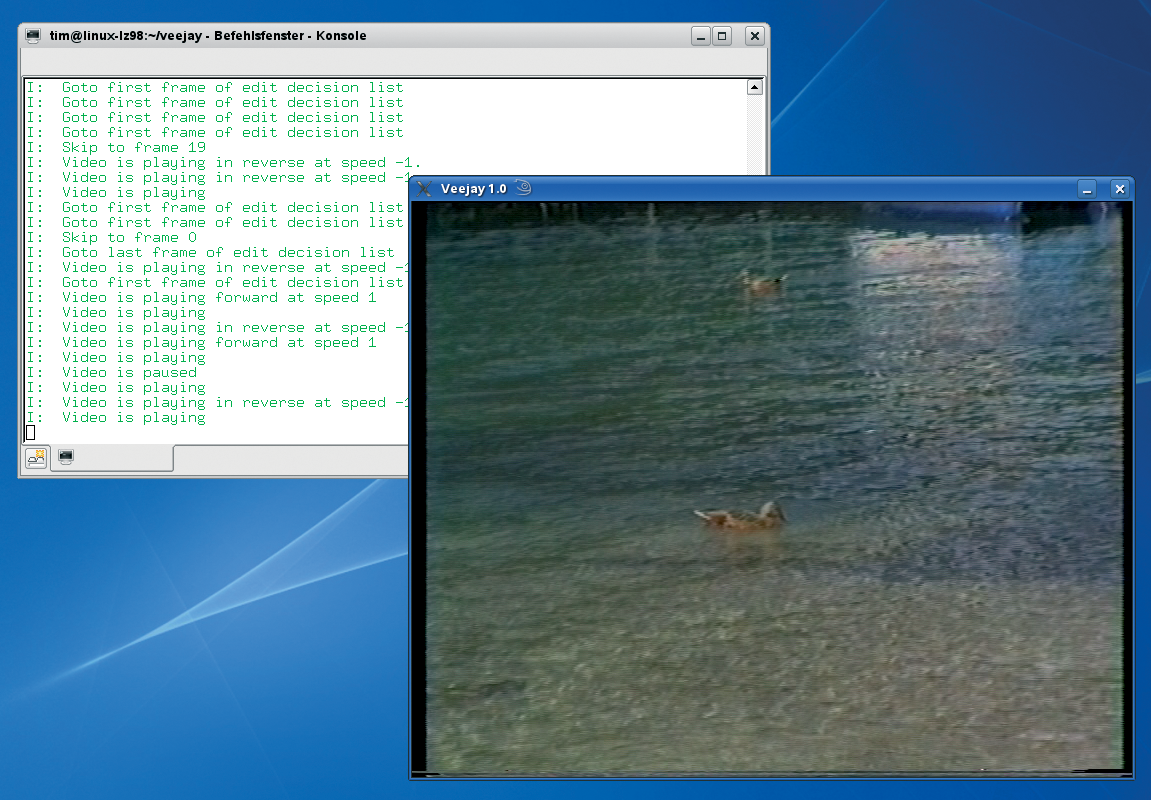
Video jockeys (VJs) are a by-product of music TV. Instead of juggling with LPs, VJs projected colored images onto the screen. Today, all you need to be a VJ is a standard PC and the right effects program. To get started, you just need a couple of snippets of original video material and the free effects program, Veejay [1] (Figure 1). According to the ads on the project homepage, Veejay "allows you to `play' the video like you would play a piano."
Before you try to walk in the footsteps of the famous video artist Nam June Paik, you must navigate the fairly stubborn Veejay installation; the dependencies could drive you crazy. SUSE users are advised to download the ready-to-install RPM packages from PackMan [2]. To integrate the packages, launch YaST and select Software | Installation source, and then select Add | FTP to add PackMan as a package source. Type packman.iu-bremen.de as the Server Name. The Directory on Server is suse/10.2; you might need to replace 10.2 with your version of SUSE.
Veejay installs along with the Veejay GUI veejay-reloaded in the usual way. On openSUSE 10.2 and 10.1, YaST might complain about missing dependencies. Before you start, install the Unicap package [3]. Working as root, create a new link,
ln -s /usr/lib/libunicap.so.2.0.0/usr/lib/libunicap.so.0
and you can then ignore the Unicap dependency.
The only way to install the Veejay video effects tool is by way of the source code [1]. To build the application from the source code, you need at least 200MB of free space on disk, and you must install the utilities and libraries listed in the "Dependencies" box via YaST, Synaptic, or Adept.
Your distribution should have packages for these programs and libraries, so launch your package manager and try your luck. Also, don't forget to install the matching developer packages at the same time; you can typically identify the developer packages by the -devel or -dev string in the package name.
Users with Ubuntu 7.04 (Feisty Fawn) who want to run version 1.0 of Veejay need the latest FFmpeg version from an external repository. Before you install FFmpeg, you must first uninstall the following packages: libavcodec0d, libavformat0d, libpostprod0d, ffmpeg, and any matching developer packages. Then add deb http://ubuntu.tonio.homelinux.org/ feisty main to your /etc/apt/sources.list as a package source, update the package list, and install ffmpeg, libswscale-dev, libavcodec-dev, libpostproc-dev, and libavformat-dev; otherwise, you will not be able to build Veejay from the source code. After you finish installing the latest versions of FFmpeg and the other necessary packages, you can also install older versions without any difficulty.
To install Veejay, you need Unicap and Gtkcairo. You'll find that Ubuntu and Debian packages for Unicap are available online [3].
Now copy the archive to a folder of your choice, unpack the archive, and change to the directory that this step created. When you get there, compile the code by typing ./configure && make and make install; you need root privileges for the latter command. Then, create a gtkcairo directory and move the archive from the DVD to the archive to compile GtkCairo. Next, unpack and follow these steps:
sh autogen.sh
./configure &&make
sudo make install
Finally, add a line with export PKG_CONFIG_PATH=/usr/lib/pkgconfig to your ~/.bashrc file to make sure the configuration step for the Veejay sources works as intended.
After all that hard work, it's time to install Veejay by unpacking the archive and, in a terminal window, typing ./configure && make, then, working as root, typing make install.
| Dependencies |
Optionally, you might want to add:
|
Before you start, copy your video material to your PC. Veejay is extremely choosy. The effect artist will only accept digital videos in DV format and MJPEG-compressed movies in AVI or QuickTime files. Veejay will not accept MPEG4 material, including DivX and Xvid material, unless it happens to be entirely made up of I frames, which is fairly unlikely.
Converting the movie material with Transcode is an experience in itself. To prepare, for example, ASF material with sound for Veejay, the Transcode command looks like this:
transcode -i source.asf -o ziel.avi -x mplayer -y mjpeg -N 0x1 -g 640x480 -J resample -e 4000 -E 48000 -b 128 -F libmpeg2 -f 25.000,11
For additional help, see the comprehensive Transcode Wiki [4].
The list of Veejay's conditions is not quite done - all the movies you will be playing must have the same resolution and frame rate. Veejay also refuses to mix NTSC movies with PAL material. Before you go live, convert all your movie material to the same format and store the material in a separate directory or on a separate, fast hard disk.
After collecting your movie material, it's finally time to launch Veejay. If you need sound support, don't forget to launch the Jack sound server in a separate terminal by typing jackd -d alsa or jackd -d oss. In this case, the two videos party1.avi and party2.avi will be my sample material for Veejay, so I can launch the program with veejay party1.avi party2.avi.
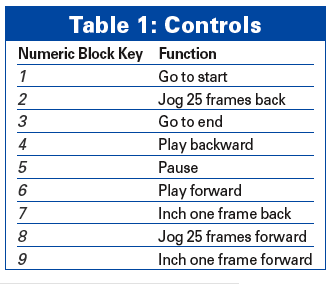
Assuming nothing goes wrong, you should now see a window in which the two movies, the original material, run from start to finish in quick succession. To play around with the material, you first need to cut it into manageable snippets. To do so, first click to select the output window with the video and then move to the keyboard. The numeric block replaces the control keys on a typical video recorder (Table 1).
To go to the position in the movie where you want to start the sample, press [ to mark the start of the sample. After marking the start of the sample, use the numeric block to go to the end of the sample and press ]. Now assign the video snippet to a function key. If you press F1, the sample will be available for playing whenever you press the F1 key. To quit Veejay, click on the terminal window and press Ctrl+C.
To cut another snippet and assign it to F2, first press / in the numeric block. This takes Veejay back to plain video mode, which is the mode in which the program plays the whole video, whereas sample mode will only play individual clips assigned to function keys.
Repeat the procedure and assign samples to your F1 through F12 keys. Of course, 12 samples aren't going to get you far at a live gig. Don't worry, Veejay uses the numeric keys below the function keys to remember full sets of function key assignments. To access 12 samples assigned to your F1 through F12 keys, press 1. If you press 2, you can launch into a new set of assignments. This lets you store a total of 9x12=108 samples. Veejay refers to the sample sets as "banks." Musicians will be familiar with the term.
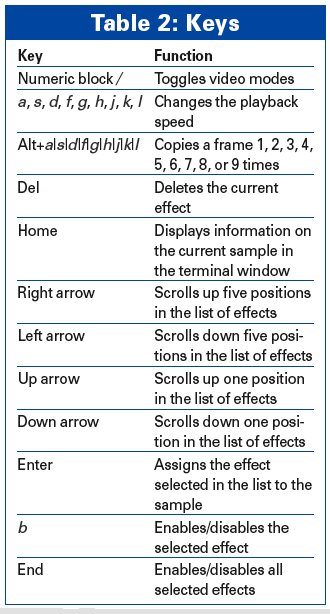
Effects are also enabled via the keyboard. To select an effect, use the arrow keys and then press Enter to enable. Table 2 shows interesting key assignments; the Veejay manpage has a complete list.
Reloaded (Figure 2) is the GUI that comes with Veejay. If you prefer to work at the command line, you can use the text-based counterpart sayVIMS [1], which also supports scripting. A description of the extremely cryptic commands is available online [5].
To install Reloaded, copy the Reloaded source code archive to your machine, unpack the archive, and change to the directory created by this step. Next, enter ./configure && make and, working as root, make install.
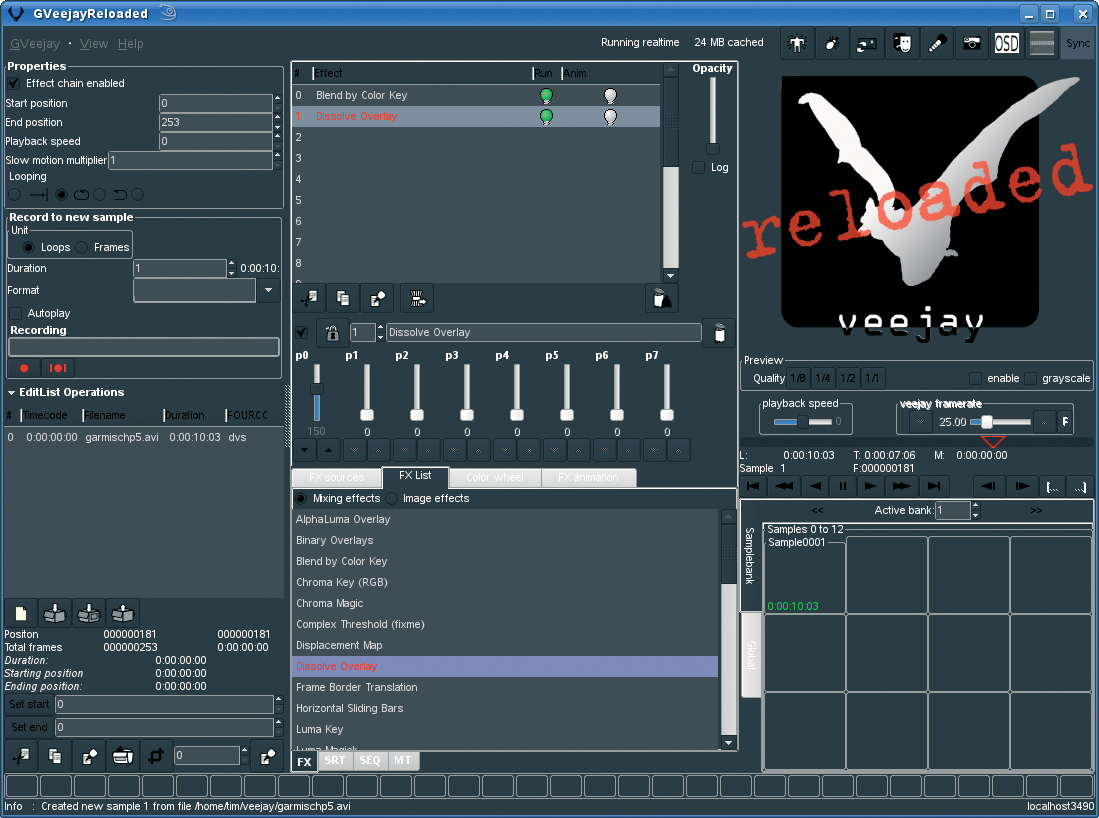
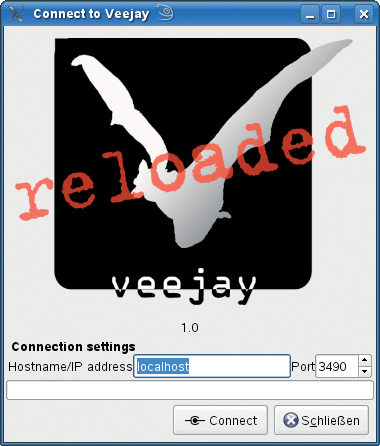
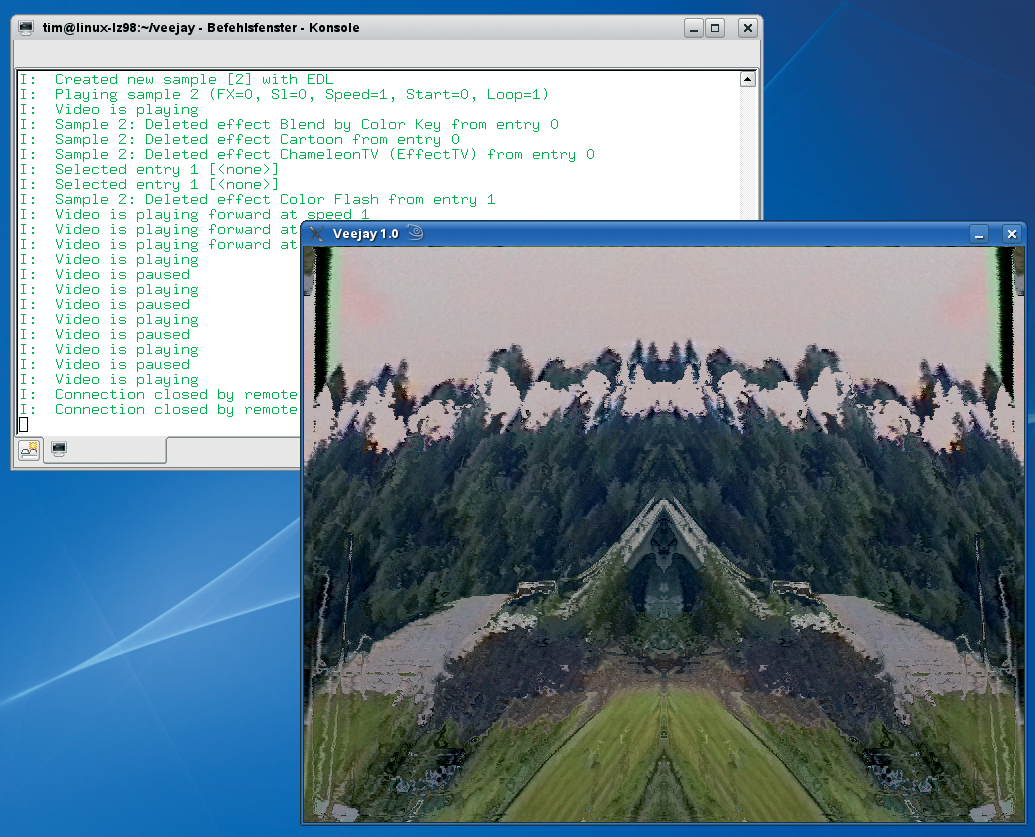
Veejay must already be running for Reloaded to launch: Open a terminal window and enter reloaded. To quit the window in Figure 3, select Connect. Reloaded contacts Veejay and, if successful, comes up with the main window shown in Figure 4. Figure 5 shows effects applied in Figure 4.
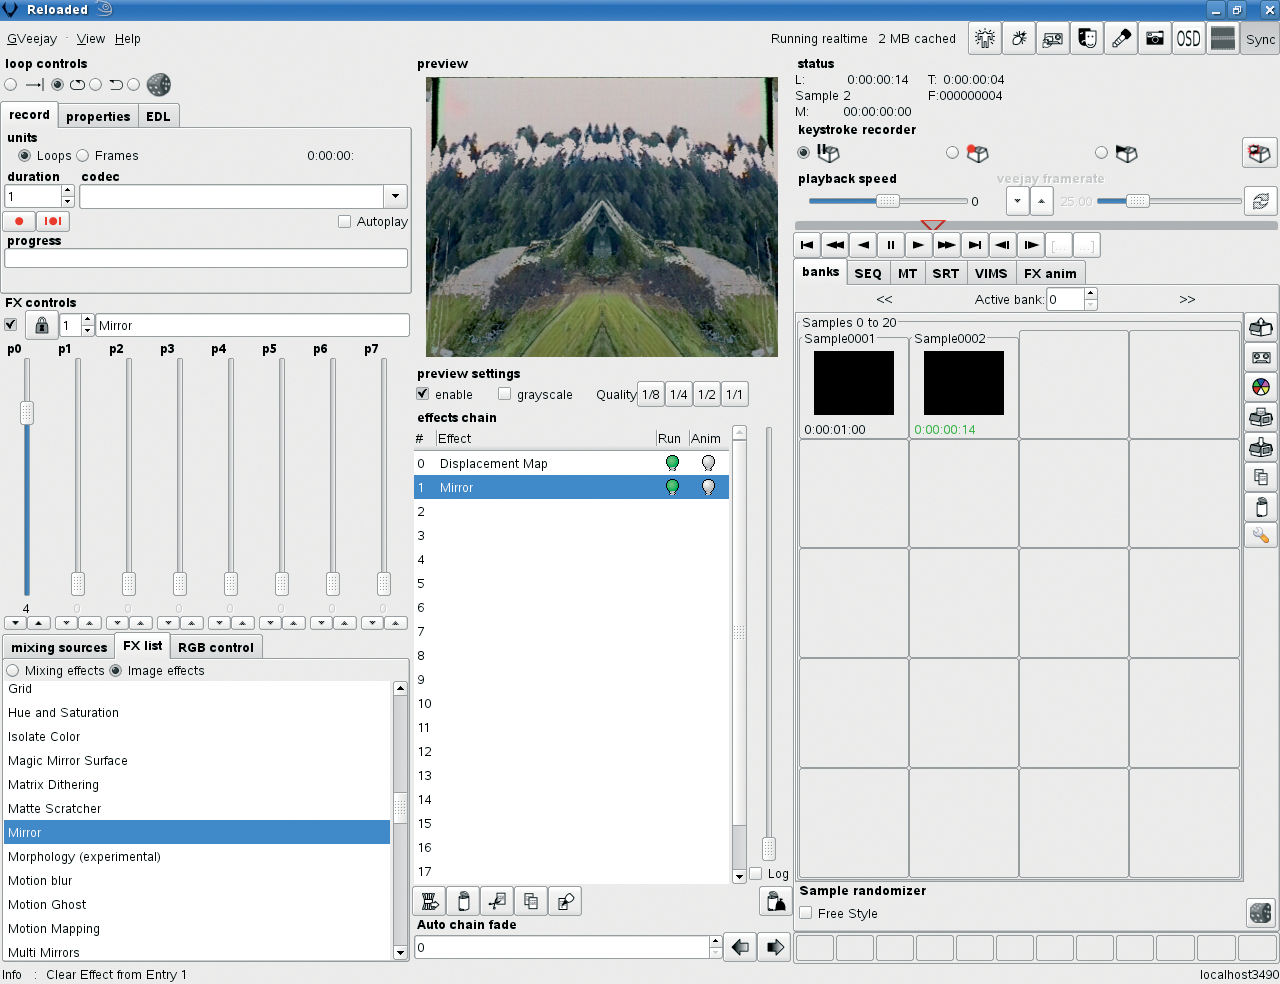
A preview is at top center, but you do need to click Enable to view the action in the Veejay window. If the window fails to output your DV material, you can try selecting 1/1 as the Quality.
The playback controls are located upper right. Instead of using the numeric block, you now have a convenient group of buttons. The playback speed button lets you slow down or speed up the playback.
Directly below this are several tabs, and banks is currently active. Reloaded gives you a button for each sample with a function key assignment. Double clicking sends the sample to the output, and you can use the Active bank slider to specify which bank to use.
To create a new sample, first go back to plain mode. A number of smaller buttons are at the far top right. To change the current video mode, press the third from the left (a little box with an extension). Now use the buttons referred to earlier to go to the start of the new sample, then click on the opening square bracket in the playback control, go to the end of the sample, and enable the closing square bracket.
Reloaded will drop the new video sample into the next free box in the current bank. As an alternative to this approach, you could select GVeejay | Sample | New from File to choose a video on your disk as the new sample. Reloaded again will drop the sample into the next free box.
After collecting enough samples, it's time to apply some effects in the center screen. First, enable a sample to run in the preview. At the lower left corner of the screen (Figure 4), you will see a number of tabs, including an FX list tab that is already selected, showing a long list of effects.
Selecting the Mixing effects radio button displays all the effects that mutate at run time, whereas Image effects gives you simpler image effects. To apply an effect, just double-click on it.
After completing your video composition, you can save your masterpiece by selecting GVeejay | Save | Save samplelist. This just saves the current settings, but not the video files, so don't forget to launch Veejay with the same videos next time.
Veejay really makes a splash with an amazing number of effects and interesting options for VJs and video artists. If you're looking for interesting video effects, you'll find much to appreciate with this tool.
On the downside, the Veejay video effects tool gives you a messy and, in the case of Reloaded, totally cluttered user interface that comes with very infuriating documentation. If you need to delve deeper into Veejay's options and capabilities, check out the slightly outdated PDF documentation [6].
| INFO |
|
[1] Veejay homepage: http://veejayhq.net/
[2] PackMan: http://packman.links2linux.org/ [3] Unicap: http://sf.net/projects/unicap/ [4] Transcode Wiki: http://www.transcoding.org [5] Veejay how-to: http://veejay.sourceforge.net/veejay-HOWTO.html [6] More information and how-tos: http://veejay.dyne.org/ |