By Kristian Kißling
The Xnee tools give users the ability to record mouse movements and keystrokes, replay them on another machine, and thus repeat entries like a macro.
Many Linux users developed an interest in screen recorders during the Beryl/Compiz boom. Another option for preserving desktop results is Xnee [1], a tool that captures mouse clicks, movements, and key presses by sniffing communications between the X server and X client. If you replay the recorded file on another computer with Xnee, Xnee will repeat the steps.
An Xnee macro can help you perform routine steps you would otherwise do manually, such as opening emails or logging on to a server via SSH. Launching multiple instances of Xnee simulates a machine under heavy load and is a simple way of stress testing.
Xnee macros are also useful for training and troubleshooting. If a remote user is experiencing problems, you can send the user a lean Xnee file that repairs the damage rather than having to launch a remote connection.
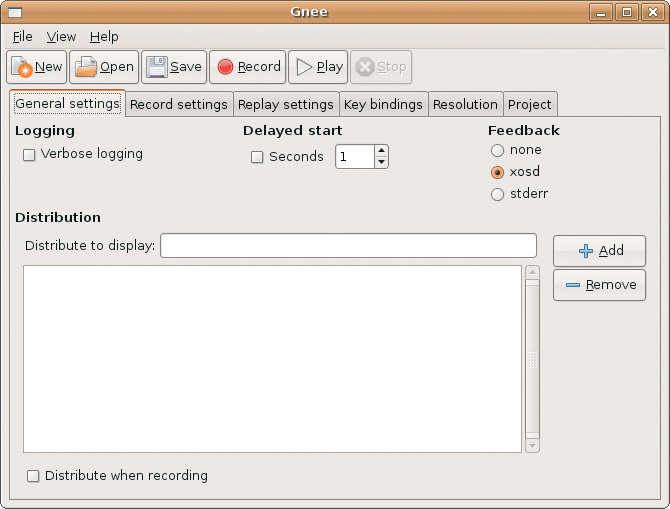
Xnee is actually a collection of tools. The suite includes three components - Gnee, Pnee, and Cnee - all of which rely on the Libxnee library. Gnee is a Gnome GUI for Xnee (Figure 1), Pnee helps the software run in the Gnome Panel, and Cnee is the command-line program. Pnee did not work in our lab, but I did manage to try out Gnee and Cnee.
If you are using openSUSE 10.2 or Ubuntu "Feisty Fawn," your package manager will give you a version of Xnee; however, I advise you to steer clear of the ancient version 1. The source code for version 3.01 is available at the project website [2].
Ubuntu users need the build-essential, libxtst-dev, libxcb1, libxcb-xtest0, gtk2.0-dev, libpanel-applet2-dev, and checkinstall packages. Unpack the source code file, change to the new directory, and enter ./configure.
If a configuration error occurs, the text output will tell you which package you are missing. If the configuration stage is successful, the text shown in Figure 2 will be displayed.

Users of openSUSE 10.2 can follow the same approach; the packages you need to install are gnome-panel-devel, gnome-panel, and checkinstall.
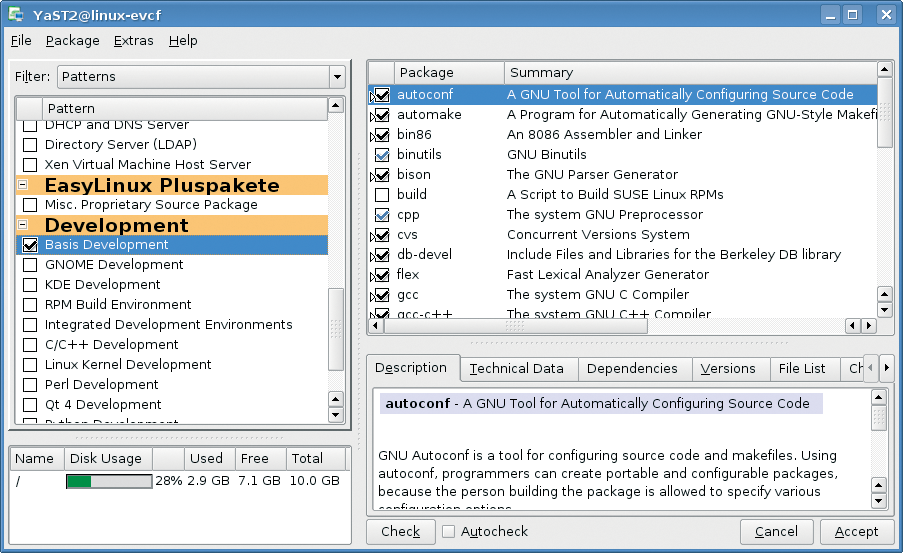
To install the developer tools, go to the Filter menu (top left in YaST's software installation section) and select Schemas | Basis Development (Figure 3).
Users with SUSE Linux 10.1 should go to Selections | C/C++ Compilers and Tools and then install the gnome-panel, gnome-panel-devel, and checkinstall packages.
If you want to use the software on Mandriva 2007, you will need the packages gcc, make, and gnome-panel.
After completing the configuration, enter make to compile the source code. Once this process has completed, become root and run checkinstall. This installs the software globally in the /usr/local directory and also builds a DEB or RPM package. Just keep pressing Enter when prompted.
SUSE users need to install the package by entering rpm -Uhv /usr/src/packages/RPMS/i386/Xnee-3.01-1.i386.rpm - again, you need administrative privileges to do this. The path to the RPM on Mandriva is /usr/src/rpm/RPMS/i386/Xnee-3.01.rpm.
The X Window System is a client-server system. The server and the client typically run on the same computer and use the X protocol to communicate.
The X server draws graphics and it also accepts mouse and keyboard input. Applications that want to use these input devices register as clients with the X server. X clients are also able to run on remote computers.
Xnee listens to communications between the X server and client and records the result as numeric data. The server and client exchange four different types of messages: requests, replies, events, and errors [3].
Xnee detects user-generated events such as keystrokes; however, it also records requests and responses that are otherwise transparent to the user. The X protocol processes this information independently of the user. In contrast to screen casts, the files produced by Xnee take up just a few kilobytes of disk space and are easy to email.
For Xnee to work properly, you first need to enable the record extension for your X server. To do so, become root, open the /etc/X11/xorg.conf file, add a Load "record" line to the Module section, and restart the X server.
On openSUSE 10.2, SUSE Linux 10.1, and Mandriva 2007, you can terminate the X server with root privileges; just enter init 3 and restart by entering startx. On Ubuntu, you need to enter sudo /etc/init.d/gdm stop and then sudo /etc/init.d/gdm start to stop and restart the X server.
Once you install Xnee and restart the X server, you can try Xnee from the command prompt using the cnee command. The following command shows you how the X protocol sees your mouse movements. Enter the command at the console and then you can watch the X protocol at work:
$ cnee --record --mouse --events-to-record 1000
Columns of figures display at the console as soon as you move the mouse and disappear again after 1000 events.
To launch the Gnome-based GUI version of Gnee, pop up a command line and enter gnee. The graphical user interface includes several tabs for configuring the software. Unfortunately, Gnee comes with no documentation whatsoever. Right now, the GUI does not appear to be very mature. One thing that really bugged me was that I was unable to store any changes I made, and at times, Gnee crashed spontaneously.
Take a look at the six tabs (Figure 1). If you enable Verbose logging below General settings, the program will store detailed information on activities in the console. If you check Seconds, Gnee will wait the number of seconds you specified before starting to record. This also tells the software to ignore the first mouse release when you click Record.
Now change to the Record settings tab (Figure 4). Enter a Display if you will be recording actions on another display. The entry will be something like :0.1; :0.0 is the default display.
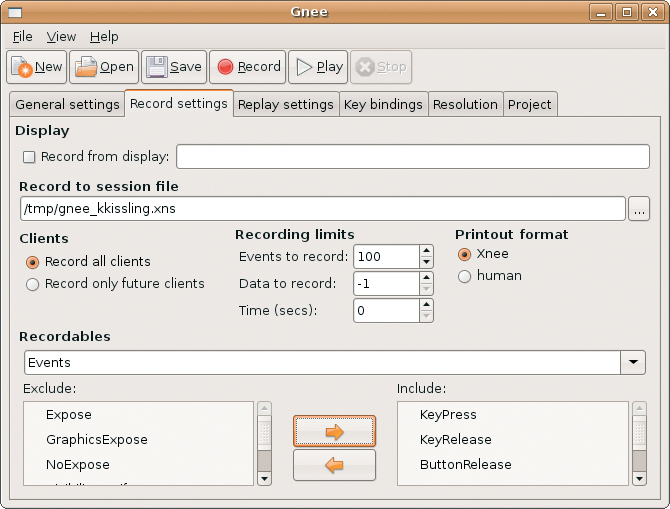
It seems that Gnee will not accept a path entry for storing temporary session files (with the XNS extension), so just keep /tmp as the target.
The Recording limits option sets a limit for the length of the recording, and you can restrict the Events to record, such as mouse clicks and mouse movements, the data volume (Data to record), or the elapsed time (Time (secs)). If you set Events to record to -1, Gnee will record until you press Ctrl+C or another defined quit code.
Two fields at the bottom of the dialog, Exclude and Include, let you move X server commands from the left to the right side by double clicking or with the arrows. However, you can only move the X protocol elements one by one, and this could be a very time-consuming process. Gnee will record the events and play them back later.
Do not change anything in the Replay settings tab. Replay with speed lets you change the playback speed for your recording. Leave the defaults for Thresholds because they tell Xnee to synchronize the playback time within specific thresholds.
Although the software will need to record more user-dependent X protocol data to do this, it will respond far more flexibly in case of playback delays. If Xnee keeps strictly to the schedule, playback might fail if a program starts more slowly than expected, or if a browser takes too long to load a page. Synchronization tells the software to wait until a specific event has occurred before carrying on with the rest of the program.
Next, click the button labeled Record. If you entered a value for Seconds, a countdown will start at the console before the recording session starts.
To perform a test, go to the start menu and open a program - a text editor, for example - and write a couple of words. Change the font, and then go back to the console in which you launched Gnee. Press Alt+C to finish recording.
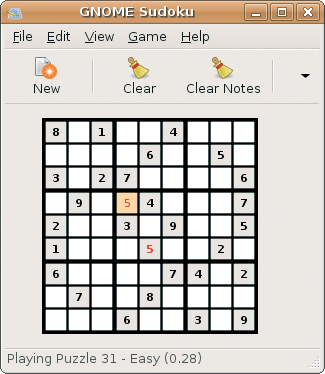
When you are recording, remember that Gnee will just replay all your steps. It is pretty difficult to play Sudoku with Gnee, for example; the keyboard and mouse input is replayed perfectly, even though the numbers are different each time you run the program (Figure 5).
To play a recording, simply launch the software at the command line and then click Play. Gnee should repeat the actions you just performed. Otherwise, you will have to restart, which can be tricky in Gnee because it means moving the entries in Record settings and Recordables back and forth again, one by one.
The command-line version of the tool is simpler than the GUI version and not only because it includes a 50-page manual. Type
$ cnee --record --keyboard --mouse --events-to-record -1 --stop-key q --out-file test1.xnl
to launch into your first recording.
If you press Enter, Cnee will record (--record) mouse movements (--mouse) and keyboard input (--keyboard). The tool will not stop (--events-to-record -1) until the user presses the Q key (--stop-key q). Cnee stores your actions in a file called test1.xnl in the current directory.
To replay the session, go back to the command line and type:
$ cnee --replay -f test1.xnl --time 3 --recall-window-position
This command tells the software to wait three seconds (--time 3) and then start replaying the file (--replay -f test1.xnl); Cnee will open the window at its original position (--recall-window-position).
According to the manual, if you replay a Xnee recording on a desktop with a different resolution - 800x600 pixels, for example - the program will automatically modify the playback file to reflect the new resolution. However, this did not work reliably in our lab. You will need to experiment with your macro to see whether it will run at different resolutions. Avoid using the start menu to launch programs; use Alt+F2 and other keyboard shortcuts or console commands instead.
Gnee lists the X commands it can record in the Recordables area of the Record settings tab. You can add this list manually to Cnee to achieve synchronous data transfer. According to the manual, the following command starts a synchronized session:
$ cnee --record --keyboard --mouse --events-to-record -1 --stop-key 9 --out-file test2.xnl --delivered-event-range
Expose,MapRequest,Leavenotify,EnterNotify
The difference between this command line and the previous example is the --delivered-event-range line and the commands that follow. You can find a list of supported X protocol parameters and explanation of their meanings online [4] [5].
You might be familiar with macros from OpenOffice in which you can click Tools | Record macro for the software to record all your steps, then press a keyboard shortcut for the macro to run all the recorded steps automatically.
With Xnee, you can create macros that replay at the press of a button. To create these macros, first create a shell script that calls the Xnee recording you just created and that was stored as my_xnee.xnl in your home directory, /home/user:
#!/bin/sh
cnee --replay --file/home/user/my_xnee.xnl &
Now store the script for this example as macro.sh in your home directory and enter chmod u+x makro.sh to make it executable.
Gnome users can now press Alt+F2 and enter gconf-editor. Click on run_command_1 on the right, below apps | metacity | global_keybindings, and enter <Alt>m in the last line of the dialog that appears (Figure 6).
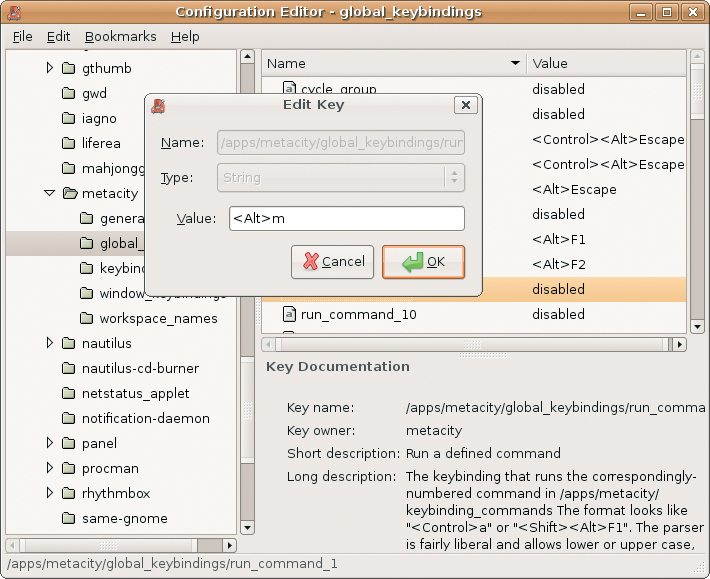
Then change to the left window, keybinding_commands. Double-click command_1 to open another window. Enter the path to your Xnee macro: /home/user/makro.sh in this example. Now press Alt+M to play back the Xnee macro.
Xnee can simulate keyboard and mouse input, and even if you don't have a specific application in mind, it can still be fun to play around with the program.
The Gnee user interface is not quite ready for production use. Be careful: Do not let the robot move too freely inside your menus and programs without testing first, or you might end up regretting the results.
| INFO |
|
[1] Xnee GNU project: http://www.gnu.org/software/xnee/
[2] Xnee download: http://ftp.gnu.org/gnu/xnee/ [3] Wikipedia on the X Window System protocol: http://en.wikipedia.org/wiki/X_Window_System_core_protocol [4] Details of the X protocol commands: http://python-xlib.sourceforge.net/doc/html/python-xlib_13.html [5] More details on the X protocol: http://www.catb.org/~esr/writings/taouu/html/ch03s07.html |
| THE AUTHOR |
|
Kristian officially studied german philology, history and social science in Berlin but wasted a lot of his time with computers. He got hooked on Linux in the 90ies and works now as editor for LinuxUser. |