
By Alex Legler and Peter Kreussel
The free and popular Eclipse development environment [1] gives programmers a feature-rich editor, version control manager, and debugger on a shared GUI. Eclipse was designed as a universal IDE that is easily extensible to accommodate a variety of programming languages. The PHPEclipse plugin converts Eclipse into a full-fledged IDE for PHP-based dynamic websites. Another plugin called Subclipse integrates version control with the Subversion version management system [2]. In this article, we describe how to set up a PHP development environment with Subversion and Eclipse.
If you are developing dynamic websites, it makes sense to install a web server that supports your choice of scripting language locally. In this article, we describe a setup in which all of the required components run on the local machine. However, the Subversion system could run on a central server to give access to a team of developers.
Debugging requires that you have a project folder in the web server's root directory. To debug, you need to execute the files on the web server to allow the server to run the embedded PHP code. On the other hand, the debugger also needs direct access to the source code. When you launch Eclipse, select the server's root folder as your Workspace. Also, make sure that the user running Eclipse has write privileges.
The configuration described in this article requires the following software:
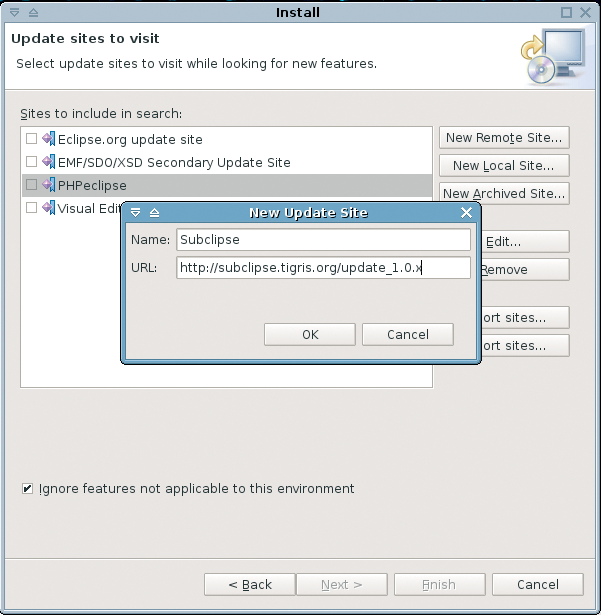
The Subclipse [3] plugin provides Subversion support for the Eclipse IDE. Subclipse, which is available under the Common Public License, is easy to install via the Eclipse plugin interface [4]. Help | Software updates | Find and install opens the update tool (Figure 1); then, enable the Search for new features to install option and click Next before pressing the Add remote Site button and typing the URL http://subclipse.tigris.org/update_1.0.x/. The user executing Eclipse must have write privileges for the program directory.
As of this writing, Eclipse is unable to use the filesystem to access local repositories directly, unless you build Subversion (SVN) with the JavaHL bindings and tell Eclipse to use them by selecting Preferences | Team | SVN. The SVN source code is available from the homepage [5]. The Subversion server is easy to configure, and it is typically easy to use for local repositories.
To create a repository for the project, enter svnadmin create --fs-type fsfs path/to/repository]; then, edit svnserve.conf (Listing 1) and passwd (Listing 2) in the conf/ subdirectory of the repository to configure server access.
| Listing 1: Server Configuration |
01 ### conf/svnserve.conf 02 [general] 03 password-db= passwd 04 realm = example realm ### a kind of "namespace" 05 anon-access = none ### for anonymous read access: "read" 06 auth-access = write |
| Listing 2: Access Data |
01 ### conf/passwd 02 [users] 03 testuser = secret ### User / Password |
Type svnserve -d -r path/to/repository to launch the server. To allow Subclipse to access the repository, you first have to register. To do so, select Window | Open Perspective and change to the SVN Repository Exploring perspective. The left-hand panel has a window titled SVN Repository that displays all of the integrated repositories. On the far right of the toolbar in this window, you will find an Add new SVN Repository button. Press the button and type the URL svn://localhost in the dialog. Subclipse will prompt you to enter the password. After doing so, the new repository appears in the list on the left-hand side of the window.
If the project you are working on in Eclipse resides in an SVN repository, Subclipse will help you to check out: click File | New | Other... to open a selection of available project wizards. SVN | Checkout projects from SVN lets you create a new Eclipse project from the files in the repository.
If you need to work on existing PHP files, copy the project root directory into your workspace folder and create a new project with the name of the project folder in Eclipse. Right-click the project root folder and select Team | Share Project to hand over control to the version management system.
By right-clicking on the file browser, you can create a new project. Select New | PHP Project. If the PHP Project does not appear directly in the New menu, you might need to take a detour via Other.... By right-clicking and selecting Team | Share Project, you can assign the new project for version control.
Once you have completed an editing step, you can commit the changes to the repository: To do so, right-click the file or folder and select Team | Commit (Figure 2). A comment can be added to each version created by a commit, and it makes sense to use this option for easier traceability later on.

If you have created a new file, you must explicitly assign control to SVN. To do so, check the box to the left of the file name; this changes the status to added.
If multiple developers edit the same file at the same time, SVN automatically merges the different versions, provided the changes relate to different lines of code. However, if the changes overlap, Subversion will report a conflict, which you will need to resolve manually because SVN is obviously unable to understand changes to the source code.
Subclipse transfers the output from the command-line tool to the graphical Eclipse environment; for files with conflicting changes, an exclamation mark appears to the left of the file name in the list. If you open a file, you will see that SVN has inserted conflict markers such as <<<<<<< .mine or >>>>> >> .r7 (see Listing 3).
| Listing 3: Conflict in SVN |
01 $name = $_GET['name']; 02 <<<<<<< .mine 03 $age = $_GET['age']; 04 ======= 05 $country = $_GET['country']; 06 >>>>>>> .r7 07 08 <<<<<<< .mine 09 print "<h1>Hallo, $name. You are $age years old.</h1>"; 10 ======= 11 print "<h1>Hallo, $name. You come from $country</h1>"; 12 >>>>>>> .r7 |
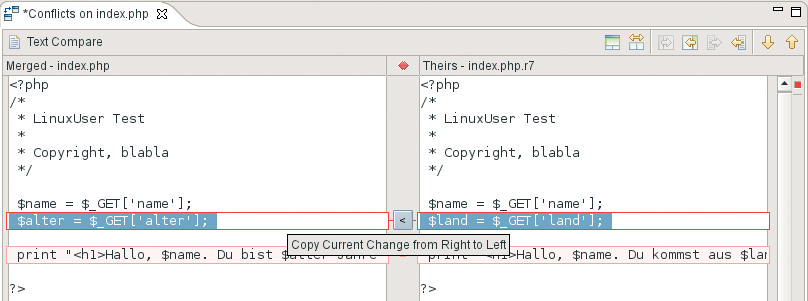
In Listing 3, the lines above the equals signs reflect the local file content, and the lines below the signs show the content from the repository. Eclipse offers a view that juxtaposes conflicting lines in Team | Edit conflicts (Figure 3). The buttons between the two editor windows with the different code versions let you keep the changes from either version. After modifying the code, you can select Team | Mark as resolved to tell the version control system that you have resolved the conflict.
The Update function saves you the trouble of checking out the whole repository whenever you make a change. Files are only downloaded if the version in the repository is newer than the local working copy. Just as with the Commit function, you can trigger an update via the dropdown menu for the folder you want to update: Team | Update gives you the latest status. The Console window in the bottom half of the Eclipse window lists the files that have changed.
The PHPEclipse extension, which you can add via the plugin interface, changes Eclipse into a programming environment for PHP. To launch the Update tool, press Help | Software updates | Find and install, select Search for new features to install, and then click Next. Then select Add remote Site to add a new download URL http://phpeclipse.sourceforge.net/update/nightly/.
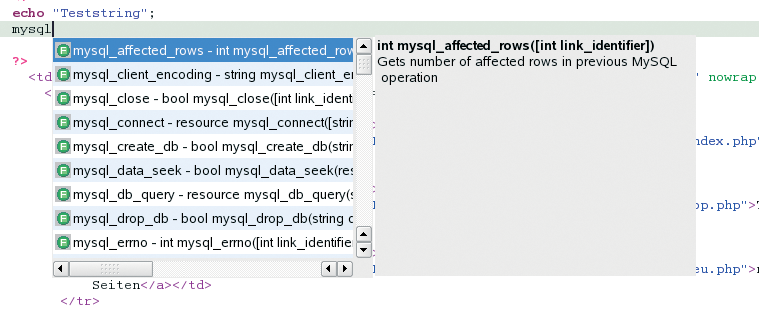
The Eclipse/PHPEclipse editor gives developers everything they need for rapid programming of PHP code: Ctrl+Spacebar completes PHP commands (Figure 4). At the same time, Eclipse displays an overview of parameters and return values, as well as a short description of the command. Automatic code completion also works with variables you have used previously. Brackets and exclamation marks are closed automatically. Eclipse indents code blocks with if instructions or for-next loops.
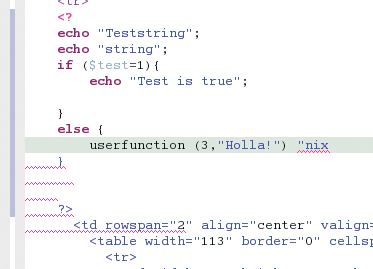
Eclipse highlights commands, functions, variables, strings, and some other code elements with different colors (Figure 5). In Preferences | PHPEclipse Web Development, you can customize the color scheme. This is also where you enable line numbering. Eclipse marks lines that have been edited since the last save with a blue tag at the start of the line.
In contrast to syntax errors, which are indicated by PHP error messages with line numbers to match, errors in the program logic are often difficult to find. The debugger interrupts the program flow at predefined points ("breakpoints"). The browser shows you the output the script has created up to the current point, and the debugger shows you the values of all variables. You can manipulate variables to change the program flow.
Additionally, the debug cursor points directly to the line of code, giving the developer an excellent overview of the flow of the script. Besides breakpoints, the debugger also supports various single-step modes in which the cursor follows the execution sequence.
Eclipse supports the Dbg PHP debugger, which is available as a binary archive [6]. Select the dbg_modules that match your PHP version; modules often work with newer releases.
To install the dbg.so PHP module, modify the PHP configuration file (php.ini). To find out where the file resides, create a test.php file with phpinfo() as its content, and call the file in your web browser. Search for php.ini in your browser and then for the extension_dir variable in the php.ini file. This tells you the directory with the PHP extension modules on your system. Now unpack the archive you downloaded, and move the dgb.so-x.x.x file that matches your PHP version to the module folder. Then, rename the file to dbg.so.
In php.ini, add the following lines below the position you just found:
extension=dbg.so
[debugger]
debugger.enabled = true
debugger.profiler_enabled = true
debugger.JIT_host = clienthost
debugger.JIT_port = 7869
Now disable the Eaccelerator extension (eaccelerator.enable="0") if it exists, and comment out the entry for XDebug (;zend_extension=/usr/lib/php4/20020429/xdebug.so). Other incompatible PHP extensions can be found as well [7].
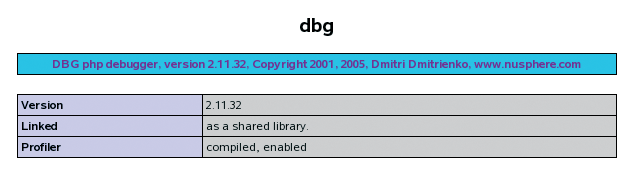
Change the value of the implicit_flush variable to On. This tells PHP to pass dynamically generated content to the web server before the script has finished running. The advantage of doing this for debugging is obvious; however, you will not want to use this setting for a production system because it affects system performance. After restarting the web server, call test.php again. If the phpinfo() output lists dbg as one of the installed extensions (Figure 6), the debugger installation was successful.
You still need to configure the debugger tool in Eclipse (Figure 7). Open the debugger by selecting Run | Debug. In the Configurations panel, select the PHP DBG Script entry and click New. A few basic settings are needed in the PHP Environment tab: In the Remote Debug tab, check Remote Debug.
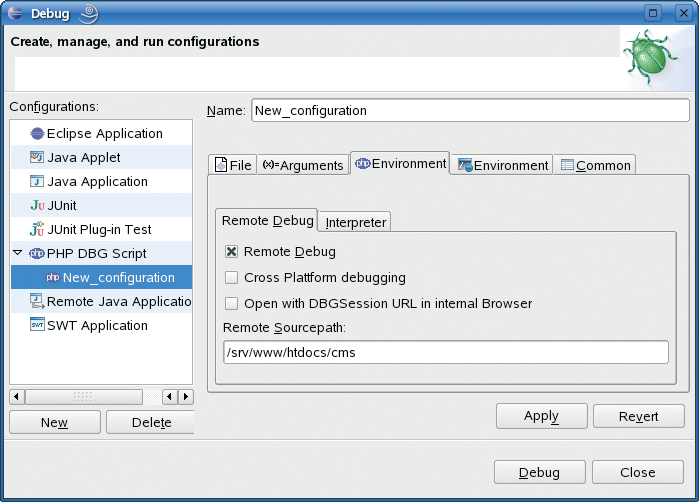
Remote Debug means that the debugger will use the web server to access the pages, and it is the only way to interpret pages that contain PHP code with scripting. Remote Debug is the right option here, even though the server is running on the same machine as Eclipse. Remote Sourcepath must point to the project folder. In the Interpreter tab, enter the path to the PHP binary. You can find the path at the command line by typing which php. If the interpreter binary does not exist, you will need to install the CGI component for PHP or build PHP with CGI support enabled.
Now select the project and the file you want to debug in the File tab; click Apply and close the debug tool, which is now fully configured. Take a look at the source code of the PHP file you want to debug and decide where you need to investigate the interpreting process more closely. Double-click the left edge of the editor window to set a breakpoint. Eclipse marks breakpoints with blue dots. Breakpoints only work in lines with PHP commands. Now launch the debugger again (Run | Debug) and start to debug by pressing Debug.
In the web browser, open the file you want to debug. To launch the debugger, add ?DBGSESSID=1@clienthost:10001 to the address line in the browser. This action is only required when you launch the debugger for the first time because the debugger will set a cookie. The web browser should now display an incomplete page as the breakpoint interrupts processing of the file. If your window manager lets it do so, the Eclipse window will move into the foreground. To view the debugger output, open the debug view in Window | Open Perspective, and you will see the active debugging session in the debug subwindow.
The Variables window in the Debug perspective shows all your variables. At the bottom edge of the window, you can see the variable content and manipulate the content if needed to run the rest of the script with different values. For arrays, you can click on the small array to view the elements and their values. The Breakpoints subwindow lists all the breakpoints and allows you to disable them temporarily.
By right-clicking in the debug window, you can stop or restart a session. If you have used the debugger and no longer have an active session, the browser will display an error page when you call pages via the local web server. To resolve this, delete a cookie called DBGSESSID.
The debugger needs at least one breakpoint per file, otherwise the debug script will just run without stopping. If you want to step through the code, you do not need to set a breakpoint in every line: F5 steps through the script line by line after the first breakpoint. A green cursor shows you which command is currently being executed. When stepping through the script, the debugger automatically opens any include files. Pressing F6 tells the debugger to skip substructures so that you can concentrate on the main loop. At each step, the Variables window gives you read and write access to all variable values.
The ability to see what a program is doing step by step helps you find logical errors. It's fine for exceptional programmers to say they prefer to use their own heads rather than a debugger, but if you know what it is like to spend all night looking for a trivial error, you will be happy for any help you can get.
The ability to leverage version control directly from within the GUI helps to facilitate ongoing development of existing program code. Finally, a feature-rich editor accelerates typing, provides a clear view of the program structure, and helps you write readable code.
| INFO |
|
[1] Eclipse download: http://www.eclipse.org/downloads/
[2] Comprehensive guide to version management SVN: http://svnbook.org/ [3] Subclipse: http://subclipse.tigris.org/ [4] Eclipse plugins: http://www.eclipseplugincentral.com/ [5] Subversion: http://subversion.tigris.org/ [6] Dbg PHP Debugger Dbg: http://dd.cron.ru/dbg/downloads.php [7] Dbg incompatible PHP extensions: http://www.plog4u.org/index.php/Using_PHPEclipse_:_Installation_:_Installing_the_DBG_Debugger |