
By Kristian Kißling
Some people call it "Pixie," but PXE is actually an acronym for "Preboot Execution Environment." This Intel [1] specification dates back to the 1990s.
PXE lets a client computer connect to a server and download a boot image over the network. This technology was designed for terminal-based computing environments, where a thin client device without on-board storage must find and download a boot image. Since then, admins have found other uses for PXE - for instance, as a tool for network installation of normal PCs.
A PXE server can save an admin mileage when installing a large number of computers - connect to the network, boot, and install. The best thing is that setting up this whole constellation just involves a couple of simple steps.
Consider two computers: Santa (a client) and LittleHelper (a server). Santa will retrieve data from LittleHelper via the network. Santa doesn't need you to do much; just change the boot sequence in the BIOS and move PXE boot up to the top. The BIOS on Santa's NIC will look for a DHCP server (LittleHelper, in this case), and Santa will then obtain a boot image. LittleHelper assumes the role of a proxy DHCP server and tells Santa where to find the boot image.
The boot image doesn't need to be on LittleHelper's own hard disk - LittleHelper can simply supply a path to the boot image on another computer. Santa picks up the boot image from the specified location and uses TFTP to download it into RAM. Before it can do so, LittleHelper gives Santa a valid IP address, which Santa needs in order to access the PXE boot image.
Although other DHCP servers don't faze the PXE protocol, it is a good idea to make sure your boot image is not loaded by unauthorized machines on the network. You can easily tell LittleHelper not to serve the image to clients unless it knows their MAC addresses.
In this scenario, the critical components that must be present on the server are a DHCP server, a TFTP daemon, and PXE images for the network install. On Ubuntu "Feisty Fawn," you can use the package manager to install the packages dhcp3-server, tftpd-hpa, and netkit-inetd if they are not already installed. OpenSUSE users need yast2-dhcp-server, dhcp-server, yast2-tftp-server, and tftp.
LittleHelper (the server) also needs a static IP address.
| Tip: Firewall Issue |
|
If you have LittleHelper advertising its images on openSUSE, but Santa fails to find it, this could be an issue with the openSUSE firewall. To modify the configuration, go to the Security tab and select User . |
To start, set up the DHCP server. On Ubuntu, the DHCP server wants to run out of the box, but it fails for lack of a meaningful configuration. To set this up, you need to edit /etc/dhcp3/dhcpd.conf with root privileges until you get something like the configuration shown in Figure 1. Before you start, make sure you create a safe backup of the original configuration file. Then restart the DHCP server by entering sudo /etc/init.d/dhcp3-server force-reload. The netstat -tulpe command tells you whether the DHCP server is running.

In Figure 1, the filename line specifies the file that the clients will use as their boot image.
In openSUSE, you'll need to specify the IP address of the the LittleHelper machine (on which the DHCP and TFTP servers will be running) in /etc/dhcpd.conf. Then launch the DHCP server as root by issuing an /etc/init.d/dhcpd force-reload. If you prefer to restrict access to specific MAC addresses, add the line host pxeclient { hardware ethernet MAC_address; } with curly brackets.
YaST helps you set up TFTP on openSUSE: select Network Services | TFTP Server (the icon with the green sneaker); click the circle next to Enable and add the path to your PXE image. The path for openSUSE is /tftpboot. Click Quit to start the server and modify firewall settings.
On Ubuntu, you need to modify the TFTP server configuration file before you launch TFTP. Enter
# sudo pico /etc/default/tftpd-hpa
and change RUN_DAEMON="no" to RUN_DAEMON="yes". The line below shows which directory TFTP expects to find the image in - this is normally /var/lib/tftpboot.
Relaunch the daemon by typing sudo /etc/init.d/tftpd-hpa force-reload. Netstat should show you that both the DHCP server and the TFTP daemon are running. The PXE images that LittleHelper will deliver to the clients when they establish a connection are missing now.
Several popular Linux distributions provide PXE-related files. See your vendor documentation. If you use Ubuntu as your PXE server, copy the client files to the /var/lib/tftpboot directory; this is /tftpboot on openSUSE.
Start by downloading the files in the normal way. Ubuntu users can change to a directory where they have read privileges and type the following non-intuitive command:
$ wget -nH --cut-dirs=8 -r -R *index*,gif,html,jpg http://archive.ubuntu.com/ubuntu/dists/feisty/main/installer-i386/current/images/netboot/
Replace the feisty entry with your version of the distribution, such as dapper, edgy, or gutsy. Then, acting as root, copy the files to the /var/lib/tftpboot directory.
On openSUSE, start by launching YaST to install the syslinux package. Then execute the following steps at the console, working with root privileges. Create two directories on LittleHelper - mkdir -p /tftpboot/pxelinux.cfg. This is where you will be storing the image files. Because you have installed Syslinux, you will already have a pxelinux.0 file on your computer; you can copy the file to the /tftpboot directory you just created:
# cp -a /usr/share/syslinux/pxelinux.0 /tftpboot
The next step is to type vi /tftpboot/pxelinux.cfg/default to create a configuration file called default; press I to insert text, and enter the following lines:
default linux
prompt   1
timeout  30
label linux
kernel linux
append initrd=initrd splash=silent showopts
Press Esc and then :wq to store these settings - you need to be root for all of this. Then go to the /tftpboot directory and download the two files you need off the network (this is for the openSUSE 10.3 installation):
# wget http://download.opensuse.org/distribution/SL-OSS-factory/inst-source/boot/i386/loader/initrd

# wget http://download.opensuse.org/distribution/SL-OSS-factory/inst-source/boot/i386/loader/linux
You can replace these files with versions for openSUSE 10.2 or SUSE Linux 10.1 as required.
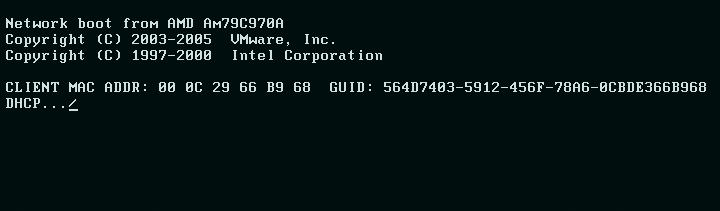
To start with the installation, change the boot sequence on the Santa client, and power the client on. A line will show you that the client is looking for the PXE server (Figure 2). If it quits, you can assume that something is awry with your dhcpd.conf.
If everything works out fine, you should see the boot menu. At the prompt, press Enter to boot openSUSE, or select the matching installation from the start menu for Ubuntu. The client will then load the kernel and the root filesystem.
If you want to rely on Internet repositories to complete the installation, you will need Internet access, which means connecting to a router.
In some cases, you might need to add the http or ftp source for the installation repository manually.
Alternatively, you can use a local Ubuntu or openSUSE repository on LittleHelper for the install instead of retrieving the files from the Internet.
| INFO |
|
[1] Intel PXE specification: http://www.pix.net/software/pxeboot/archive/pxespec.pdf
[2] Linux Terminal Server Project: http://www.ltsp.org |
| THE AUTHOR |
|
Kristian officially studied German philology, history and social science in Berlin but wasted a lot of his time with computers. He got hooked on Linux in the 90s and now works as an editor for LinuxUser. |
