By Klaus Knopper
If you can't find a Linux that strikes your fancy, why not roll your own? A new generation of Linux tools helps you build a custom Linux system. You can use these distro-building tools to create Live CDs - bootable discs suitable for troubleshooting, mass installation, and even ordinary end-user tasks. Add a missing driver to the base system and remaster a modified DVD, then start your familiar home environment from anywhere - without disturbing the contents of the hard drive.
Today's Live systems aren't confined to the CD tray. Live-Linux users also boot from USB sticks and other portable media. And not all custom distros fall in the Live niche. If you're really ambitious, you can build a conventional hard-disk system file by file.
This month, we examine tools for creating Linux systems. We start with a look at the documents and utilities of the Linux From Scratch project. We also take you to the NimbleX website, where you can create a custom bootable CD online. And we examine a pair of competing distribution tools from a pair of major vendors: SUSE's Kiwi and the Ubuntu Customization Kit (UCK). But first, we start with an introduction to the challenges of Live Linux by Knoppix founder and Live-distro pioneer Klaus Knopper.
In 1999, collections of system repair tools on bootable business-card-sized CDs became a popular marketing giveaway at Linux-related expos. Although these CDs were merely intended as huge bootable floppies with a command shell and some troubleshooting tools, I started thinking about the possibility of creating a CD that was not just a "set of tools," but a full Linux desktop system on a CD. If I could put a whole Linux system on a portable CD, I wouldn't have to carry a laptop with me to foreign IT environments. I could just slip my portable system into any available computer and boot my own familiar work environment. The concept of booting from an easily transportable medium was a very promising idea.
Some Linux distributors offered Live demos and semi-Live bootable CDs (CDs that offered some basic tools as a front end for a hard-disk installation), but these tools were intended for demonstration purposes - to get people to buy the "real" product in a shrink-wrapped box. I wanted a Live system for practical work: software tests, presentations, and play. I did not spend much time on finding a fancy name for this experiment; I just called it Knoppix [1].
Affordable USB memory sticks and USB hard disks were not available then, so I decided to take a look at the technical aspects of booting and running software directly from a read-only CD. This task posed a unique set of problems, which I will describe in this article.
Live systems have grown much more sophisticated since the early days. Knoppix now comes as a full DVD image. Several tools are available for creating custom Live CDs and DVDs - some of which you'll learn about in this issue. Behind the scenes, though, the developers of these tools face the same problems I faced when creating the first versions of Knoppix. No matter what special features you put inside, a good Live system has to boot Linux, support write access to important files, and successfully detect the system hardware.
Although hard-disk-like devices (including USB sticks, Zip media, and even floppy disks) read a boot record at device or partition start, the El Torito BIOS standard for CD-ROMs and DVDs takes a different approach to loading an OS. The developer has three options for designing a bootable CD or DVD:
isolinux.bin is a small program with the same purpose as lilo or grub. This mini-bootloader loads an operating system's kernel and accepts options typed from within an interactive boot shell. The isolinux.bin boot loader also allows loading of additional menus. Some distributions offer a fancy interface with graphics, interactive elements, and mouse support, but so far, the plain isolinux bootloader has shown the best compatibility with the full range of BIOS types. With isolinux.bin, cases in which the CD won't boot because of problems with the BIOS/bootloader combination are very rare.
isolinux allows boot options and kernel choices, but you have to type them on the boot command line. If you just hit Return without entering the options, isolinux continues to load the kernel with default options set in isolinux.cfg (Listing 2). Because isolinux is capable of reading files directly from the ISO filesystem structure of a CD (hence the name), no additional drivers or mounts are necessary in order to access the kernel and the initial ramdisk.
| Listing 2: isolinux.cfg |
01 DEFAULT linux 02 APPEND initrd=minirt.gz 03 TIMEOUT 300 04 PROMPT 1 05 06 LABEL knoppix 07 KERNEL linux 08 APPEND initrd=minirt.gz |
isolinux accesses the CD using BIOS calls. As soon as the operating system kernel starts and switches to protected mode, everything about the CD - including its location - is "forgotten." At that point, the operating system must find where the CD is located, mount its filesystem, and continue to start the system. If the kernel does not have a driver for the controller the CD is plugged into, continuing to boot is not possible and you will most likely end up with a "kernel panic" because the kernel won't be able to mount the root filesystem.
In the case of Knoppix, you'll receive a message that indicates the CD cannot be found. (This message will sound odd to someone who just put the CD in the drive and booted from it.) The initial ramdisk, which is loaded by the bootloader when the system is still in "BIOS mode," must contain all drivers and commands necessary to access the CD again and mount it successfully.
| Listing 1: Creating a Bootable CD ISO Image |
01 mkisofs -pad -l -r -J \ 02 -no-emul-boot -boot-load-size 4 -boot-info-table \ 03 -b boot/isolinux/isolinux.bin -c boot/isolinux/boot.cat \ 04 -o cd-image.iso cd-data-directory |
| SysLinux |
|
An equivalent to isolinux for DOS-formatted hard-disk-like devices (such as USB sticks and flash memory) is called SysLinux. It is quite easy to create a bootable memory stick from a CD by just installing SysLinux and renaming boot/isolinux/isolinux.cfg to syslinux.cfg. Knoppix versions from 5.0 and up include a small utility called mkbootdev for this task. |
The next big question faced by a Live CD designer is how to create a writable space for the system. Luckily for the developers of Linux Live CDs, Linux does not need a lot of writable space in normal operation.
The minimum is a writable home directory - necessary for applications that write personal configuration files and programs such as web browsers that use a local cache - and /tmp as a global temporary space, which also is used by shell scripts for inline redirection and temporary files. Just mounting /home and /tmp as a ramdisk will provide a nearly complete working system.
Of course, the requirements greatly depend on what you plan to do with the Live system. For a demo, it is fine to use simple default settings that work on virtually every computer (such as a VESA graphics driver and fixed settings for the desktop).
If you want a fully configurable system, you will need write permissions for at least /etc and /var. Just copying them to the ramdisk quickly eats up all available memory, and most of the space would be wasted by files that might not ever change.
One possibility is to copy only the files that are likely to change to the ramdisk. This option is inexact, however, requiring a lot of time and guesswork to determine which files will be modified.
Another possibility is to make certain directories writable and create symlinks to the files within them. A simple command like cp -aus /read-only-dir/etc /ramdisk/etc does this. /ramdisk/etc and all subdirectories are now writable, but the files contained within are just symlinks to the mounted read-only medium. This surprisingly stable technique was used in Knoppix up to version 3.7. You would think that this method would cause lot of "permission denied" messages when programs try to overwrite files symlinked to the read-only area, but in fact, most programs are implemented in a way such that the original file is first moved away, a modified copy is created, and then the moved original file (in this case, the old symlink) is deleted upon success. The result is that the symlink gets replaced with a real file when the file is modified.
For programs that use a direct write on the symlink, the files should be manually copied into the ramdisk. In my experience, some CUPS configuration files, some Samba databases, and /var/log/{wtmp,utmp} need this extra attention. The problem with this option is that you still do not have the full writing capabilities needed to try out new software at arbitrary places in the filesystem. Just copying everything to the ramdisk as symlinks eats up too much RAM.
The third option is to overlay a writable ramdisk with read-only data. This technique, which has gained popularity with the appearance of the UnionFS filesystem (Figure 1), really is like magic.
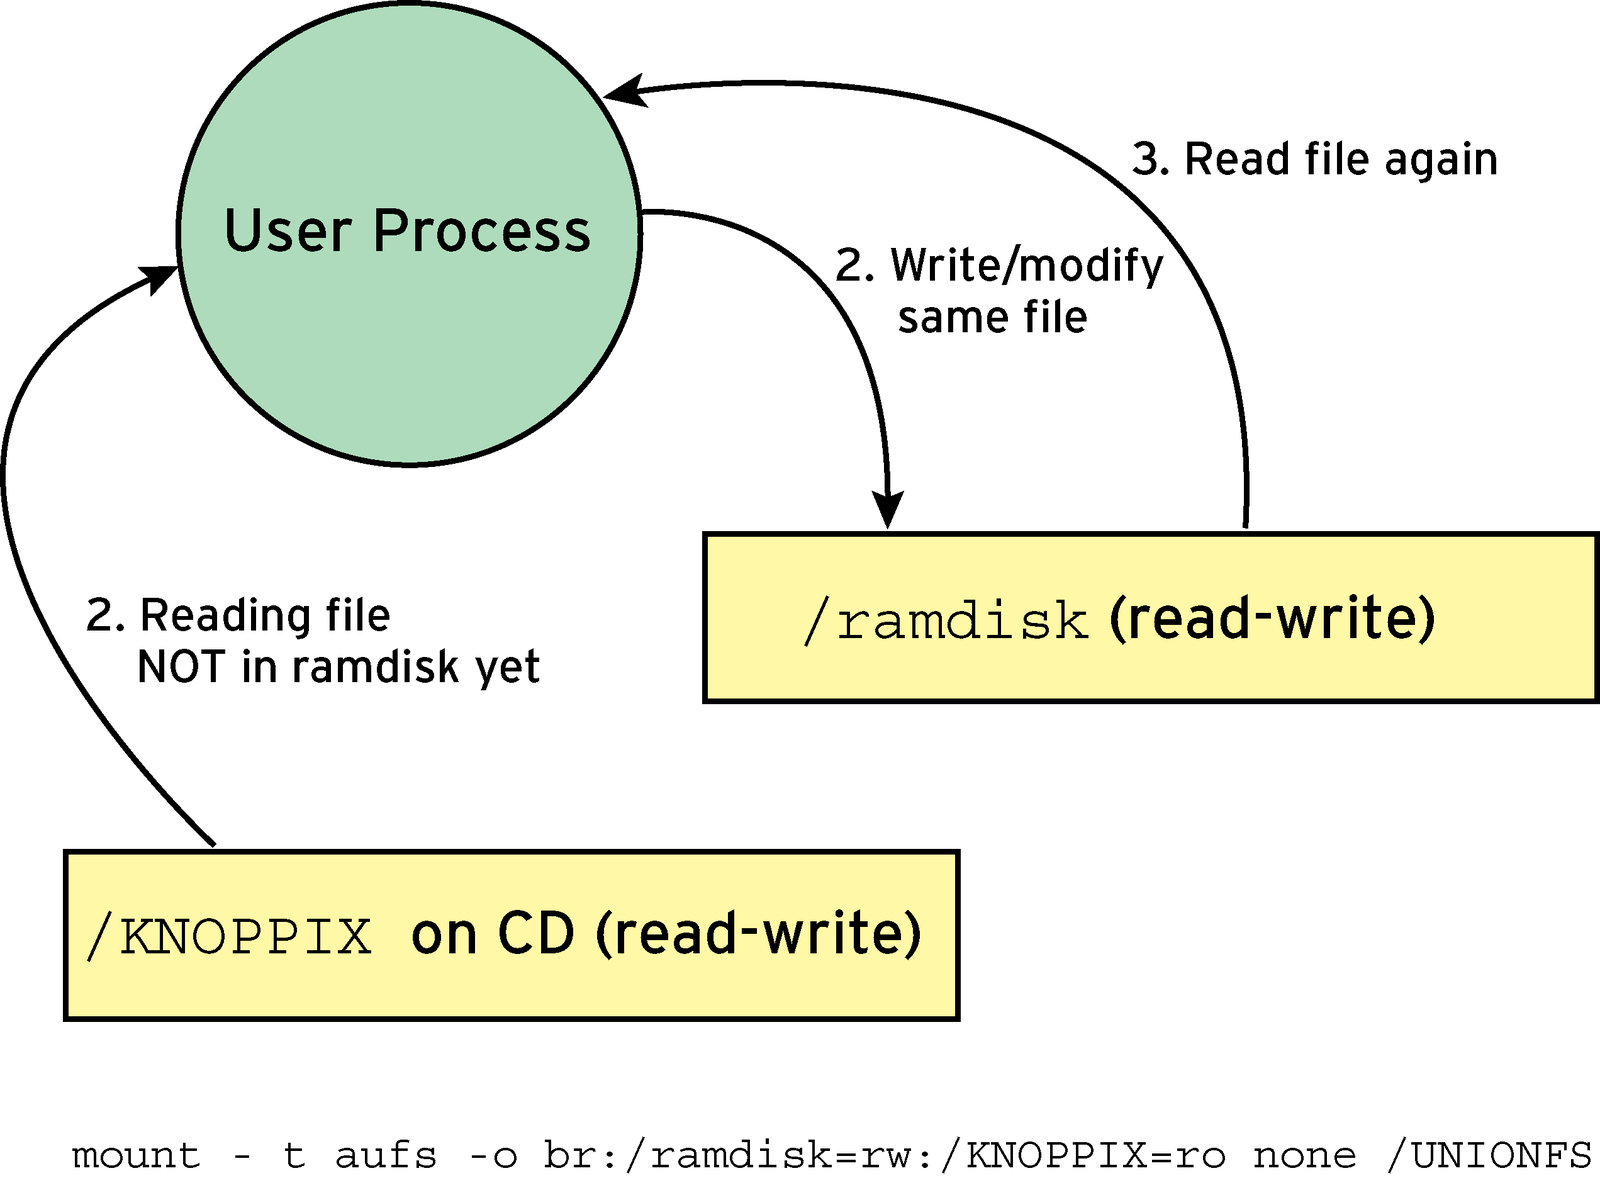
Had UnionFS existed in 1999, many problems in Knoppix would have been solved much more elegantly - without a lot of symlinks and scripts as workarounds for making read-only data writable on demand. UnionFS [2] was developed at Stony Brook University and was first used in Knoppix in version 3.8 to eliminate the strict separation of writable vs. non-writable directories and data.
Unfortunately, because of the code's complexity, the first versions of UnionFS were not very stable in situations with many consecutive file open/delete/create actions, but it was a good fit for simply running a Live CD.
Junjiro Okajima's AUFS (Another UnionFS) is a complete rewrite with the basic features of UnionFS, but without the bugs [3][4]. Now AUFS is used in Knoppix and many other Live Linux distributions.
A Live system for mobile use should adapt itself to the hardware on which it runs. Therefore, the Live CD should contain a kernel that is not too CPU specific, with as many drivers as possible compiled as modules. Knoppix uses a kernel compiled in 386-compatibility mode, which should run on all CPUs since the first 80386.
For detection speed, most IDE and SATA drivers needed for CD-ROMs are directly compiled into the kernel, whereas others (SCSI, USB, sound) are loaded as modules.
Udev (the standard dynamic hardware detection and device manager in Debian) and hwsetup (a Knoppix-specific tool written in C that loads drivers and sets symlinks independently of Udev) take care of activating all peripheral devices.
Another important feature is automatic creation of configuration files. Manual configuration is very time consuming - especially for the Xorg graphical subsystem. The X server has an auto-creation routine for /etc/X11/xorg.conf, but unfortunately it is not very reliable.
Knoppix uses scripts to create a working xorg.cnf file from templates and chipset-specific information obtained from DDC probes and the PCI subsystem.
Currently, each distribution comes with its own hardware detection utility, so it should not be too tricky to discover and load the right modules. Finding the best working sequence of detection and configuration for each device, however, requires some trial and error.
| Speed and Disk Space |
|
Because a Live system is limited in size, and because it must operate from the relatively slow CD tray, Live CD developers try to make the best possible use of available resources. Many of the steps for optimizing a Live system are quite different from the steps for optimizing a system that runs from the hard drive. One example of a problem associated with writing for the CD is latency of read access. CD-ROMs have comparably heavy mechanics - the laser head is very slow in positioning to the requested sector. Compared with devices with no moving parts (like USB memory sticks), CDs and DVDs have dramatically slower read access just because of seek times. A solution to the read latency issue is to defragment the filesystem so that the system requires only one seek per file. Another time-saving step is to place files that are frequently accessed together, right behind each other in the access order so they can be read in a continuous sweep. ISO9660 is a good filesytem for read-only data because it stores directory information right at the beginning of the filesystem (not scattered between files). ISO9660 also stores files as continuous data streams, with no gaps in between, since a gap would cause another seek. Another problem associated with Live systems is the lack of available space. For the first versions of Knoppix, 700MB of available space seemed like a lot, especially compared with the business-card-sized Live CDs, which had to fit in only about 20MB. However, a modern Linux distro with decent desktop software requires about 2GB, and desktops like KDE and Gnome always tend to grow in size in every new release. Iptables author Paul "Rusty" Russell quickly hacked up a kernel module based on the file-backed loop module for a repair toolkit CD. This module lets you store a filesystem with blockwise gzip compression, which reduces the data size to 1/3 of the original, tripling the available space for an average installation. I ported and later rewrote this module for newer kernels, extending it for 64-bit file access. In addition to saving space, the cloop module [5] improves read speed because the CD reader only reads about 1/3 of the data that an uncompressed file would require, which results in a net time savings even though the data must be uncompressed. |
With a union filesystem, the system will look and feel just like a hard-disk installation. Still, some work is required to remove temporary files and manage private settings - such as passwords and secret keys - but tasks related to customizing and adding new software have become significantly easier.
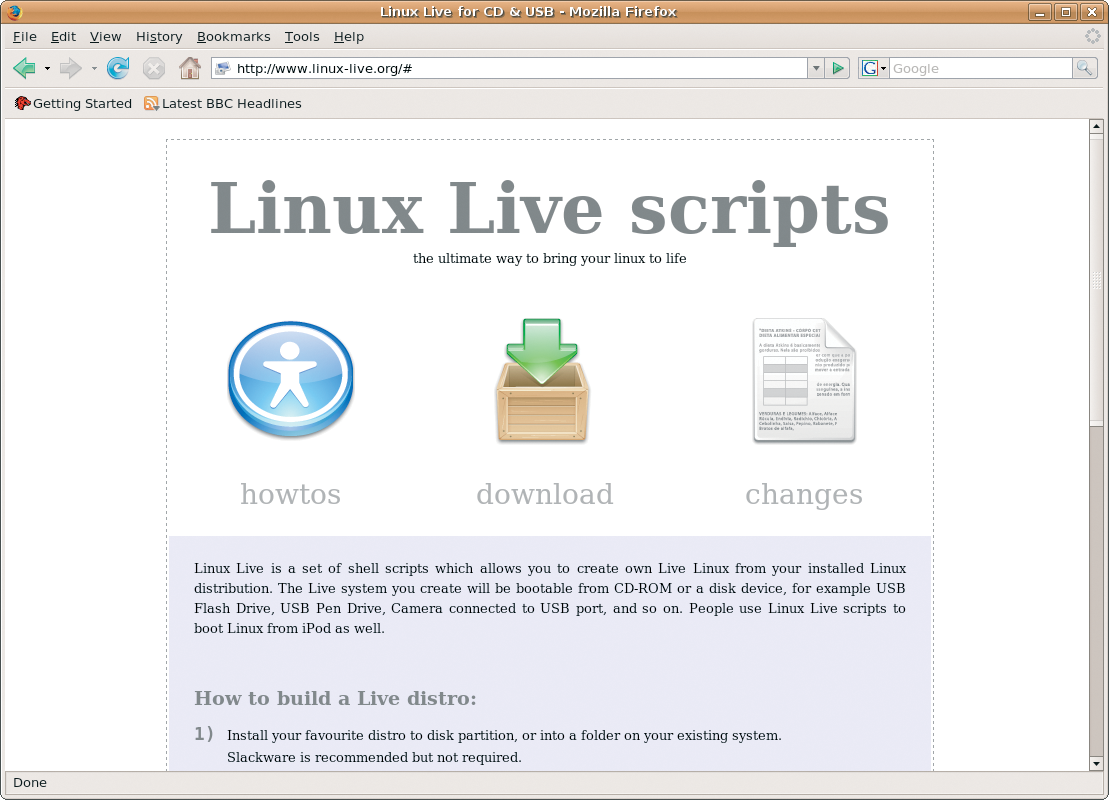
Although it is still my own preference to build a Live CD from scratch, some developers have created and published easy-to-use scripts with menus that let you create Live CDs from a master installation very quickly; for example, check out the Linux Live project [6].
Read on for more articles about other distro-building tools.
| INFO |
|
[1] Knoppix: http://www.knoppix.net/
[2] UnionFS: http://www.filesystems.org/project-unionfs.html [3] AUFS: http://aufs.sourceforge.net/ [4] Comparing UnionFS and AUFS: http://www.unionfs.org/ [5] Cloop module: "Cloop" by Klaus Knopper, Linux Magazine, January 2008, pg. 32 [6] Linux Live Project: http://www.linux-live.org/ |