
By Eric Amberg
Even minimal Linux distributions often contain components you will never need. If you prefer to keep control over the contents of your Linux system, one option is simply to build your own system from scratch. Building a Linux system package by package - including the kernel and shell - gives you an extremely lean and fast system. Also, you'll gain great insights into the structure of Linux.
The Linux From Scratch project (LFS) provides step-by-step instructions for building your own Linux system. LFS also maintains a Live CD you can use as a starting point for building your Linux. Just work through the LFS instruction book to create a complete system piece by piece. Keep in mind that the procedure takes much longer than a simple CD-based installation. In fact, it could take you several days or even weeks, but the effort is worthwhile for anybody wanting a peek behind the scenes at how a Linux system fits together. In the course of the build steps, you will come to understand many concepts that will help you in your daily work with Linux.
The Linux From Scratch manual is available from the project website [1] in PDF, text, or HTML format. To build you own Linux, you need good working knowledge of the shell: You should know how to create, copy, move, and delete files and folders. Basic knowledge of the installation and use of Linux software is also recommended. In particular, I recommend the Software Building HOWTO [2], the Linux Users Guide [3], and the LFS project's pre-reading list [4] as background reading.
A new system is always built on an existing Linux system called the host system. The LFS main book defines the minimal requirements, which any fairly recent distribution will fulfill. Just to be sure, compare the minimal requirements with your host system. The LFS "Host System Requirements" section includes a shell script that helps you check for the necessary components.
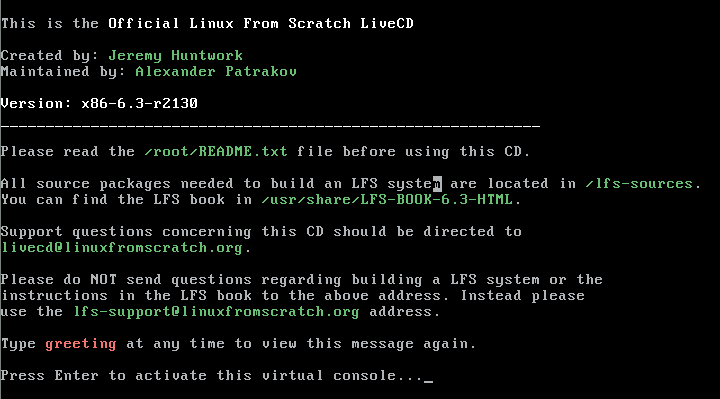
If you don't want to start with your own host system, you can use the LFS Live CD [5] instead (Figure 1). The Live CD includes all the tools you need, and the disc has a full set of required sources. This said, working from the LFS Live CD is not very convenient. The Knoppix Live CD is another alternative. When you are using the LFS documentation, make sure you check for any revisions at the errata website [6].
Before you get down to building your own special brand of Linux, it makes sense to take a bird's eye view of the procedure. To start, create a partition, then download the required packages and build the temporary tools you need to create your Linux system. This developer software is referred to as a tool chain.
The new Linux system will be built within the tool chain, which you will need to resolve the package dependencies of the host system.
After setting up your base camp, chroot to a new environment where you will install more packages; then, it's on to the boot scripts, the kernel, and the boot loader. Finally, you can boot your computer from your new LFS system.
To start, download the latest version of the LFS Live CD (currently 6.3-r2130) and burn the image onto a CD. It makes sense to print out the text of the manual and keep it next to your PC before you boot your host system from the Live CD. The sources are located in /lfs-sources. The CD gives you the latest version of the LFS documentation in /usr/share/LFS-BOOK-6.3-HTML. As with any other project, you should read the README.txt file before you start.
The LFS installation needs a separate partition. To create the partition, launch your favorite partitioning tool - cfdisk, for example - and create a native Linux partition. A minimal installation needs at least 1.3GB of disk space.
Depending on the applications you intend to install, you will need another 2 to 4GB of disk space later. Although the installation needs far less space later, the build process requires a fair amount of temporary memory. It also makes sense to create a swap partition.
After creating the partition, set up an ext3 filesystem on it. Assuming your partition is /dev/hda1, the command for creating a filesystem is mke2fs -jv /dev/hda1. The documentation also recommends using the original E2fsprogs package named by the LFS sources rather than your distribution's own tools to avoid issues with incompatible extra functions.
If you have created a second partition (e.g., /dev/hda2) as your swap partition, you can initialize the partition by typing mkswap /dev/hda2; then, mount the main partition. It makes sense to mount the partition as /mnt/lfs. Because this path is used time and time again, it also makes sense to store it in a variable. Next, create a directory, and finally enable the swap partition if you have one (see Listing 1).
| Listing 1: Enabling a Swap Partition |
01 # export LFS=/mnt/lfs 02 # mkdir -pv $LFS 03 # mount -v -t ext3 /dev/hda1 $LFS 04 # swapon -v /dev/hda2 |
Chapter 3 of the LFS book describes the packages and patches required for a minimal installation. For your first steps, the authors recommend keeping to package versions that are known to work.
If you use the LFS Live CD, you won't need to worry about the package versions. Otherwise, you will find a download address for each package in the documentation. To store the packages, create a new directory and set the permissions. The second command adds the sticky bit, by stipulating +t, in addition to the write permission.
# mkdir -v $LFS/sources
# chmod -v a+wt $LFS/sources
If you are using the Live CD, copy the whole archive to the directory you just created by typing cp /lfs-sources/* $LFS/sources. Otherwise, use this directory as your download directory.
The tool chain I referred to earlier also needs its own directory, $LFS/tools, which you can now create by typing mkdir -v $LFS/tools. Then type ln -sv $LFS/tools / to create a symbolic link to point to $LFS/tools as /tools. The strange-sounding syntax is actually correct. The advantage is that the tool chain will always be able to reference /tools, whether it's on the host system or on the LFS partition, which you will be making your temporary root directory later by running chroot.
To build the source packages, make sure you use a non-privileged user account; otherwise, you might damage the host system. It is a good idea to create an lfs user and grant the user full access to the $LFS/sources and $LFS/tools directories. Then type su and change to the new account:
# groupadd lfs
# useradd -s /bin/bash -g lfs -m -k /dev/null lfs
# passwd lfs
# chown -v lfs $LFS/tools
# chown -v lfs $LFS/sources
# su - lfs
The LFS document explains the command-line options for the useradd command (Chapter 4.3), or you can check out the man page for the tool.
The next step is to create a user environment without any potentially dangerous environmental variables. To do so, create a user-specific ~/.bash_profile with just the following line:
exec env -i HOME=$HOME TERM=$TERM PS1='\u:\w\$ ' /bin/bash
This line simply defines the variables HOME, TERM, and PS1 and launches a new Bash shell. As a non-login shell, the Bash shell parses the ~/.bashrc file, which should contain just the following:
set +h
umask 022
LFS=/mnt/lfs
LC_ALL=POSIX
PATH=/tools/bin:/bin:/usr/bin
export LFS LC_ALL PATH
Again, these lines give you a pure environment for the lfs user. The LFS book explains all these options in detail. Parse the profile as the lfs user by typing source ~/.bashrc. The host system is now ready for the tool chain.
The next step is to set up a temporary minimal Linux in which you will build up the LFS system. Chapter 5.1 of the LFS book gives an overview that tends to put people off because of the complexity of the processes - but don't dismay! Subsequent sections of the book provide details on every single step.
The $LFS variable should point to the LFS directory. Also, you need to know your host system platform, or target triplet as it is called. For a recent PC, this is typically i686-pc-linux-gnu. The name of the dynamic linker is very important for the remaining steps. Most systems use ld-linux.so.2, but you can find out by typing readelf -l /bin/ls | grep interpreter.
The next step is to unpack, build, and install the numerous basic and auxiliary packages. Chapter 5 of the LFS book tells you which packages to install and in which order.
The HOWTO assumes that the source code packages are in $LFS/sources, that you typed tar -xjf package_name to unpack, and that you changed to the package directory $LFS/sources/package_name. Path references in the guide are relative in some cases, as in mkdir -v ../gcc-build; your current working directory is thus critical.
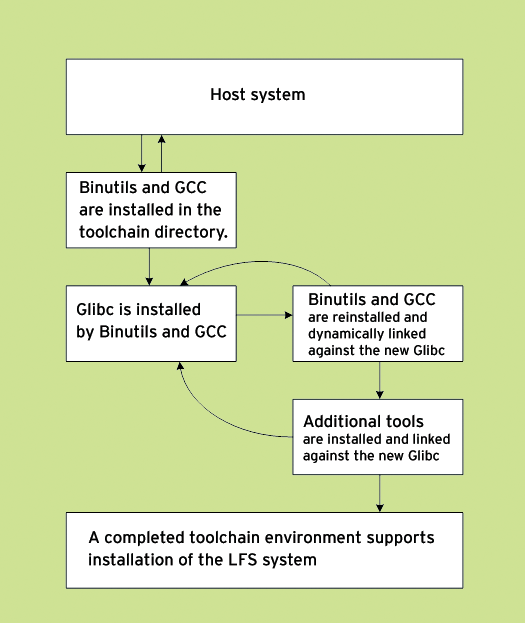
It can take a while to build some of the packages - get a cup (or a whole flask) of coffee or tea. To create the tool chain, first install the critical developer tools (the compiler, linker, assembler) by installing the Binutils and GCC packages, the C standard library glibc, and the Kernel API. To detach from the host system, link all your programs against the new libraries, then install a number of required packages to enable use of the GCC and Binutils test suites. Later, you can enter make check to see whether the build was clean and whether the programs will work.
Before you continue, install GCC and Binutils a second time to allow these tools to use the new linker and libraries. Then, run the patch command to install a patch for the GCC code. Patches typically contain bug fixes and minor modifications that developers provide until the next release cycle comes around. In the course of the installation, you will need patches for various packages.
After installing the packages specified in Chapter 5, you now have a working environment that is independent of the host system and which you will use to build the LFS system in the next step. However, feel free to do some memory optimization beforehand. For example, you can run strip --strip-debug /tools/lib/* and strip --strip-unneeded /tools/{,s}bin/* to remove the debug symbols from executable files and libraries. This will save about 70MB of space, and you can save another 20MB by removing the documentation with rm -rf /tools/{info,man}.
The last step in creating the tool chain is to change the owner of the tool chain by typing chown -R root:root $LFS/tools. If you have been working as lfs previously, you should now become root.
Finally, you can install the LFS system. Chapter 6 of the LFS book explains the steps. To create the directories in which you will mount the required virtual kernel filesystems, type mkdir -pv $LFS/{dev,proc,sys}. Udev also needs the /dev/console and /dev/null device files, which you can create as follows:
# mknod -m 600 $LFS/dev/console c 5 1
# mknod -m 666 $LFS/dev/null c 1 3
To create the device files in /dev, use the mount command's --bind option to bind the /dev directory on the host system (mount -v --bind /dev $LFS/dev). For details, refer to Chapter 6.2.2.
Additionally, mount the virtual kernel filesystem by running the following commands:
# mount -vt devpts devpts $LFS/dev/pts
# mount -vt tmpfs shm $LFS/dev/shm
# mount -vt proc proc $LFS/proc
# mount -vt sysfs sysfs $LFS/sys
Now you have everything you need to use the new working environment. The chroot command lets you create a temporary root directory in a directory of your choice.
After running the commands in the example, select /mnt/lfs as your chroot environment (Listing 2).
| Listing 2: The chroot Environment |
01 chroot "$LFS" /tools/bin/env -i HOME=/root 02 TERM="$TERM" PS1='\u:\w\$ ' 03 PATH=/bin:/usr/bin:/sbin:/usr/sbin:/tools/bin /tools/bin/bash --login +h |
Listing 2 also sets the right parameters for your new environment. Now follow the instructions in Chapter 6.5 to create a (FHS-compliant) folder structure for the new LFS system.
Now create a couple of required files (see Chapter 6.6), such as /etc/mtab, /etc/passwd, and /etc/group, and a couple of symbolic links to various programs, which other tools require at various positions on the filesystem. Then, install individual packages in the normal way.
After installing all the packages, you might want to take the opportunity to remove superfluous debugging symbols from all your binaries (Chapter 6.59). This saves another 90MB of space.
Then say goodbye to the temporary working environment (used by the tool chain), which is located in /tools. To do so, modify the chroot command to use the new chroot environment (see Listing 3). Now you also can delete the /tools directory.
| Listing 3: Modifying chroot |
01 chroot "$LFS" /usr/bin/env -i HOME=/root TERM="$TERM" PS1='\u:\w\$ ' PATH=/bin:/usr/bin:/sbin:/usr/sbin /bin/bash --login |
The lfs-bootscripts-6.3 package contains various scripts for starting and stopping the system when you boot or shut down. Some of these scripts are likely to need customization, but most of them will run as is.
To discover more about the correlations between critical components of your Linux system, read Chapter 7, and make sure you add any configuration files that you are missing (for the network for example).
Chapter 8 starts with setting up the /etc/fstab file, which specifies where, in which order, and with which options the system mounts the partitions.
After editing the file, you can move on to installing the heart of your Linux system: the kernel. All you are missing now is a boot loader. Chapter 8.4 tells you how to configure Grub.
Believe it or not, you are done, and after a bit of clean-up work (Chapter 9.3), you can boot your new LFS system.
With just a couple of functions and programs, you have successfully used LFS to build a minimal system. Apart from the standard tools, this system does not offer you much.
The BLFS subproject (see the box "Linux From Scratch Resources") shows you how to install further applications on your LFS system to give you a completely customized Linux.
Now you can think about package management - Chapter 6.3 of the LFS manual has a couple of suggestions. If you are interested in adding some protection to your system, check out the HLFS documentation, which is also available from the project website.
| Linux From Scratch Resources |
|
Linux From Scratch is primarily a set of documents, but the project also provides a Live CD to serve as a foundation or build host for your homegrown Linux. At the LFS website [1], you'll also find hints, patches, and other helpful materials. According to the LFS site, the project consists of the following components:
|
| INFO |
|
[1] LFS project: http://linuxfromscratch.org
[2] Software-building HOWTO: http://www.tldp.org/HOWTO/Software-Building-HOWTO.html [3] Linux Users' Guide: http://www.linuxhq.com/guides/LUG/guide.html [4] The essential pre-reading hint: http://www.linuxfromscratch.org/hints/downloads/files/essential_prereading.txt [5] LFS Live CD: http://www.linuxfromscratch.org/livecd/download.html [6] LFS errata list: http://www.linuxfromscratch.org/lfs/errata/ [7] FHS: http://en.wikipedia.org/wiki/Filesystem_Hierarchy_Standard |
| THE AUTHOR |
|
Eric Amberg has worked as a system engineer for IT networks in various large corporations for many years. Eric's special fields include Linux and network security. He is also a freelance author and magazine writer. His latest book, Linux Server with Debian GNU/Linux [in German], was published in June 2007. |