
By Marcel Hilzinger
The Kiwi image system is SUSE's favorite entry in the recent pageant of Live Linux tools. Although Kiwi is very capable of creating an ordinary Live CD or DVD, you can also use Kiwi to generate other types of bootable images, such as Xen-based virtual images, USB stick images, and even PXE-based network boot images for thin clients. I decided to put Kiwi to work creating a bootable Linux USB stick.
OpenSUSE 10.3 includes RPM packages for the Kiwi image system. Also, you can download Kiwi source code from the project website [1]. If you are setting up Kiwi on an openSUSE system, you will need to install kiwi-desc-usbboot, kiwi-desc-livesystem, and a couple of Perl and Python packages. Either add the Tools repository from the openSUSE build service as a package source or click the two YaST meta packages in the openSUSE wiki [2].
On the command line, you can add the repository and install Kiwi as follows:
zypper sa http://download.opensuse .org/repositories/openSUSE:/Tools/openSUSE_10.3/ Tools
zypper install kiwi-desc-usbboot
zypper install kiwi-desc-livesystem
You will need about 5GB free disk space for the Kiwi install and the whole live system.
Kiwi installs a complete openSUSE system on your computer and then transfers the whole system to a USB stick in a compressed Squashfs filesystem. The boot loader resides on a separate ext2-formatted partition.
To let Kiwi know where to install additional packages for the target system, you must add two repositories to your /usr/share/kiwi/image/kwliveCD-suse-10.3/config.xml file by replacing the entries around line 30 with the two repositories from Listing 1. Instead of using the main openSUSE repositories, you can also enter a mirror server.
| Listing 1: Specifying a Package Destination |
01 <repository type="yast2"> 02 <source path="http://download.opensuse.org/distribution/10.3/repo/oss/"/> 03 </repository> 04 <repository type="yast2"> 05 <source path="http://download.opensuse.org/distribution/10.3/repo/non-oss/"/> 06 </repository> |
If you will be creating your stick version from an openSUSE DVD without downloading packages from the Internet, mount the DVD in, say, /mnt, and then add the following source:
<repository type="yast2">
       <source path="/mnt"/>
</repository>
Theoretically, both approaches should work on 32- and 64-bit systems. However, the 64-bit stick demonstrated some strange behavior in the lab.
Because two kernels were installed on the stick (32- and 64-bit), all attempts to load modules after initrd failed. The reason for this is probably a bug in the 64-bit version of Smart. Read the "64-Bit Bug" box to discover how to set up a 64-bit system on a Live USB stick despite the bug.
Do not modify the /usr/share/kiwi/image/usbboot/suse-10.3/config.xml file. The openSUSE wiki is misleading here: Because Kiwi uses the KwliveCD configuration, no further modification of initrd is necessary. Kiwi developers are planning to make the configuration files read-only and to add a checksum.
| 64-Bit Bug |
|
The Kiwi schemas for KDE and Gnome need a number of packages from the non-oss repository by default. Because of a bug in Smart, you can only specify one installation source on a 64-bit machine, so you must remove all packages and dependencies on the non-OSS repository from your /usr/share/kiwi/image/kwliveCD- suse-10.3/config.xml configuration file, including:
After creating your stick, you can then go on to install these packages or add another source to the installation. This workaround is also required if you want to create a 32-bit stick on a 64-bit system with linux32 kiwi .... |
The next step is to download packages and prepare the system that will be copied to the USB stick:
kiwi --prepare /usr/share/kiwi/image/kwliveCD-suse-10.3 --root /tmp/kiwi-tmp --add-profile KDE --logfile terminal
Kiwi uses Smart rather than YaST as the package manager for downloading and installing packages.
According to the Kiwi documentation [3], you can also use Zypper as the package manager; however, attempts to use Zypper in our lab just produced error messages. Your mileage can vary at this point depending on your download speed. Kiwi took just short of half an hour to install the system on our lab machine. The tool then displays the message KIWI exited successfully.
If one of the repositories is unavailable or you have added packages without a repository entry to your list, you will be bombarded with error messages.
The step described in the openSUSE wiki, rm -fr /tmp/kiwi*, is not needed unless you have already experimented with the software and want to remove residual installations.
After the download, you will find a complete system in /tmp/kiwi-tmp/. Smart saves the packages it has downloaded temporarily in /tmp/kiwi-tmp/var/lib/smart/packages/, but it deletes this directory again after the installation.
The third step includes creating a compressed filesystem for the complete directory tree from the existing one:
mkdir /tmp/kiwi-image

kiwi --type usb --create /tmp/kiwi-tmp -d /tmp/kiwi-image--logfile term
To create a compressed filesystem, Kiwi calls the mksquashfs /tmp/kiwi-tmp/ command. The tool then goes on to create the initial ramdisk, initrd. This code loads the system into memory when you boot your machine and before Kiwi mounts the compressed filesystem on the stick. The required files are in /tmp/kiwi-image/.
The basic system with KDE takes up about 700MB of disk space, and initrd accounts for another 20MB. Thus, you need a USB stick with a capacity of at least 1GB. If you install a text-based openSUSE system instead of the KDE desktop, version 10.3 will fit on a 256MB stick.
The last step is for Kiwi to partition the USB stick and copy the required files to it. The tool creates a writable partition on the free memory space of your stick. This writable partition lets you save changes to the system.
To allow this to happen, you need to plug the stick into your computer and then enter the following:
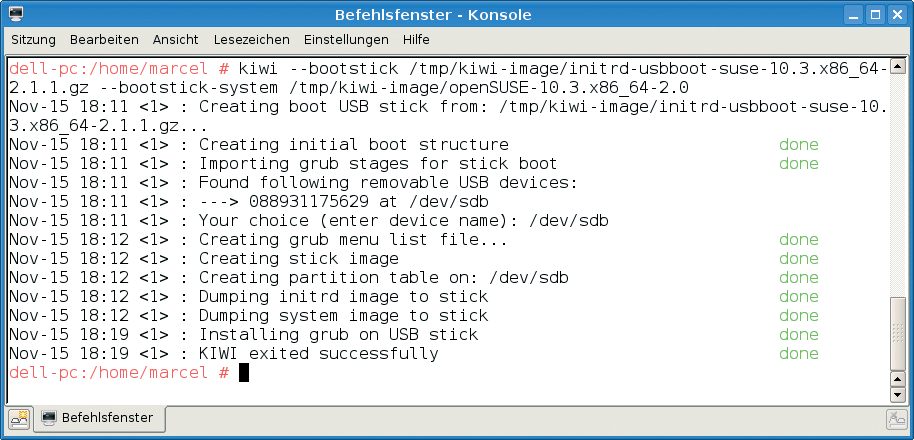
kiwi --bootstick /tmp/kiwi-image/initrd-usbboot-suse-10.3.i686-2.1.1.gz--bootstick-system /tmp/kiwi-image/openSUSE-10.3.i686-2.0
Because openSUSE automatically mounts external storage media, you should run the mount command first to make sure the USB stick is not already mounted. If so, you must umount the medium to prevent Kiwi from exiting with an error message.
On 64-bit systems, make sure you modify the names for the initrd and openSUSE images. Instead of initrd-usbboot-suse-10.3.i686-2.1.1.gz, you can specify an initrd with splash.gz. This step avoids the need for Kiwi to build the splash screen and saves you a couple of seconds.
Because Kiwi automatically locates USB sticks and suggests them in a list of devices, you don't need to specify a device name. Just type the name of the correct device file.
Depending on your stick's write speed, it can take about 10 minutes to transfer the files (see Figure 1).
In my tests with four different USB sticks, I only managed to boot from two of them, and even this took multiple attempts. Before you even try to boot a machine from a stick you have just created, it makes sense to remove and reinsert the stick. The system must be able to detected and mount the two partitions; if it doesn't, your stick is broken. Repeat the last step once again and do not remove the stick immediately on seeing the KIWI exited successfully message.
I was unable to use a stick by Tulip, which uses a sector size of 2,048 bytes instead of the standard 512 bytes. To see whether you have a stick by this vendor, check the output from fdisk /dev/sda. Devices with this problem show up as:
The sector size is 2048 (not 512)
If you want to format a stick of this kind with a FAT filesystem on Linux, you have to call mkfs.vfat with the -S 2048 option. The boot partition on the Tulip stick was always 77MB instead of 18, and it was inoperative. An attempt to install the system on an SD card using a card reader also failed.
| Four Steps for a Bootable Stick |
|
Following is a quick summary of the process described in this article.
zypper sa http://download.opensuse.org/repositories/openSUSE:/Tools/openSUSE_10.3/ Tools
zypper install kiwi-desc-usbboot
zypper install kiwi-desc-livesystem
kiwi --prepare /usr/share/kiwi/image/kwliveCD-suse-10.3 --root /tmp/kiwi-tmp --add-profile KDE --logfile terminal
mkdir /tmp/kiwi-image
kiwi --type usb --create /tmp/kiwi-tmp -d /tmp/kiwi-image --logfile term
kiwi --bootstick /tmp/kiwi-image/initrd-usbboot-suse-10.3.i686-2.1.1.gz --bootstick-system /tmp/kiwi-image/openSUSE-10.3.i686-2.0 |
Kiwi currently supports either Gnome or KDE, which you specify by setting the --add-profile GNOME or --add-profile KDE options. Several options for adding your own packages or drivers are available. The easiest approach is to add everything before the installation. As long as you have enough free space on the stick. You then can add any packages and change any settings you like.
If you want to add software to the stick during the creation process, simply add further repository entries to the configuration file, then add the required package names to the KDE or Gnome profile. Then, you will need to restart the whole download.
The chroot command gives you a faster solution. Type chroot /tmp/kiwi-tmp to make /tmp/kiwi-tmp your root directory; then, you can install any packages or remove packages you do not need. This step also lets you replace Kaffeine and the Xine libraries with packages from Packman. Do not forget to exit the chroot environment by typing exit before you create a boot image.
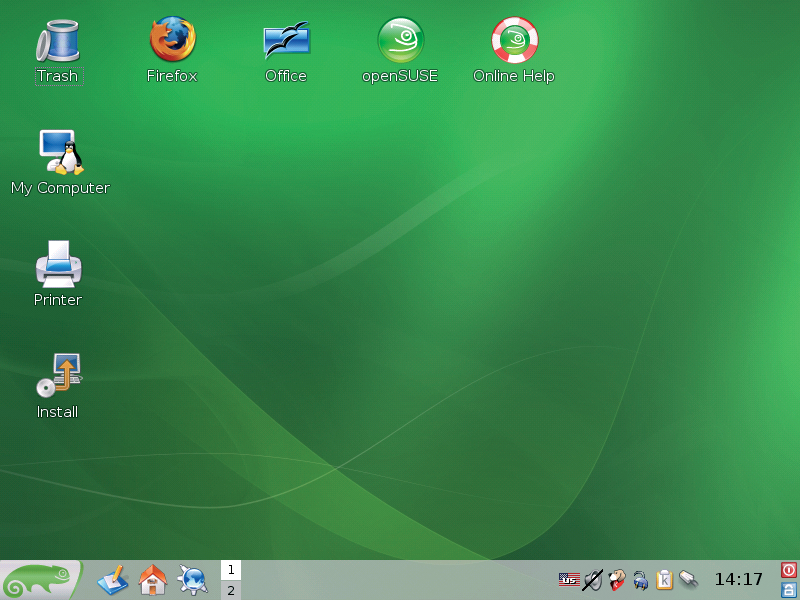
After all this hard work, the reward is a fast and totally portable openSUSE system (Figure 2). On our lab system with 1GB RAM, USB SUSE worked faster than any other installed system, with no unpleasant side effects. The KDE desktop even has an icon that lets you install the system permanently.
| INFO |
|
[1] Kiwi homepage: http://kiwi.berlios.de/
[2] Information on the OpenSUSE wiki: http://en.opensuse.org/Live_USB_stick [3] Official Kiwi documentation: http://svn.berlios.de/wsvn/kiwi/kiwi-head/doc/kiwi.pdf?op=file&rev=0&sc=0 |