
By Juliet Kemp
Puppet is a centralized configuration management system that uses a cross-platform specification language. To use it, you run a central Puppet server - the puppetmaster - and run puppet daemons on all the computers you administer. Configuration options for all the client machines are set up on the puppetmaster. Then, configuration changes are propagated from the puppetmaster to the appropriate clients.
Puppet lets you manage files (ownership, mode, content, and existence), users, groups, packages, and services from a central location. You can run commands or scripts, and you can also manage crontabs, filesystem mounts, and network configuration settings.
Each item you manage is known as a resource, and resources are categorized into types (e.g., file, package, service, cron). Puppet is under active development, and people are regularly adding more types - you can even create your own type.
Three major reasons for using Puppet are:
Another advantage of Puppet is that it works together with a tool called Facter. Facter sets up per-host variables (such as hostname, IP address, and operating system) automatically, allowing you to fine tune specific settings on individual clients without losing the benefits of a common configuration.
Puppet source code is available from the project website [1].
Puppet packages reside in the repositories of several Linux distributions. For Debian, the Puppet server package is puppetmaster. Also, you will need a set of Ruby packages, which apt-get will sort out for you.
Puppet is also available for other distributions and can be compiled from source.
Note that the current Debian stable package is v0.20.1, whereas the current source release is v0.24.1, so some newer features are missing from the Debian package discussed in this article.
The main configuration file is at /etc/puppet/puppetmaster.conf and is straightforward; for example:
[puppetmasterd]
# Make sure all log messages are sent to the right directory
# This directory must be writable by the puppet user
logdir=/var/log/puppet
vardir=/var/lib/puppet
rundir=/var/run
To store file content, you'll also need a file server configuration file at /etc/puppet/fileserver.conf. The example shown here gives the path for file storage on the puppetmaster and allows access to all machines in example.com:
[files]
 path /etc/puppet/files
 allow *.example.com
# deny *.evil.example.com
# allow 192.168.0.0/24
Also, you can ban specific machines or domains and can specify by IP address if you prefer. To create the Puppet users that the daemon runs as, run the puppetmaster daemon for the first time with the mkusers flag. Because you haven't created any node definitions yet, you'll also need to use the --nonodes flag:
/usr/bin/puppetmasterd --mkusers --nonodes
Now that the initial server setup is done, I'll look at how to set up your site manifest and start managing configurations and other types. By default, the main Puppet site manifest is at /etc/puppet/manifests/site.pp. Anything in this file will run on all clients. To start, try putting in an easy recipe; the sudoers file is a useful one and is shown here:
file { "/etc/sudoers":
    owner => "root",
    group => "root",
    mode => "440"
}
This will ensure that the sudoers file on the client has these properties.
When testing, you will want to run your puppetmaster as puppetmasterd --verbose, which sends output to the screen rather than to logs, so you can tell what's going on immediately.
Next, start the puppetmaster, and then you also will need to set up a client so you can run a test. For a client, you need the puppet package. To set the server name for your site, edit /etc/puppet/puppetd.conf,
server = puppetserver.example.com
then change the modes or owner of the /etc/sudoers file on the client so they differ from what you've set in site.pp on the puppetmaster. Then, run the client for the first time using the puppetd --waitforcert 60 --test command.
Clients are authenticated by a certificate request to the puppetmaster. The client will complain about the lack of certificate and then pause, so you need to tell the puppetmaster to sign the client's certificate. puppetca --list on the puppetmaster shows the list of clients waiting for signature. puppetca --sign client.example.com (on the puppetmaster) will sign the certificate (or puppetca --sign --all signs all the waiting certificates). After 60 seconds, the client will pick up the signed certificate and run. The test flag makes the client run in verbose mode, one time through.
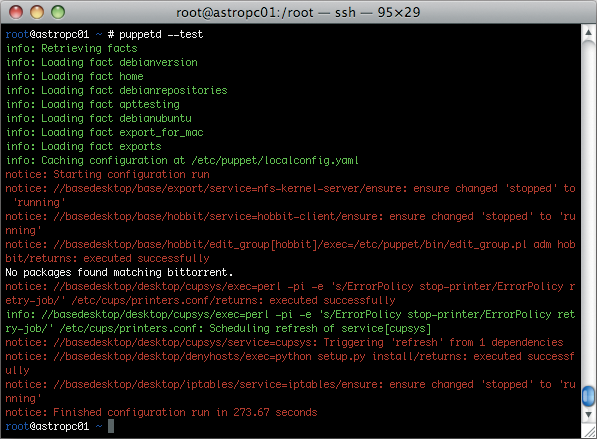
Figure 1 shows a slightly more complicated sample run on one of my clients.
After the run finishes, check /etc/sudoers; the modes should now be as you set them on the puppetmaster.
In addition to managing these file attributes, you can also manage file content using Puppet as a file server. First, create a sample sudoers file and put it in /etc/puppet/files/sudoers.
Then, edit site.pp again so that the sudoers recipe looks like this:
file { "/etc/sudoers":
    owner => "root",
    group => "root",
    mode => 440,
    source => "puppet://puppetserver. example.com/files/sudoers",
}
Edit the file on the client so it looks somewhat different from this sample file (e.g., add a test comment line), and run Puppet on the client again with puppetd --test. The file content will change.
When managing files, you can also ensure that softlinks exist or that directories exist. This snippet also shows how you can use a single file { } container for multiple file resources.
file {
    "/star":
        ensure => link,
        target => "/soft9/star";

    "/test/dir":
        ensure => directory;
}
Note the semicolon at the end of each resource specification.
Resources interact with each other. Certain packages are required for certain services, for example, or you might want a service to restart when a particular file is changed. Puppet has dependencies - notably require and subscribe - to set up these interactions.
The example below uses the service type, which you can use for exim, Apache, or any other daemons that you want to keep running:
service { "slapd":
    ensure     => running,
    hasrestart  => true,
    require    => Package["slapd"],
    subscribe   => [File["ldap.conf"], File["/etc/ldap/schema"]],
}
The hasrestart option lets Puppet know whether to restart service with stop/start or with restart. require simply provides an ordering relationship; it guarantees that the referred-to resource - in this case, the slapd package - will be set up before this resource. All types support this.
subscribe is a reactive dependency. If the specified resources change, then the resource will refresh. The types exec, service, and mount support this.
Note the way that you specify Puppet resources in this context: using the type name capitalized and giving the name of the resource. Also, these resources must be specified elsewhere, or an error will occur.
Puppet can manage numerous types:
package { "slapd": ensure => installed; }
exec { "exim4-update":
    command     => "/usr/sbin/update-exim4.conf",
    user        => "root",
    subscribe    => File["update-exim4"],
    refreshonly  => true,
}
user { "manager":
    ensure     => present,
    home       => "/local/manager",
    managehome  => true,
    gid        => "systemusers",
}
For a full list of types, see the Puppet project website.
New types are being developed all the time - although you might need to update to the latest version of Puppet to use them.
| Listing 1: Cron Job to Restart Puppet |
01 01 cron { restart-puppet:
02 02   command => 'if [ -e /var/run/puppetd.pid ];
03        then ps uw -p `cat /var/run/puppetd.pid`
04        | grep -q ' ruby /usr/sbin/puppetd'
05 03        || (rm /var/run/puppetd.pid; /etc/init.d/puppet start); fi',
06 04   user => root,
07 05   minute => '0',
08 06 }
|
For any resource, you can set up defaults. For example, if most of your files are owned by root and have chmod value 644, the snippet here will set these values as default for all files:
File {
    owner => "root",
    group => "root".
    mode  => "644"
}
To override this default, specify a different value for any of these values within a particular resource. Note that defaults only apply to their own scope (class) and any class beneath that; if you want them to apply globally, you should set them outside any class - for example, in site.pp.
The Puppet website offers suggestions for organizing your files and manifests. Regardless of what system you use, make sure it is comprehensible and easily updatable.
My system looks like this:
- Puppet main dir:
  |- Files
  |- Applications
     - Users
  |- Manifests
    |- site.pp
     - Nodes -- directory with
       various node manifests --
       see next section
     - Classes -- directory with
       various class manifests,
       according to program
       (e.g., apt.pp, apache2.pp)
  |- Definitions.
  |- Templates.
The subdirectories all contain class files (see below), and to include these, site.pp looks like this:
import "classes/*"
import "definitions/*"
import "nodes/*"
import "users/*"
So far, I've only considered the configuration for a single machine, but Puppet really comes into its own when you have multiple machines. If they're all identical, you only need to set up one configuration - the default.
# site.pp
default {
    include sudo
}
If this is the only configuration, it will run on any Puppet client connecting to this puppetmaster.
But you can also have a configuration that differs for each machine, or you can set up base configurations and then either inherit from or include them in the node configuration. For example, you may have a basic server config that differs from your desktop config, and both may inherit from a base or default config (Listing 2).
| Listing 2: Multiple Classes and Inheritance |
01 class base {
02     # Various basic things
03     include autofs
04     include cron
05     include puppet
06     include ssh
07     # and so on
08 }
09
10 class desktop inherits base {
11     # Everything in the base class will automatically be included here
12     # Then you can also
13     include latex
14     include gnome
15     # and so on
16 }
17
18 class server inherits base {
19     # Again, everything from the base class will automatically be included
20     # Then some other server-only things
21     include nfs
22     # and so on
23 }
|
Classes can be specified either in a single file or in a file per class; I recommend the latter for ease of configuration management.
A useful aspect of Puppet is that it comes with Facter, a utility that sets various "facts" about a particular machine, including hostname, IP address, architecture, operating system, SSH key, processor information, memory information, and others.
To see the full lists of the facts provided by default, type facter at the command line. You can refer to these facts within Puppet with $factname. These facts have two important uses: to create conditional structures, and to use in templates.
Puppet has three types of conditionals:
package {
    "krb-clients":
       ensure => $operatingsystem ? {
          ubuntu  => absent,
          debian  => installed,
          default => undef
    };
}
Here, if the $operatingsystem fact is set to ubuntu, the package is not installed; if it is set to debian, the package is installed. The default is not to set the attribute at all. Note the lack of a comma on the final line.
case $operatingsystem {
   ubuntu:  { include ubuntu }
   debian:  { include debian }
   default: { include basic }
}
In this snippet, the class specific to each operating system is included, depending again on the value of the $operatingsystem fact. Multiple conditions can be specified by using a comma.
if $needexample {
    file { "/usr/local/example": ensure => present }
}
else {
    file { "/usr/local/test": ensure => present }
}
Currently, it is only possible to determine whether the variable is set, but not to distinguish between particular values of a variable. To do that, you must use the case or selector statements.
A template uses Ruby to put variables into a source file. In other words, it's like providing a central file that can vary machine by machine.
A good example of using a fact in a template is to set an ipchains policy. For example, the file iptables.erb (ERB is the Ruby template syntax) shown in Listing 3 uses $ipaddress.
Then, you can refer to this template:
file { "iptables_config":
   name    => "/etc/sysconfig/iptables",
   content => template ("/etc/puppet/templates/iptables.erb"),
}
Note that whereas files need the puppet://puppetserver.example.com syntax, templates do not.
| Listing 3: iptables.erb |
01 *filter 02 :INPUT DROP [0:0] 03 :FORWARD DROP [0:0] 04 :OUTPUT ACCEPT [0:0] 05 -A INPUT -d 127.0.0.0/255.0.0.0 -i ! lo -p tcp -j DROP 06 -A INPUT -d <%= ipaddress %> -m state --state RELATED,ESTABLISHED -j ACCEPT 07 -A INPUT -i lo -j ACCEPT 08 -A INPUT -s 104.198.153.0/255.255.255.0 -d <%= ipaddress %> -j ACCEPT 09 -A INPUT -d <%= ipaddress %> -p tcp -m tcp --dport 22 -j LOG --log-prefix "ssh:"-A INPUT -d <%= ipaddress %> -p tcp -m tcp --dport 22 -j ACCEPT 10 COMMIT |
Default facts are available on all clients automatically.
However, if you write custom facts, you will want to keep them on the puppetmaster and then set up the clients to synchronize their facts with the server.
Add a section to /etc/puppet/fileserver.conf on the puppetmaster,
[facts]
  path /etc/puppet/facts
  allow *.example.com
and on each client, add a line to /etc/puppet/puppetd.conf:
factsync = true
Then, restart puppetmasterd on the server and puppetd on the clients. Now you can put any custom facts in /etc/puppet/facts and have them propagated. For example, to set up a fact that sets the $home fact to the $HOME environment variable, create the file /etc/puppet/facts/home.rb:
Facter.add("home") do
   setcode do
      ENV['HOME']
   end
end
The next time Puppet runs on your clients, this fact will be synchronized and can then be used in any of your recipes.
Variables are useful in other situations as well. A variable set in site.pp will be available to all other manifests or classes. So, for example, if you have a standard set of users who are allowed to log into your servers and you want to edit /etc/ssh/sshd_config accordingly, then the snippet and template in Listing 4 would work well.
Setting the file server via a variable can also be a good idea; if your server ever changes, you won't have to edit every file that refers to the Puppet server.
| Listing 4: Using Variables in SSH Setup |
01 # in site.pp
02 $server_ssh_users = "root jkemp admin"
03
04 # in ssh.pp or wherever else you want to keep it
05 file { "sshd_config":
06     name => "/etc/ssh/sshd_config",
07     allow_users => 'AllowUsers $server_ssh_users',
08     template => "/etc/puppet/templates/sshd_config.erb",
09 }
10
11 # relevant snippet of sshd_config.erb
12 LoginGraceTime 600
13 PermitRootLogin without-password
14 StrictModes yes
15
16 <%= allow_users %>
|
This brief overview is only a glimpse into the possibilities available with Puppet. More recent versions of the software let you arrange your setup in modules, which can give even more flexibility and reusability. If you use LDAP to store users and machine information, you can take your node definitions from there.
Having file content in one place also makes it very easy to use Subversion (or another version control system), and I strongly recommend that you do so! The ability to roll back changes is helpful.
If you need more information or support, check out the Puppet website, wiki [2], and the mailing list [3]. Go forth and pull the strings on your machines!
| INFO |
|
[1] Puppet project: http://reductivelabs.com/projects/puppet/
[2] Puppet wiki: http://reductivelabs.com/trac/puppet/wiki [3] Puppet mailing lists: http://reductivelabs.com/trac/puppet/wiki/GettingHelp#mailing-list |
| THE AUTHOR |
|
Juliet Kemp has been playing around with Linux ever since she found out that it was more fun than Finals revision and has been a sys admin for about five years. She thinks that the more you automate your systems, the more free time you have for when something really serious goes wrong... or for surfing the Internet. |