By Thomas Pelkmann
Part of the daily grind for people who edit digital photos includes masking and extracting image elements. Image extraction lets you improve the brightness, contrast, or color of an individual element without changing the rest of the picture. Artists also use masking and extraction tools to compose collages and add graphic features to documents.
In the days before digital photography, masking entailed working with cardboard templates that covered or exposed different parts of the image. The principle remains unchanged in digital photo-graphy; however, the digital age has added new options for masking and extracting images. Masking isn't always easy, though; in fact, it can be downright frustrating. For instance, if you are masking an object with a diffuse border, the results are often less than ideal.
A new generation of tools promises to make masking simpler and more reliable. One of these tools is SIOX (Simple Interactive Object Extraction), a development from the Center for Digital Media at the Free University of Berlin, Germany [1]. SIOX lets you roughly mark an object and then lift if off the background. The tool is available as a plugin for Inkscape and GIMP 2.2 or newer.
To use SIOX in GIMP 2.2 or newer, first download the pre-built binary from the project homepage; the siox4gimp binary is located in the Plugin for GIMP 2.2 section. Copy the file to .gimp-2.2/plug-ins in your home directory (or to /usr/lib/gimp/2.0/plug-ins for a global installation). If you like, you can type sudo chmod a+x siox4gimp - or use an equivalent file manager function - to let GIMP automatically bind the plugin next launch time.
If you will be using SIOX with the Inkscape vector graphic program, you don't need to do anything; SIOX is included with the current version of the program.
SIOX will work with any RGB(A) image, that is, with any graphic that uses the RGB colorspace plus the alpha channel for transparency; you cannot use SIOX with grayscale images.
Graphics with indexed colors, such as web-optimized GIFs, have to be converted to RGB before masking with SIOX. To do this in GIMP, click Image | Mode and then select RGB.
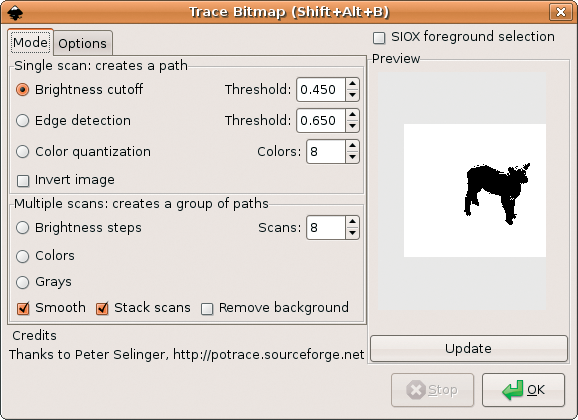
Users with version 0.44 or newer of the the GPL vector drawing program Inkscape have it easier - SIOX is part of the Trace Bitmap function, which is available via the Path menu or the keyboard shortcut Shift+Alt+B. When you get there, enable the option SIOX foreground selection (Figure 1).
As the function name suggests, Inkscape does not use SIOX to mask individual parts of an image for ongoing processing. Converting pixel-oriented images to a vector format is the objective of tracing bitmaps. In contrast to pixel graphics [2], vector graphics can be scaled or manipulated without compromising image information [3].
To extract an object using SIOX, first load a bitmap into the workspace with File | Import. Pressing F4 enables the Rectangle tool, which is then available in the toolbox on the left of the screen. Using the rectangle tool, drag a frame over the object you want to extract. Pressing Ctrl+A selects the object and the frame.
Select Path and pop up the Trace Bitmap toolbox, where you can set the sensitivity of the extraction tool. To do so, enable one of the options below Single Scan: creates a path and adjust the threshold values or colors. To see how these settings affect the image, just click Update. OK applies your selections. The toolbox window stays open, but you can press the "x" in the upper right corner to close it.
You will see a smaller selection behind the rectangle in the image. The selection precisely covers the contour of the extracted object, but it is hidden behind the rectangle. Pressing Ctrl+C copies this selection to the clipboard, and you can then press Ctrl+V to insert the graphic at another position.
GIMP versions prior to 2.3 support the extraction tool as a plugin only, whereas the latest version (2.4) has an additional SIOX foreground extraction tool.
To use the extraction tool as a plugin, load a graphic, then right-click on the image and select Filter | Misc | Foreground Extraction. This takes you to a workspace where you can select critical areas in three steps.
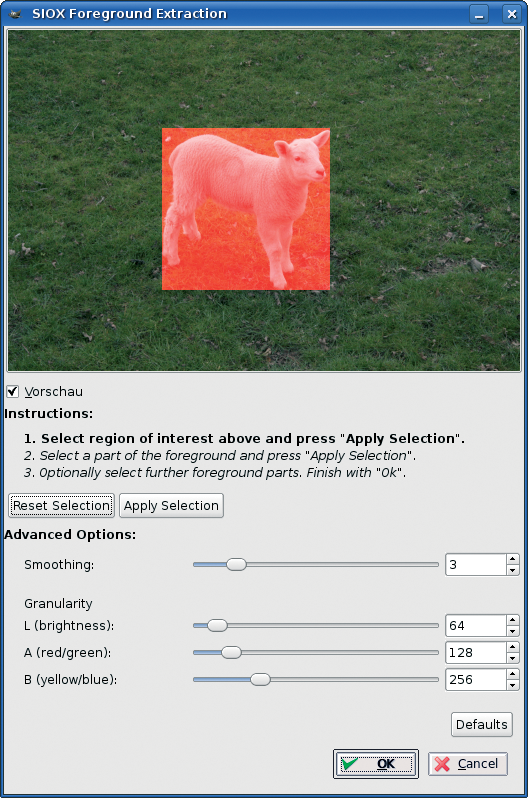
Start by roughly marking the foreground area you will be extracting (Figure 2). To do so, hold down the left mouse button and drag a rectangle over the image. Try to mark as much of the foreground and as little of the background as possible. A red selection triangle now appears in the image. Clicking Apply Selection selects the element, or click Reset Selection to discard the selection and start again. In both cases, the selection disappears.
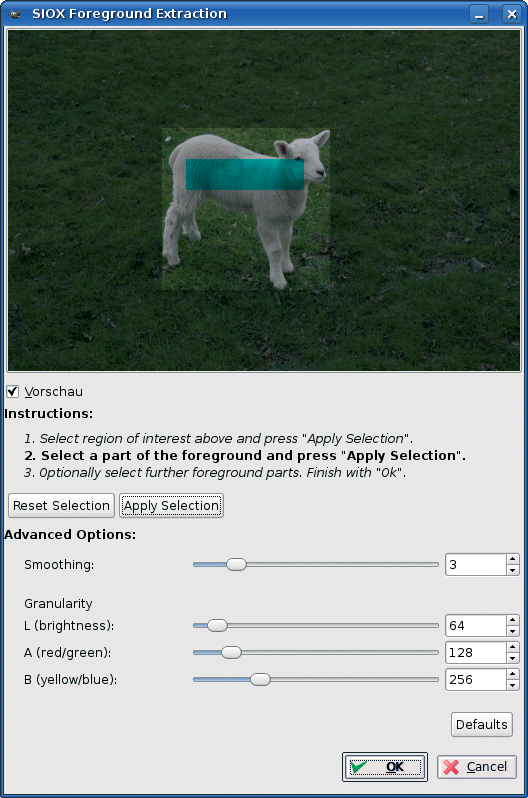
Now revise the foreground selection (Figure 3). Again, you need to hold down the left mouse button and drag the mouse to draw a turquoise rectangle. When you are done, press Apply Selection or enter Reset Selection to restart. In this step, make sure you do not select any part of the background. Repeat this step as often as necessary, until you are sure you have selected all the critical parts of the object.
Now it's time to experiment. The best results are obtained by enabling SIOX's advanced options to improve edge sensitivity or intensify the SIOX plugin's reaction to brightness or specific colors. Unlike Inkscape, you do not get to see a preview of the results before clicking OK to start extracting. In other words, you choose your weapons, press OK, and wait to see whether your guess was good. If not, it's back to square one.
Assuming you manage to achieve satisfactory results with your final OK, SIOX will now flag all the background components of the image as transparent, letting you edit the remaining foreground components.
The latest version of GIMP improves usability by integrating SIOX as part of the Foreground Extraction function.
To install GIMP 2.4 on Ubuntu and Debian, type sudo apt-get install gimp at the console. Users with openSUSE can type yast -i gimp; if you have Fedora, the command is yum install gimp.
The principle for using SIOX in GIMP is basically the same: Start by roughly selecting the foreground, then refine your selection. When you select the foreground extraction tool, the mouse pointer also shows a lasso. Selecting all of the foreground by holding down the left mouse button and dragging the mouse is important; do not worry about the background at this stage.
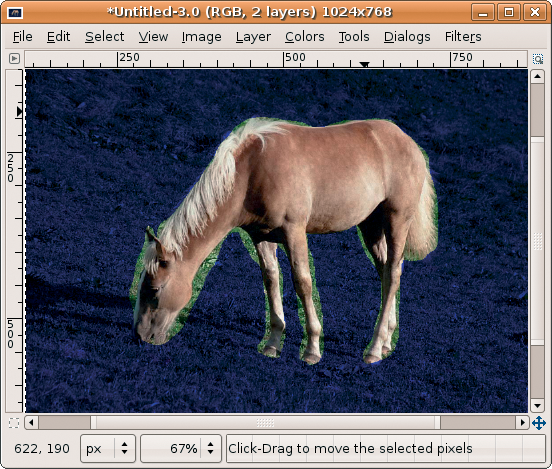
When you release the mouse button, the background of the image will change to blue (Figure 4), and instead of the lasso, the mouse pointer now shows a brush.
To set the brush size for refining the foreground selection, you can use the slider tool, and use the brush tool to drag a line into the foreground object. The line should contain all the different color and brightness areas in the object (see Figure 5). The more aspects you cover, the better the results will be; when you release the mouse button, you will see what I mean.
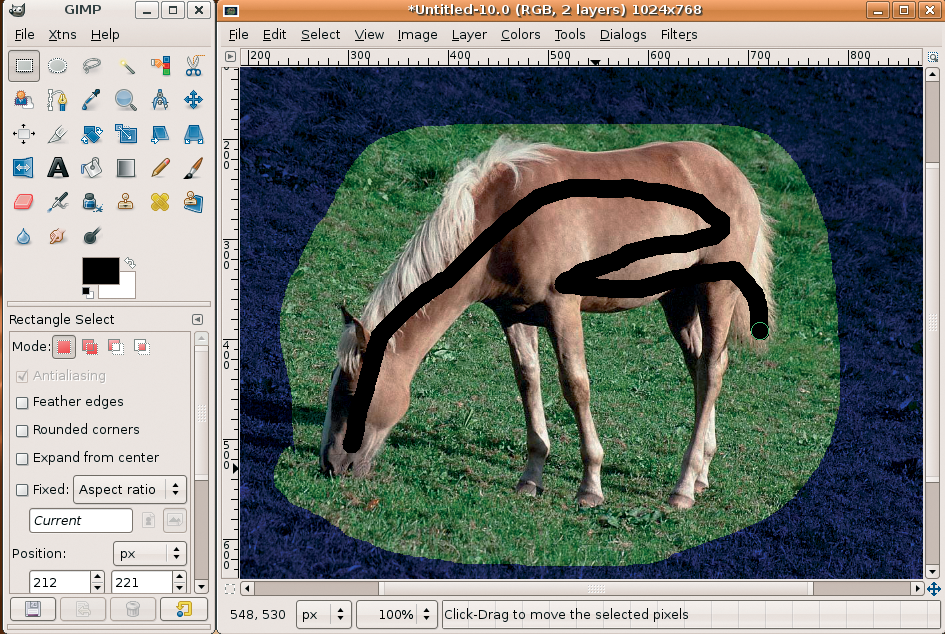
Avoid dragging the line into the background; inadvertently selecting the background will prevent you from extracting the foreground element from it. When you let go of the mouse button, GIMP will paint the non-selected elements dark.
Pressing Enter keeps the foreground object selection. Pressing Ctrl+C copies the selection to the clipboard, Ctrl+X cuts the selection, and Ctrl+V inserts the selection into another image.
If you are not happy with your selection, you can select any other tool - before pressing Enter - to discard the selection; the Ctrl+Z keyboard shortcut is disabled here.
Extraction works well with just a couple of easy steps; however, if the results are not what you expected, a variety of refinement options are available.
With the Contiguous option enabled, the brush stroke will only be applied to areas that directly touch the selection. If you remove the check mark, GIMP will select areas with the same or similar colors, even if the areas do not directly touch the selection.
The Smoothing option might make it easier to select critical areas. If you set the slider to 0, the tool will not select inclusions of above one pixel. If you choose a higher value, the foreground extraction tool will cover larger areas.
Simple masking via rectangles works quite well with simple objects, but to see SIOX's true capabilities, you need the lasso and brush tools in the GIMP 2.4 Foreground Extraction function. In both cases, the results are impressive, although you may need to fine-tune the tool settings.
If you use SIOX as a plugin, you will need to live with its failings - there is no preview function, and SIOX does not store your settings.
For the most part, these weaknesses have been removed following integration of SIOX into GIMP 2.4. GIMP 2.4 keeps the settings and it also offers a preview; however, you cannot easily undo individual steps.
If anything goes wrong, you will need to repeat the process.
| INFO |
|
[1] SIOX homepage: http://www.siox.org/
[2] Wikipedia on pixel and raster graphics: http://en.wikipedia.org/wiki/Pixel_graphics [3] Wikipedia on vector graphics: http://en.wikipedia.org/wiki/Vector_graphics |
| THE AUTHOR |
|
Thomas Pelkmann has worked for more than 20 years as an author and editor for radio, newspapers, and business and computer magazines. He has also written several technical books. |