By Kurt Seifried
Computer crime is a serious problem - in large part because almost all corporate information is now managed on computers rather than through traditional paper and people tools. Your computers and networks represent a juicy target for attackers, and depending on what they want, an attack might be anything from annoying to catastrophic. Because almost all your company information is on computers, anyone who accesses that information with criminal intent will probably leave clues.
One thing attacks have in common is that when you first notice an incident has occurred, you probably won't have all the information you need to deal with it. Lining up the facts sometimes requires a forensic investigation. Was the attack an inside job, or did it make use of an externally available flaw? Did the attacker access a single system, or your whole network? Did the attacker steal data? Plant a virus? Install a rootkit?
The BackTrack Live Linux distro [1] and the Sleuth Kit forensics toolkit [2] will help you gather information about the attack. In this article, I'll show you how to get started with BackTrack and Sleuth Kit, but first, I'll begin with a look at some preliminary steps to take before starting your forensic analysis.
Electronic forensics is a huge topic, and even narrowing it down to just a few tools for Linux systems leaves a lot of material to cover. In this article, I will make the following assumptions:
Although I focus on Linux, the tools I cover can be used to examine other forms of Unix and Windows systems.
| Hardware Requirements |
|
Forensics systems require lots of storage. Having too much storage is unlikely. You want enough space for a copy of the evidence, plus some room to work; a safe bet is 2-3 times as much space as the total amount of raw evidence. The good news is that 2TB hard drives are shipping now. If you want to search for keywords or check for deleted files, you'll want fast disks. The thing to remember is that you are accessing the drives in a manner that is more like a tape drive (steady streaming of extremely large files) than a traditional hard drive (seeking and reading relatively small files). Thus, depending on devices such as RAID products might actually slow things down. By its very nature, electronic forensics requires the system to process and sort through large amounts of information. Most modern workstations will have a hard drive that is at least 100GB, if not larger. My workstation has a 750GB hard drive that cost US$ 200 when I bought it a half year ago. Searching 100GB of information - let alone 750GB - for key words like "pornography" or a string of credit card numbers requires some pretty hefty CPU power. The good news is that, like hard drives, CPUs have become extremely fast and cheap. You're going to want to go with at least a dual core chip and plenty of memory to buffer information. |
One major decision you will face is whether or not to shut down the system once you know or suspect that it has been compromised. And if you decide to shut it down, you must decide how to shut it down - in an orderly fashion, or by pulling the power plug? Forensic examination of a live system has several advantages. You can view the process table to see what is running, you can list network connections, and you can copy the contents of memory for later examination.
Also, there are several major disadvantages to investigating a live system, including that what you see might not be what you actually have. Modern rootkits can easily hide processes and data, for example, by inserting kernel-level hooks. A dead system is easier to examine, and you can guarantee that after you turn it off, you have not modified or deleted evidence from the state the system was in.
But how do you turn the system off? An orderly shutdown could trigger programs that clean up after the attacker and delete evidence or, if the attacker is especially nasty, overwrite hard drive firmware or system firmware. However, simply pulling the plug might leave the system in an inconsistent state or prevent data from being written to the hard drives. Examine the issues carefully - the best choice for how to shut down the system will probably depend on what information you want to collect and what you plan to do with it.
| Law Enforcement and Rules of Evidence |
|
I am not a lawyer, and this is not legal advice; however, I do know that in some jurisdictions, you can gather evidence within your organization without needing a search warrant. If you decide to go to the police, you might be considered an agent of the police and thus need a search warrant for any further discovery and examination. Additionally, the rules of evidence collections, chain of custody, and accepted tools vary from jurisdiction to jurisdiction. If you do plan to go to the police at any point, you should consult with a lawyer to find out the intricacies, and you should be very careful about documenting everything you do. |
The process of collecting and examining evidence from a Linux system follows this general pattern:
The following sections take a closer look at this process.
| Anti-Forensics |
|
The purpose of forensics is to figure out what happened and find evidence to support decision making or, in some cases, legal action. This takes time, and the more time an attacker can force the process to consume, the more likely they are to escape. Additionally, if an attacker can pollute the evidence by wiping files and data, injecting false data, or modifying what is left, there is a greater chance that real evidence will escape notice. The bad news is that attackers are getting much better at anti-forensics, with a number of advanced toolkits now available. |
If at all possible, an orderly shut down is recommended; however, if you have any suspicion that the attacker has left logic bombs or cleanup scripts in place, you should consider pulling the plug. The advantage of shutting down the system is that you can boot off of trusted media, such as a recovery CD or a forensics CD like BackTrack, and create an image of the disk. If you image a live system, it is possible for rootkits to hide information.
| Hardware Write Blockers |
|
Consider investing in a hardware write blocker. According to the Forensics Wiki, a write blocker allows "... acquisition of information on a drive without creating the possibility of accidentally damaging the drive contents. They do this by allowing read commands to pass but by blocking write commands... ."[3] Typically, a write blocker costs US$ 100-300, and a full kit (for parallel, serial ATA, SCSI, memory cards, USB devices, etc.) can cost between US$ 1,000--2,000. However, the cost of accidently modifying or deleting evidence should be weighed against the cost of the device. (The lack of a write blocker might also be enough to raise a reasonable doubt in a court of law). |
Again, you have a choice to make: You can leave the affected hard drives in the system and boot off of a CD-ROM or USB memory stick, or you can remove the hard drives and attach them to another system in order to image them.
If you decide to leave the hard drives in their original system, ensuring that you configure the BIOS to boot off of CD-ROM or memory stick and not the hard drive is imperative.
Also, note that you cannot guarantee you will not write to the hard drives, for example, by making a mistake during drive imaging.
After you shut down the system, one popular alternative is to begin the investigation by booting to a Live Linux CD. A Live system will reveal the evidence disk simply as data - you won't have to worry about any scripts or trojaned utilities the attackers might have left on the system to cover their tracks.
Like many software choices in Linux, the choice of a Live distro leaves you both blessed and cursed by an abundance of options. Almost all bootable installation media (Red Hat, Debian, etc.) have a recovery or emergency mode you can use to access the system. Live Linux distributions - on CD or USB media - are also a possibility.
I recommend the security-oriented BackTrack Live CD distribution (Figure 1) [4]. Some of the advantages of BackTrack are:
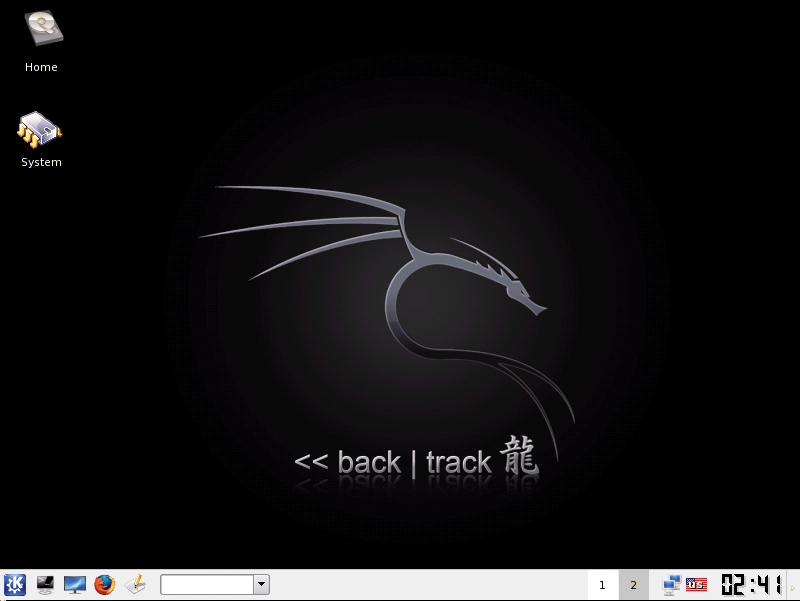
To download BackTrack, you're going to need a BitTorrent client (the software is distributed via BitTorrent); I used the current beta version of BackTrack with no problems. Simply go to the BackTrack download page, hit the torrent, and wait for it to download. Then you can use any standard CD burning software to burn BackTrack to a CD-ROM.
Alternatively, you can download a USB version and copy it onto a USB memory stick; of course, this only works if the system you are interacting with is recent enough to support booting off of a USB memory stick.
After you have a copy, you can start BackTrack by simply booting off the CD-ROM or USB stick.
| Configuring /etc/fstab on a Forensics System |
|
If you attached evidence drives to a Linux system, be sure you know how these drives will be treated in fstab. During boot up, Linux will scan all the drives for labels. If it finds multiple labels with the same name (e.g., two drive partitions labeled "home"), it will mount the last one it finds. Thus if you have /dev/hda2 labeled as home, and you plug in an evidence drive that has /dev/hde3 labeled as home, your system will end up mounting /dev/hde3, which will potentially result in evidence being modified. |
Creating a complete image of a partition or a drive is relatively simple in Linux. The dd tool, which is included on the BackTrack CD, can image a partition or an entire hard drive.
To pipe the contents of the image to another system and reduce the need to disassemble systems to get the hard drives out, you can combine dd with tools such as nc or SSH. Simply run the command
dd if=/dev/hda1 bs=2k | nc 192.168.0.1 9000
which will image the first partition on the first IDE hard drive (hda1) and send the data to TCP port 9000 on the host 192.168.0.1. On the host 192.168.0.1, simply run nc in listening mode and dump the output to a file:
nc -l 9000 > driveimage.dd
dcfldd includes a number of capabilities useful for digital forensics work. Unlike dd, dcfldd has the ability to create MD5 and SHA256 hashes of the data, thus allowing you to verify the data more easily, and the ability to split files up easily by specifying a split size. (Working with a single 250GB file may prove unwieldy for some people.) For example, the following
dcfldd if=/dev/hda1 hash=md5,sha256 hashwindow=10G md5log=md5.txt sha256log=sha256.txt hashconv=after bs=512 conv=noerror,sync split=10G splitformat=aa of=driveimage.dd
will image hda1, create an MD5 and a SHA256 hash of each 10GB block of data (and write them to a log), continue reading if it encounters errors, and pad input blocks if needed. Finally, the command splits the data into 10GB files with filenames ending in aa, ab, and so on.
One thing to remember is that unless you are sending the data over a secure, trusted network, you're going to need to be able to prove it hasn't been altered in transit. This can be done by making cryptographic hashes (MD5 and SHA256) and safely copying them off the system, for example, via memory stick, or by encrypting the data in transit by using a tool such as OpenSSH to create a tunnel.
Sleuth Kit is a handy collection of open source forensics tools. Some of the tools in Sleuth Kit include mmstat, which displays information about partition tables, and jls, which lists the contents of a file system journal.
The typical procedure for a Sleuth Kit investigation is:
An example of the initial steps is:
fls -f ext -m / /evidence/ddriveimage.dd > output-data

ils -f ext -m /evidence/ddriveimage.d >> data-output

mactime -b data-output 01/01/2008-12/31/2008 > activity-report-2008
If an attacker altered access times, you'll want to specify a large data range to ensure you get all the data. After you run this, you should end up with output similar to Listing 1, in which you can see a user named Kurt accessed an account via SSH.
| Listing 1: Tracking Access |
01 Mon Jun 02 2008 01:16:45 24 ..c -/-rw-r--r- kurt kurt 58498 /home/kurt/.bash_logout 02 176 ..c -/-rw-r--r- kurt kurt 58499 /home/kurt/.bash_profile 03 124 ..c -/-rw-r--r-- kurt kurt 58500 /home/kurt/.bashrc |
Icat is a relatively simple utility that finds an inode in an image file and copies the data out to a file. The icat utility includes several useful options. The -s option copies the slack space, which might contain interesting or hidden information, and -r recovers deleted files. For example:
icat -s -f ext driveimage.dd 58499
This command will show you the contents of /home/kurt/.bash_profile (Listing 2).
| Listing 2: /home/kurt/.bash_profile |
01 # .bash_profile 02 03 # Get the aliases and functions 04 if [ -f ~/.bashrc ]; then 05 . ~/.bashrc 06 fi 07 08 # User specific environment and startup programs 09 10 PATH=$PATH:$HOME/bin 11 12 export PATH 13 14 autopsy - a web interface to Sleuth Kit |
Although the learning curve for Sleuth Kit isn't very steep, you can easily make a mistake that could cost you a great deal of time and effort. The Autopsy forensics browser, which is available through the Sleuth Kit website [2] automates the process and slaps on a web interface. Autopsy also provides some additional features, such as tracking cases, handling notes and events, and supporting multiple users. By default, autopsy only allows localhost (127.0.0.1) to connect to the web server.
To allow a remote IP address, you need to use the -c option; however, it is important to remember that Autopsy doesn't provide any encryption, so if you don't access it locally, you either need to connect via a trusted network or use something like OpenSSH to create a secure tunnel.
In the Autopsy image analysis screen, you'll find several options. My favorite option is the File Type screen, but before clicking on Sort Files by Type, plan to wait a while.
This feature will scan the entire image file; extract files; sort them into various categories such as images, documents, executables, crypto-related files, etc.; and give you the option of copying the files out so you can further examine them.
An example of the output for crypto files is shown in Listing 3.
| Listing 3: Crypto File Output |
01 /home/secret/.pgp/secring.pgp 02 PGP key security ring 03 Image: /evidence/ddriveimage.dd Inode: 672945 04 Saved to: crypto/ddriveimage.dd-672945 05 06 /home/secret/.pgp/pubring.pgp 07 PGP key public ring 08 Image: /evidence/ddriveimage.dd Inode: 672959 09 Saved to: crypto/ddriveimage.dd-672959.pgp |
Another benefit of Autopsy is the keyword search screen. Not only does the search handle regular expressions, with a link to a cheat sheet, it also offers a number of pre-configured searches such as credit card numbers, social security numbers, IP addresses, and dates. Search results are cached, so once you have done a search and waited for the results, you never have to wait again.
Sleuth Kit offers an incredibly powerful -- and free - set of utilities for electronic forensics, working not only on Linux but also on Windows and other forms of Unix. With the addition of the Autopsy web interface, the software is extremely easy to use, and getting results with it shouldn't take too long.
In my testing - using older testing machines with hard drives that have seen it all - I found information spanning several years, from old installations of Windows to documents I hadn't seen in ages. Sleuth Kit definitely deserves a place in any system administrator's or auditor's toolkit.
| INFO |
|
[1] BackTrack: http://www.remote-exploit.org/backtrack.html
[2] Sleuth Kit: http://www.sleuthkit.org/ [3] Write blockers: http://www.forensicswiki.org/wiki/Write_Blockers [4] BackTrack download: http://www.remote-exploit.org/backtrack_download.html [5] dcfldd: http://dcfldd.sourceforge.net/ [6] Linux LEO: http://www.linuxleo.com/ [7] "Defeating Forensic Analysis on Unix": http://www.phrack.org/issues.html?issue=59&id=6 |