
By Erik Bärwaldt
IT trainers understand that the best way to teach a desktop procedure is to help the user visualize each step. Overhead projectors were long regarded as the best approach; in recent years, computer-based slideshows and video projectors have extended this philosophy. But even these "modern" teaching aids suffer from the fact that they are static: In the best case, all you can show your students is a short text segment and a couple of screenshots.
Educational videos, typically implemented as Flash animations, are a relatively recent innovation. To play the video, all the student needs is a web browser with a suitable Flash plugin. Because a native Linux application for Macromedia's proprietary Flash format did not exist at first, trainers and teachers had no alternative but to create their own tools for building training videos.
A number of Linux developers rose to this challenge and programmed recordMyDesktop [1] and Istanbul [2]. Both programs are currently at an early stage of development, but lab tests reveal that recordMyDesktop is certainly mature and stable enough for everyday use.
To run recordMyDesktop, all you need is a working Linux PC with one of the major video players (Totem, Xine, MPlayer). If you want the recording to be professional, the system also must have a sound card, and you will need a microphone for sound recording. If you intend to use the GUI to control the software, you need both the free Theora codec and a complete Python environment, including matching Qt and Gtk modifications.
RecordMyDesktop is available in binary format for almost any Linux distribution, which considerably simplifies the installation. Users with Fedora and Mandriva, or their derivatives, will find pre-built packages at Rpmfind [3]; packages for Slackware and its derivatives are available from Linuxpackages [4]. Debian and Ubuntu offer the package in their own repositories, and fans of openSUSE can turn to Rpmseek [5]. If you use any other distribution or prefer to build the program yourself, Sourceforge [6] has a tarball with the current source code package.
Although recordMyDesktop is a command-line program, the developers have programmed two almost identical front ends for Gnome/XFCE and KDE: Gtk-recordmydesktop and Qt-recordmydesktop. Both are available as pre-built binary packages for most distributions.
Synaptic, Rpmdrake, and YaST will also set up the required menu entries when they install the programs, allowing users to launch the software in next to no time.
Modern computers typically have a sound card. To avoid reinventing the silent movie with recordMyDesktop, just attach a microphone to your sound card's microphone input jack.
In our lab, I achieved the best results with a simple clip microphone clipped onto the collar of my shirt or attached to a buttonhole (Figure 1).
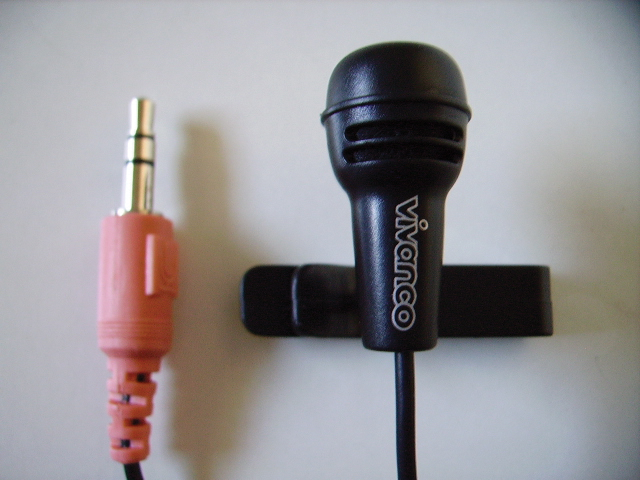
The microphone needs a stereo jack; if you use a mono jack, a modern sound card will only record on one channel. On top of this, PC sound cards are not designed to support just any input impedance.
Microphones with just a couple of hundred ohms impedance are not suitable: You will achieve the best results with a device that offers about 2.5 to a maximum of 10kohms.
To avoid feedback through your PC's loudspeakers, most distributions disable the microphone input by default; you might need to enable it in the ALSA Mixer. To do so, check the Rec. checkbox in the Mic slider window.
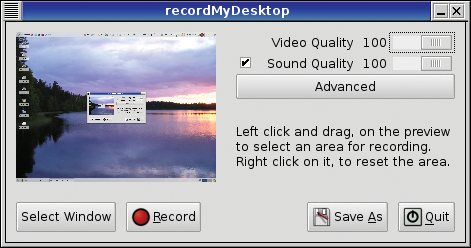
Clicking the recordMyDesktop entry in the menu launches the program and shows a preview of the current desktop in a small window. The Video Quality and Sound Quality sliders - both set to a maximum value of 100 - can be changed here.
Clicking the Advanced option takes you to more settings, such as the frame rate or the sound card sampling rate (Figure 2). Normally, you will not need to modify these values.
At the bottom left of the program window, you will also see a Select Window button, which you can use to select the window drawn by an active program. After you click the button, the mouse pointer changes to a small cross; now click the active application window on the original screen.
RecordMyDesktop draws a red frame around the window in the preview and you can immediately see which activities you are recording. If you mistakenly enable the wrong window, just right-click the preview image to revert to your previous selection.
Besides this, you can also record a specific screen area by selecting the area with the mouse in the preview.Clicking the Record button starts the recording.
RecordMyDesktop then takes snapshots of the desktop at the preset frame rate and - assuming you enabled the sound option - records the sound at the same time. Clicking Quit quits recordMyDesktop.
The recordings generate a fairly substantial volume of data, so make sure you have enough space for this on your hard disk. What you also need to take into consideration is that the space requirements skyrocket if you have a high screen resolution. And higher audio sampling frequencies will consume even more space.
Because recordMyDesktop does not typically encode the data it collects on the fly (preferring to do the job later), you need twice the amount of disk space to be able to convert the recording later. Making sure you have several hundred megabytes of free disk space for a recording of just a couple of minutes is a good idea.
On top of this, the CPU load will probably grow to just below 100 percent, no matter how powerful your computer is.
To avoid drop-out or jerky images in the video, it makes sense to stop any programs running in the background - and possibly any cron jobs scheduled to run in the next few minutes - before starting to record.
During recording, recordMyDesktop displays a square blue button in the system tray; clicking on the button stops the recording. When you click the button, the program stops recording current screen activity and immediately starts encoding the raw data (see Figure 3).
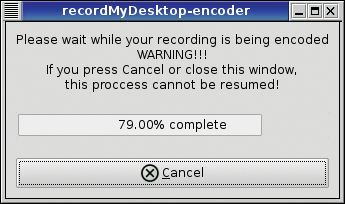
Whatever you do, avoid clicking Cancel to interrupt this process; doing so will destroy the raw data.
If you have recorded a longer sequence at a high video resolution and with high-quality sound, encoding even on powerful CPUs well above 1GHz clock speed will take several minutes.
After encoding is complete, the main window of the program again appears and prompts you to enter a path for saving the results. By default, recordMyDesktop will choose the file out.ogg in your home directory; any recent video player on Linux will be capable of playing the results.
The container file uses the free Theora codec for the video recording and the free Ogg Vorbis codec for the audio signals.
Thanks to the high-quality codecs, recordMyDesktop produces very attractive results. Audio and video signal synchronization works without restriction, and when you play back your screen movies, you will notice that the quality is excellent at any resolution.
In our lab, I recorded videos with a resolution of 1600x1200 pixels at a frame rate of 15 frames per second, and then at 1280x1024 pixels, again at 15 frames per second. When I played the recordings back, they were pleasingly smooth, without drop-out or jerkiness, and the focus was sharp - even in full-screen mode.
RecordMyDesktop returns good results with interpolated resolutions, even if you change the screen resolution while the recording is in progress.
This kind of premium-quality video is demanding on storage capacity: 50MB per minute are required for the raw data. Splitting the recording into several sessions makes sense, especially for longer movies. This not only gives you more flexibility in storage space management, but also lets you divide more complex topics into smaller chapters.
RecordMyDesktop finally provides a solution for creating high-quality screen movies on Linux.
Despite the relatively low version number, the software is stable and has a full set of features. The controls are mostly self-explanatory, and there is no need to RTFM. RecordMyDesktop thus provides a useful and efficient approach to creating training material for software rollouts.
The only drawbacks are the non-trivial free disk space requirement and the need to have a powerful CPU for a smooth recording. Now that hard disk capacities are measured in terabytes and CPU clock speeds of several gigahertz are the rule, these requirements might not pose a serious problem.
| INFO |
|
[1] recordMyDesktop: http://recordmydesktop.iovar.org
[2] Istanbul: http://live.gnome.org/Istanbul [3] Binaries for Fedora and Mandriva: http://rpmfind.net [4] Binaries for Slackware: http://www.linuxpackages.net/pkg_details.php?id=12173 [5] Binaries for openSUSE: http://rpmseek.com. [6] Source packages: http://sourceforge.net/projects/recordmydesktop. |