
By James Stanger
A trackback is a way for a blogger to automatically notify different blogs that he or she has either begun or extended a conversation with another blogger. A trackback is one of three main types of linkbacks (see the "Trackbacks and Linkbacks" box) that bloggers use to keep track of each other's postings and ensure that their readers can link to related content. Once a website has trackbacks enabled, one blogger can reach out to another on a separate site by sending a "ping" to that user. The ping simply says, "Here's a topic that is related to what you've posted, check it out."
If a blogger on a separate site wants to respond, the conversation between the two bloggers becomes stronger. To use the parlance of today's blogging community, the conversation between these two bloggers becomes "context" because now they have been participating in a detailed, relevant conversation. They are building a body of knowledge that will be useful to any reader interested in the topic they are writing about.
With trackbacks, two seemingly unrelated conversations become more strongly associated. Each time an update occurs in the conversation, the context becomes stronger and richer. Search engines often rank pages higher if they are linked from other sites. Trackbacks thus promote higher ratings and perhaps more exposure for a project or product.
Several content management systems (CMSs) include trackback options. In Drupal [1], if you've enabled trackbacks, a blogger on your system just has to enter the URL of a remote blogger who supports trackbacks, and the blogger will be notified. In this article, I describe how to set up trackbacks in Drupal with examples based on the implementation included with Ubuntu 8.04. If you use a different CMS, the configuration will differ but the steps are similar.
| Trackbacks and Linkbacks |
|
A trackback is a particular form of a linkback. Three methods of linkback exist:
You can learn more about linkbacks in all their forms in various sources, although I recommend beginning at Wikipedia [2], then going to other sources [3] [4]. |
To enable trackbacks in Drupal, you'll need the TrackBacks module, which is available at the Drupal website [5]. Because so many implementations of Drupal exist, the creators have worked hard to support both 5.x and 6.x versions. As with most modules in Drupal, installation of the module is simple. Simply untar and uncompress the archive inside of the /var/www/drupal/modules/ directory. Again, if you are using a different Linux version, substitute the correct path for your particular distribution.
Once you've unpacked the module, your /var/www/drupal/modules/ directory should have the structure shown in Figure 1. You shouldn't have to restart Apache after installing the module. If you are upgrading from a previous module version, however, you'll have to go Administer | Modules then run the update.php script.
Once you've installed the module, you'll need to enable it. To do this, go to Administer | Modules, then scroll down through the list of installed modules. Enable the trackback module by selecting the checkbox next to it (Figure 2), then click on the Save configuration button. If you plan on using trackbacks along with blogging, you'll also want to enable the blogging module.
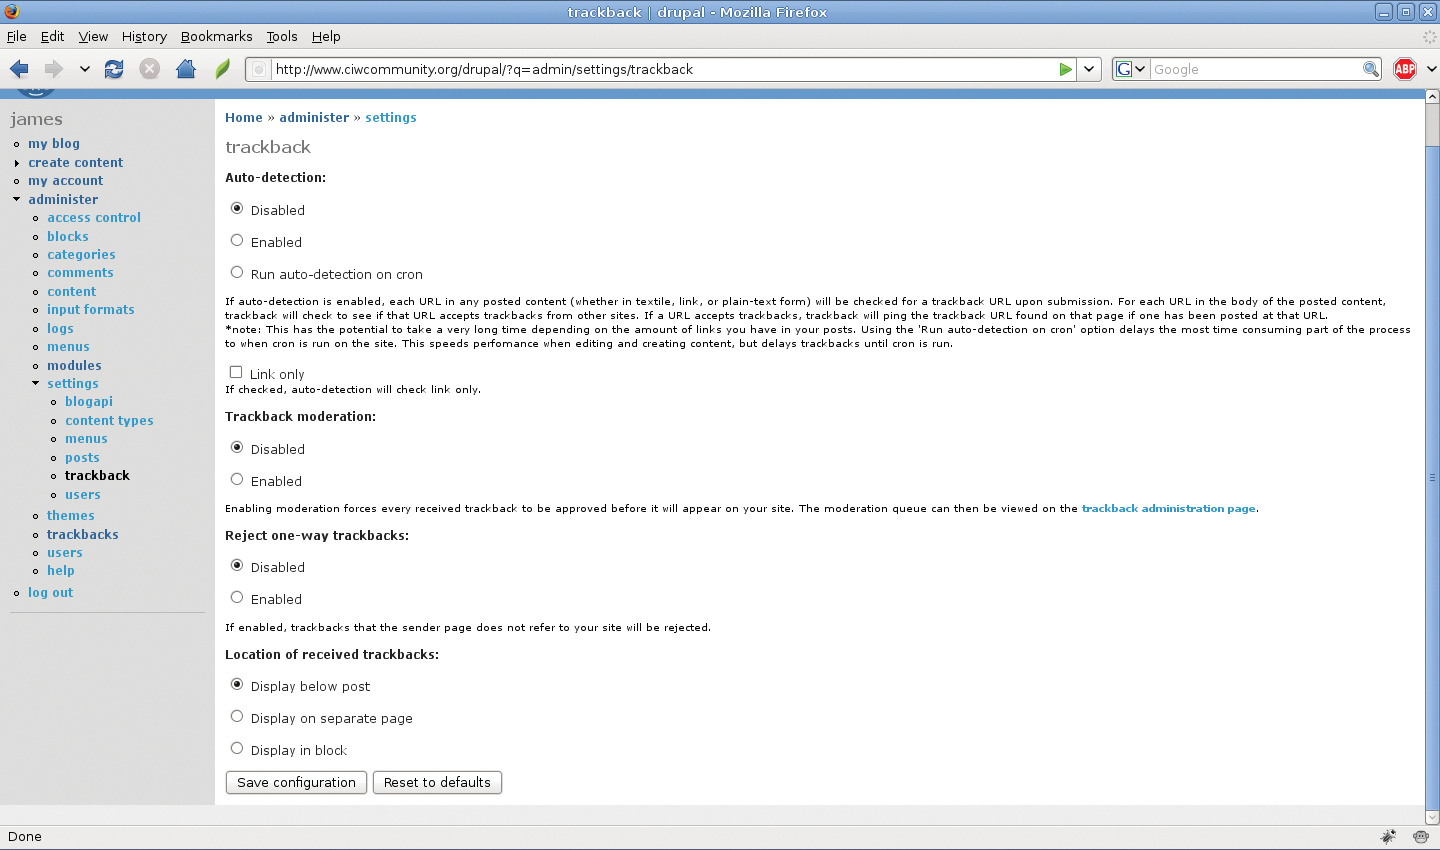
The official trackback documentation is rather sparse on the configuration topic [6]. Most of the configuration options are available in the Drupal Administer section. Go to Administer | Settings | Trackback, and you'll find the menu options shown in Figure 3.
This menu allows you to determine exactly how Drupal will handle trackbacks. Settings include:
If you enable auto-detection in this particular Drupal module, any URL you post will be checked automatically for a trackback link. It doesn't matter whether you enter the link in a URL or plain text form. The trackback module will check each URL in your document, and it will check to see whether the URL on each page goes to a site that allows and accepts trackbacks. If the remote site does allow trackbacks, the Drupal trackback module will send a ping to the trackback URL found on the remote page.
Auto-detection of every URL can bog down your server, especially if you have quite a few URLs on your page. If you're worried about the volume, use the Run auto-detection on cron option, which delays the URL check until the next time cron is run. If you set cron to run at a time when the server is not busy, it is possible that no one will notice the performance slowdown. The problem with this option is that you won't have trackbacks enabled instantly. It's up to you to configure your cron settings optimally.
Also remember that auto-detection can open your server to spam trackbacks, a trackback that attempts to link your content to unrelated postings. This form of spam is as annoying as traditional email spam.
If you choose to moderate your trackbacks, you will have to manually consider each and every submission. If you're already busy as an administrator, selecting the Moderation setting will make your life even busier. However, it does let you review the suitability of trackbacks and reduce the amount of trackback spam. To review trackbacks, select the Administer | Trackbacks menu option.
Search engines and many bloggers want to see only trackbacks that have been mutually initiated. If you opt to reject one-way trackbacks, then you require mutual trackbacks. Although you might increase the quality of you trackbacks, other bloggers might have a problem initiating contexts and pings.
Trackback location determines where trackback replies will appear in a blogger's post. The default setting positions the trackback URL immediately beneath the post, but you can have these entries posted on a separate page or inline with the text. Most administrators keep the default setting because most people want to see how popular the posting is with other bloggers. If you want to hide trackback replies for whatever reason, select Display on a separate page.
The final configuration task is to determine which content types you want to enable for trackbacks. Trackbacks are enabled by default for all blogs in Drupal, no matter what version you're using. However, they are the only content type enabled by default. The user must explicitly allow trackbacks for other content, such as pages, stories, or other types.
To allow trackbacks for these other content types, go to Administer | Settings | Content types and you will see the various choices. To enable trackbacks for all new pages, click on configure next to the content type, and choose Enabled under Trackbacks.
These trackback settings are not retroactive; if you enable trackbacks for new pages, you will still have to go back and re-publish existing pages to add trackbacks to your previous work. This step will enable trackbacks for any older page, and you'll have to do this for each page individually.
If you want to enable trackbacks for individual entries, you will have to explicitly enable them for each content type by clicking on each URL and enabling the trackback feature.
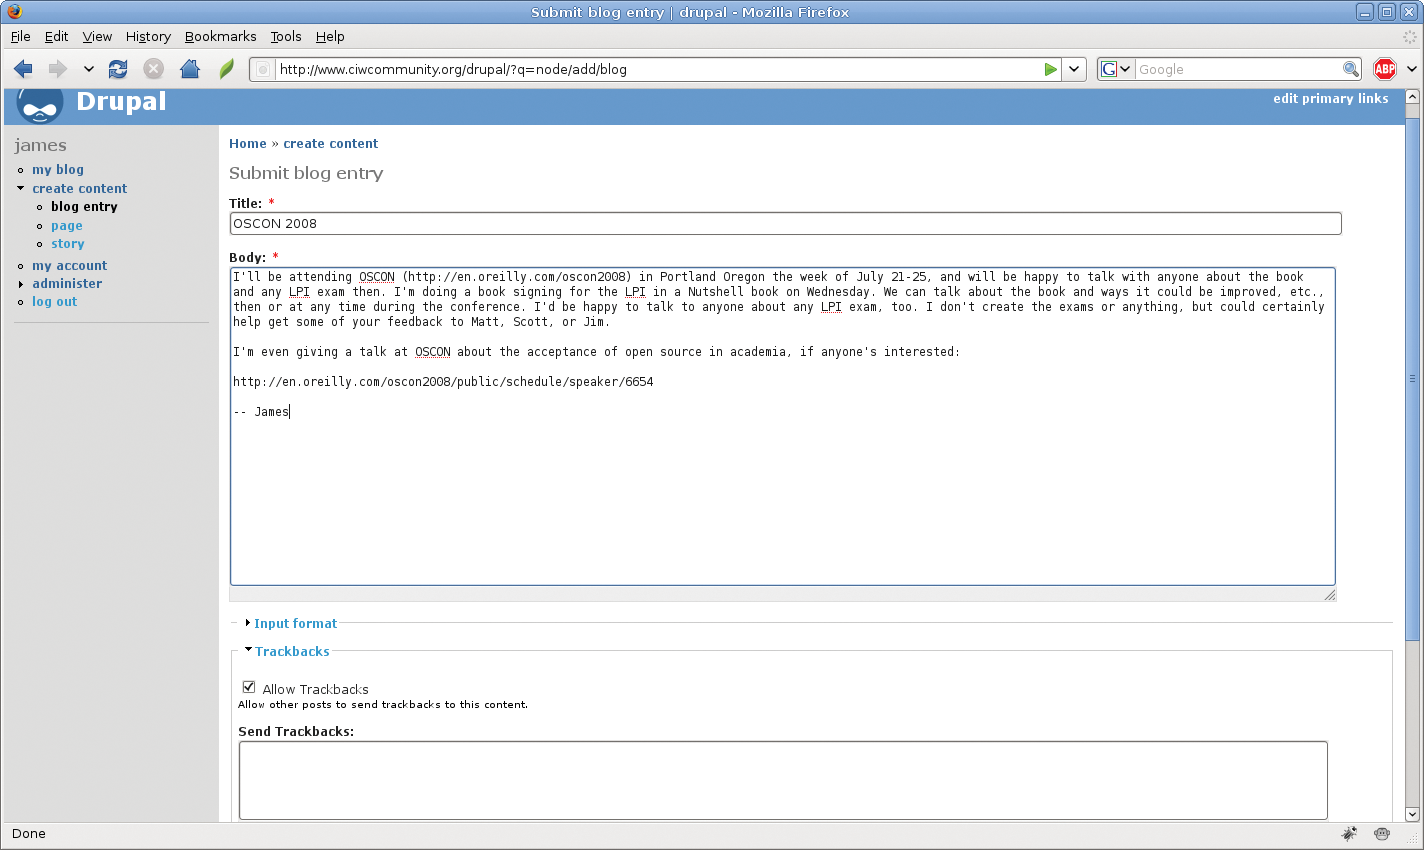
Once you've installed and configured trackbacks, your blog authors can easily set up trackbacks. A blogger who creates a blog entry will see a couple of new options. For example, if I'm planning to go to OSCON and I want to let people know, the Allow Trackbacks option at the bottom of the Submit blog entry form enables trackbacks for that particular blog.
If I want to manually ping other sites that have trackbacks enabled, all I would have to do is put in the URL of the blogging site that will receive the trackback. A blogger at the other site will notice the ping I've just sent and will then be able to choose whether or not to accept my request for a trackback.
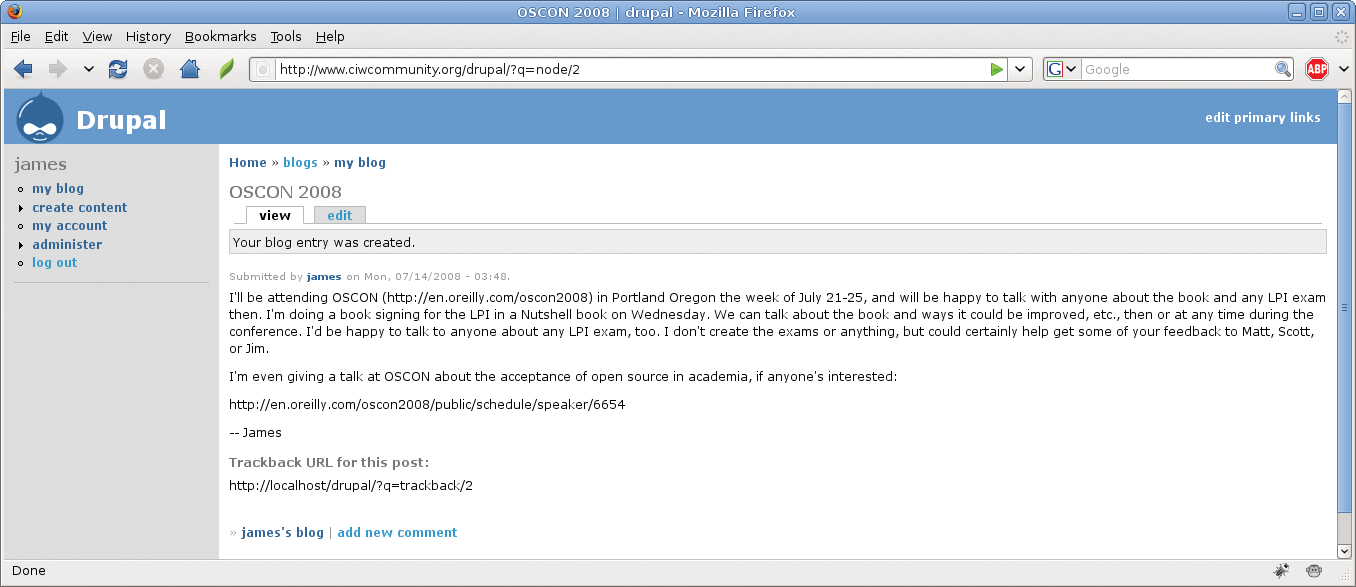
Once I click the Submit button, my blog entry will be shown with the trackback URL.
You can send a trackback to any trackback-enabled site; you aren't limited to just Drupal or another CMS. WordPress and many other major blogging tools support the Trackback Technical Specification (see the box titled "How Do Trackbacks Work?").
Spammers will sometimes take advantage of trackbacks. As you learned earlier in this article (see the "Configuring Trackbacks" section), if you are concerned about receiving unwanted trackbacks for unrelated content, you can enable checking and moderation to review trackback results. Another option is to install one of the common Drupal anti-spam modules [7]. Additional modules that can help you combat spam also are available through Drupal [8].
| How Do Trackbacks Work? |
|
A trackback is an http packet sent between one web server and another. It is sent whenever a user chooses to enable it, usually when the blogger creates or updates content. Trackbacks are implemented with the use of either POST or GET queries. These queries are exactly the same as those used in processing HTML forms. Trackbacks were created with the use of existing queries to capitalize on previous work, and also because the developers didn't want to create a new type of traffic that could be blocked easily by firewalls and other security software. Still, it's possible, though unlikely, for this type of traffic to be blocked. You might want to test to see whether your pings are going through to remote systems. To verify a problem, consider reviewing the Trackback Technical Specification [9]. |
Trackbacks aren't going to make a blogger instantly popular, and they could cause additional work if you are serious about reviewing URLs to thwart spamming. However, some groups have found that trackbacks help increase their hit ratio for Google and Yahoo! searches. More importantly, trackbacks support better communication within their communities.
| INFO |
|
[1] Drupal: http://drupal.org/
[2] Wikipedia on trackbacks: http://en.wikipedia.org/wiki/Linkback [3] vBSEO linkbacks FAQ: http://www.vbseo.com/linkbacks [4] WordPress tutorial: http://www.optiniche.com/blog/117/wordpress-trackback-tutorial [5] Drupal trackbacks page: http://drupal.org/project/trackback [6] Trackbacks documentation: http://drupal.org/handbook/modules/trackback [7] Drupal anti-spam module: http://drupal.org/project/spam [8] Spam control module: http://drupal.org/node/206787 [9] Trackback technical specification: http://www.sixapart.com/pronet/docs/trackback_spec |