By Thomas Leichtenstern
Just imagine the disappointment: When you get back from vacation and check your snapshots on your PC, you find out that your favorite image is color cast and the darker sections totally lack contrast. If you used the typical JPEG format, even the most capable image manipulation program would offer little help in restoring the shots. RAW format images, on the other hand, contain far more image data, which provides greater opportunity for post-processing (see the box titled "RAW Digital Negatives"). For example, you can correct underexposed images without affecting the quality of the original.
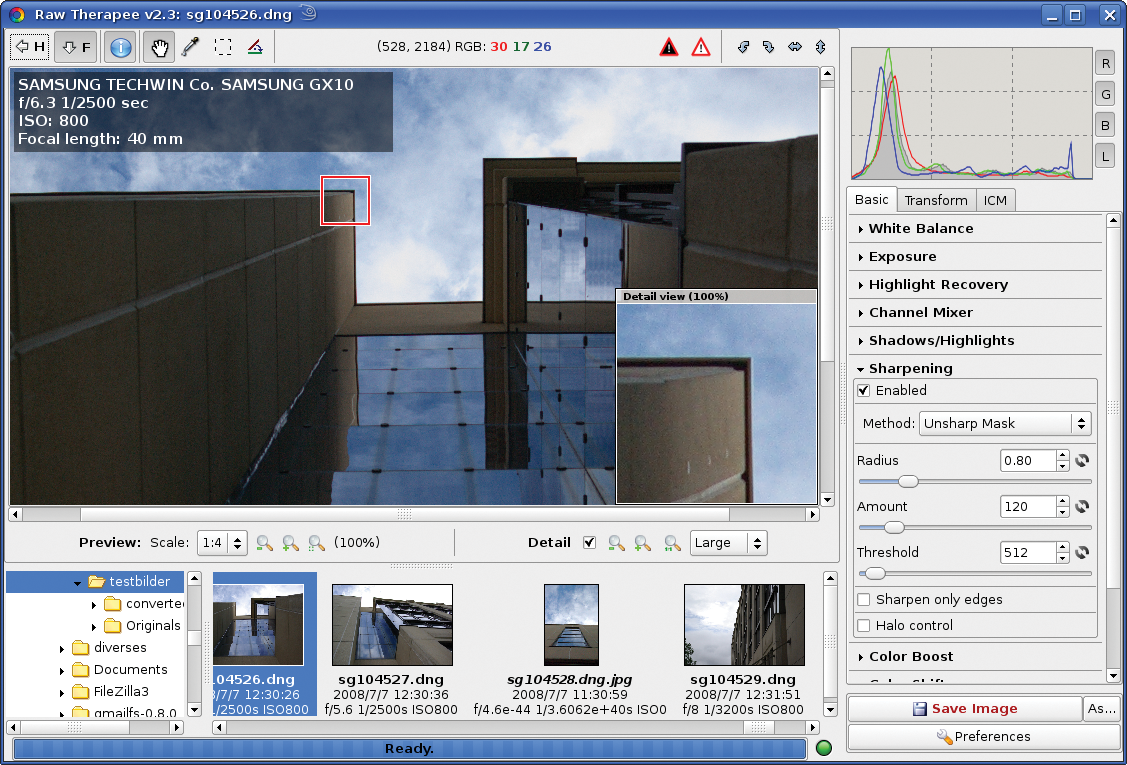
Camera manufacturers such as Canon and Nikon use proprietary RAW formats, and you typically need a commercial Windows program to open them. To avoid the Windows trap, try the freeware program RawTherapee [1] (Figure 1), which is based on DCraw [2]. RawTherapee can open nearly any RAW format, and it has a huge set of manipulation features. The project website [3] compares RawTherapee with other RAW converters. The program is also useful for editing JPEG- or PNG-formatted files.
In this article, I describe the stable version 2.3. A beta version of the 2.4 release is also available for download. Version 2.4 offers comprehensive metadata support (Exif and IPTC), that 2.3 lacks.
| RAW Digital Negatives |
|
Lossy image formats such as JPEG go through a number of processes in the camera: interpolation of individual pixels, as well as various optimizations, such as sharpening, white balance, or noise compensation. When you store an image in RAW format, the camera avoids this workflow and writes the data captured by the photo sensor directly to the memory card. The advantage is that all the information is kept in its original form; the optimization process is the photographer's responsibility. The disadvantage of this approach is that it takes five to seven times more memory compared with JPEG. In addition, internal processing is slower. The RAW format's biggest advantage is the information density of the images: Whereas JPEG only saves 256 luminance levels per pixel (8 bits), RAW uses 4,096 (12 bits). In practical terms, this means a vastly extended colorspace and improved contrast, which in turn gives you far more power to manipulate the original image. |
| GLOSSARY |
|
Exif: Exchangeable image file format. A standard for the file format that modern digital cameras use to store information. IPTC: Or to be more precise: IPTC-NAA, International Press Telecommunications Council - Newspaper Association of America. A standard for storing text information of image content on arbitrary media (text, photos, graphics, audio, video). IPTC gives users the ability to store copyright information (author, title, keywords, etc.) directly in the image file. |
The first step is to download the tarball for your system from the project homepage. Then unpack the archive and copy the new folder created by this step to your home directory. To launch the program, click the rt file.
The basic settings - such as the local image directory or storage format - are available in the Settings menu in the top right. To load images for preview, use the integrated Directory and file browser (bottom left) to open the directory with the RAW files. This step displays the images in the directory in the preview pane on the right. Clicking on an image loads it for editing in the main window. Information on the photo, such as the camera type used, the aperture, shutter speed, and focal length are displayed when you click the i icon in the menubar.
At the bottom of the editing window are the settings for the Preview. RawTherapee displays changes in real time, so you might want to set Scale to 1:3 or 1:4 to avoid major delays in displaying the images. If you enable the checkboxes next to Details, a red frame appears in the image, and an additional Detail view window appears showing the section within the frame at the original size. To move the selection, just press the right mouse button and drag the frame.
The Editing profile pull-down offers three different defaults for image optimization. The neutral option leaves the image as is, default sharpens slightly and corrects the brightness, and crisp additionally adjusts the contrast.
The program also creates a separate editing profile for each image and saves the profile in the same directory as the images themselves. If you re-edit an image, RawTherapee automatically loads the matching profile. If you want to apply the settings from one image to another, you can store them in a separate profile and open the profile along with the image you want to edit. The program does not have support for batch operations; however, the developers have a beta version with batch support on the roadmap.
The tool never modifies RAW images, but it stores the modified data in JPEG, TIFF, or PNG format with a color depth of 8 or 16 bits. Editing tools are available in the pane to the right of the main window. The menu items are ordered to support a practical workflow, and it makes sense to keep to this order. Clicking a tool opens the matching editing options.
One common fault seen in images is color casting because of incorrect white balance. To correct this, you can click the set manually box in the White balance tab. Then, move the pipette to a neutral section of the image like a cloud or a wall. The RGB values are shown at the top of the window. Left-click to accept the selection, and then correct any imbalance by dragging the Color temperature and Hue sliders.
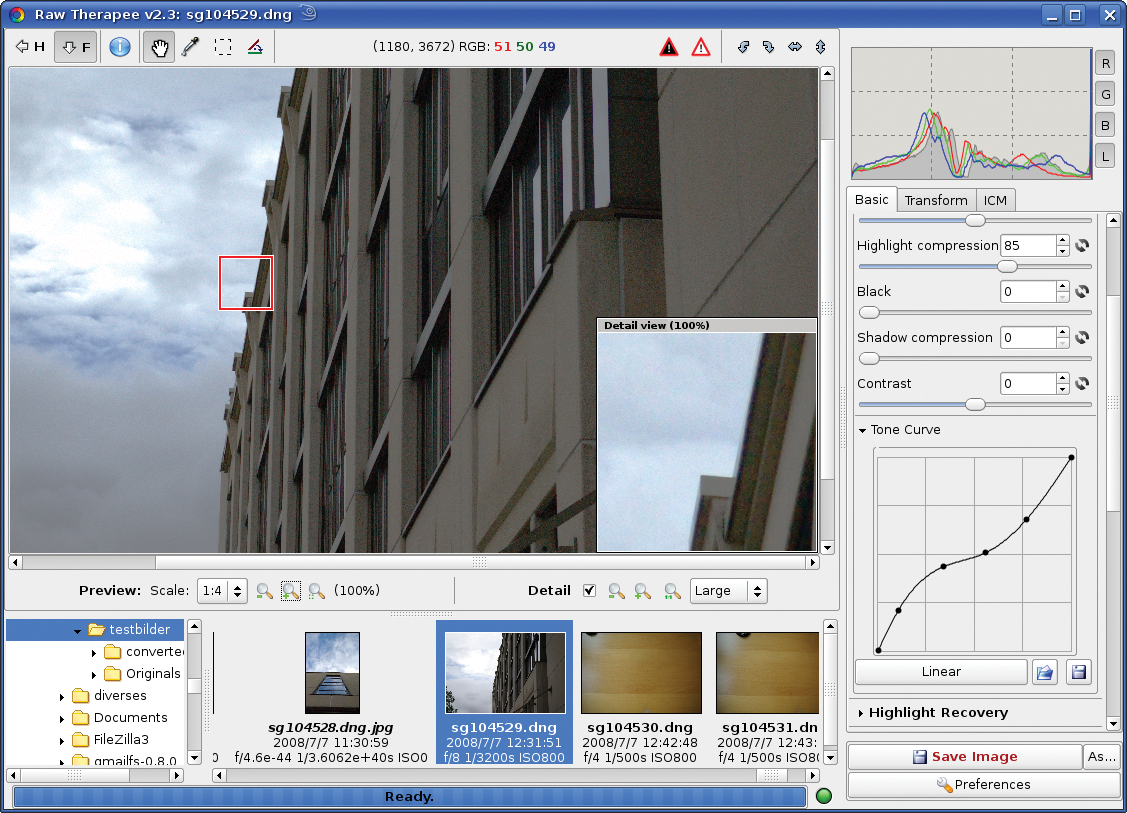
A click on Lighting opens up a lot of options for changing the brightness and contrast of the image. At the top, you will see the Exp.Correction option. This lets you brighten or darken the image by up to five aperture settings. Light compression removes the highlights. The Tonal value graph gives you more control over light distribution in the image. It consists of a diagonal line that lets you insert editing nodes at any position and modify the values as needed (Figure 2). The RGB histogram is displayed above the image manipulation tool; it shows you how the brightness and color components are distributed in the image.
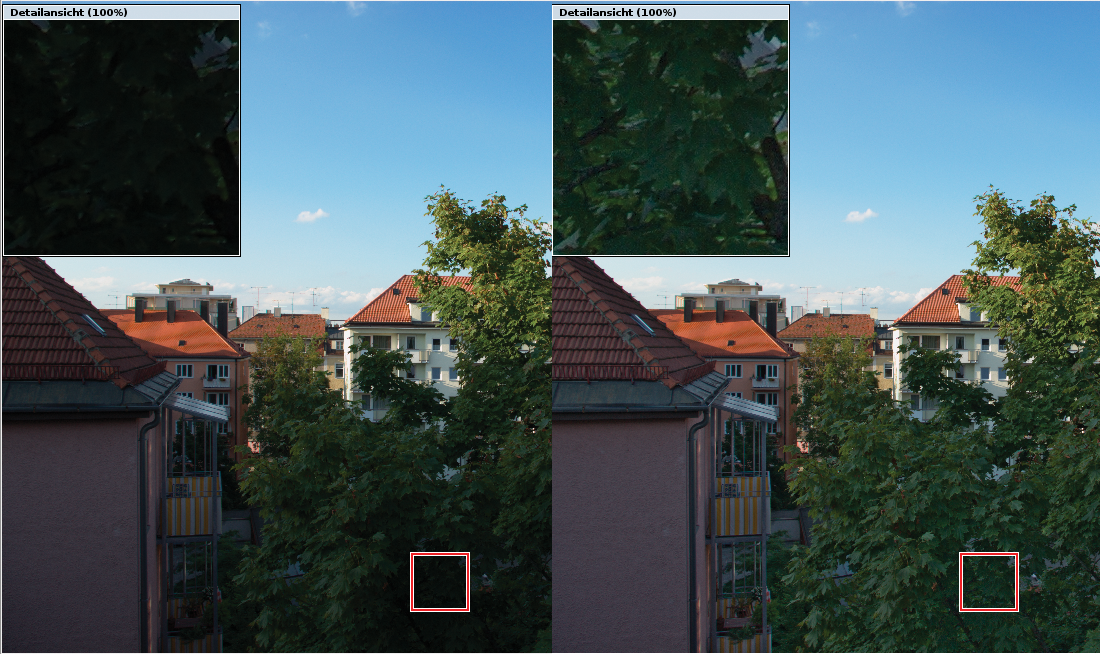
The white and black warning triangles above the main window in the toolbar give you further options for checking the exposure. If you enable them, sections that are too dark show up in white, and sections that are too light show up in black. The Shadow/Lighting section has tools for correcting tonal values of individual sections of the image. Note that you first need to enable this section before you can use the tool. Moving the Shadow slider (Figure 3) tells RawTherapee to lighten areas of the image that are too dark. The same thing applies to Local contrast, which modifies the contrast in a small area.
Changing brightness values in an image often leads to more noise, although this effect is not as pronounced with RAW files as with JPEGs. The effect can be mitigated by applying the Luminance noise filter. Use the Radius filter to define the intensity at which the filter identifies noise. Edge Tolerance lets you specify to what extent a pixel must differ from its neighbor to qualify as an edge. Although the program has another noise suppressor called Color noise filter, the preview does not work, and I would thus not recommend using it.
The use of noise filters often compromises the sharpness of an image. To counteract this, you can apply the sharpen tool. It offers the methods fuzzy mask and R-L image restoration. For details of how to use the filter check out the PDF Tutorial [4].
To align an image vertically or horizontally, click Rotate in the Modify tab. Next, choose Select guideline, hold down the left mouse button, and use the cursor to follow a horizontal or vertical line. The slant of the line is displayed in degrees. RawTherapee will correct the slant to vertical or horizontal when you release the mouse button.
To remove pincushion or barrel distortion, click Deform and drag the slider from the left to the right. With the use of orrect edge lighting, you can correct darker edges. The top slider, Volume, defines the intensity, whereas the bottom slider defines the radius.
Chromatic aberrations can be removed with the use of Remove chromatic aberration. Depending on whether you are removing a red or blue cast, you can move the slider to the left or right until the color cast disappears.
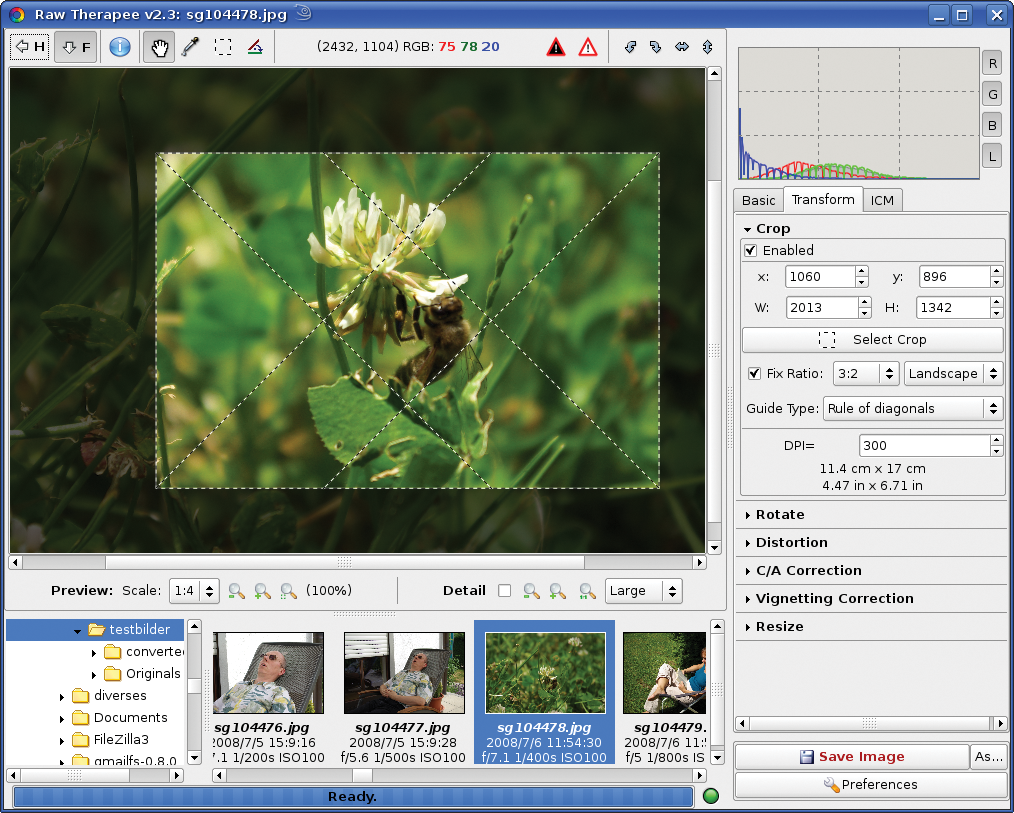
In the end, all photographers want to make the best of their images. Often this is done by selecting the perfect detail from a photograph. Configuration elements to help you do so are available below Detail. For easier orientation, the program will show you various guides, such as Golden Section or Diagonal (Figure 4). The Keep aspect option, which is enabled by default, keeps the detail in a photo-compatible format. You can enable the selection by clicking Select detail, which you can then move to any position in the image by pressing the Shift key and holding down the left mouse button.
RawTherapee is easily the best manipulation tool for RAW images on Linux right now. It can handle any format and holds its own with commercial programs. The lack of a batch mode and the broken color noise filter preview are the only minor niggles right now.
| INFO |
|
[1] RawTherapee: http://www.rawtherapee.com
[2] DCraw: http://www.cybercom.net/~dcoffin/dcraw/ [3] RAW converters compared: http://www.rawtherapee.com/RAW_Compare/ [4] RawTherapee manual: http://www.rawtherapee.com/?mitem=6 |