
By Thorsten Scherf
Asymmetric cryptography provides a powerful and convenient means for encrypting Internet communications. In this scenario, each entity involved in the encryption system possesses a pair of keys: a public key and a private key. The public key is used to encrypt data or to validate signatures. Data encrypted with the public key is then decrypted with the matching private key.
If Alice wants to send an encrypted message to Bob, she needs to obtain Bob's public key for her key ring. Encryption software on Alice's computer then uses Bob's public key to encrypt the message, and Bob's computer uses Bob's private key to decrypt it.
This system only works if you can be sure the keys you are using are genuine - that is, if you can verify that the keys really do belong to the person they say they belong to. This situation is where a Public Key Infrastructure (PKI) comes in. A PKI is a central authority that verifies the authenticity of public keys. (For more on how a PKI works, see the box "Inside a PKI") Once the authenticity of the key is verified, the certification authority signs the key to confirm its validity. The result is referred to as a digital certificate.
| Inside a PKI |
|
A PKI comprises multiple components, some of which are optional. These components include:
The CA is the entity that issues the certificates; it can validate public keys by attaching its signature. In many cases, a whole hierarchy of certification authorities exists, in which the topmost CA in the hierarchy, known as the root CA, only issues signature certificates for subordinate CAs. The authorities lower down in the hierarchy authenticate user and server keys. In a scenario like this, the root CA is not usually accessible online. The RA accepts authentication requests for keys and forwards them to the CA. The CRL contains an overview of invalid certificates and provides a means of checking the validity of a given certificate. A directory service such as LDAP serves up certificates and CRLs. When a change to a CRL occurs, or when a new certificate is issued, this information is stored immediately in the directory and can be queried via the directory. The OCSP supports realtime validation of certificates. If the protocol is enabled in a browser, the validity of a certificate is checked in real time. The check takes place both transparently and automatically as a background operation. The DRA can also store a copy of any key that is generated, thus providing the ability to restore keys in emergencies. The certificates themselves typically use the X.509 format, which is an International Telecommunication Union Telecommunication Standardization Sector (ITU-T) certificate standard. |
Several commercial certificate authorities issue and validate certificates for a fee. Free, community-based authorities, such as the CAcert.org community [1], also offer certificate services. In some cases, however, you might prefer to maintain your own certificate system. Some organizations might opt for an in-house certificate authority simply as a means of saving money. In other cases, the global reach of an Internet-based authority might not be necessary for a system operating on an internal network, or a local certificate server might be part of some larger infrastructure. Many security-minded administrators prefer to maintain their own Certification Authority (CA) system simply because they don't trust an external organization to handle such a critical task. The recent controversy over flaws in the MD5-based certificates provided by several commercial certificate authorities [2] provides new arguments for the administrators who opt to keep some control.
In March 2008, Red Hat released the source code for the Red Hat Certificate System. This code has now found a home with the Fedora-sponsored Dogtag certificate system [3]. Dogtag is a powerful tool for users who want to implement a full-featured PKI.
Dogtag is available on Fedora Version 8 and newer as an Open Source PKI implementation. To install the packages, drop the Yum configuration file, pki.repo, into the /etc/yum.repos.d folder. To store the certificates, Dogtag needs the Fedora Directory Server (FDS), which you can install from the Yum repository. A HOWTO for installation is located at the project website [4]. The registration agent needs a SQLite database, which is available from the standard Fedora repositories.
The pkiconsole administration tool provides a graphical front end. This tool requires a current Java Runtime Environment (JRE); again, you can install this environment via the standard repository (yum install java-1.6.0-openjdk). After completing these preparatory steps, install the individual subsystems via Yum as follows:
yum install pki-ca pki-console
In this article, I focus on the installation and configuration of the PKI--CA. The Dogtag project provides installation guides for the other Dogtag subsystems, including pki-dra, pki-ocsp, and pki-dra.
Assuming the pki-ca package installs successfully, the pki-ca service will launch immediately and output a URL for the next configuration step. Clicking the URL launches your web browser and brings up a web interface, which you can use for all further configuration tasks (see Figure 1).
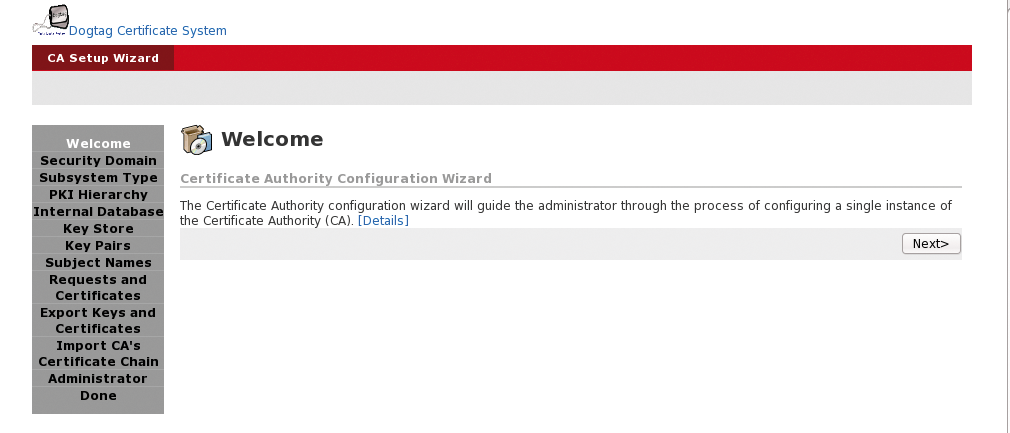
The URL contains a setup PIN for configuring the CA. If you prefer to leave the configuration until later, you can check the logfile, /var/log/pki-ca-install.log, for the URL and the PIN.
Through the web interface, you can enter information about the CA you are installing, such as the directory server you will use as the back end, information on whether or not the CA is a root or a subordinate CA, and the admin account you would like to set up.
If you prefer, you can use a command-line tool, pkicreate, for all of these settings. After answering all of the configuration wizard's questions, go on to access the CA's website in your browser at https://Servername:9443.
If you need to access the CA as a user in order to generate a certificate for yourself or a network service, follow the SSL End Users Services link to a page with various certificate profiles.
The profiles let you create certificates with specific properties and parameters. For example, the Manual User Dual-Use Certificate Enrollment link creates user certificate requests.
The private key for the certificate is generated directly when the request is created and stored in the browser's certificate memory. Later on, it will be mapped to the imported X.509 certificate. If you need to generate a certificate for a service - a web server, for example - select the Manual Server Certificate Enrollment profile from the list of available profiles to issue a Certificate Signing Request (CSR) for the server. It is fairly easy to formulate a server certificate request in PKCS#10 format [5] with OpenSSL:
openssl genrsa -des3 -out webserver.key 1024
openssl req -new -key webserver.key -out webserver.csr
After you submit the request, it must be verified and confirmed by a CA administrator or a CA agent with appropriate privileges. To do this, log in at the CA start page and follow the Agent Services link to the CA's certificate management page. For this login, you need to authenticate with a certificate. The required certificate is generated when you configure Dogtag and store it in your web browser's certificate store. Of course, you can assign CA management privileges to other users at any later time.
After you log in, the List Request item will give you a list of pending signing requests, which you can then validate and confirm. List Certificates displays a list of all authenticated certificates in PKCS#7 format. A user wanting to retrieve a certificate clicks SSL End Users Services on the main page of the CA. The Retrieval tab lets you list all authenticated certificates, or you can search for your own request via the ID request that Dogtag generates and displays when you submit a request.
After locating your own certificate, import it into your browser's certificate store. Just like Dogtag, the Firefox web browser uses the Network Security Services (NSS) library. Various Berkeley DB files are used as the database back ends for NSS, each of which is stored in a matching Firefox profile folder. Public Certificate Revocation Lists (CRLs) are typically stored in cert8.db, and private keys are stored in key3.db. The web browser Properties lists all the imported certificates.
To import the certificates into another application, such as a mail client, choose the PKCS-#12 format, which exports both the certificate and the private key. If you prefer to work at the command line, use the certutil tool. The command line shown in Listing 1 shows how to obtain details of your own certificate store. Of course, you can use Certutil to add new certificates or delete existing certificates [6].
| Listing 1: certutil at the Command Line |
01 certutil -L -d ~/.mozilla/firefox/i1nfei2a.default/ | grep -i tux 02 03 Certificate Authority - Tuxgeek Domain CT,C,C 04 CA Administrator of Instance pki-ca's Tuxgeek Domain ID u,u,u 05 foo1 bar's Tuxgeek Domain ID u,u,u 06 foo2 bar's Tuxgeek Domain ID u,u,u 07 Thorsten Scherf's Tuxgeek Domain ID u,u,u |
Dogtag can issue certificates directly, without the need for an agent to authenticate them manually. Several approaches are available to handle this, the most common being LDAP and PIN-based authentication. In both cases, users have to authenticate against a directory server with their username and password before submitting the certificate request. In the case of PIN-based authentication, a user must also supply a PIN, which is stored as an additional attribute along with the user object. Both authentication methods can be configured with the use of pkiconsole, the graphical admin tool that you launch by typing pkiconsole https://Server:9443/ca (Figure 2).

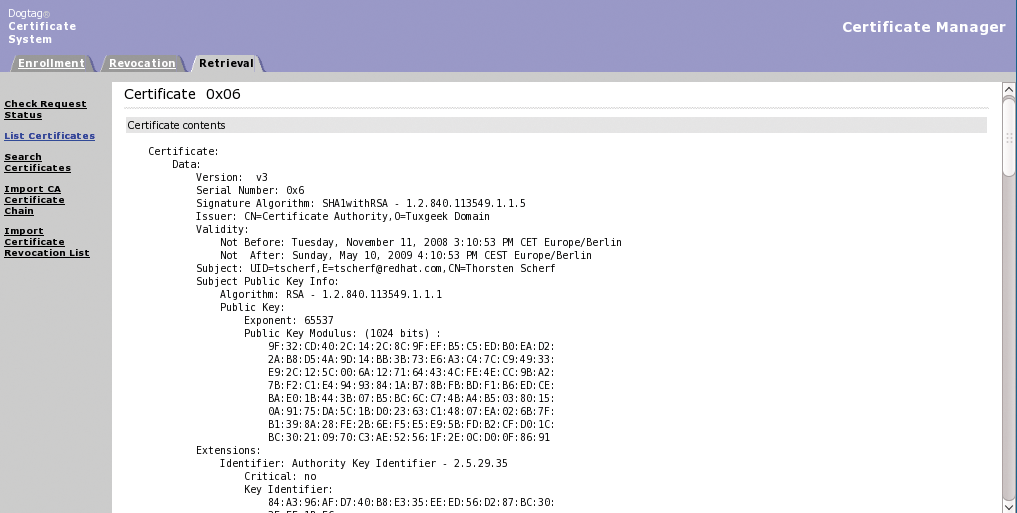
In Authentication, you can set up various plugins for user authentication against the Dogtag server. First, you need to select and configure the UidPwdDirAuth plugin for LDAP-based authentication, which relies on the username and password. To additionally require a PIN, choose the UidPwdPinDirAuth plugin. Of course, each user object will then need a PIN attribute. To configure this, run the Dogtag setpin tool. After you set up user authentication, users do not need to wait for an agent to authorize their certificate requests manually; instead, certificates generated automatically are available from the Retrieval tab in the SSL End Users Services section (Figure 3).
In large-scale environments, especially, it makes sense to publish automatically any X.509 certificates you issue in a directory service. Although a separate server is preferable for production use, you also can use the directory server that handles your Dogtag configuration. In Windows environments, you can use an Active Directory server to publish the certificates because the Active Directory server is in fact an LDAP server. The admin simply binds the certificate to the user object as an additional binary attribute.
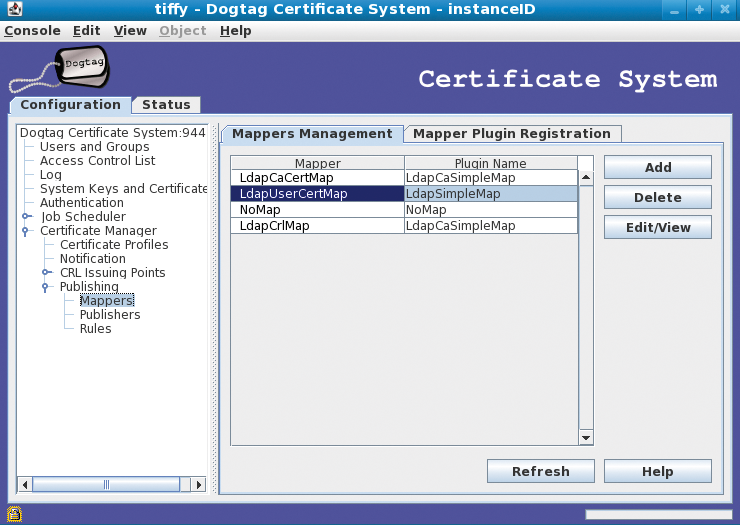
The Certificate Manager | Publishing menu item under the Configuration tab lets you set up a mapper for user certificates (LdapUserCertMap; Figure 4). The mapper links the subject name on the certificate with the user's Distinguished Name (DN), thus allowing you to map the certificate to a tangible user object. The dnPattern mapping could look like this:
UID=$subj.UID,OU=people,dc=tuxgeek,dc=de
To additionally store the CRLs and the CA certificate in LDAP, add the LdapCaCertMap and LDAPCrlMap mappers. To complete this, you need to add the connection date for the directory service in the Publishing section. Now, when the user submits a certificate request to the Dogtag server, the issued certificate is immediately published on the LDAP server. A manual request to the directory server confirms this (Listing 2).
| Listing 2: ldapsearch |
01 ldapsearch -x -b dc=tuxgeek,dc=de -h tiffy.tuxgeek.de uid=tscherf -LLL 02 03 dn: UID=tscherf,ou=people,DC=tuxgeek,DC=de 04 cn: Thorsten 05 sn: Scherf 06 objectClass: top 07 objectClass: person 08 objectClass: organizationalPerson 09 objectClass: inetOrgPerson 10 uid: tscherf 11 userCertificate;binary:: MIIDDzCCAfegAwIBAgIBCTANBgkqhkiG9w0BAQUFADA5MRcwFQYDV 12 QQKEw5UdYhnZWVrIERvbWFpbjEeMBwGA1UEAxMVQ2VydGlmaWNhdGUgQXV0aG9yaXR5MB4XDTA4MT 13 ExMTE3MzkwM1oXDTA5MDUxMDE3MzkwM1owSTERMA8GA1UEAxMIZm9vMiBiYXIxHjAcBgkqhkiG9w0 14 BCQEWD2ZvbzJAdHV4Z2Vlay5kZTEUMBIGCgmSJomT8ixkAQETBGZvbzIwgZ8wDQYJKoZIhvcNAQEB 15 BQADgY0AMIGJAoGBAO22zHGO/tIuKect+DMiWl4l5OtA4oQKp8DbQrBhVl8R4O7MroY6+g6EeDwpJ 16 6NFPFkbrxK4F+e5Pil1Sthr9LVjUb+E1CJGtdsWli3lrEnmdy2NjLRXY1obTwLn2PSd4Q4WGKcYGp 17 BlZT4QmoVhlJ3pByalIIJvRPhrSuZn4VThAgMBAAGjgZUwgZIwHwYDVR0jBBgwFoAUhKOWr9dAuOM 18 17u1W0oe8MD7vG/YwQAYIKwYBBQUHAQEENDAyMDAGCCsGAQUFBzABhiRodHRwOi8vdGlmZnkudHV4 19 Z2Vlay5kZTo5MDgwL2NhL29jc3AwDgYDVR0PAQH/BAQDAgXgMB0GA1UdJQQWMBQGCCsGAQUFBwMCB 20 ggrBgEFBQcDBDANBgkqhkiG9w0BAQUFAAOCAQEApSA7qHWm4dvjf6WcPm9rChDD0OMfbSL8HzCYCd 21 /b5RfrCAB7EOa5wdJNb8ldEi4Zj9OD3r4yxq7QJlOSlKUxd+vmrRLLCeDZZMsFUE5owdOMP7QCSzs 22 T+FMOQZaAVGrKFNbv06ceuaKssb0HrD6gSAmFpqGP3wEhKHIGt76hHbmsYgl3gMawFpWmzuqEDzlx 23 KMeo0jdQF++icxnh3zpkJSyLwueGM33kQ2zmU6buZfSt/ROJ8qo4Te58Wy/G1l01eI6NAMdMzKI0r 24 5nQLyEprj6j3ZU99+taxW+tHM9sjBXvEt1PCDTSiSrTv33064+qrEs4EGiaLWfPLikYafmxng== |
Note that you need a user object for the user below the specified Organizational Unit (OU); otherwise, the system will be unable to publish the certificate. On top of this, you will only find certificates generated in response to new requests in LDAP; certificates issued before you define the publishing configuration will not automatically be transferred to the directory service, although you can add them manually at a later stage with ldapmodify.
Certificates very often become invalid if, for example, the private key for the certificate is lost. To notify other applications of this, you can set up Certificate Revocation Lists (CRLs). A CRL is a publicly accessible list that a web browser can periodically query or import to identify invalid certificates.
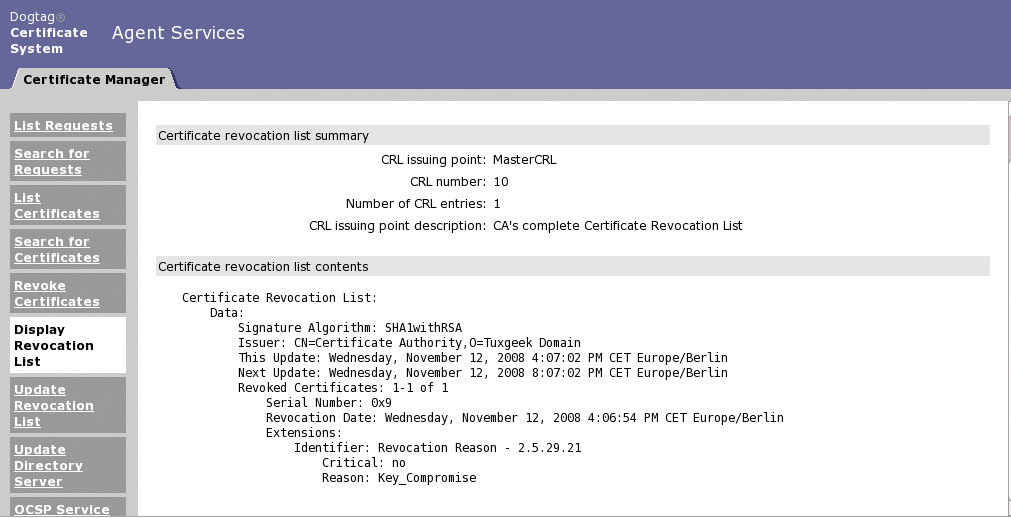
Both the CA administrator and the owner of the certificate can decide which certificates to put on the list. Administrators can access Agent Services, select the Search for Certificates menu entry to list all issued certificates, then press Revoke to put a certificate on the revocation list. Of course, you can also search for a specific certificate. Next, you need to update the CRL by pressing Update Revocation List and Display Revocation List to display the modified version on the screen (Figure 5).
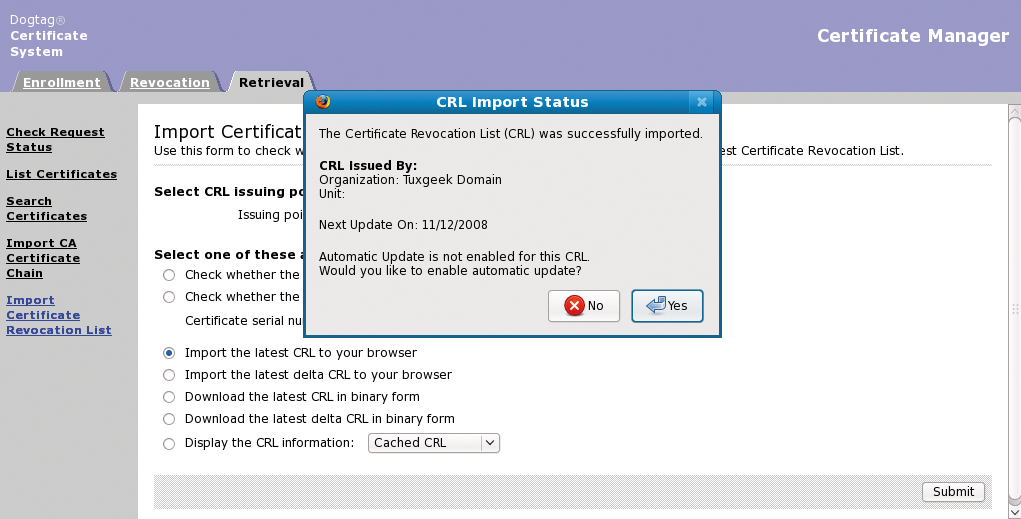
End users can go to SSL End Users Services to import a current version of the CRL into an application. Selecting the Import the latest CRL to your browser radio button under the Retrieval | Import Certificate Revocation List menu item starts the import process (Figure 6). Users can modify their browser properties to specify CRL update intervals (Figure 6, CRL Import Status window), which would avoid the need to periodically download a new version of the CRL. To view the CRL content in your web browser, use Properties. The command shown in Listing 3 reads the content directly in Dogtag.
| Listing 3: ldapsearch |
01 ldapsearch -LLL -x -b dc=tuxgeek,dc=de -h tiffy.tuxgeek.de -D 02 03 cn="Directory Manager" -w password objectClass=certificationAuthority 04 certificateRevocationList 05 dn: UID=Certificate Authority,OU=people,DC=tuxgeek,DC=de 06 certificateRevocationList;binary:: MIIBtjCBnwIBATANBgkqhkiG9w0BAQUFADA5MRcwFQY 07 DVQQKEw5UdXhnZWVrIERvbWFpbjEeMBwGA1UEAxMVQ2VydGlmaWNhdGUgQXV0aG9yaXR5Fw0wODEx 08 MTMxMjQ2MjZaFw0wODExMTMxNjQ2MjZaMCIwIAIBCRcNMDgxMTEyMTUwNjU0WjAMMAoGA1UdFQQDC 09 gEBoA4wDDAKBgNVHRQEAwIBDDANBgkqhkiG9w0BAQUFAAOCAQEAHpdSIx/tm3u0ALqhbKJwdDVUsx 10 V/TaARtJ9Xthw5/EblPTrngNLmN1iVpdBRO2Nr0vFfLdqGwDTpli35jUmK4mOyD5viVv1dv9TmEwG 11 aCU2q3SQceRcHAliAJv/2ol28Rr1/Dk+5LtgpppWxia2Smbt8II/ZZPsq1kwy2EmOWR9V8z40Wode 12 Eb3HUQzpZefKje8otH1xSX3eG7roblcVhFP/CnlHGfUDEB1sCGvv9VQkLQQqjQoGKvz2HMs6LiOv1 13 VmRfjXzlblrHBzHSmesliuGaCmZCaHg91WeEic1q7xJfOnw1v+VgpfidEV4gm+Ty5IYICcvEBlN7k 14 wjLbX06A== |
For a more readable version of the CRL, send the content of the CRL attribute to the PrettyPrintCrl tool.
CRLs have one big disadvantage: They must be managed manually. For example, reaching a large number of different servers from which you need to request a CRL at regular intervals would involve considerable overhead and waste disk space because the CRLs are stored on the local filesystem. The whole process is easier if your client supports the Online Certificate Status Protocol (OCSP). OCSP lets you query certificates from different certification authorities in real time. The only condition is that the issuing certification authority has to run an OCSP responder to answer client requests concerning certificate validity. If the CA does have an OCSP responder, all the certificates issued by this CA will have an Authority Information Access extension containing the URL for the responder.
Dogtag finally brings a powerful public key infrastructure to the open source world. Thanks to the web interface and the graphical console, administrators should have no trouble finding their way around daily operations and management. With the various templates available from /var/lib/pki-ca/webapps, you can modify the application's look and feel to suit your taste.
| INFO |
|
[1] CAcert.org: http://www.cacert.org/
[2] MD5 problems: http://www.linux-magazine.com/issues/2009/100/broken_chain_of_trust/ [3] Dogtag Project: http://pki.fedoraproject.org/ [4] Dogtag data storage: http://pki.fedoraproject.org/wiki/PKI_Data_Storage_Requirements [5] PKCS specification: http://en.wikipedia.org/wiki/PKCS [6] Certutil: http://www.mozilla.org/projects/security/pki/nss/tools/certutil.html |