By Michael Schilli
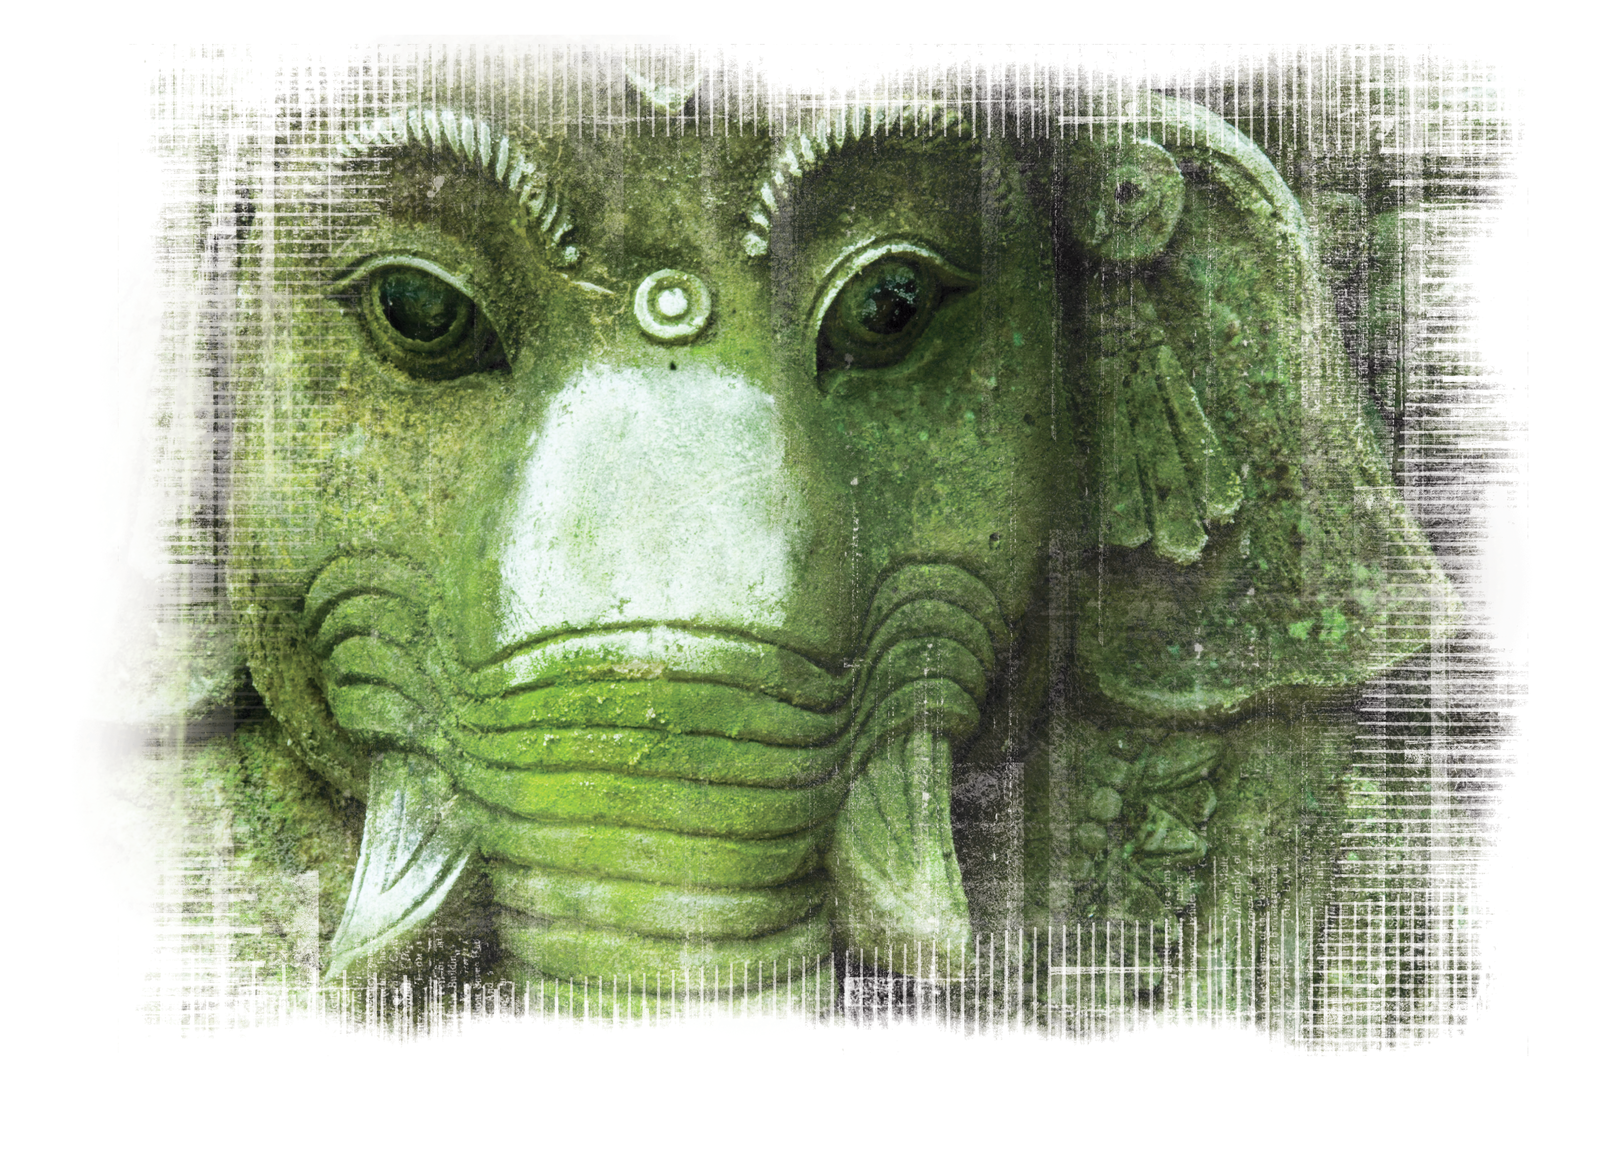
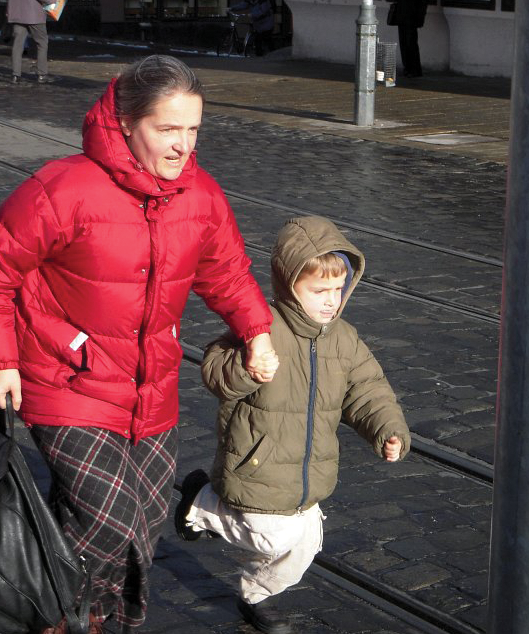
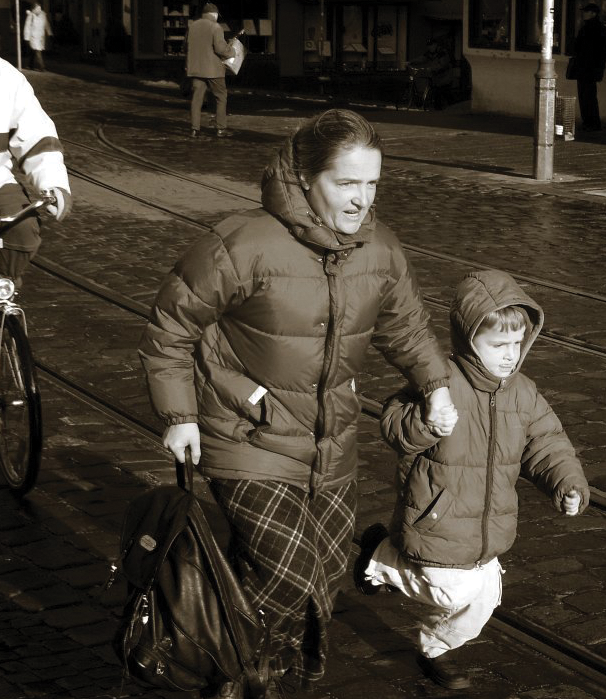
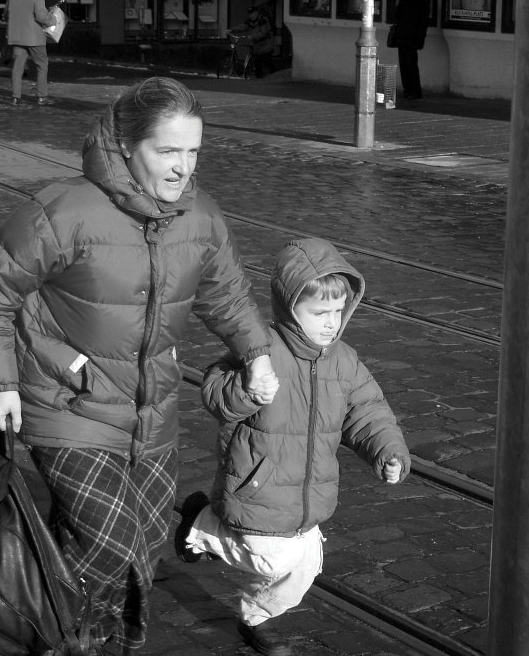
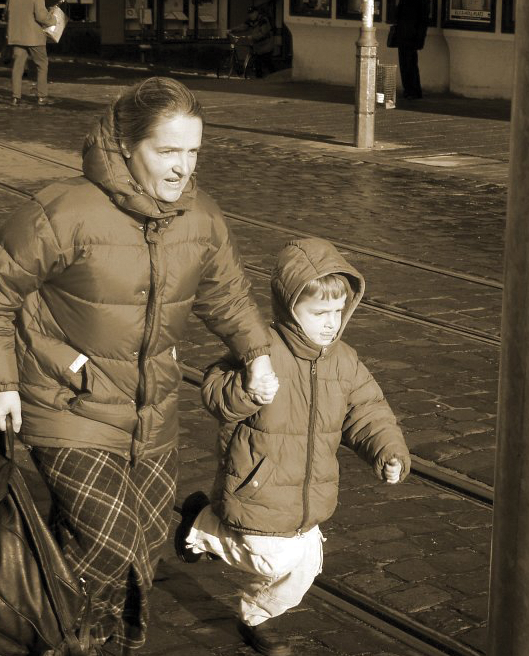
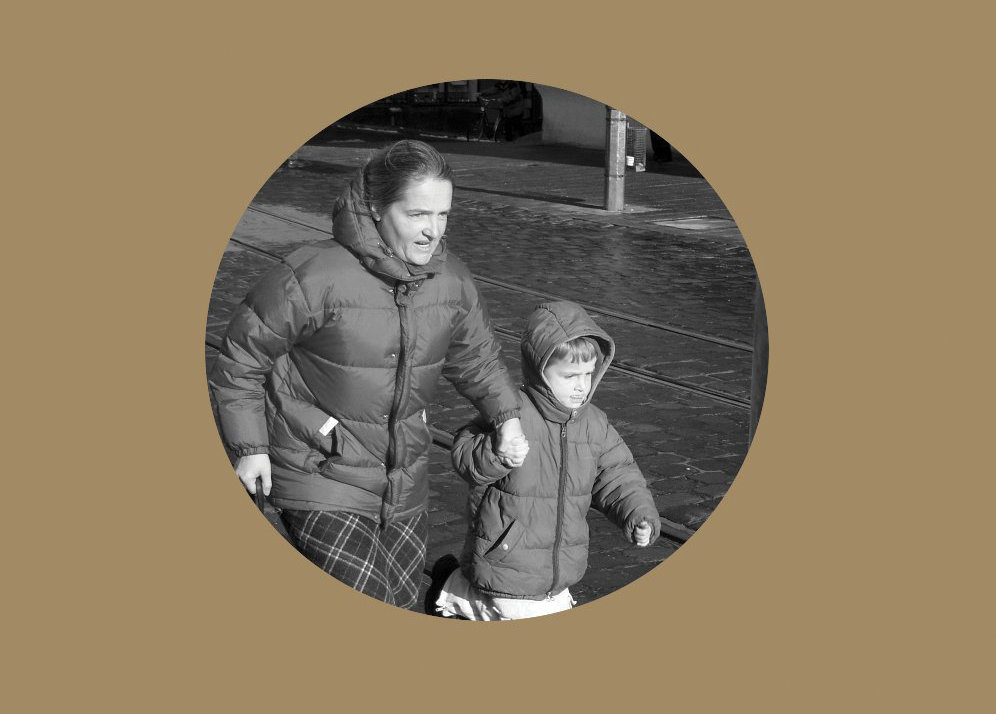
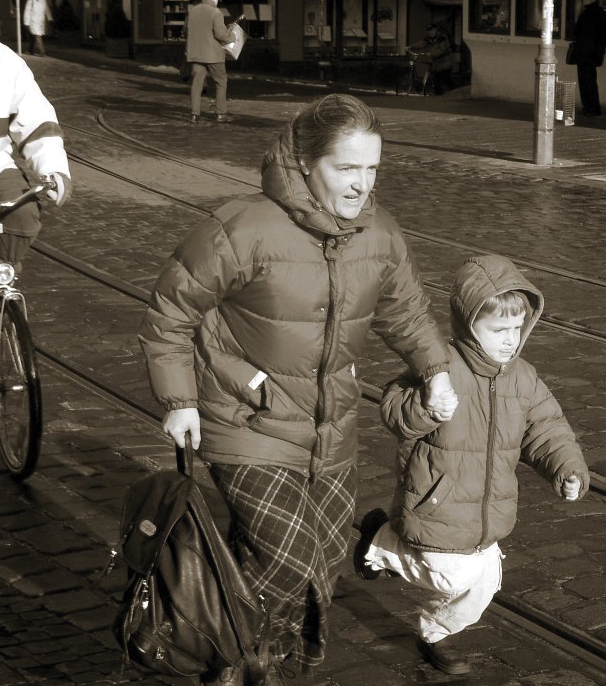
If you look at 100-year-old black-and-white images, you can't help noticing the sepia tint. The black areas in particular are likely to have yellowed significantly over the years, whereas the lighter hues will only have a slight tint. On my last trip to my home country, Germany, I had the idea of converting a couple of shots I had taken there with my digital camera (Figure 1) into black-and-white and aging them artificially (Figure 2), just to illustrate how much more colorful I perceive the scenery in my current residence, San Francisco.
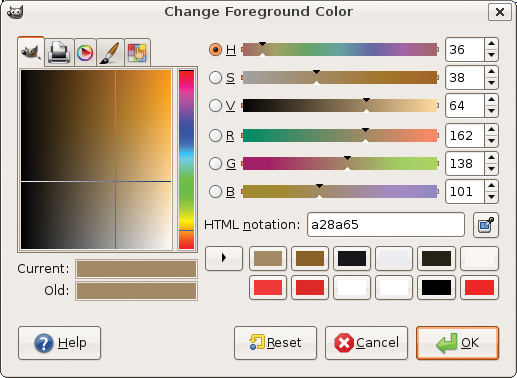
According to Wikipedia [3], the sepia tint of old photographs comes from a pigment that was used in photography as of the late 19th century. It was taken from a cuttlefish that is indigenous to the English Channel and that has the official Latin name Sepia officinalis. To achieve the same effect with digital images, the artist has to tint the darker parts of the image yellowish brown (Figure 3). The colors at the middle of the spectrum are not greatly affected by this, and the light parts not at all.
It is not sufficient to simply remove the color information from the image and dye it yellow uniformly - to be convincing, more subtle measures are needed. Digital photo specialist Eric Jeschke published a number of GIMP operations [4], which, if applied in sequence, produce convincingly original "pre-war" pictures. The CPAN Gimp Perl module lets you combine the individual steps as a Perl script, which you can then run against a number of photos.
The sepiafy script (Listing 1) expects an image file at the command line, performs a number of transformations on it, and then outputs an artificially aged black-and-white image with a yellow tint. For example, the sepiafy image.jpg command results in a file called image-sepia.jpg, which can then be viewed with a tool like eog (Eye of Gnome).
As explained in one of my earlier columns [5], GIMP scripts need to cut through a fair amount of red tape before they can actually talk to GIMP. The register()function called in line 21 defines a name, a menu entry, and a number of other mandatory values that are fairly useless in the command-line version, such as the name of the author and help text. Line 34 finally enters GIMP by calling the event loop main(). Once there, thanks to the entry in line 31, GIMP then calls sepiafy() defined in lines 37ff.
| Listing 1: sepiafy |
001 #!/usr/bin/perl
002 use warnings;
003 use strict;
004
005 use Gimp qw(:auto);
006 use Gimp::Fu;
007 use Getopt::Std;
008 use Log::Log4perl qw(:easy);
009
010 Log::Log4perl->easy_init(
011  $DEBUG);
012 DEBUG "Starting up";
013
014 my $menu =
015 "<Toolbox>/Xtns/Perl-Fu/Sepiafy";
016
017 my $file = $ARGV[0];
018 die "No file"
019   unless defined $file;
020
021 register(
022  "perl_fu_sepiafy", # Name
023  "Sepia Toning",    # Explain
024  "",                # Help
025  "",                # Author
026  "",        # Copyright
027  "",        # Date
028  $menu,     # Menu
029  "*",       # Images accepted
030  [undef],   # No parameters
031  \&sepiafy  # Function
032 );
033
034 exit main();
035
036 #############################
037 sub sepiafy {
038 #############################
039
040  my $img =
041    gimp_file_load(
042   RUN_NONINTERACTIVE, $file,
043   $file);
044
045  die "Can't load $file"
046    unless $img;
047
048  my $layer =
049    image_get_active_layer(
050   $img);
051
052  DEBUG "Desaturate";
053  $layer->desaturate_full(2);
054
055  # 2: Average
056  my $sepia_mask =
057    $layer->layer_copy(1);
058
059  # 1: Add Alpha Channel
060  $sepia_mask->layer_set_mode
061    (COLOR_MODE);
062
063  # Insert layer above
064  # active layer
065  $img->image_add_layer(
066   $sepia_mask, -1);
067
068  gimp_context_set_foreground(
069   [ 162, 138, 101 ]);
070  $sepia_mask->drawable_fill(
071   0);
072
073  # 0: FOREGROUND-FILL
074  DEBUG "Adding layer mask";
075  my $layer_mask = $sepia_mask
076    ->layer_create_mask(0);
077
078  # 0: White mask
079  $sepia_mask->layer_add_mask(
080   $layer_mask);
081
082  $layer->edit_copy();
083
084  my $float =
085    $layer_mask->edit_paste(
086   0);
087
088  # 0: Clear selection
089  # 1: Paste behind it
090  $float->invert();
091  $float->floating_sel_anchor(
092  );
093
094  DEBUG "Flattening image";
095  $img->flatten();
096  $layer =
097    $img->get_active_layer;
098
099  $layer->curves_spline
100    (HISTOGRAM_VALUE,
101   [ 0, 0, 58, 36, 255, 255 ]
102    );
103
104  $file =~ s/\./-sepia./g;
105
106  DEBUG "Saving $file";
107  gimp_file_save(
108   RUN_NONINTERACTIVE,
109   $img,  $layer,
110   $file, $file
111  );
112
113  return $img;
114 }
|
The gimp_file_load() function in line 41loads image files in any format supported by GIMP and converts them into GIMP's native, internal format. If the load procedure fails because the specified file does not exist or is unreadable, gimp_file_load() returns undef and the test condition in line 45 terminates the program with an error message.
To manipulate an image in GIMP, you first need to specify the so-called "drawable" abstraction of the image the operation should relate to. In this case, it is the active (and only) layer in the GIMP image. The image_get_active_layer() function returns this layer if you pass it the $img reference returned by the previous call to the imager loader.
The desaturate_full() method (line 53) removes all the color information from the drawable layer. The parameter 2 specifies the DESATURATE-AVERAGE algorithm for this. Alternatively, you could have used DESATURATE-LIGHTNESS (0) and DESATURATE-LUMINOSITY (1), which convert colors to grayscales on the basis of their lightness or luminosity values, respectively, and return slightly different results.
The result is a grayscale image (Figure 4) that still lacks the brightness-based sepia tint. To add the tint, the layer_copy() function (line 57) creates a copy of the original layer ($sepia_layer) in the image. An empty layer would have been sufficient for the purposes here, but by copying the existing layer, the height and width are automatically correct. The parameter of 1 tells the new layer to create an alpha channel, which you will need later to create a so-called layer mask.
Line 60 calls layer_set_mode() with the parameter COLOR_MODE to define how the new layer will overlay the original to create an overall image. In this way, their colors mix evenly whereas other modes wipe out their peer layers, or "burn" or "dodge" them. A final call to image_add_layer() (line 65) drops the newly created, but unassigned, layer at the top of the layer dialog describing the image being edited. A parameter of -1 tells it to take the uppermost position.
But why do you need the new $sepia_layer? The script fills it with the RGB color (162,138,101), the yellowish-brown sepia hue, and then applies it to the original image layer, adding a layer mask that is used to apply the color on the basis of the brightness of the original pixels. The drawable_fill() method in line 70 takes care of filling the layer with GIMP's foreground color, set via gimp_context_set_foreground() in line 68. A value of 0 passed to drawable_fill() instructs GIMP to use the FOREGROUND-FILL mode.
If my aim was simply to spread the sepia tint evenly over the original layer, the script could collapse the two layers right now and finish up because COLOR_MODE in line 61 would gently merge the color information (Figure 5). As a matter of fact, this is similar to how GIMP's preset sepia tint function works, but I like the results of Jeschke's process much better.
Because sepiafy needs to apply more tint to the darker parts of the image than to the lighter parts, I will use a layer mask. The mask specifies how the sepia-tinted layer interacts with the original layer of the image. Line 76 creates the mask. The parameter 0 stands for ADD-WHITE-MASK, which is a mask comprising white-only pixels. The subsequent call to layer_add_mask() (line 79) adds the newly created mask to the $sepia_mask layer.
In GIMP, masks select parts of an image, just as you would with the selection tool to create a rectangular or circular selection in an image. GIMP draws "marching ants" around the selection when you do so and stores the selection information as a black-and-white image in which the white regions represent the selected parts of the image and the dark pixels represent unselected areas.
If the user draws a rectangle at the center of the image, the corresponding mask is a black image with a white rectangle at its center. And Masks can go even further: In contrast to mouse-based selections, masks can also define grayscales, in which the areas of the image are selected "softer" or "harder."
These grayscale images can be put to intelligent use as filters. Instead of painstaking manual selections, the user defines a mask image and GIMP automatically selects the parts of the original image that have corresponding light pixels in the mask image.
To define how the layer's pixels are to be applied to the image, GIMP lets you define a layer mask for any layer. The white areas of this grayscale mask make the layer pixels 100 percent opaque, whereas the black pixels in the mask make the layer 100 percent transparent; that is, they disable this part of the layer. For gray areas, GIMP applies the layer value to a certain degree, reflecting the value in the mask.
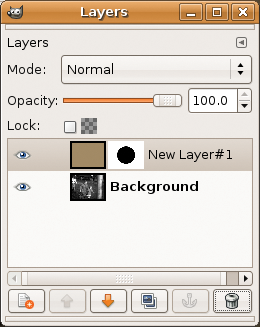
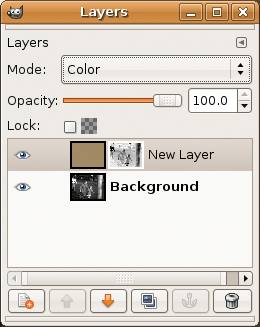
Figure 6 shows the Layers dialog with a big black circle that I added to the white background of the layer mask in the sepia layer as a test; the layer's overlay mode is set to "Normal." As you can see in Figure 7, GIMP does not change the original image in the black part of the mask but applies sepia to the white parts and ignores the image in the process. This approach is definitely not the right one, but a grayscale mask will get me closer to my goal.
What does the mask need to look like to apply a realistic looking sepia tint - that is, to open up the sepia floodgates for the darker parts of the original and leave them shut in the lighter areas? If a pixel in the original layer is black, the mask at this point has to be white, and the sepia tint will be applied 100 percent. The opposite also applies: If the original layer is white, the mask is black, and the sepia layer is not applied to the original layer at all.
For grayscales, the mask is somewhere in between. Black-to-white and white-to-black? The solution should now be obvious: The mask simply needs to invert the grayscale image of the original layer!
For this, edit_copy() in line 82 copies the image in the original layer into GIMP's internal cut-and-paste buffer, and line 85 drops this content on top of the previously created $layer_mask. This provides a reference to a floating section, which is inverted by line 90 and finally anchored in the layer mask by line 91.
To do this in GIMP by hand, you would click the original layer in the layer dialog, then change to the image window, press Select-All, then press Ctrl+C to copy the image content to the cut-paste buffer. This procedure is followed by a mouse click on the layer mask in the sepia layer (the second thumbnail in the layer line) and a return to the image window, where you need to select Paste to insert. This creates a floating section in the Layers dialog, which is fixed in place by clicking the anchor at the bottom. Finally, you would need to invert the colors in the layer mask by selecting Colors | Invert; after doing so, the Layers dialog would look similar to Figure 8.
The final step is to flatten() (i.e. merge the two layers to create a single active one). This changes the order of the active layers and the script thus needs to call the get_active_layer() method (line 97) to obtain a reference to the remaining layer.
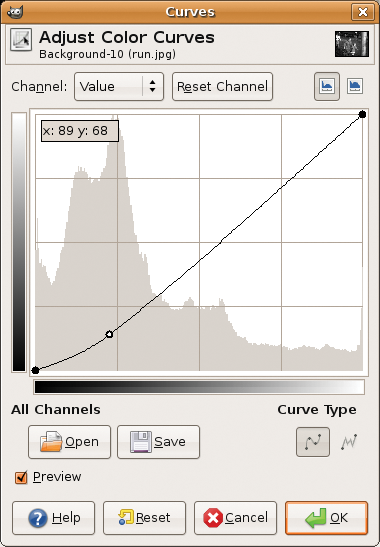
The results, with a nice coating of sepia, are shown in Figure 9, and for a more dramatic effect, as shown in Figure 10, the curves_spline function darkens the dark tones slightly, without touching the lighter ones. The six coordinates passed in to the function in line 102 define a graph, as shown in Figure 11. It manipulates the image as if the user had run GIMP's Curves against it. A linear curve in the Curves dialog leaves the image unchanged, whereas data points below the straight line darken all image pixels carrying that brightness value.
The gimp_file_save() function saves the results in a new file, which line 104 creates by appending -sepia to the original name.
To install the required Perl modules, Gimp and Gimp::Fu, on Ubuntu Hardy Heron, enter:
sudo apt-get install libgimp-perl
Older Ubuntu versions have a bug, but in a previous article [5], I told you how to work around it. The Log4perl module (available from CPAN or in the liblog-log4perl-perl package with your Ubuntu distribution) shows the progress of the image conversion at the command line. If you prefer a less verbose script, you can comment out the call to easy_init() in line 10 of the script.
The documentation for GIMP's Perl interface isn't very detailed, but GIMP has an excellent procedure browser (Figure 12) that you can call via Xtns | Procedure Browser.
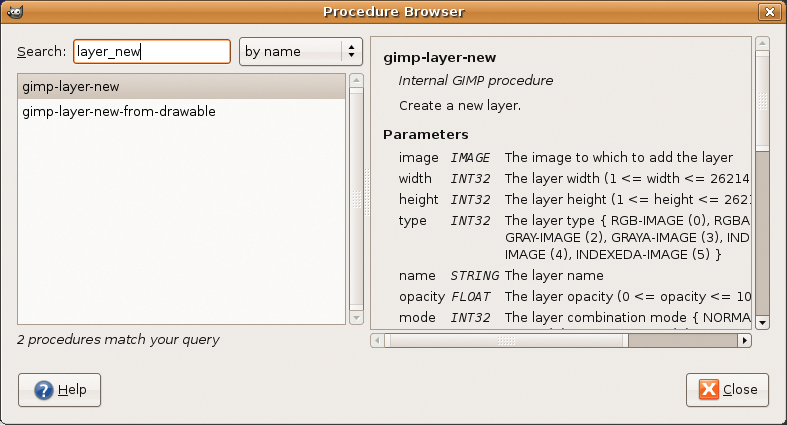
After doing so, type the part of the function name that you have already guessed, such as "load," "save," or "layer," and the procedure browser will return a list of available API functions with precisely documented parameters and return values. It is thus typically possible to find an API function for any action in GIMP's point-and-click user interface, empowering the user to automate steps in scripts instead of repeating them by hand.
| THE AUTHOR |
|
Michael Schilli works as a software engineer with Yahoo! in Sunnyvale, California. He is the author of Goto Perl 5 (German) and Perl Power (English), both published by Addison-Wesley, and he can be contacted at mschilli@perlmeister.com. Michael's homepage is at http://perlmeister.com. |
| INFO |
|
[1] Listings for this article: ftp://ftp.linux-magazine.com/pub/listings/magazine/102/Perl
[2] "Luminosity Masks and Sepia Toning" by Doug Nelson, RetouchPRO, May 2001, http://www.retouchpro.com/tutorials/lum-mask-sepia.html [3] Sepia: http://en.wikipedia.org/wiki/Sepia_tone [4] "Sepia Toning" by Eric R. Jeschke, 2002, http://www.gimp.org/tutorials/Sepia_Toning [5] "Color Play" by Michael Schilli, Linux Magazine, September 2008, http://www.linux-magazine.com/issues/2008/94/color_play [6] Bunks, Carey. Grokking the GIMP. New Riders Publishing, 2000 |