
By Daniel Niedzielski
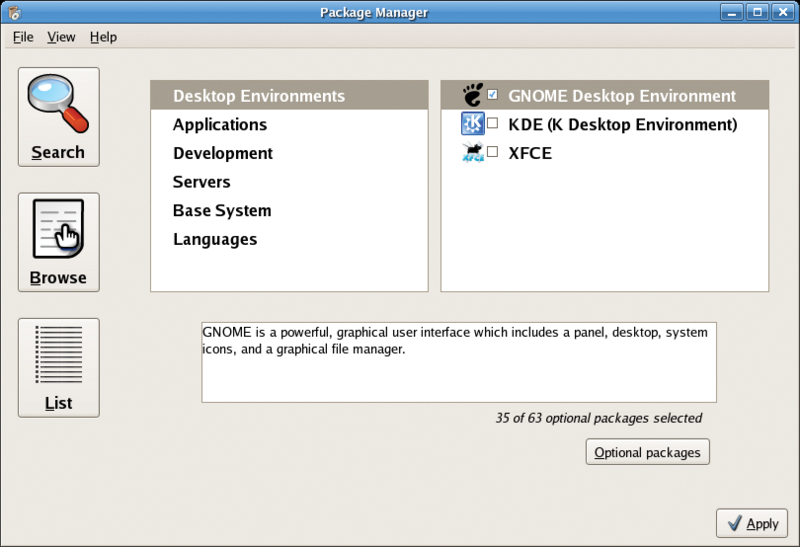
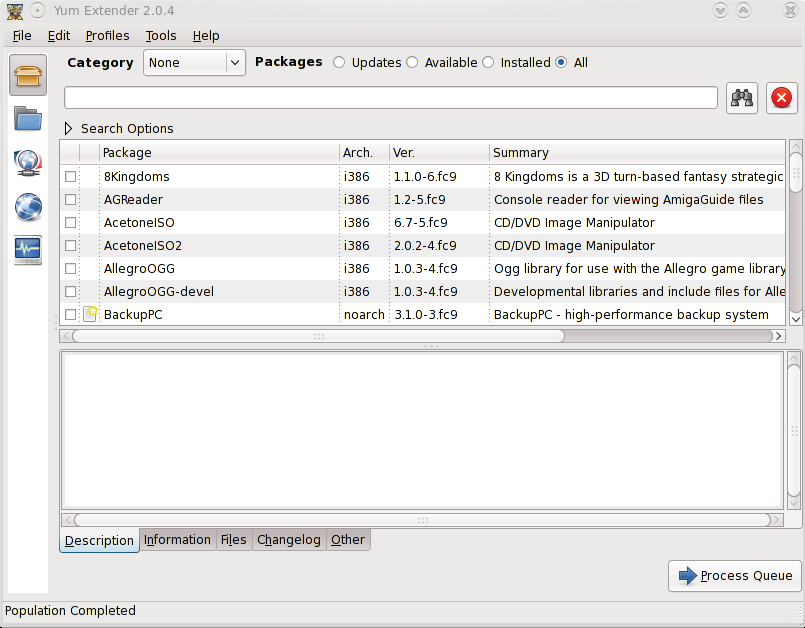
Yum (Yellow Dog Updater, Modified) runs on Fedora and Yellow Dog Linux as an interface to the underlying RPM system. You can think of yum as something like the apt package manager found on Debian-based systems. If you favor a graphical approach, yum graphical front-ends include pirut (Figure 1), gyum, yum extender (Figure 2), and kyum; however, if you are familiar with a few basic yum commands, you might find that yum is faster and easier without the GUI. In this article, I'll help you get started with command-line Yum.
The yum package manager is really easy to use. To install a package, type yum install package_name; you can specify any number of packages at the same time. For example, to install the Pingus game, type yum install pingus.
To check the dependencies, yum starts by loading the header files with the package metadata for the new package as a background operation. After resolving the dependencies, yum lists the additional package requirements (Listing 1). Then the tool asks you to confirm that you want to start the installation; if so, type Y. If the installation is successful, yum will output a Complete! message to confirm that the packages were installed correctly.
| Listing 1: Installing with yum |
01 Dependencies Resolved 02 ============================================================================= 03 Package Arch Version Repository Size 04 ============================================================================= 05 Installing: 06 pingus i386 0.7.0-0.4.20060721.fc6 fedora 18 M 07 Installing for dependencies: 08 ClanLib i386 0.8.0-4.fc7 fedora 1.2 M 09 SDL i386 1.2.12-1.fc7 updates 219 k 10 SDL_gfx i386 2.0.13-8.fc7 fedora 52 k 11 ... 12 Transaction Summary 13 ============================================================================= 14 Install 11 Package(s) 15 Update 0 Package(s) 16 Remove 0 Package(s) 17 Total download size: 31 M 18 Is this ok [y/N]: 19 ... 20 Complete! |
If you don't like answering Yes/No prompts, you can specify the -y option to say yes automatically to all questions:
yum -y install pingus
If you are removing packages, it pays to be careful; automatically removing dependencies can have unpleasant side effects.
By default, yum will install from the configured package sources (e.g., DVD, Internet repositories). You can also install individual RPM files with yum instead of rpm. Again, yum will check for dependencies and reference the repositories to add any missing packages automatically. The command line for this is:
yum localinstall package_name
Yum also makes life easier if you need to remove a package by deleting any components you no longer need. With the example of the Pingus game installation, yum adds sdl and ClanLib.
If you want to remove these packages, you must explicitly tell the RPM command to do this:
rpm -e pingus SDL Clanlib ....
Because you typically learn the dependencies for the packages you are removing from RPM's error messages, this approach can be time-consuming. In contrast, yum remove ClanLib will list the packages to uninstall, including their dependencies. Yum quickly prompts you to confirm that you want to uninstall all the listed packages and then does so if you say yes.
To update a package - or all packages - use the yum update package_name or yum update command. If you prefer a GUI, launch the Package Updater, pup, from a console through the desktop menu. Pup is part of the pirut package, which you set up via yum install pirut.
The yum update daemon will even update the whole system. To allow this to happen, you need to set the do_update entry to yes in your /etc/yum/yum-updatesd.conf configuration file (Listing 2). At boot time, chkconfig tells you whether or not the updatesd service is launched automatically:
# chkconfig --list | grep -i yum
The output shows the runlevel the service is enabled in; you can type runlevel to identify the current runlevel. To enable automatic start-up when you boot, type chkconfig yum-updatesd on. To start the daemon once only, type service yum-updatesd start.
Most often, you are likely to use the command yum search keyword, command searches the package names and details of all available packages for the keyword. To restrict the search to the package names, you can type yum list | grep keyword.
| Listing 2: yum-updatesd.conf |
01 [main] 02 # how often to check for new updates (in seconds) 03 run_interval = 3600 04 # how often to allow checking on request (in seconds) 05 updaterefresh = 600 06 # how to send notifications (valid: dbus, email, syslog) 07 emit_via = dbus 08 # automatically install updates 09 do_update = yes 10 # automatically download updates 11 do_download = no 12 # automatically download deps of updates 13 do_download_deps = no |
If you need to complete a couple of chores one after another, the yum shell is the best place to do it. The shell lets you enter a number of actions in sequence without waiting for the previous action to complete. A typical scenario is a session in which you delete the cache, install packages, and remove other packages.
To launch the shell, type yum shell. The prompt accepts all the normal commands, such as install, remove, or update. Typing run launches the batch sequence you entered previously. When you are done, you can quit the shell by typing quit. Another use for the yum shell is to invoke a pipe to install something directly from a shell script:
# echo -e "install pingus\n run\n quit" | yum -y shell
Here documents are often used for this purpose. A here document is a special approach to redirecting commands to the stdin channel of a program (Listing 3). Unlike the normal echo command, this method keeps most indents and newlines.
| Listing 3: Here Document |
01 #yum -y shell <<EOF 02 clean all 03 install ... 04 remove ... 05 run 06 quit 07 EOF |
You might need to download a number of RPM packages that you will be installing later on, or that you need to install on several identical machines. The yumdownloader tool from the yum-utils package is useful for this. To download the Pingus game, just type yumdownloader pingus. Yumdownloader will drop the specified package into the current working directory. Then you can enter
# yum localinstall pingus-0.7.2-3.fc10.i386.rpm
to install and resolve the dependencies. If you want to resolve the dependencies at the download stage, call yuminstaller with the --resolve option.
Yum is also perfect for downloading source packages that you will be building manually. To do so, use the --source option
# yumdownloader --source pingus
to create an RPM file called pingus-0.7.2-3.fc10.i386.rpm in the current directory. To install, type:
# rpm -ihv pingus-0.7.2-3. fc10.i386.rpm
This command drops the source archive into /usr/src/redhat/SOURCES/, where you can unpack and build the application yourself.
When launched, yum updates the header files; it will always download the headers, even if you are installing the package multiple times. To avoid redundancy, you can enable header and package file caching. To do so, enable the keepcache=1 option in the /etc/yum.conf configuration file. If you then call yum with the -C option, yum will access the cache regardless of the /etc/yum.conf settings. Of course, this will only work if you really do have the required resources in the cache. If resources are missing, yum will give you the message Caching enabled but no local cache of ....
Yum has many extensions that you can install easily from the repository. When you download a file, for example, the Fastestmirror plugin performs a background search for the fastest mirror server. To install and enable the plugin, type yum install yum-fastestmirror.
If multiple mirrors are available, install the Priorities plugin, which lets you control the priorities of the individual repositories:
yum -y install yum-priorities
After giving this command, you will find a priorities.conf file in /etc/yum/pluginconf.d/:
[main]
enabled = 1
check_obsoletes = 1
To avoid legal issues, Fedora only provides software available under a free license. The default Fedora repositories do not include proprietary programs or, for licensing reasons, many other free applications, such as mplayer. Fortunately, some of these programs are available through third-party suppliers.
The most popular repositories include Livna, RPMforge, Dribble, freshrpms, and ATrpms. In Fedora 10, Dribble, freshrpms, and Livna combined to form a single repository known as RPM Fusion [1]. The unofficial Fedora FAQ page [2] describes how to add Livna, or RPM Fusion, as package source; for Fedora 10, simply enter:
# rpm -Uvh http://rpm.livna.org/livna-release-10.rpm
The configuration files for the various repositories are stored in /etc/yum-repos.d/. In these configuration files, you can enable or disable individual repositories with the enabled=1 or enabled=0 entries. Most repository files include several entries, but typically you only need the top one.
After completing a standard Fedora installation, including the RPM Fusion repository, you will have three configuration files below /etc/yum.repos.d/: fedora.repo, fedora-updates.repo, and livna.repo. Just set the top lines to enabled=1 and the others to enabled = 0.
Alternatively, you can delete and disable all additional repository entries by typing:
# rpm -e yum-priorities yum-fedorafaq livna-release
The yum-priorities plugin mentioned earlier is used here. yum repolist gives you a list of all enabled repositories.
Yum lets you upgrade a Fedora system to the next version on the fly. Unfortunately, this option sometimes doesn't work properly and typically requires some manual attention.
If you do decide to rely on yum upgrading for you, start by flushing your yum cache and updating the package sources. Listing 4 gives a short overview of the steps required for upgrading to Fedora 11. You'll find a more detailed howto in the Fedora wiki [3].
| Listing 4: Upgrading to Fedora 11 |
01 yum clean all 02 rpm -Uhv ftp://download.fedora.redhat.com/pub/fedora/linux/releases/11/Fedora/i386/os/Packages/fedora-release-*.noarch.rpm 03 yum upgrade |
If you use Ubuntu and occasionally need to compile something, you will be familiar with the build-essential package. build-essential is not a Debian package in the strictest sense, but a meta package that automatically installs a software selection. Fedora has a similar feature but calls it package groups.
yum grouplist gives you a list of available package groups. Note the Development Tools group, which you can install by typing:
# yum -y groupinstall 'Development Tools'
If you want to install all the available games, or maybe all the available office programs, just pick the right category from the list and install as described above.
You are probably familiar with the situation in which you install a new program but then need to restore the original state of the system because of incompatibilities, bugs, or other problems. This rollback can be fairly tricky - for one thing, older packages might be difficult to locate, and for another, the configurations might have been overwritten. An automatic rollback function is often the quickest, simplest, and cleanest approach.
To leverage the benefits of package rollback, you need to back up the current system status before you change the selection of packages - that is, whenever you install or delete packages. To help you do so, RPM has a repackage function.
The repackage process bundles the relevant files, such as configuration files, data, and program files, into a new RPM archive. The RPM repackage function adds a transaction ID to each archive and stores the archive at a fixed location.
To restore a previous installation state, remove the packages you just installed and install the repackage files you created before doing so.
To tell RPM which repackage files to install, each RPM transaction is assigned a unique number. If you delete multiple packages and their dependencies, all the repackage files will have a unique transaction ID. According to the RPM manpage, the ID is a simple Unix timestamp.
Yum can use RPM's rollback functionality if you enable the feature in the configuration files. To do so, add the following entry to /etc/rpm/macros:
%_repacke_all_erasures 1
If the /etc/rpm/macros configuration file does not exist, you need to create it. Then add the following line to the /etc/yum.conf file:
tsflags=repackage
Once you have configured this parameter, the system will "remember" every status setting in the /var/spool/repackage folder. If you delete a package, something such as
# rpm -Uhv --rollback '3 minutes ago'
will restore the system state from three minutes ago.
Additionally, specifying --test will perform a test run and show you the actions to perform, but without actually executing the rollback. You can specify the time for the rollback as follows:
# rpm -Uhv --rollback 'YYYY-MM-DD HH:MM'
If you can't remember the time for the installation you want to roll back, just check the timestamps on the repackage files in /var/spool/repackage.
| INFO |
|
[1] RPM Fusion: http://rpmfusion.org
[2] Additional package sources: http://www.fedorafaq.org/#getsoftware [3] Yum Upgrade: http://fedoraproject.org/wiki/YumUpgradeFaq |
| THE AUTHOR |
|
Daniel Niedzielski is a software developer. He has a family with three children, and he is currently studying Computer Science in distance learning at the University of Hagen and working on his LPIC-2 certification. |