
By Jeremy Garcia
Nginx (pronounced Engine-ex) is an Open Source HTTP server and reverse proxy. The Nginx web server is known for its high performance, stability, rich feature set, simple configuration, and low resource consumption. Nginx, which was written by Igor Sysoev, is used with many high-profile sites, including WordPress.com, Hulu, and LinuxQuestions.org. In addition to its HTTP-related functionality, nginx can also serve as an IMAP/POP3 proxy.
Nginx's basic HTTP support includes the ability to serve static files, accelerated reverse proxying with optional caching, simple load balancing and fault tolerance, remote FastCGI with caching/acceleration, and SSL/TLS server name indication (SNI). Like Apache's httpd, nginx has many features that are implemented in a modular fashion and only need to be enabled if you plan to use them. Unlike the process-based httpd, though, nginx is asynchronous. The main advantage of the asynchronous approach is scalability. In a process-based server, each simultaneous connection requires a thread, which can lead to significant overhead, especially when under high load. An asynchronous server, on the other hand, is event-driven and handles requests in a single (or at least very few) threads.
If you have a simple site or are starting from scratch, it's very possible you can completely forgo Apache and just use nginx for all your HTTP needs. If you choose to go this route, I recommend you visit the nginx Modules page [2] and verify that all the functionality you require is available with an nginx module. This article describes the common case of nginx acting as a load balancing reverse proxy to multiple existing Apache httpd back-ends. Nginx will serve some static content and then automatically gzip the dynamic content it is proxying from httpd.
Most Linux distributions have nginx in their package repositories, so you can easily install it using the standard package manager. If the packaged version for your distro is outdated or not available, visit http://nginx.net/ and download the latest stable version (0.7.61 at the time this article was written). The installation involves the standard ./configure && make && make install process. Although the defaults should work in most cases, I recommend you check out the available configuration options and tailor them to suit your environment. By default, you should see something similar to the following after you run ./configure:
Configuration summary
  + using system PCRE library
  + using system OpenSSL library
  + md5: using OpenSSL library
  + using sha1 library: /usr/include
  + using system zlib library
It's important to verify that the preceding libraries are found if you plan on using any of the functionality associated with them. For instance, the Rewrite module requires the PCRE library, and SSL support requires OpenSSL. With nginx installed, it's time set up a basic configuration.
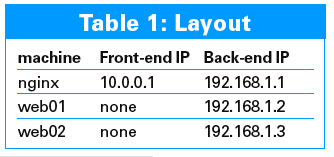
This article assumes a three-server infrastructure. The machine with nginx should ideally be on both a front-end public facing network and a back-end private network. The machines running httpd do not need any front-end network access. The layout for this article is shown in Table 1. With Table 1 in mind, edit the nginx.conf file with the information shown in Listing 1.
| Listing 1: Basic nginx.conf |
01 user                          nobody;
02 worker_processes             2;
03
04 events {
05         worker_connections   1024;
06         use epoll;
07 }
08
09 http {
10         include          mime.types;
11         default_type    application/octet-stream;
12         log_format      custom
                                '$http_host $remote_addr - $remote_user [$time_local]
                                 "$request" '
13                              '$status $body_bytes_sent "$http_referer" '
14                              '"$http_user_agent"';
15         access_log       /path/to/access.log custom;
16         sendfile          on;
17         server_tokens    off;
18
19         upstream cluster {
20             server 192.168.1.2 weight=1; // the weight can be adjust to send more
21             server 192.168.1.3 weight=1; // traffic to specific machine(s).
22         }
23
24         server {
25                 listen 10.0.0.1:80;
26                 server_name www.domain.com domain.com;
27                 location        / {
28                         proxy_pass              http://cluster;
29                         proxy_redirect          off;
30                         proxy_set_header        Host $host;
31                         proxy_set_header        X-Real-IP $remote_addr;
32                         proxy_set_header        X-Forwarded-For
                                                        $proxy_add_x_forwarded_for;
33                         proxy_buffers           8 32k;
34                 }
35         }
36 }
|
This configuration will result in both back-end machines getting the same number of requests. By default, nginx performs simple per-request, round-robin load balancing. If you'd like requests to be distributed between upstreams based on the IP address of the client, you can use the ip_hash directive. Additional, more advanced load balancing algorithm support is planned for a future nginx release. Note that, by default, all requests passed to the back-end httpd processes will appear to originate from the IP address of the nginx machine. I suggest you pass the IP address from the original request to httpd via the X-Forwarded-For HTTP header and then intercept that information with the httpd mod_rpaf module, which will change the remote IP address visible to other httpd modules. The mod_rpaf module is open source and available for download [3].
If you're using nginx as a load balancing reverse proxy, configuring it to handle SSL requests has multiple benefits. This approach simplifies your httpd configuration, offloads the CPU-load associated with SSL processing, and allows for easier load balancing, since it resolves the need to have "sticky" SSL sessions. Configuring SSL support is simple and requires the same CRT and KEY files as an httpd SSL configuration. Using the proxy configuration in Listing 1 as a template, add the settings in Listing 2.
| Listing 2: SSL in nginx.conf |
01 server {
02                 listen                  10.0.0.1:443;
03                 server_name             www.domain.com;
04                 add_header                      Front-End-Https on;
05                 keepalive_timeout               70;
06                 ssl                             on;
07                 ssl_certificate         /path/to/server.crt;
08                 ssl_certificate_key     /path/to/server.key;
09
10                 location        / {
11                         proxy_pass              http://cluster;
12                         proxy_redirect  off;
13                         proxy_set_header        Host $host;
14                         proxy_set_header        X-Real-IP $remote_addr;
15                         proxy_set_header        X-Forwarded-For $proxy_add_x_forwarded_for;
16                         proxy_buffers   4 32k;
17                         proxy_set_header        X-Forwarded-Proto https;
18                 }
19         }
|
Note that there are two caveats in the current nginx SSL implementation. The stable branch does not have certificate revocation list support. This issue has been addressed in unstable versions ≥0.8.7. Next, if you have a chain certificate file (sometimes called an intermediate certificate), you don't specify it separately as you do in httpd. Instead you need to add the information from the chain certificate to the end of your main certificate file. Do this by typing cat chain.crt >> server.crt on the command line. Once that is done, you won't use the chain certificate file for anything else; you simply point ssl_certificate to the main certificate file.
With this basic setup working, the next step is for nginx to statically serve some images. This step will allow you to tune your back-end httpd processes for dynamic content serving. I'll also serve images with an expires header of 30 days, which will cut down on the number of requests a client needs to make for common images that rarely change. To accomplish this, add the following to your server context:
location ~* ^.+\.(jpg|jpeg|gif|png)$ {
       root      /path/to/www;
       expires   30d;
}
If you'd like to disable logging for images requests, add the following line to the configuration:
access_log off;
Next, nginx will gzip some output received from the httpd back-ends before sending it to the browser. The nginx server will only gzip certain content based on mime type and will completely disable gzip for some known-broken browsers. Add the code in Listing 3 to your server context.
| Listing 3: gzip in nginx.conf |
01 gzip on; 02 gzip_http_version 1.0; 03 gzip_vary on; 04 gzip_min_length 1100; 05 gzip_buffers 16 8k; 06 gzip_comp_level 5; 07 gzip_proxied any; 08 gzip_types text/plain text/css application/javascript text/javascript text/xml application/x-javascript; 09 gzip_disable "MSIE [1-6]\."; |
If you'd like to cache some of your dynamic content with nginx, you have two options; file based or memcached based. If you're considering using nginx to cache content, be careful how you cache content that differs based on whether a visitor is logged in or not. To enable the file-based cache, add the following to the http context in your configuration file:
proxy_cache_path /data/nginx/cache levels=1:2 keys_zone=one:10m;
The levels parameter sets the number of subdirectories for the cache, and the key and filename are an md5 of the proxyied URL, resulting in filenames similar to /data/nginx/cache/c/29/b7f54b2df7773722d382f4809d65029c.
With the cache path set in the http context, you can now setup your cache in the http, server, or location context. To cache all 200 and 302 responses for 30 minutes and all 404 responses for 5 minutes, add the following:
proxy_cache one;
proxy_cache_valid 200 302 30m;
proxy_cache_valid 404 5m;
If you'd prefer to use memcached for your cache, it's almost as easy (see Listing 4).
| Listing 4: memcached nginx.conf |
01 server {
02   location / {
03     set $memcached_key $uri;
04     memcached_pass     name:11211;
05     default_type       text/html;
06     error_page         404 @fallback;
07   }
08
09   location @fallback {
10     proxy_pass cluster;
11   }
12 }
|
Many monitoring systems support the httpd mod_status module to gather and trend statistics. The stub_status module serves a similar role with nginx. This module is not compiled by default and must be enabled with the --with-http_stub_status_module configure argument. Once the module is compiled in, add the code in Listing 5 to your configuration file. An HTTP request to domain.com/nginx_status will return a plain text response in the format shown in Listing 6.
| Listing 5: stub_status nginx.conf |
01 location /nginx_status {
02         stub_status             on;
03         access_log              off;
04         allow                   TRUSTED.IP.ADDRESSES
05         deny                    all;
06 }
|
| Listing 6: nginx_status output |
01 Active connections: 291 02 server accepts handled requests 03 16630948 16630948 31070465 04 Reading: 6 Writing: 179 Waiting: 106 05 This server has 291 active connections, has accepted and handled 16630948 connections while serving 31070465 requests... |
The httpd mod_rewrite module is used by many sites. While nginx does have a rewrite module, its syntax is slightly different from the one for httpd. The nginx wiki has the full details [4].
One example of rewrite feature is a simple rewrite to enable SEO-friendly member pages:
rewrite ^/users/(.*)$ /user.php?user=$1? last;
A more complicated rewrite uses an if condition to redirect your visitors to a consistent domain:
if ($host ~* www\. (.*)) {
   set $host_without_ www $1;
   rewrite ^(.*)$ http://$host_ without_www$1 permanent;
}
The GeoIP module creates variables based on the IP address of the client matched against the MaxMind GeoIP binary files. The nginx GeoIP module has two prerequisites - libGeoIP and the MaxMind GeoIP database(s). The latest libGeoIP is available from the MaxMind site [5], but keep in mind that many distributions have libGeoIP in their package repositories.
Add the following two lines to your http context to enable the GeoIP module.
geoip_country GeoIP.dat;
geoip_city GeoLiteCity.dat;
You will now have the variables listed on http://wiki.nginx.org/NginxHttpGeoIPModule at your disposal. One common use case for the GeoIP module is to use the $geoip_country_code variable to send requests to different proxy upstreams based on country. If you'd like to pass the GeoIP information to you httpd back-ends, add the following to your proxy configuration:
proxy_set_header HTTP_GEO $geo;
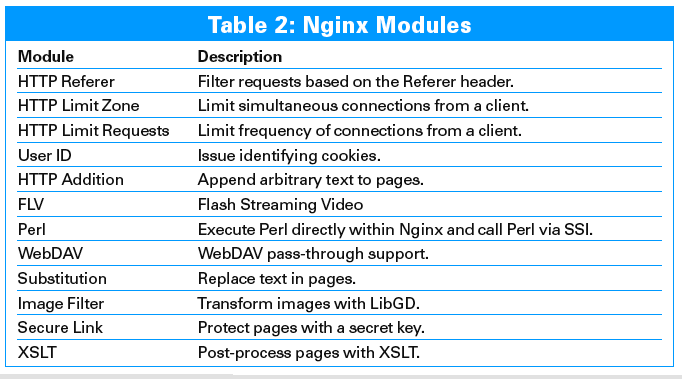
Table 2 shows some additional nginx modules, along with a brief overview of their functionality.
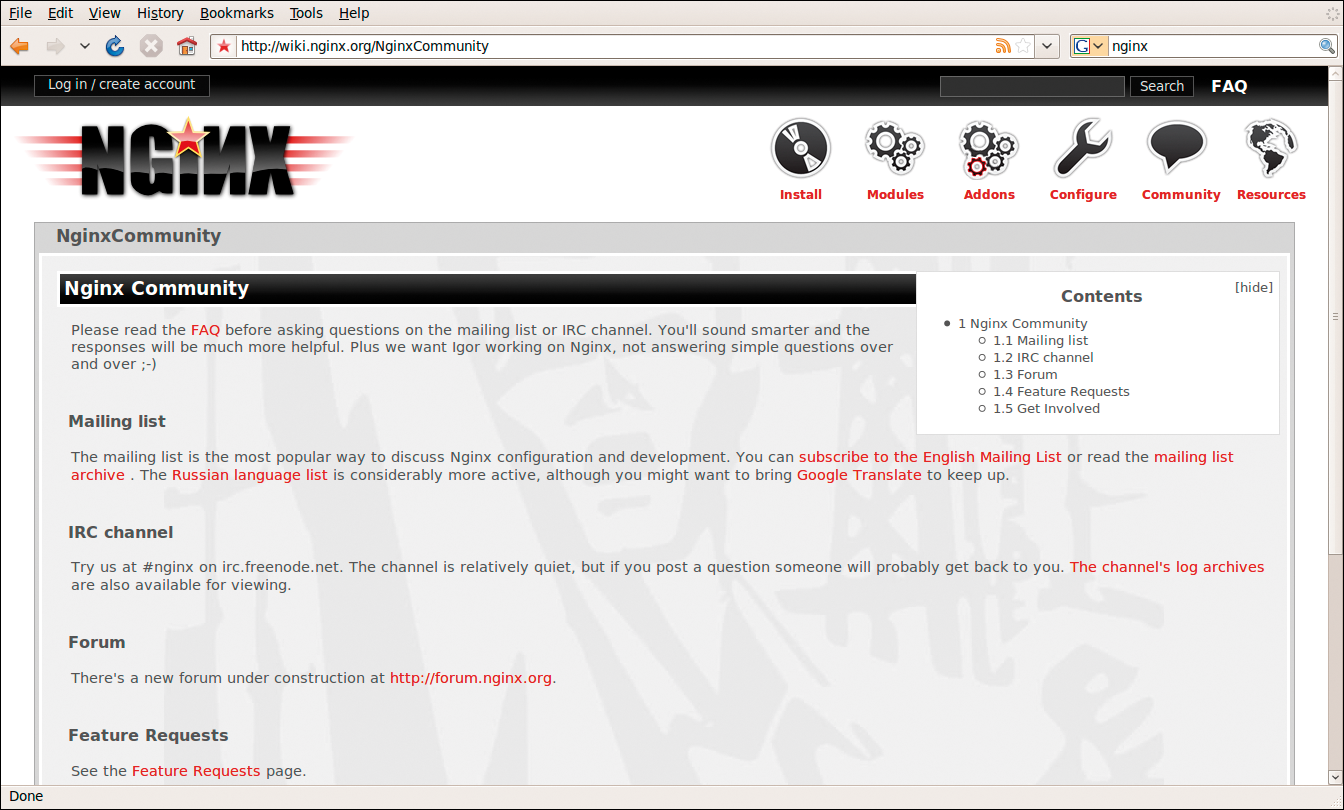
Adding nginx as a caching reverse proxy to an existing httpd setup can significantly increase the performance of your existing infrastructure. Additionally, using some of the more advanced features in nginx will give you greater flexibility and might allow you to accomplish tasks that weren't feasible with your previous setup. I suggest you read the online documentation (Figure 1) and familiarize yourself with nginx before deploying it in a production environment.
| INFO |
|
[1] nginx: http://www.nginx.org
[2] nginx Modules page: http://wiki.nginx.org/NginxModules [3] mod_rpaf: http://stderr.net/apache/rpaf/ [4] Nginx Rewrite module: http://wiki.nginx.org/NginxHttpRewriteModule [5] MaxMind: http://geolite.maxmind.com/download/geoip/database/ |
| THE AUTHOR |
|
Jeremy Garcia is the founder and admin of LinuxQuestions.org, which uses nginx to reverse proxy all of its content and is one of the largest Linux communities on the web. He has been using Linux for more than 10 years and is an ardent but realistic Open Source evangelist. |