
By Hans-Georg Eßer
E-learning comes in all shapes and sizes: Besides online-only approaches that attempt to disseminate all of the content in a training or study program via the Internet, hybrid approaches that include standard classroom teaching are also available. Such hybrid approaches are often referred to as "blended learning." However, software that supports e-learning needs to do more than just offer a collection of data and user management features for a course.
Moodle [1] is a course management system (CMS, or Learning Management System, LMS) that was originally developed by computer scientist and educator Martin Dougiamas on the bases of various didactic considerations.
Rather than focusing on file management, the software concentrates on course design and gives trainers, teachers, and lecturers numerous options for adding interactive elements to their courses, including group (home) work and tests.
Some of Moodle's really useful features are elements, such as glossaries or wikis, that trainers can link to with tasks for their students. One task could be to create five new glossary entries, for example. This means that the students add to the knowledge base stored on the learning system. After being checked by the trainer, the new entries could be added to the general knowledge pool, which is available to all participants and can be reused in later courses.
Moodle requires a working web server - typically Apache 2.x on most systems - and you need to create a new domain in the Apache configuration or modify the settings of an existing domain by adding a /moodle subdirectory.
Many Moodle installations contain normal web content besides the LMS; in this case, it makes sense to use a subdirectory. If you do not have any additional content for the domain, you can create an Apache rewrite rule to jump directly from the root directory to the /moodle directory.
Listing 1 shows a sample Apache configuration for a fictive new domain named moodletest.local. Incidentally, the rewrite engine will not work on openSUSE unless you add the rewrite module to the APACHE_MODULES variable in /etc/sysconfig/apache2.
| Listing 1: Sample Configuration |
01 # moodletest.local.conf 02 <VirtualHost *> 03 ServerName moodletest.local 04 ServerAlias www.moodletest.local 05 DocumentRoot /var/www/moodletest.local 06 # you only need the next two lines if you have no 07 # content apart from the Moodle system 08 RewriteEngine On 09 RewriteRule ^/$ /moodle/ [R] 10 ErrorLog /var/log/apache2/moodletest.local/error.log 11 CustomLog /var/log/apache2/moodletest.local/access.log Combined 12 </VirtualHost> |
The virtual host file should be located in /etc/apache2/sites-available for Debian systems, and you will need to link from /etc/apache2/sites-enabled. OpenSUSE users can simply copy the file to the /etc/apache2/vhosts.d/ folder and add a .conf file suffix to let the server find it. If you are testing the installation on your home computer, you will need an entry in /etc/hosts like
127.0.0.1 moodletest.local
to be able to use this hostname in the web browser later. To create a directory for the Apache logfiles, enter mkdir -p /var/log/apache2/moodletest.local at the command line.
Debian users run apt-get to install the php4-gd, libgd-gd2-perl, mysql-server- 5.0, php4-mysql, and php4-curl packages and then configure the MySQL server:
# dpkg-reconfigure mysql-server-5.0
On openSUSE 11.1, you must set up the required software by running zypper to install the php5, php5-gd, mysql, apache2-mod_php5, php5-mysql, php5-curl, php5-mbstring, php5-openssl, php5-xmlrpc, and php5-zlib packages. When you've finished that step, enable the MySQL server by entering the following command:
# rcmysql start; mysqladmin -u root password password
The server should be running now, and you have already assigned a root password.
Next, create a MySQL database named moodle and grant access to a moodle user account with the password moo!dle. In Listing 2 you will see the commands needed to do this. Then you can reparse the configurations for Apache and MySQL by entering /etc/init.d/apache2 reload and /etc/init.d/mysql reload.
| Listing 2: Creating a MySQL Database |
01 # mysql -u root -p 02 03 mysql> create database moodle; 04 Query OK, 1 row affected (0.00 sec) 05 mysql> grant all on *.* to 'moodle'@'localhost' identified by 'moo!dle'; 06 Query OK, 0 rows affected (0.01 sec) 07 mysql> flush privileges; 08 Query OK, 0 rows affected (0.00 sec) 09 mysql> quit 10 Bye |
The commands in Listing 3 install Moodle in the subdirectory /var/www/moodletest.local/. If you prefer to use a different folder, you can modify the path here and in the following steps.
| Listing 3: Installing Moodle in a Subdirectory |
01 $ export WEBROOT= /var/www/moodletest.local 02 $ mkdir -p $WEBROOT; cd $WEBROOT 03 $ wget http://download.moodle.org/ stable19/Umoodle-weekly-19.tgz 04 $ tar xzf moodle-weekly-19.tgz |
Moodle needs a data directory that defaults to /var/www/moodledata. The user account on which Apache is running needs read and write access for this directory. To identify the user ID under which the web server is running, check the process list for apache or httpd (Listing 4, lines 1 through 3). The first Apache process always runs as root, so ignore it. In the example here, which uses a Debian system, the correct user account is www-data; other distributions run Apache as wwwrun. Now you can set up the moodledata directory (Listing 4, lines 4 through 6).
| Listing 4: Setting Up the moodledata Directory |
01 # ps -ef | grep apache | head -2 02 root 24231 1 0 Mar15 ? 00:00:00 /usr/sbin/apache2 -k start 03 www-data 16310 24231 0 11:59 ? 00:00:00 /usr/sbin/apache2 -k start 04 # mkdir /var/www/moodledata 05 # chown www-data /var/www/moodledata 06 # chown www-data $WEBROOT/moodle |
To start the web-based configuration, open the http://moodletest.local/moodle page in your web browser. If needed, you can select a language on the first page of the dialog. Continue takes you to the second page, where Moodle checks the PHP configuration and displays the results. For all of these topics, you should see Success in green type. Continue through the following dialogs by pressing Continue.
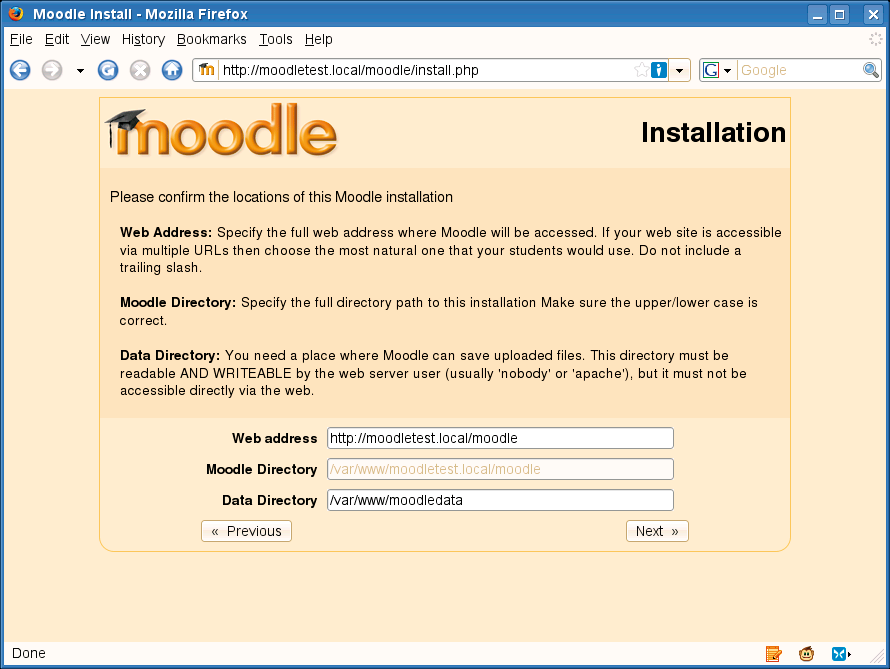
The next step is to define where you want Moodle to store its data (Figure 1). If you are following the recommendations from this example, the default (/var/www/moodledata) will do just fine. If you are running independent Moodle installations parallel to one another, you need to change this. The web address, http://moodletest.local/moodle in this example should be okay, too - after all, you have to enter the right address to call the configuration interface.
Moodle will prompt for the login credentials for the MySQL database (Figure 2). Here, I created a database user moodle with the password moo!dle; you can accept the default server name, localhost. If you are using a remote MySQL server instead of the local server used in this example, you will need to enter the correct server name here.
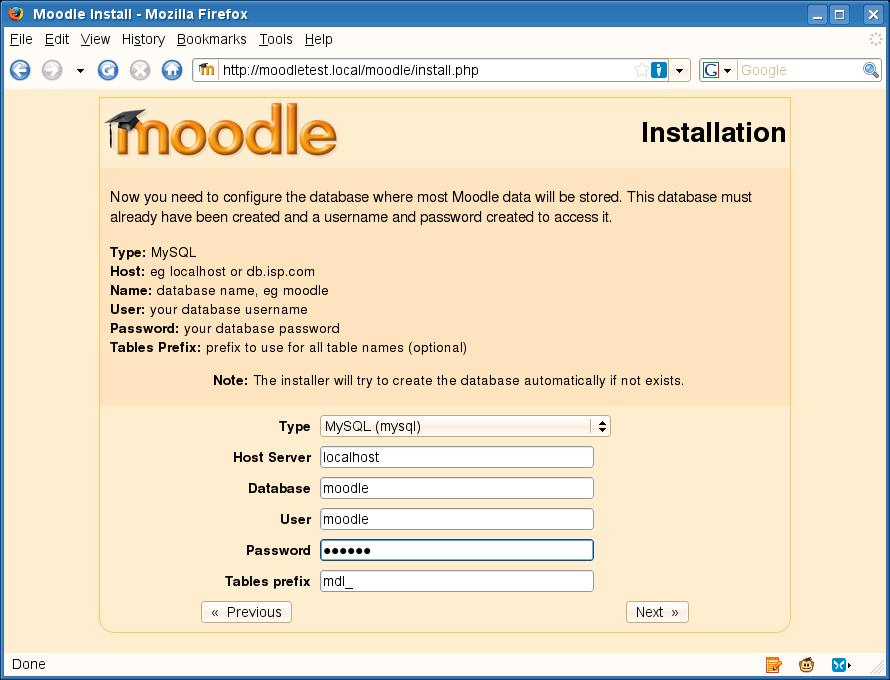
Next, accept the default database name moodle and the table prefix mdl_. A prefix on all of your table names makes it easier to use the tables of multiple Moodle versions (and any other applications you might be using) on a single database. Of course, this only makes sense if you do not have sufficient privileges to create another MySQL database.
The next dialog displays the results of various checks: You should see OK in the Status column on the right. The next page is for information purposes only. The installer creates a config.php file in the root directory of your Moodle installation; this is /var/www/moodletest.local/moodle/ here. Caution: The database password is in cleartext.
Now accept the terms of the GPL license for Moodle; again, you can let the installer handle all of the steps that follow automatically. To do so, check Automatic setup. This removes the need to keep clicking to get to the next page. The following steps can take some time, and the status messages could fill the screen multiple times.
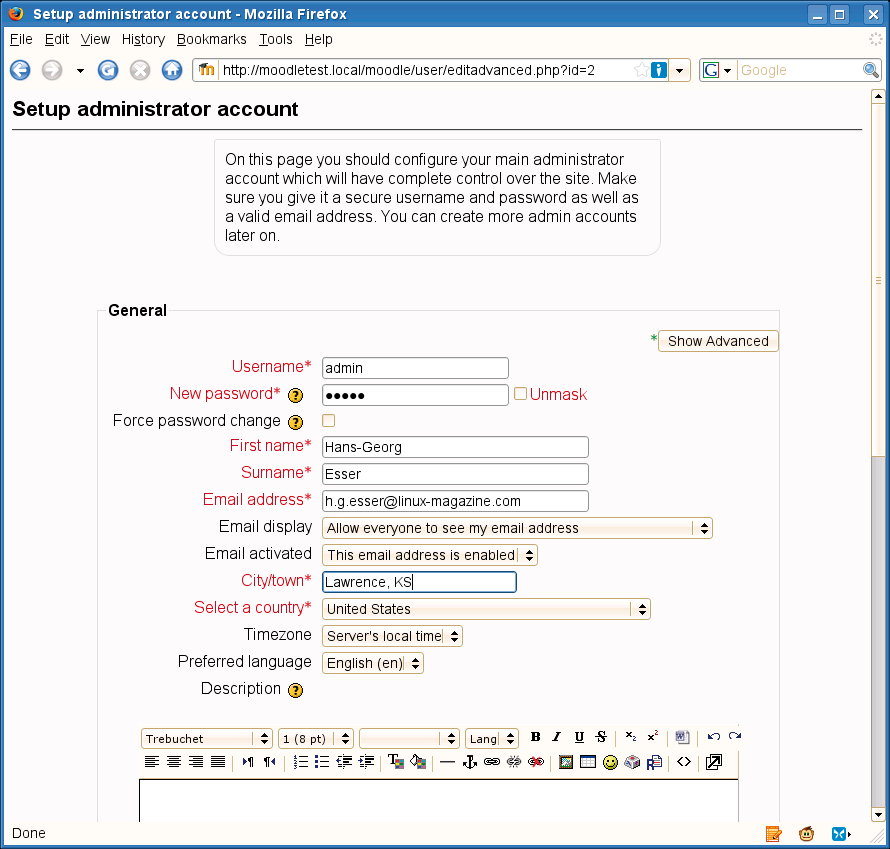
Finally, you will end up on the Setup administrator account page where you can set up a Moodle account for the administrator of the new system (Figure 3). The important things here are the login name and password - Moodle will suggest a username of admin. Also, you need to fill in some of the other fields, although you can leave the optional entries for later.
The installation continues with information about the new Moodle page (Figure 4). Here, you can enter long and short page identifiers and, if needed, add a short piece of text for the start page.
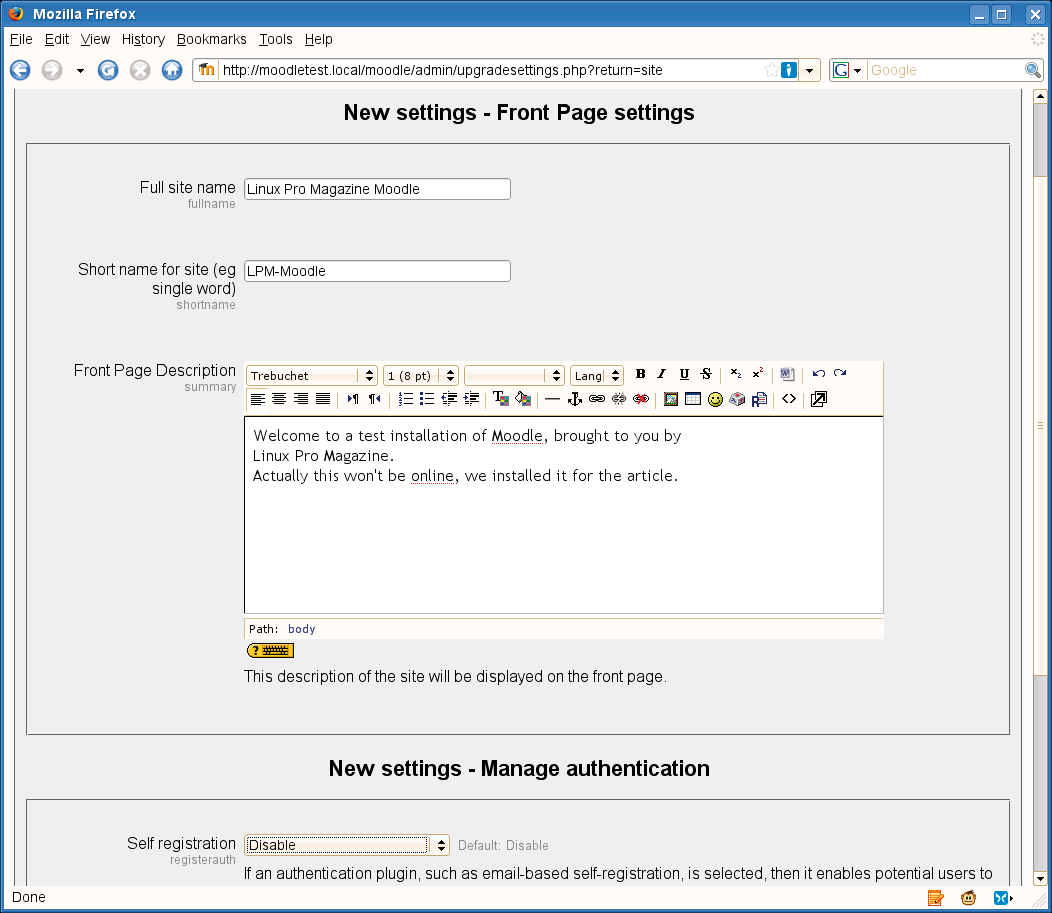
Switching the Self-registration from Disable to Email-based self-registration allows users of your Moodle page to register with the system. This assumes that your computer has Sendmail, Postfix, or some other mail daemon and can dispatch mail; as an alternative, you can set up access to a remote SMTP server for dispatching mail. At the end of the page, you can accept the changes by clicking Save Changes. This action completes the setup and takes you to the start page - as the administrator (Figure 5).
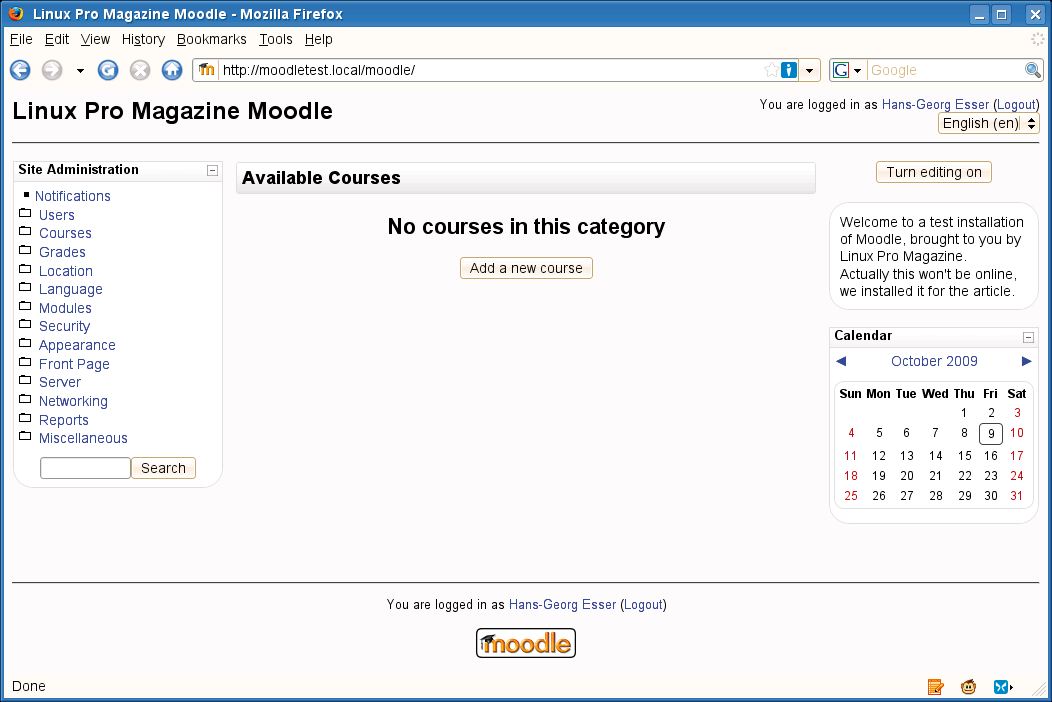
After setting up the Moodle server, you can set up a new course. To do so, click Courses in the Site Administration area and then click Add/edit course in the drop-down menu. This displays the "Course categories" overview. In larger Moodle installations, you can create various categories of courses here. The only default category is Miscellaneous. When you click Add a new course, Moodle shows you a complex mask that you can use to create the course (Figure 6).
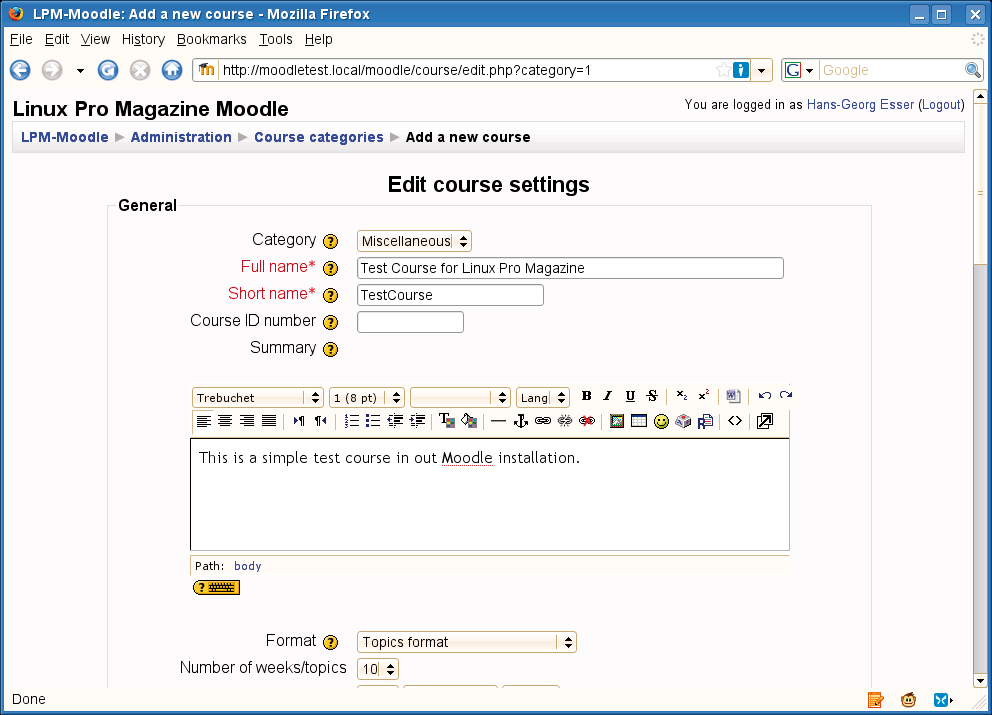
The Full name and Short name fields are required; you do not need a course ID number. Commercial trainers (or universities) have their own system of numbering courses. Although it might not make sense to use this course number in Moodle as well, it does have a field that accepts an externally assigned course number. The editor area below is for a description of the course.
Moodle does not organize your content into classical directory structures; instead, they are organized into a weekly format, which assumes that the trainer will be able to distribute the material strictly over a fixed number of weeks, or a topic format, which lets you split a topic into various subjects (e.g., to reflect the order in which you will be dealing with them in classroom teaching).
Select the topic format that is more intuitive to get started with Moodle; you can change the default number of 10 topics later. This applies to almost all the settings. In other words, you needn't be afraid of scrolling down to the bottom of the page and clicking Save changes to set up your first Moodle course.
Saving changes takes you to a new page where you can assign roles and access privileges, although it's not a requirement at this stage. Clicking the button at the bottom of the page jumps to the new course.
The first step for many trainers is to emulate a legacy course website and present material sorted by topic. The material can include PDF-formatted presentations, audio tracks of talks, or links to websites. The files can be stored on the Moodle server (after uploading them) or another server. Creating a collection of material is easy; start by clicking on Turn editing on. This displays new drop-down menus and buttons, which you can use to edit the course at various positions.
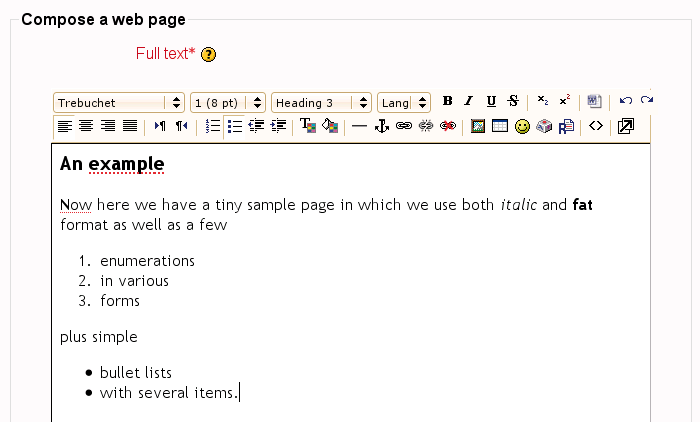
Moodle refers to non-interactive elements as "Resources." At any time, you can add new material in edit mode by clicking on Add a resource and then selecting the appropriate type in the drop-down menu. To create a new text page, you would select Compose a web page. This will take you to a page with three important text boxes: a page title, two editor fields for adding a short description, and the page content proper. Later, Moodle will display this title to students who click on Resources.
If you have HTML-formatted text, you can upload the HTML file directly and add it to your resources. Otherwise, use Moodle's internal page editor to create new text. The easiest approach is to drop pre-formatted text into the page editor by pressing Ctrl+C (e.g., to copy from OpenOffice) and then pressing Ctrl+V to paste into the page editor. This method keeps the formatting, including the paragraph formats (Figure 7).
The Resources button is also used to add links to external documents. Moodle has a plugin for multimedia fields and is capable of playing video and audio files on its internal media player. To upload documents to the Moodle server, click Files in the Administration section of the course start page. For each course, you need to create directories, fill them with files, then link in the content via Resources. If you copy packed archives to the Moodle server, it saves you the overhead of uploading each file individually.
If you have been following the examples, your new Moodle page should have a small collection of resources. However, if this is all you plan to give your students, a simple website or CMS would do the job better and faster. Things become interesting when you use the features that make Moodle a learning environment.
Moodle offers educators a number of options for actively involving students. Moodle collectively refers to these options as "Activities" [2]. If you are familiar with forums in other programs in which all users logged in can exchange information, you will understand Moodle forums. Moodle supports forums that allow different roles for teachers and students. Besides legacy forums (in which anybody is allowed to post), you can set up special areas, such as question and answer forums. This lets the trainer set tasks that all students are required to perform, but students are not allowed to read the other answers until their own responses have been added.
Moodle's internal wikis work much like their classical counterparts, and they offer a variety of deployment options. Trainers can fill a wiki with content to provide an overview of classroom teaching topics with cross references, but you can just as easily ask students to collaborate on creating a wiki.
In the case of larger projects, which the students complete as groups, wikis can also be used for project documentation purposes. In this case, assuming your configuration is correct, only the members of the individual groups (and the trainer) are then allowed to access the individual wiki content.
Moodle glossaries are collections of terms with explanations and are thus similar to dictionary entries. To create a new glossary, select Add an activity | Glossary. A new page will appear (Figure 8) to which you can add a name and a description of the glossary and define a number of settings - including allowing or prohibiting multiple entries for the same term. Multiple entries make sense if your students will be creating the glossary entries over time; in this case, you should disable the Approved by default entry. This gives the trainer the opportunity to read entries by students and correct them, if needed, before they are published.
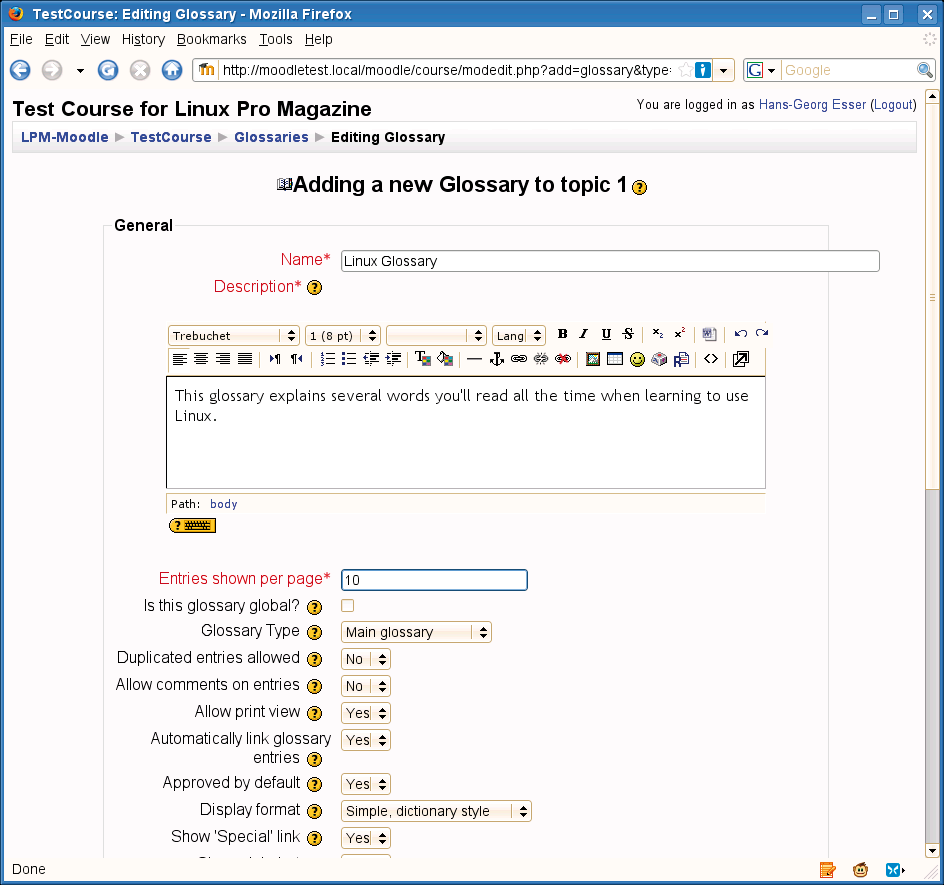
Moodle has two glossary types: secondary and main. Although you can create any number of secondary glossaries (e.g., on specific topics), the main glossary plays a special role because you can export entries from any secondary glossary to the main glossary. If you use the glossary function extensively, this means that you can decide which entries are good enough to be added to the main glossary.
Glossaries offer automatic linking: If you enable this feature via the Filters section in the administration area, Moodle will select and link entries explained in the glossaries that occur on other Moodle pages. For example, you can use this function to create a document with a large number of technical terms as a resource and then ask the students to explain the terms in the text by making entries in the glossary. Then, when your students click on a selected word, a small window showing the explanation pops up.
The glossary you created appears on the start page for the course. If you click it, the stored entries are displayed and you (and your students) can enter new information by clicking Add a new entry. For more detailed notes on the available types, refer to the Moodle wiki [3].
| Advertising |
|
If you will be using Moodle for a commercial learning platform, you have the option of displaying paid ads. The most popular advertising platform for this is Google Ads, for which a Moodle plugin [4] exists. Simply unpack the plugin in the blocks/ directory below your Moodle installation and arrange the ad blocks like any other blocks on the Moodle page. |
Group editing functions can also be useful if all of your students contribute regularly. Trainers can divide the students into groups and assign the groups work on various activity types. Also, it is possible to create different group assignments that allow students to work in larger teams for some assignments and smaller teams for others. For many activity types, you can specify whether students should do the work in groups or individually.
If you give final grades for a course, you can grade all of the activities and even use different grading systems (e.g., percentages from 0 to 100 or legacy school grades with plus and minus scales). The Administration | Grades menu shows an overview of completed activities and average grades of your students. Students only see their own grades. When you are grading activities, you can optionally provide feedback, which Moodle will mail to your students.
Simple tests include multiple choice questions, and in a language course, for example, you could test vocabulary. Moodle even does a little math, so you can create problems in which numbers vary automatically and Moodle calculates the correct answers according to a formula you supply. When you create test questions, you can group them in a pool from which individual tasks are selected for a test. Moodle automatically grades simple tests, but for more complex tests, you assign grades manually. Teachers can grade collaborative work as well, such as a glossary or other team activities.
Moodle is a highly complex e-learning system - understanding its features and using them meaningfully takes some practice. Having said this, it is quite easy to make a start. If you already have a traditional website with simple content collections, you can transfer them easily into the Moodle system and add interactive elements as needed. If you intend to put Moodle to serious use, the Moodle website has numerous tips [5].
| INFO |
|
[1] Moodle: http://www.moodle.org/
[2] Activities: http://docs.moodle.org/en/Activities [3] Moodle wiki: http://docs.moodle.org/en/Main_Page [4] Google AdSense plugin: http://www.gennarovarriale.it/2007/03/20/google-adsense-for-moodle/ [5] Teacher documentation: http://docs.moodle.org/en/Teacher_documentation |