
By Marcel Gagné
This is an interesting time for Linux. How you define interesting depends somewhat on how you view Linux's success on the various platforms. Some will point to the server world, where Linux runs massive clusters for companies like Google, Research In Motion, and Amazon.com. They will cite the countless nodes that make up the infrastructure of the Internet, pointing out the vast numbers of web servers, mail servers, and every kind of server out there. They'll direct your attention to Hollywood, where cutting edge graphics for major blockbusters are created on Linux-based render farms. Others will direct your attention to the embedded world, where Linux is in everything from cell phones to thermostats. Linux, including Free and Open Source software (FOSS), is obviously the greatest success story of all time.
Meanwhile, the detractors casually point out the pitiful market share that Linux claims on the desktop, where Microsoft continues to dominate, and only Apple's Mac OS plays the contender.
The reality is somewhere in between, perhaps more accurately reaching over all of these points. As the world's attention is drawn increasingly to cloud-based services, the desktop arguably matters less and less. Popular Web 2.0 applications like Gmail or Flickr run on Linux servers, so what you run on your desktop doesn't need to be a full-blown application smorgasbord. A reliable operating system that supports a good browser is really all you need. Which brings me back to Linux. Perhaps Linux World Domination isn't so far fetched after all. In the end, it just might not look quite as one expected.
The big cloud desktop story surely comes from Google. As I write this, Google has just released their first public offering of Google Chrome OS. Although I'll finish this column by exploring Chrome OS, I want to start by looking into other FOSS cloud desktops that predate Chrome OS, are often more mature than Chrome OS, and are still being developed. Google might dominate the cloud, but you have alternatives.
Richard M. Stallman called cloud computing a trap [1], saying, "It's just as bad as using a proprietary program. Do your own computing on your own computer with your copy of a freedom-respecting program. If you use a proprietary program or somebody else's web server, you're defenseless. You're putty in the hands of whoever developed that software."
If you agree, there are still ways to get the benefits of cloud computing without being tied to Google, Amazon, or whatever other web behemoth might be trying to get your cloud OS business. The answer is your own private cloud, with your own suite of cloud-based operating systems, all running under Linux. As you might expect, there are many different cloud OSes, web OSes, and everything in between. Here are a few.
The first cloud OS I want to explore is Coadunation. Coadunate means joined together, as in a coadunate operating system, whose intent is to "merge local, Internet, and intranet content into a seemless [sic] environment" [2]. The project is still in its infancy, but it uses an interesting approach to delivering its applications (Figure 1). In many ways, it is truly an operating system in that it includes its own DNS server; SMTP, IMAP, and POP3 servers; wiki; and more. Administration and configuration are all based on XML.
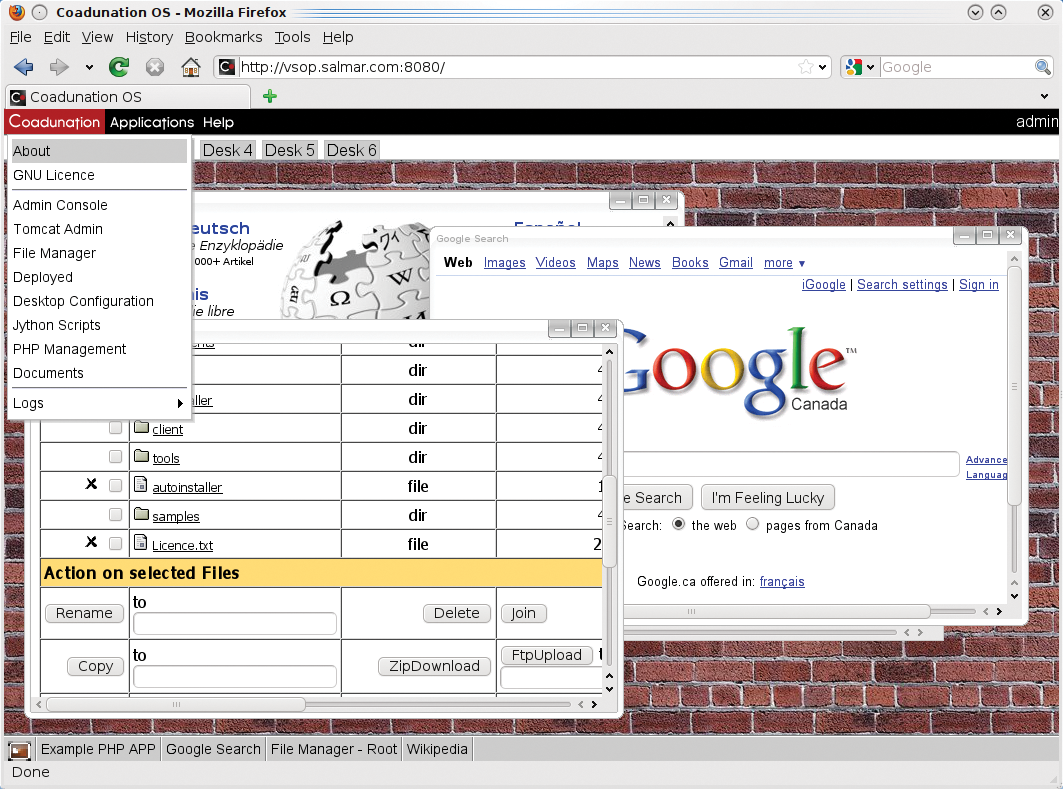
Coadunation uses Apache, Java, and Tomcat and, as such, is relatively easy to deploy and test. The whole package is essentially one JAR file that you can put anywhere on your remote server. However, you do need to install this from a graphical desktop or, at the very least, an X session via SSH:
java -jar CoadunationOS_Install_R1.0.B5.jar
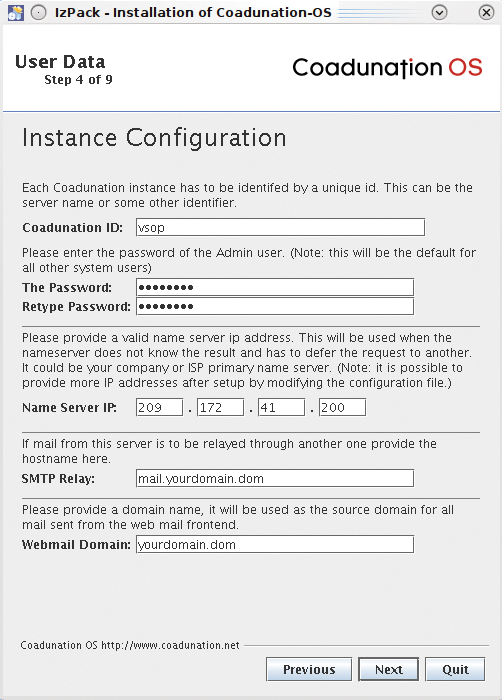
When you follow the instructions as they are shown (Figure 2), you'll be asked for a location to store the application, the location of your JDK, and a password to access the admin account, among other things. While the installation proceeds, a progress meter shows you where things are at. If you want to deploy multiple instances, Coadunation provides a final step that allows you to create an automated installation script.
To run Coadunation OS, visit the install directory's bin folder and execute the run.sh file (./run.sh), then connect to your newly deployed instance of Coadunation OS. The URL should be that of your server at port 8080. For instance, on a localhost installation, the URL would be http://localhost:8080.
Once there, you'll be asked to supply a password for the admin user as defined during installation. As I mentioned, this cloud OS is still early in its development, despite a number of features and daemons being fully functional. Although it might not be production ready, it's an interesting glimpse into the development of a web OS framework, and one the hobbyists among you can appreciate.
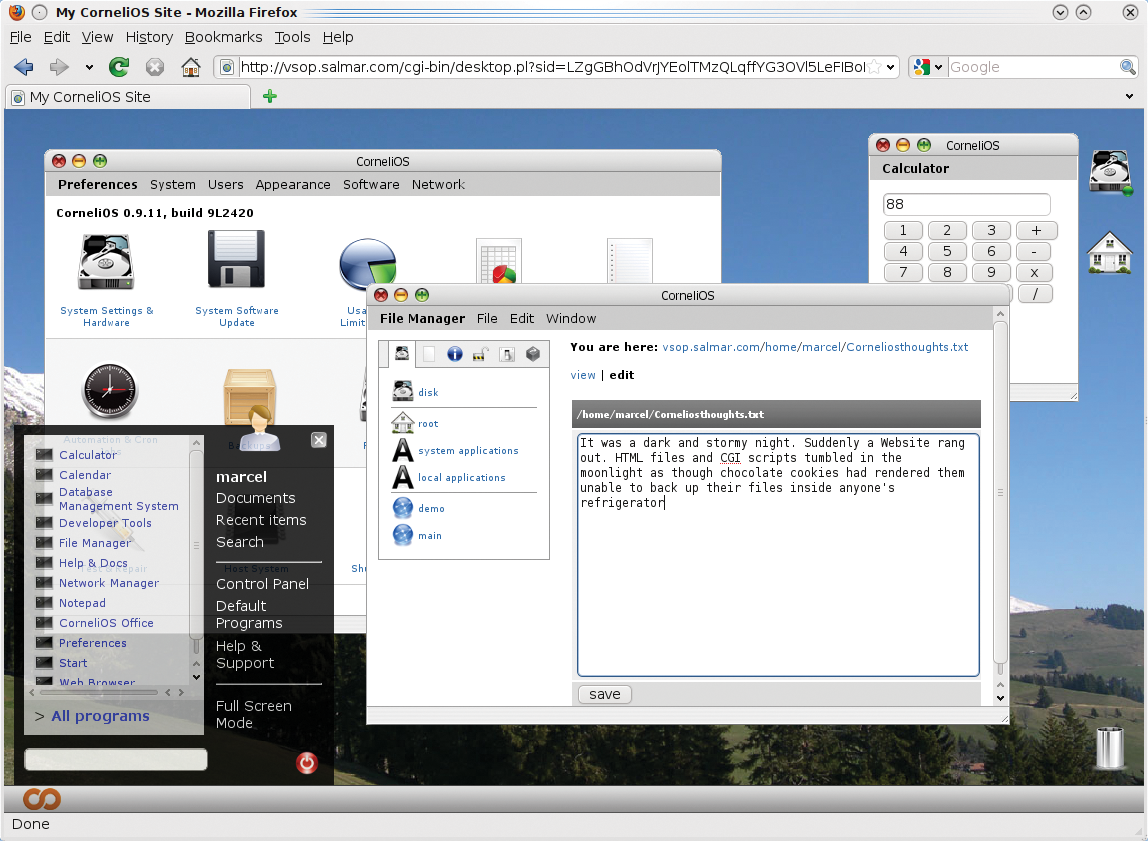
Somewhat more fleshed out is CorneliOS (what is it with the Cs?), an OS that somehow brings to mind memories of Planet of the Apes. Strange associations aside, CorneliOS is a complete multi-user web OS, complete with a suite of applications to provide users with a web desktop, including some simple applications like a basic office suite, a calendar, a calculator, and so on (Figure 3). To get started with CorneliOS, download the latest distribution [3].
Installation of CorneliOS takes place on an Apache web server that supports CGI scripts (.pl files in this case). Also, you will need to make sure that the includes module is loaded on the system (a2enmod include). Then, create a website definition, complete with a cgi-bin directory, and extract the ZIP file inside that directory. In reality, you only need two of the files included in the bundle: software.zip and installer.pl. Just make sure the files are set to executable (e.g., chmod 755 installer.pl) and run the installation script:
./installer.pl
Files and folders are created and moved into place, and seconds later, the whole process is complete. If you haven't already done so, restart Apache to make sure the new site is available. That's really all there is to it. The default admin user is root with password root. To log in as root user, enter:
http://cornelios.yourdomain.dom/login
Once logged in, you'll be informed that your password is not secure and that you should change it, so click the provided link to change your password. Now you will be able to work with your new CorneliOS system. The first stop is the Start page (Figure 4). To change your password or login information at any point, click on the My Account icon on the Start page.

When I gave you the login link previously, I sent you to the /login page rather than the website's root because the root page is just an installation confirmation page for CorneliOS. To define where and how a user gets directed into the site, click on the Start page. From an administration standpoint, the Start page (or tab) provides you with a site-wide (i.e., CorneliOS-wide) file manager, a database management system, and a website manager (this last is actually a content management system).
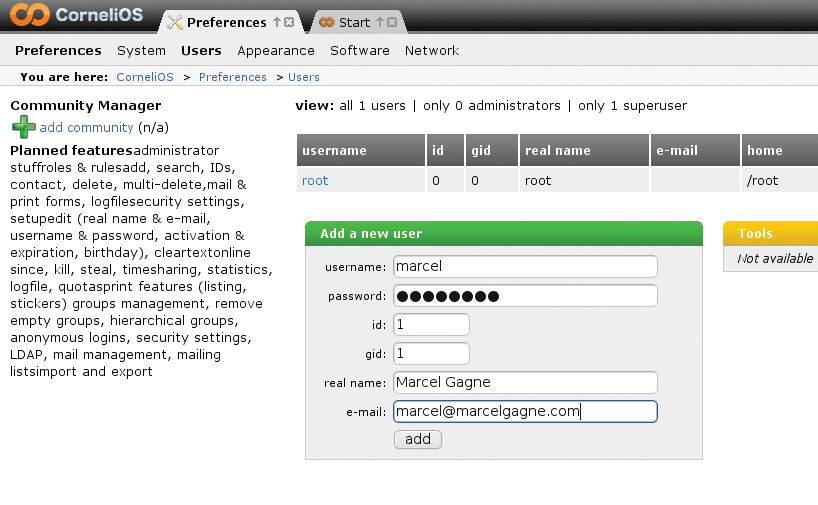
Of course, a multi-user system is only interesting if you start adding users. To do so, click on User Manager. The first time, you will see one user (root) on the system. To add a user, fill in the appropriate fields in the Add a new user section (Figure 5). This new user can log in from your defined start page, bring up a desktop, edit documents, surf the web, and more.
Next up is an impressive little desktop OS you can also run from your Linux server called eyeOS. It provides a full web desktop and comes bundled with small applications fine tuned for the web to play music files, watch videos, surf, create documents, chat, play games, and a whole lot more (Figure 6). eyeOS is a free and open web OS system that's more like a thin client network without the thin client hardware.
Getting and running eyeOS is easy. Very easy. Your Linux server should be up to date and running PHP5 to use the latest eyeOS, but there isn't much more to it than that. To begin, download the latest copy of eyeOS [4], then find a place for it inside your web server's document root. Now, using your Apache user, extract it as follows:
unzip eyeOS_1.8.7.1.zip
The package will extract into a directory called eyeOS, but you can, of course, change that if you like. If you extract it as the root user, you'll need to do a global group and ownership change on that directory so that Apache can write to it. Either make eyeOS its own website or simply place it in an existing website tree. Assuming you put eyeOS in the root of an existing website, you would connect from your browser something like this: http://yoursite.dom/eyeOS/index.html. Because this is your first time accessing EyeOS, you'll be redirected to the installer (Figure 7).
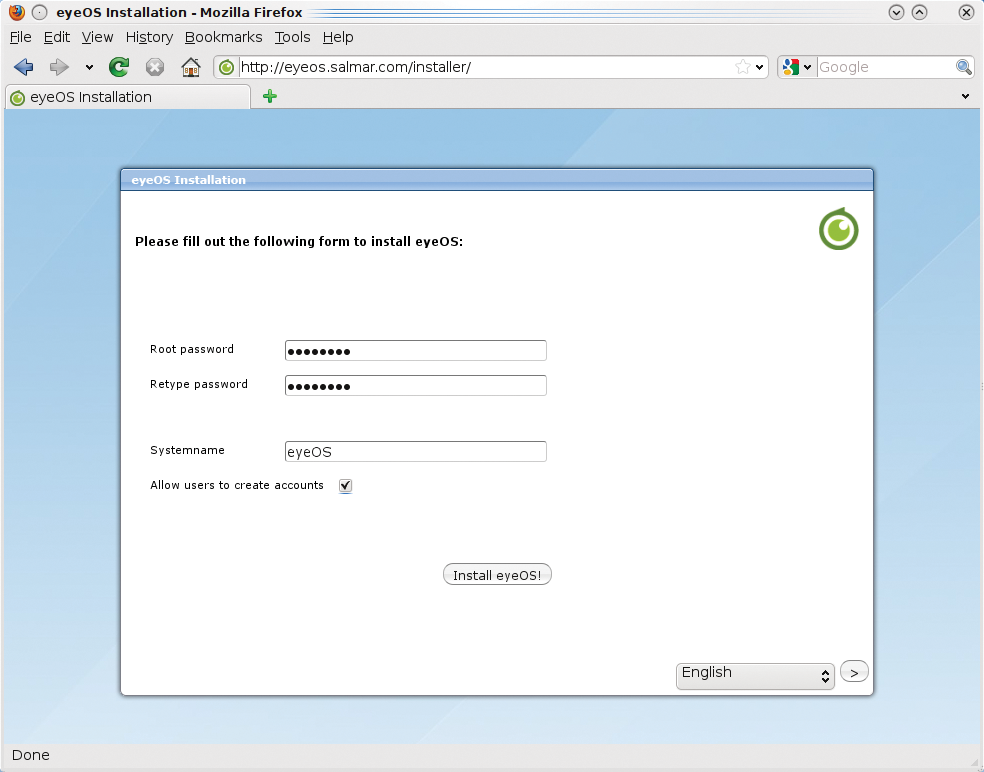
Notice that the installer asks for the Root password. That's the eyeOS root password, the one that will serve as the master account for this installation of eyeOS, not the one for your server. Make sure you select a password for eyeOS specifically. Before you click the Install eyeOS! button, look at the checkbox directly above that is labeled Allow users to create accounts. If you check this, anyone can freely create an account on the system, without root approval (eyeOS root, that is).
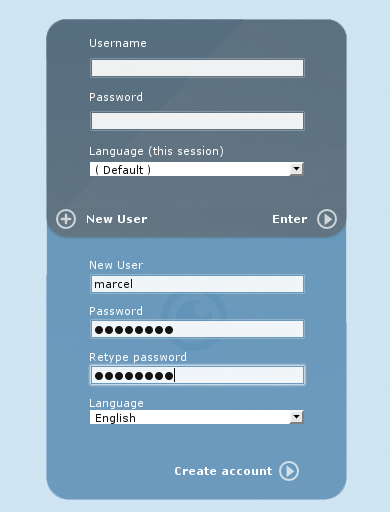
Once you click the install button, everything happens very quickly, and you find yourself at the login screen. Congratulations. That is really all there is to installing eyeOS. Although you could log in as root here, let me show you what happens if you allow registration and choose to create a user.
Directly below the username and password information on the login screen is a New User button (Figure 8). If you click here, you get an extended login form where you define a username and password of your choosing. That's all there is to it. Now you're ready to log in with the username and password you've just created.
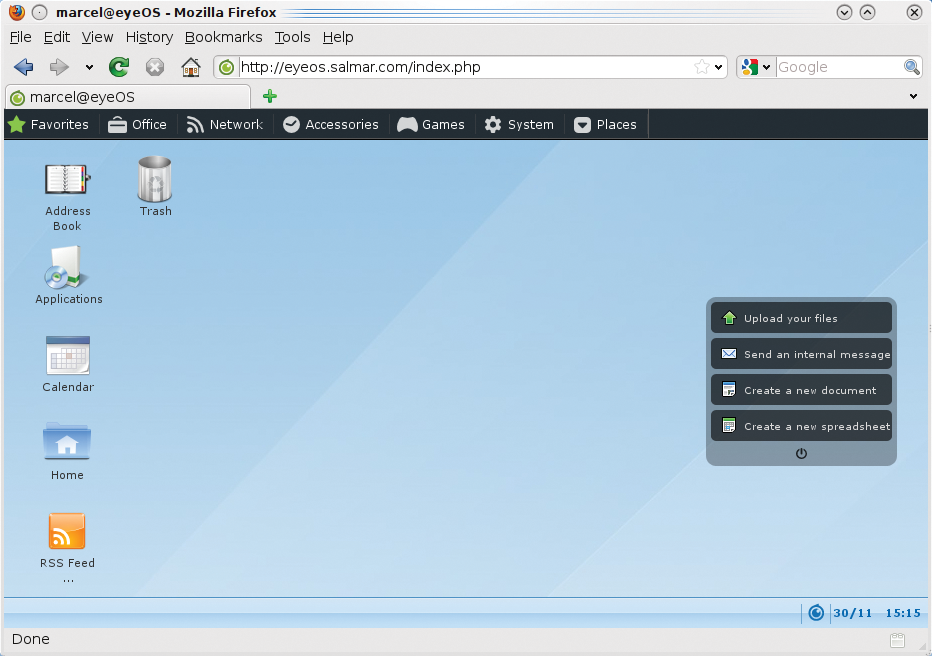
Once logged in, you'll find yourself at the eyeOS desktop (Figure 9). Along the top is a panel referred to as the application dock that is your gateway to an impressive collection of built-in applications. The desktop itself has a handful of icons to access common tools like your calendar, the home folder, and so on, quickly. To the right, you'll see a small menu floating on the desktop. Those are mini-actions - functions that, although they might open an application, aren't applications per se.
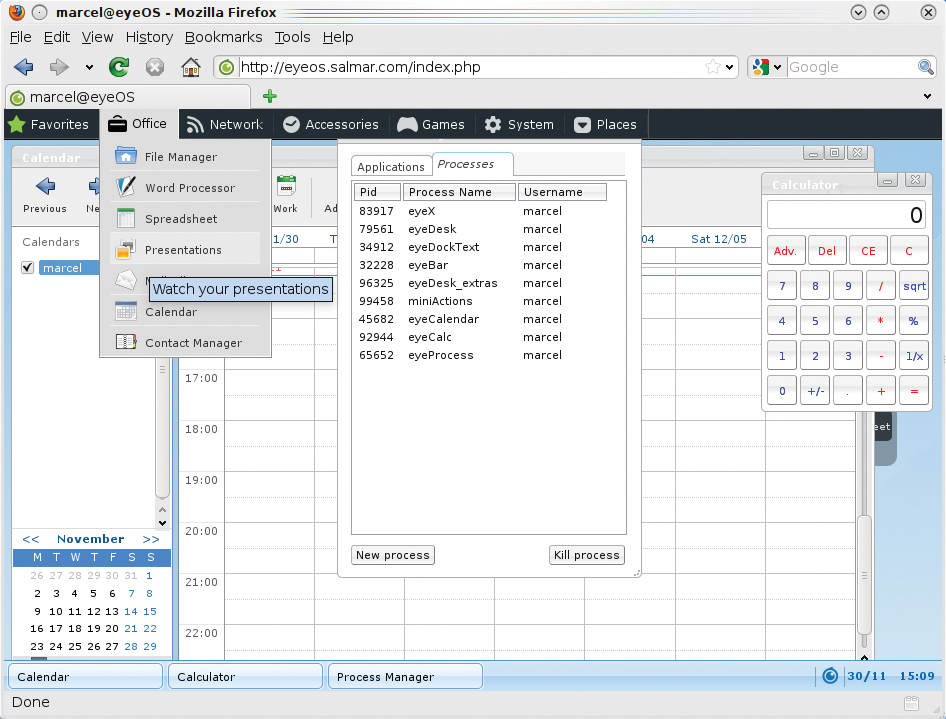
Down along the bottom is another panel, or bar, which shows your running applications, the date and time (along with a pop-up calendar), and a small icon that launches a system menu (Figure 10). From here, you can change your session preferences (the root user gets an enhanced preferences dialog - more on this), get a list of all installed applications, find out about eyeOS, launch a program (similar to the Alt+F2 quick launch in Gnome and KDE), or log out.
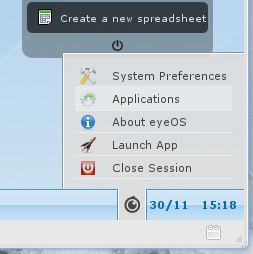
In the preferences dialog (Figure 11), you can change your personal information and password. Also, it's the place to change the look and feel of eyeOS. To change your wallpaper, click on Desktop, or to use a completely different theme that changes your window decorations, icons, application dock, and more, click on Theme.
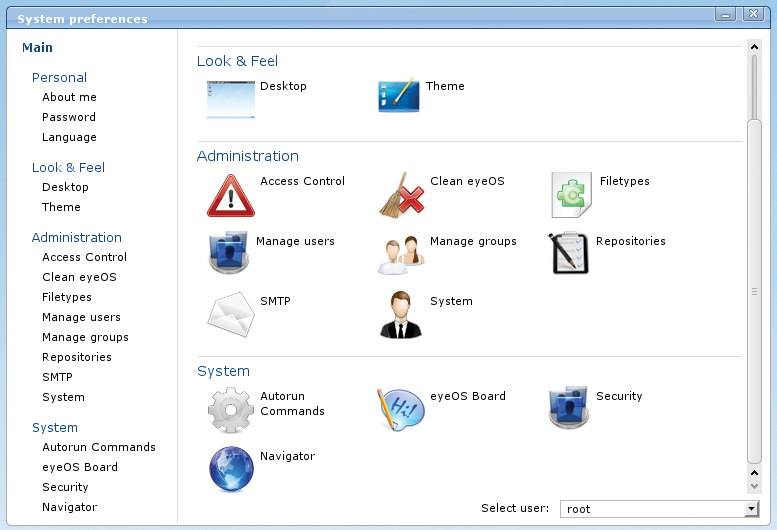
Under System, you can change the behavior of the eyeOS board, a kind of built-in instant messaging program that lets you communicate with other users logged in to your eyeOS cloud. Autorun Commands are those that you want to run automatically when you log in. The application dock and the mini-actions are just two of the programs already in the Autorun queue. Security is interesting in that you can secure your personal session by IP address. If you want to make sure that you (or your username) can only log in from your personal system, look here.
A couple of applications I've mentioned already, one being the eyeOS board, lets you chat with other logged in users. Of course, you also have the classic applications that you can't do without, namely office tools like a word processor and spreadsheet (Figure 6). Clicking the Office link on the eyeOS application dock and selecting Word Processor brings up a word processor that, although not as full featured as OpenOffice.org (which you can install, by the way), does read and write Microsoft Word format (aka DOC files). Additionally, you have a spreadsheet application, an address book and contact manager, a chat client, and more.
The root user's experience is much the same as any other user's, but with some important differences as well. For instance, letting everyone create an account this easily is probably fine if you are truly running from a private cloud, from inside an office, or on a private network. But what if you don't want every person who logs in to have instant access? The System preferences window (click on the system menu in the lower right-hand corner and choose System Preferences) serves up a whole Administration section (Figure 11).
One of the cool things about eyeOS is the community apps repository [5], where you'll find a huge list of additional packages built for eyeOS. eyeOS is so easy to set up that it's practically insane not to try it.
Now, I'd like to take you back to Google, where I started this column. I mentioned that Chrome OS had only just been released, and, like many others, I couldn't wait to get my hands on a copy of their new killer operating system [6]. The preferred method was a VMware VMDK image download. If you want to roll your own, you can also find links to the developer site, and there's a download that will let you create your own bootable image on a USB key (or thumb drive). For virtual machines, I primarily run VirtualBox; luckily, it can handle VMDK images. After I created a virtual machine inside VirtualBox using the Chrome OS image as the disk file, I booted it and started looking around. Not surprisingly, Chrome OS looks like a dedicated version of the Chrome browser (Figure 12). Your login to Chrome OS is your Google or Gmail username and password.
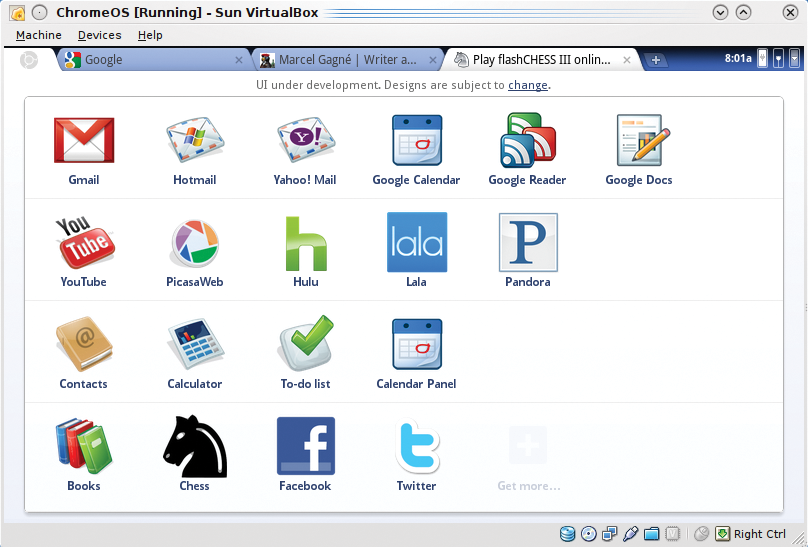
As you can see, the main desktop provides links to many Google services like Gmail, Google Calendar, Google Docs, YouTube, Picassa, and so on. But it's not all Google; other icons lead you to popular social networking sites like Facebook and Twitter. If you are thinking that these are essentially all bookmarks in a browser, you aren't far from the truth. Is Chrome OS then, just an operating system with a browser front end? Although that might be an over simplification - after all, you still need an OS to boot, connect to the network, configure hardware, and so forth - there is some truth to that statement.
So what operating system is under the surface? Luckily, there is a way to get under the hood and discover what Chrome OS is doing. Pressing Ctrl+Alt+T takes you to a shell. On the demo version, the username is chronos with password chronos. Although you can have fun exploring, you could just type:
cat /etc/lsb-release
Figure 13 shows the result: an Ubuntu Karmic Koala system. Indeed, Linux World Domination appears to be right on track.

| INFO |
|
[1] Interview with Richard Stallman: http://www.guardian.co.uk/technology/2008/sep/29/cloud.computing.richard.stallman
[2] Coadunation: http://www.coadunation.net/ [3] CorneliOS: www.cornelios.org [4] eyeOS: http://eyeos.org/ [5] eyeOS community apps: http://www.eyeos-apps.org/ [6] Chrome OS: http://gdgt.com/ |
| THE AUTHOR |
|
Marcel's an award-winning columnist, book author, public speaker, radio and television personality, and a well-known voice in the Linux and open source universe. He's also a published science fiction author and editor and a private pilot, and he was once a Top 40 disc jockey. |