
By Hans Joachim Liesert
You don't have much time until the next appointment, and you've just shut down your computer when you suddenly notice you don't have the address, but you know that it is in an email message somewhere. It's going to take three minutes to boot the operating system and load the desktop, and your bus leaves in five minutes ...
Wouldn't it be great to have a system that only takes a couple of seconds to come to life and offers all the functions you need? Some hardware vendors now offer express Linux options, but replacing the BIOS or motherboard is probably more trouble than you want to take, especially since an easier solution is available.
A simple alternative for a faster Linux boot is the Tiny Core Linux mini-distribution. You can put Tiny Core on your hard disk - parallel to your existing system - and you don't even need a separate partition. The Tiny Core system that I describe in this article will boot in fewer than 25 seconds on a fairly ancient laptop with a 1GHz CPU and 512MB of RAM.
One prerequisite for this configuration is a preinstalled distribution such as Fedora, openSUSE, or Ubuntu with Version 1 of the GRUB boot manager. (You can't use Ubuntu 9.10, which comes with GRUB 2.) Also, you need some free disk space, but most contemporary systems have the necessary 100MB to spare. The computer should also have at least 256MB of RAM and an Internet connection.
The next thing you need is the Tiny Core Linux [1] ISO image. This article is based on Tiny Core version 2.4.1, but the steps should be similar for subsequent releases. After completing the download, you will have a file labeled tinycore_version _number.iso. As the file suffix suggests, Tiny Core Linux is designed as a bootable CD, and installing on disc will take some manual attention. The first thing you need is the CD content. One option would be to burn the ISO image onto a CD and then read the files from the CD, but you can also mount the image without burning a separate disc.
The following commands assume you are logged in as root on the future host operating system. Typing mount -o loop tinycore_version.iso /mnt mounts the contents of the ISO images in the /mnt directory. The next step is to enter mkdir /tce to create the directory where you will be storing Tiny Core Linux. Then use the cp /mnt/boot/bzImage /tce and cp /mnt/boot/tinycore.gz /tce commands to copy the basic framework of Tiny Core Linux into your chosen directory.
Finally, you need to add an entry for the newly installed distribution in the boot manager. To do so, launch your favorite editor and append the lines from Listing 1 to your /boot/grub/menu.lst file. The first line, which starts with a hash (#), is a comment. You can choose a label to display the new distribution in the GRUB menu below title. The line starting with the kernel keyword tells the boot manager which kernel to boot (/tce/bzImage in this example).
| Listing 1: Adding to GRUB |
01 # Tiny-Core 02 title Tiny Core 03 kernel /tce/bzImage tce=hda1 restore=hda1/tce 04 initrd /tce/tinycore.gz |
The details following the kernel keyword are parameters that GRUB passes in to the Linux system when it boots. tce=hda1 tells Tiny Core to load installed packages and saved user settings from the hda1 partition. Tiny Core will look for packages and settings in the tce directory (i.e., the directory into which you copied the files). If your system does not reside on the first partition of the first hard disk (hda1), you will need to modify this entry appropriately.
The restore parameter specifies the device and possibly the directory in which Tiny Core Linux stores its user-specific settings. When Tiny Core shuts down, it creates a mydata.tgz file, which is simply a tarball of the /home/tc user directory. Incidentally, tc is the user account on which the GUI and the applications will be running. Whenever the system boots, it unpacks the mydata.tgz archive, restoring the original settings. In this case, you have already stored the user archive in the tce directory.
The last line in the menu.lst excerpt specifies where the Initial RAM Disk image is located. This is where the Tiny Core Linux root filesystem-- that is, the directories that compose the basic system - is stored. These directories are also the paths to built-in commands such as ls, mv, cp, or rm. When GRUB boots, it stores all of this in a RAM disk, and this is where the system actually runs, unlike legacy distributions, in which the basic system resides on disk. The RAM disk offers the decisive advantage of supporting very fast access.
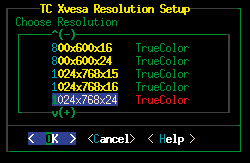
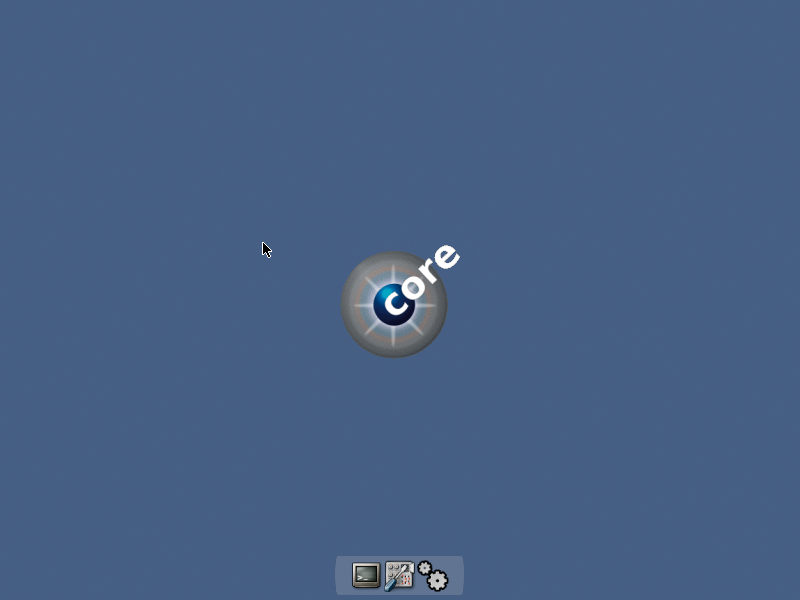
As a trial run, reboot your Linux system, and you will see an entry for Tiny Core in the boot manager menu. Now select the entry, and a couple of seconds later, you will just see an error message at the console and a prompt, rather than the desktop you might have expected. The problem is that Tiny Core has failed to find the /home/tc/.xsession file with the screen settings because you still don't have a mydata.tgz archive. This problem is easily solved by running the xsetup command (Figure 1) and selecting the correct resolution. Then you can quit xsetup (this will cause Tiny Core to write the .xsession file) and launch the desktop by typing startx (Figure 2).
The remaining steps assume you have a working network connection. If your computer uses an Ethernet card and a router to access the Internet and you have a DHCP server on your network, the network should be configured correctly after booting. If you don't have a DHCP server, or if you prefer to assign a static IP address, press the screwdriver icon to launch the Control Panel in the Launchpad, then launch Netcardconfig, and you will see a dialog box with all the required data. If you need WLAN, or DSL/PPPoE, access to the Internet, see the box labeled "Setting up WLAN and DSL" for more details.
| Setting up WLAN and DSL |
|
Like many distributions, Tiny Core Linux needs a working Internet connection to install packages. This can be a problem if your only access to the Internet is via a WLAN or DSL modem: The basic installation does not give you the software you need for WLAN or DSL connectivity, so you need to establish a network connection to obtain the software for establishing a network connection. The same problem applies to NDIS-Wrapper. One solution is to access the package repository [2] directly from another system with a working Internet connection and manually download the packages. To install, simply copy the package files to your /tce directory. In this case, you will need to resolve any package dependencies manually. To identify the dependencies, refer to the package description in the repository. For example, you will find the following files for the TCZ package ndiswrapper.tczm:
If the file with the .dep suffix is missing, the package does not have any dependencies. Otherwise you need to install all the packages listed in the .dep file. When you install a package, the App Browser writes all the files listed in the previous paragraph, except *.list and *.info, into the PPR (for an explanation, see the "Package Installation" section). The Tiny Core website also provides a WLAN adapter configuration How-To [3]. To use a DSL modem for Internet access, you need the pppd.tczl package. Then, you can follow the normal procedure to configure the DSL line via pppoeconf and connect via pon. |
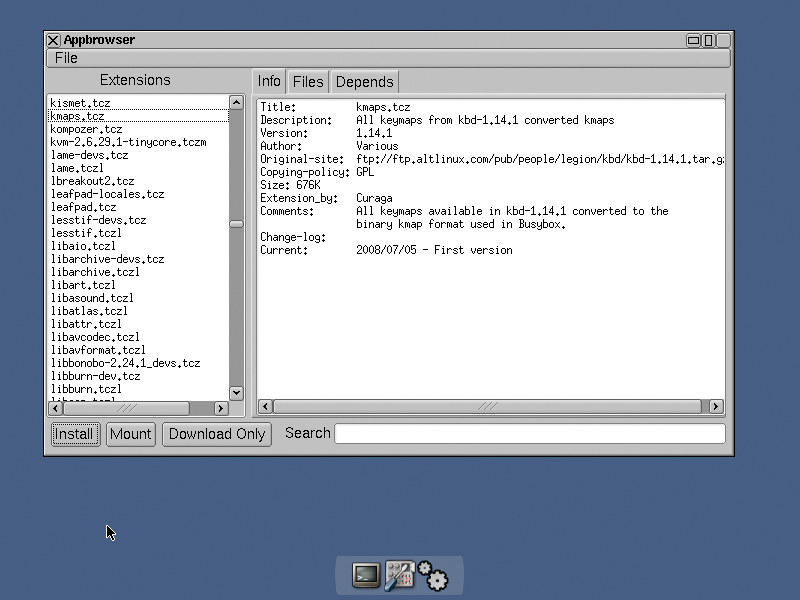
Although you have installed the operating system, you still don't have any application packages. Tiny Core always follows the basic principle of keeping the original system as small as possible, then loading everything you need individually and in a modular way. The App Browser (Figure 3) helps you install applications; you can launch it via the gearwheel icon in the Launchpad. This opens a connection to the Tiny Core web server, where you can download the required application packages, which are stored in a directory on your disk, loaded when you boot the system, and pushed onto the RAM disk.
Tiny Core distinguishes between two approaches to setting up packages: install and mount. Install means loading the package content into the RAM disk from the Persistent Personal Repository (PPR) at boot time. The PPR is the directory you set up at the start of this article, which Tiny Core looks for when it boots (parameter tce=...).
Because the packages are loaded into the RAM disk, Tiny Core needs a fair amount of RAM. After booting, it will typically only take a second to launch the browser after you click the Firefox icon. In contrast, packages mounted from the PPR do not reside in the RAM disk but are mounted via loop-mount. This approach saves memory; however, the number of packages you can mount is restricted.
The good news is that you can combine the two methods. Applications you need to start quickly should be installed. Programs you do not use often are candidates for the memory-friendly mount method. If your computer is low on RAM, you will probably prefer to mount all the packages you need. Tiny Core Linux uses the tcz2ram.lst file in the PPR to remember which packages it should load into the RAM disk.
To install an application, launch the Application Browser by pressing the icon with the two gearwheels in the Launchpad. When the program has loaded, press Connect to open a connection to the repository on the Tiny Core website. The Application Browser will then load a list of available packages and display them in the dialog window.
As an example, to install a package such as firefox, select it in the list, then click Install or Mount. The Application Browser downloads the required packages and installs them according to the method you select. There is no need to worry about resolving package dependencies now - the Appbrowser will resolve dependencies during the installation.
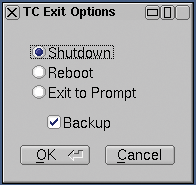
Although you can use the applications immediately after they are installed, it is a good idea to reboot to apply all the other changes you made so far. Right-click the desktop and select Logout. Make sure you check the box for Backup (Figure 4) to tell Tiny Core to save the changes you just made.
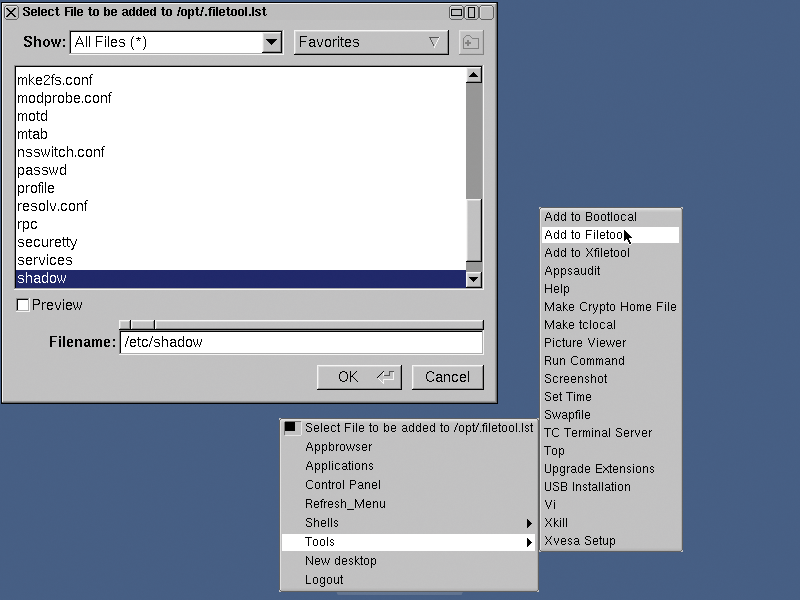
Security-conscious readers will probably notice that the Tiny Core Linux GUI launches without a login, and you have access to a root shell via a drop-down menu. This approach is quite normal for a Live CD, but it is definitely not compliant with best practices for a hard disk installation. Fortunately, Tiny Core Linux has a solution: Just add the noautologin parameter to the /boot/grub/menu.lst kernel line. Whenever you attempt to launch the GUI, Tiny Core Linux will prompt you to log in. The user account is tc, and a password is not set by default. To set a password, just run the standard passwd command, but again, make sure the password survives the next reboot; that is, make sure Tiny Core stores it in the mydata.tgz file by right-clicking the desktop and selecting Tools | Add to Filetool. Then enter /etc/shadow for Filename and click OK (Figure 5).
To complete your installation, add whatever packages you need. The Tiny Core Linux website [1] has some additional tips on optimization.
| INFO |
|
[1] Tiny Core Linux: http://www.tinycorelinux.com
[2] Package repository: ftp://distro.ibiblio.org/pub/linux/distributions/tinycorelinux/2.x [3] WLAN configuration: http://wiki.tinycorelinux.com/tiki-index.php?page=Setting+up+Wifi |