
By Nathan Willis
PiTiVi is built around the GStreamer [1] multimedia framework - the same audio and video underpinnings that power Ubuntu media players like Rhythmbox and Totem. Because GStreamer understands a vast array of video, audio, and still image formats, PiTiVi also automatically supports these same formats for import and export.
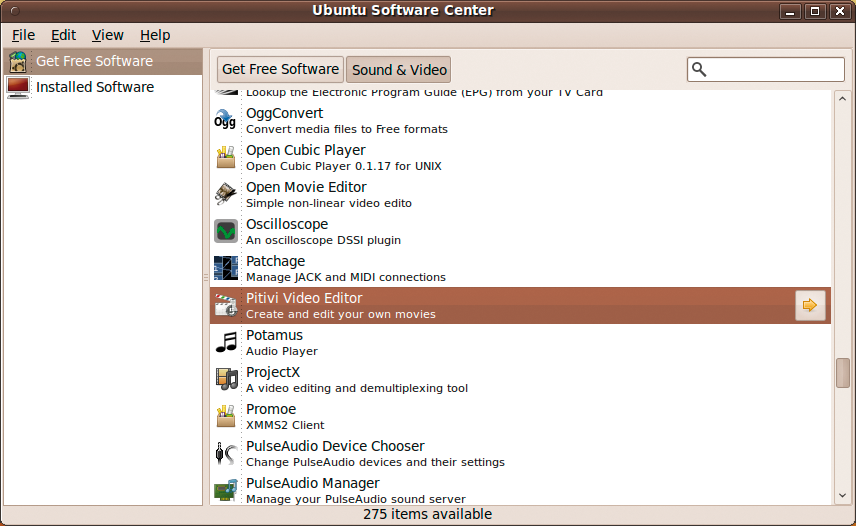
To install PiTiVi, you can use the Ubuntu Software Center or the Synaptic Package Manager (Figure 1). The latest release is numbered 0.13.3. To use PiTiVi, you must additionally install GStreamer packages, which should be selected automatically by the installer; if you want to be cautious, however, you can install additional packages yourself. The gstreamer-plugins-* packages include codec support, so adding them could provide crucial support for particular file formats.
You should also make sure you have your video clips handy before you get started. If you already have video content to work with, you can transfer it onto your computer - for most video phones and flash-based cameras like the Flip series, the fastest thing to do is attach the device with a USB cable and copy the files into a folder. For transferring video from tape-based (DV) cameras onto your hard drive, you can use another application, such as Kino.
On the other hand, if you just want to experiment with PiTiVi, you can download Creative Commons-licensed clips from the Internet [2] or use the audio and video samples included in Ubuntu's "Free Culture Showcase" - they are installed on your system in the /usr/share/example-content folder.
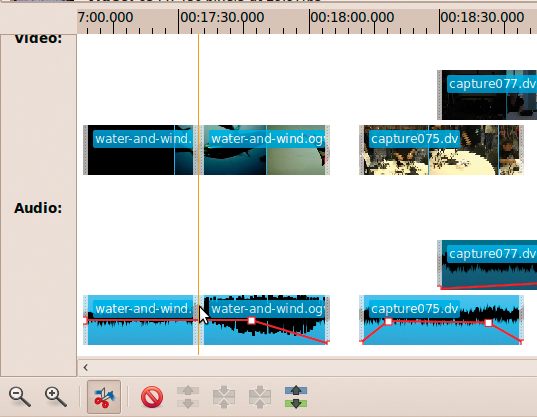
With your video files in place, you can launch PiTiVi and become familiar with the interface. A few basic buttons are at the top of the window beneath the menus, for opening, saving, and rendering projects. The majority of the screen, however, is divided between the Clip Library, the preview window, and the editing timeline (Figure 2).
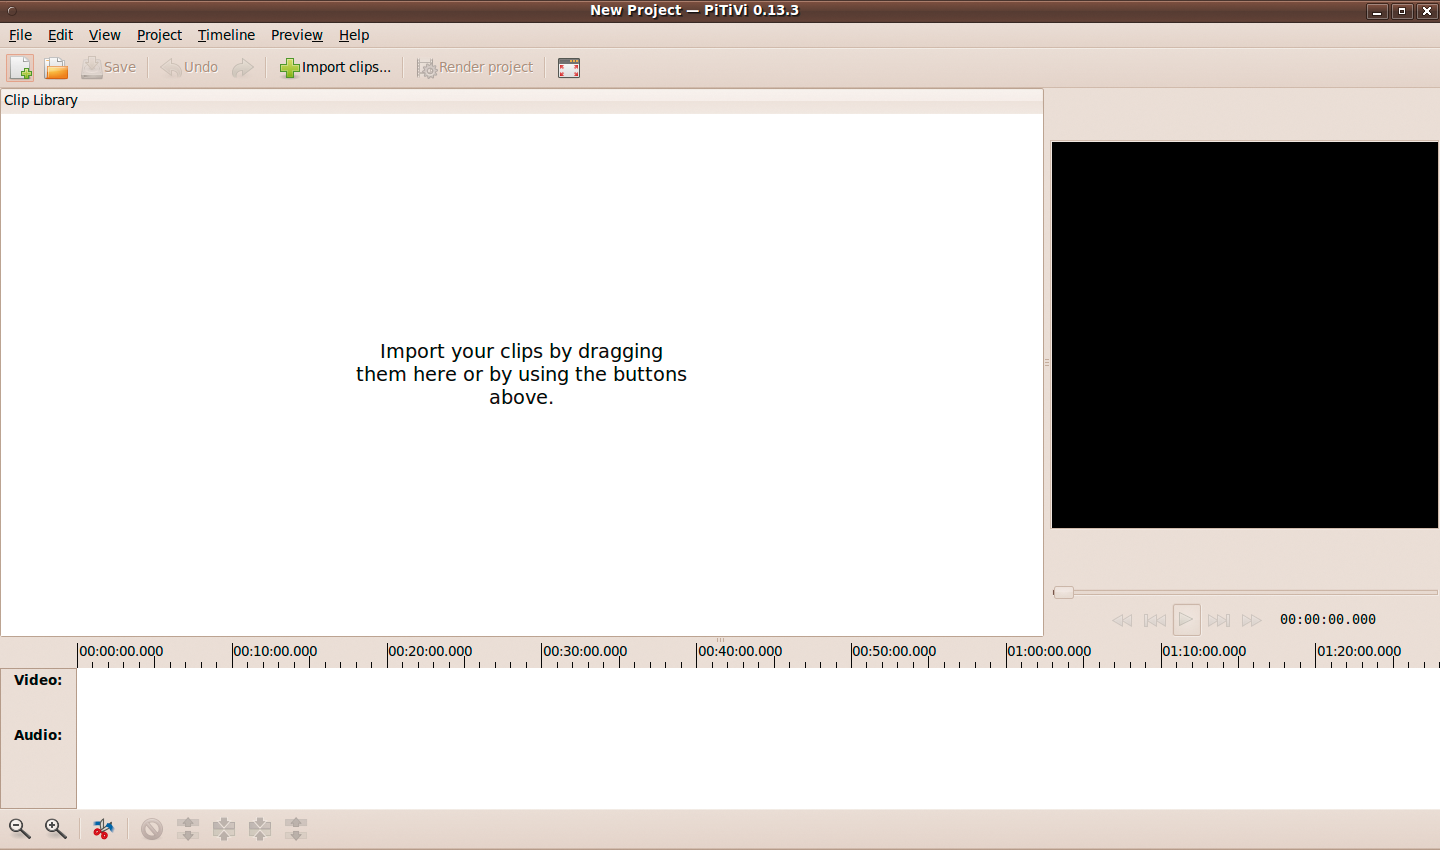
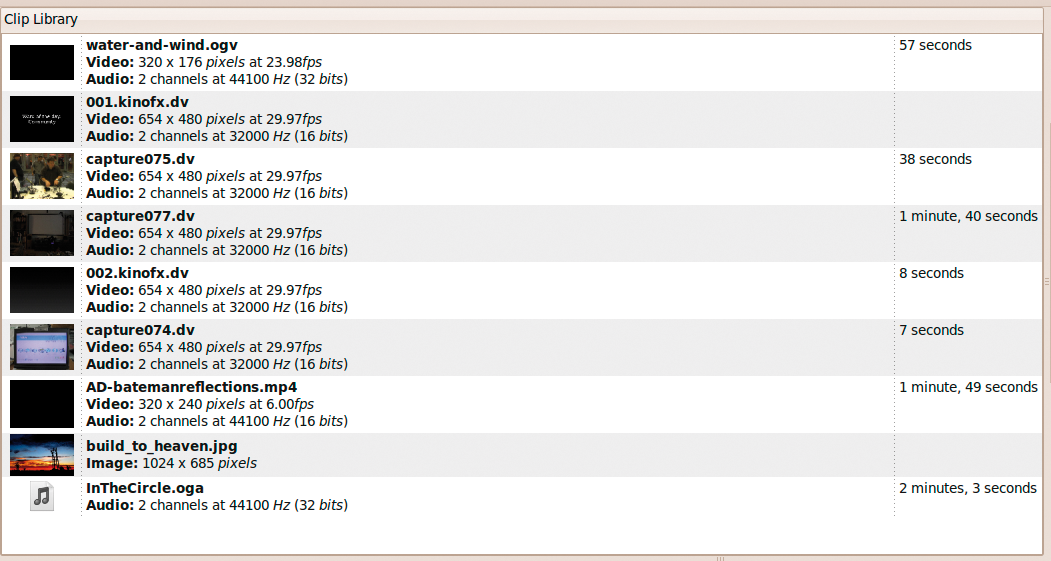
The Clip Library is a browser for the media snippets you have loaded into your project. The larger your project, the more difficult it can be to keep track of the various clips you use; consequently, each entry in the browser shows a thumbnail and basic clip information such as video dimensions, frame rate, clip length, and the number and sampling rate of audio channels.
The preview window is an embedded video player you can use to preview individual clips or portions of your edited project. The controls use normal video player functions for fast forwarding, rewinding, and stepping through clips, and the clock displays time codes that can be helpful when trying to hone in on a specific place at which to make a cut. Double-clicking on any video element - a clip in the Clip Library or the edited video in the timeline - starts playback in the preview window.
The real work of assembling a video takes place in the editing timeline at the bottom of the window. Time codes are displayed in the ruler at the top, with video and audio clips below. All video clips on the timeline are displayed in a stacked series of rows above all audio clips, to make it easier to line up transitions precisely.
Editing in PiTiVi is a very mouse-driven task; you move clips by dragging them around the timeline, change audio volume levels by clicking on them, and so forth. Consequently, if you need additional space to see the clips on the timeline, you can grab the resizing handle at the top of the editing timeline pane and drag it upward to increase the viewable area.
One final feature to be aware of before beginning an editing session is PiTiVi project settings options (Figure 3). To begin, open the Project Settings item from the Project menu. From here, you can change the human-readable name of your project (which does not have the same restrictions as the name you give to the project's file name) and include a brief description.

More importantly, perhaps, are the output settings. You can specify the video and audio formats and quality settings to be used, including your choice of codecs, container file formats (i.e., Ogg or MPEG), and any resizing needed for final export.
By including all of these options in the project's settings, PiTiVi saves you from having to remember them at render time - all you do is click on the Render project button and watch. You can choose to modify the output settings before beginning the final render, but you do not have to worry about forgetting your selections between final renders.
To import clips into a project, you can either choose the Import clips option from within PiTiVi itself, or you can drag and drop files onto the PiTiVi window from the system's file manager. Within PiTiVi, you can also import an entire folder's clips at once to save time. When you import a clip, the application scans through it and adds it to the Clip Library - if the import fails, an alert will appear in the Clip Library with more information (Figure 4). Importing does not make a duplicate copy of the clip, however, so if space is an issue, have no fear.
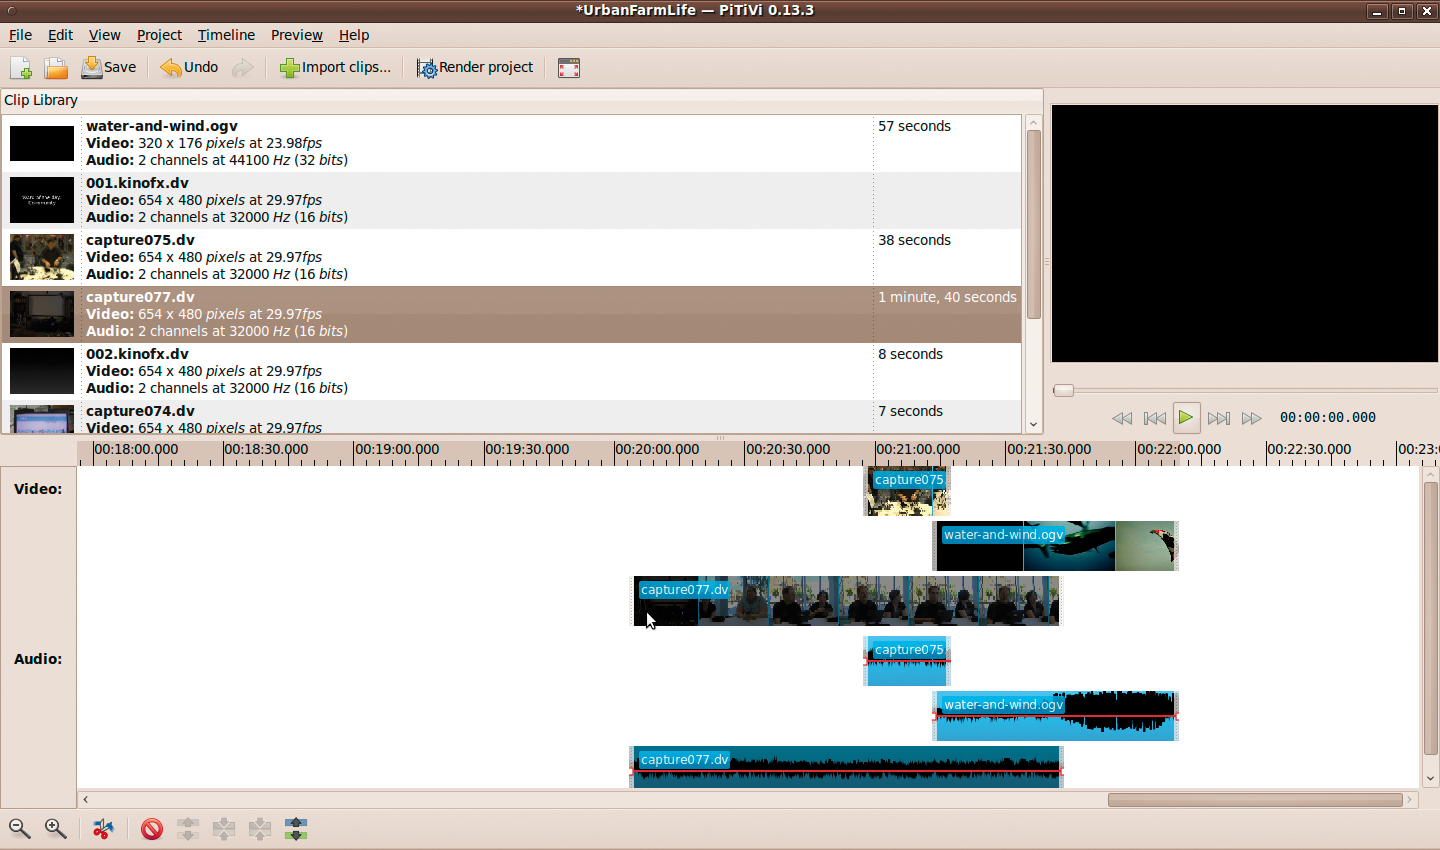
To begin assembling your video, simply drag a clip from the library to the timeline. Video content will appear on the timeline as a series of thumbnails that extends over the appropriate length of the clip. Audio content will appear as a waveform image displaying the audio volume. You can zoom in and out with the magnifying glass buttons at the bottom of the window.
With this method, you can add as many clips as you like; the Video and Audio rows will expand as necessary to show them all. Although the timeline physically separates video and audio into separate rows, when a clip has both audio and video tracks, the two will be linked together - moving one on the timeline will move the other, preserving perfect synchronization. In PiTiVi terminology, the two tracks are "grouped," and you can ungroup and re-group tracks with the buttons at the bottom of the window or from the Timeline menu.
A similar idea is the ability to link two tracks, with one important difference: You can link an arbitrary number of audio and video tracks to each other, but they do not have to be synchronized. When you link a set of tracks, you can move them around the timeline while preserving their positions relative to each other, which is handy when assembling a movie with a lot of cuts.
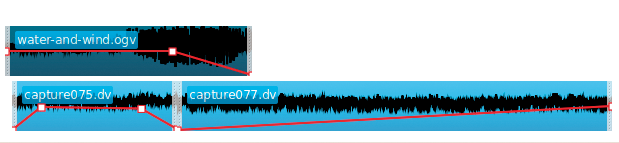
Very little else is visible to the naked eye concerning the rearrangement of clips on the timeline, but as you move content around with the mouse, you will discover a few important things. When multiple video tracks overlap on the timeline, for example, you will only see the topmost clip when playing back the movie. To change what you see, you can rearrange the vertical stacking of clips. On the other hand, when multiple audio tracks overlap, you will hear sound from all of the tracks mixed together (Figure 5).
The latter effect might be useful if you need to add background music with an audio-only track while an audio and video track plays. Even then, however, you will probably want to adjust the relative volume of the tracks. To do this, click and drag the red volume line that runs across the center of each audio track. Grabbing the line itself lets you raise or lower the volume of the whole clip; grabbing a control point allows you to adjust the volume at one point in time, thus enabling you to fade a track in or out (Figure 6).
By default the clip has only two control points: the start and end. Double-clicking on the volume line creates a new control point that you click to create a fade effect with a specific duration.
The current version of PiTiVi does not support special effects for video tracks, although they are under development. These include transition effects like fading in and out or dissolving between video tracks. Consequently, the only video transitions you can make within PiTiVi now are basic cuts.
To make a cut, select the razor tool from the toolbar beneath the timeline (currently, the tool icon depicts a pair of scissors, but "razor" is the name used in the interface). The razor tool will make exactly one cut to whichever track you click on in the timeline; afterwards, it is immediately deselected so that you do not accidentally make a second cut.
To be more precise, the razor cuts a group of tracks - this is one other important distinction between grouping and linking. If two tracks are grouped together, as is the case with an audio and video track when first placed on the timeline, the razor will cut them both at exactly the same time code (Figure 7). If two or more tracks are linked, however, the razor will only cut the track on which you click.
Once you are familiar with cutting, grouping, and linking, the real work begins. PiTiVi lets you sort and rearrange your clips with absolute freedom; it helps you in little ways, such as by automatically snapping together adjacent clips when you bring them within a few pixels of each other on the timeline. The zoom controls allow you to do frame-accurate cutting if you so desire - but the artistic touch that will make your project the next web sensation or feature blockbuster can only be developed with practice.
Such practice is of limited use if you don't share your work with unbiased eyes, though, so no matter how new to PiTiVi you are, you will need to familiarize yourself with the rendering and export options.
As mentioned earlier, each project file contains pre-set values from audio, video, and container file format rendering options. Once your settings are in place, you can click on the Render project button to produce your final output. If you are not familiar with your options, the Export settings dialog box does a good job of explaining them. The Video Output section gives you control over the intrinsic parts of how the video content will look - width, height, and frame rate - without regard to the codec used. Similarly, the Audio Output section lets you specify mono or stereo output, sampling rate, and other codec-independent settings.
The Export to section is where you worry about codecs themselves, and here again, the PiTiVi team has presented the choices simply but with clarity, separating container format, audio, and video selections. The container format simply means the file format that contains the audio and video information (which are separate) and the information that keeps them synchronized with each other.
The codecs are the mathematical algorithms that encode the images and sound. Because all container formats can handle a wide variety of codecs, these settings are kept separate from each other.
PiTiVi supports a wide array of container formats through GStreamer: which format you should choose for any particular export depends on where your video is destined to be seen. Ogg, QuickTime, AVI, and Matroska are suited for computer and embedded device playback, for example, whereas different variations on MPEG might be best for DVDs or VCDs.
The drop-down container selection box includes a brief description of each option. Whichever you select, PiTiVi will then switch to the preferred audio and video codecs in the selection boxes then listed below. For strict compatibility (such as for DVD player usage), it is best to leave these settings alone, but for computer-based files, you can experiment with different video codecs (e.g., Theora or Dirac) and audio codecs (e.g., FLAC or Vorbis) to get a feel for how they differ.
PiTiVi does not yet have fancy transition effects or a way to create and embed titles and watermarks, but those features are coming. If you would like to follow PiTiVi development more closely, you will find information on the project's wiki [3], including tutorials and an online manual that is updated with every release. Additionally, you can ask questions on the PiTiVi mailing list and IRC channel. Still, the best way to get more out of PiTiVi is just to grab your camera, shoot some footage, and hit the editing room.
| INFO |
|
[1] GStreamer: http://gstreamer.freedesktop.org/
[2] Creative Commons content search: http://search.creativecommons.org/ [3] PiTiVi wiki: http://www.pitivi.org/wiki/ |