
By Dmitri Popov
Although dedicated digital asset management (DAM) applications are out there, most of them are overkill for individual users and small businesses. However, digiKam [1] offers all the features you need to manage your digital assets (i.e., photos, scanned images, and videos), which makes it a solid DAM tool. And because you already have digiKam on your machine, why bother installing, configuring, and learning yet another application? Digital asset management usually includes tasks related to importing, renaming, processing, and managing files. In this article, I'll show you how digiKam can help you perform these and other DAM-related tasks.
Before you can do anything with your digital assets, you have to add them to digiKam, and the application provides several handy import tools tucked under the Import menu. digiKam does a good job of automatically recognizing connected cameras, card readers, and USB storage devices, so as soon as you connect a device to your machine, you can import files with the appropriate command in the Import menu. For example, to import photos from your camera, choose Import | Cameras and select your camera model. This opens the window you can use to view and download photos. If you already have files stored on your hard disk, you can use the Add Images and Add Folders commands to import individual images or entire directories into digiKam. Thanks to the Import from Scanner command, you can acquire scanned files from the scanner connected to your machine directly from within digiKam. Additionally, you can use the Import from Facebook and Import from SmugMug commands to fetch photos from these popular web services.
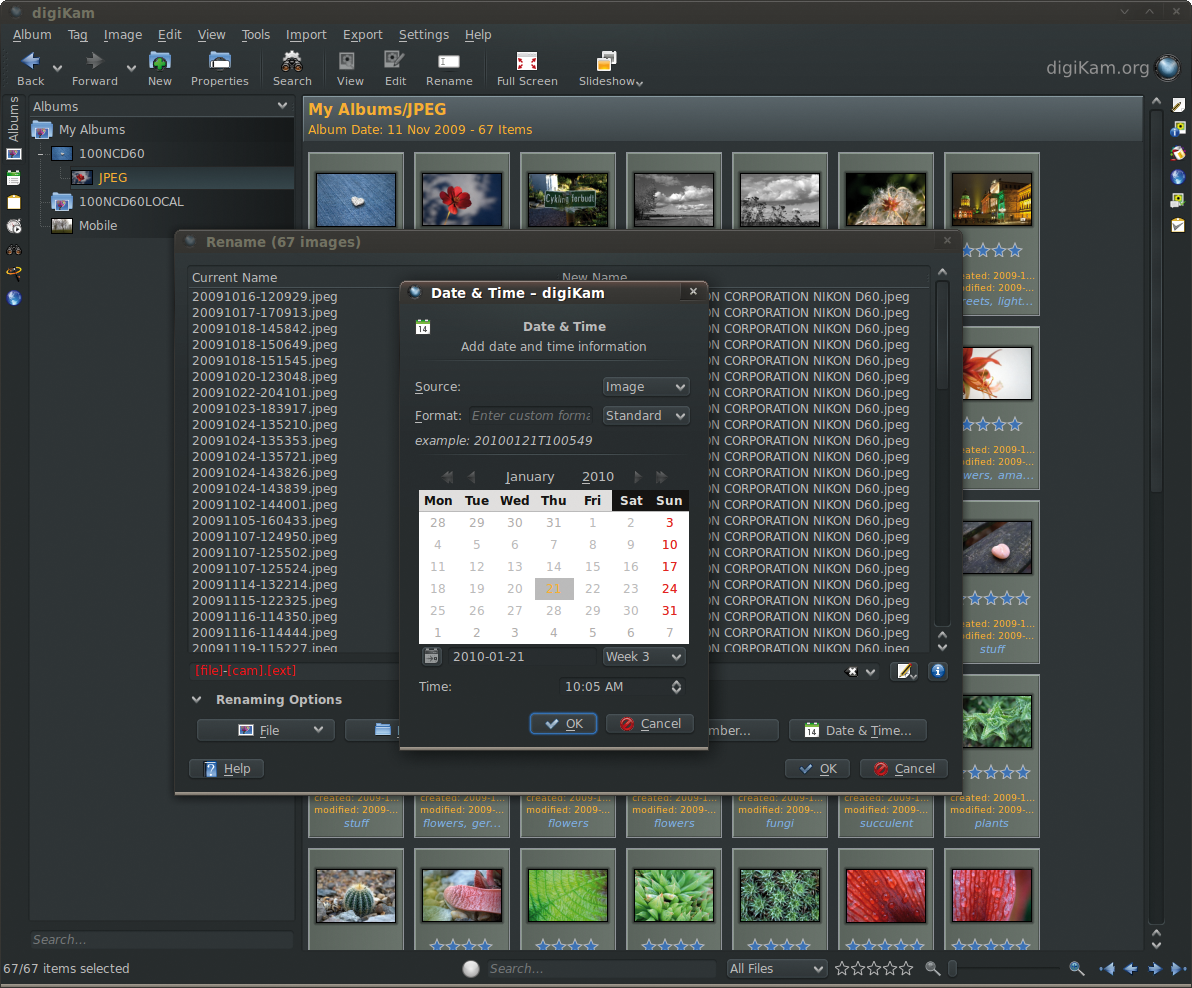
Once you've added files to digiKam, you might first want to rename the imported files. Although this is not a mandatory step, giving your files meaningful names can make it easier to keep tabs on them. digiKam provides a powerful file renaming feature that lets you rename multiple photos in one go. To use this feature, select the items you want to rename and press the Rename button in the main toolbar; alternatively, either choose Image | Rename or press F2.
Any one of these actions opens the Rename window in which you can specify the desired renaming rule (Figure 1). For example, you can add the camera model to the renaming rule so that each file name contains information about the camera it comes from. Using the Date & Time option, you can define a renaming rule that includes date and time data. In this way, you can add, for example, a date stamp to the file name and immediately see when the specific photo was taken or added to digiKam. The Date & Time option can pull date and time data from the Exif info. If the Exif information is not available or unsupported, you can specify fixed data manually.
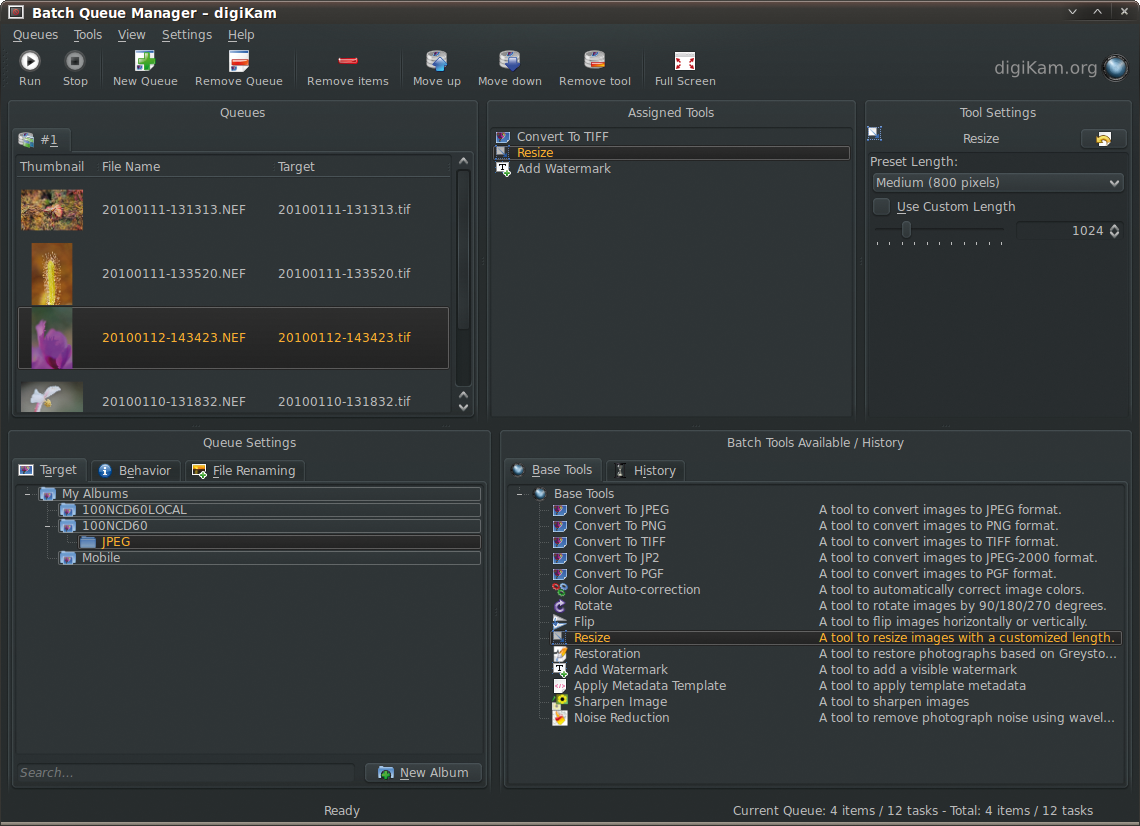
Renaming is not the only bulk action supported by digiKam. In fact, the application comes with a nifty batch tool that can be used to perform an action or a series of actions on selected photos. For example, say you want to convert the newly imported RAW files to TIFF, resize the converted images, and watermark them. To begin, select the imported files you want to process, right-click on one of the selected files, and choose Batch Queue Manager | Add to Current Queue or Batch Queue Manager | Add to New Queue. These open the Batch Queue Manager with the selected files in it (Figure 2). In the Queue Settings | Target section at the lower left, select the album for storing processed images. Then, in the Batch Tools Available/History | Base Tools section, right-click on the Convert To TIFF tool and choose Assign tools. This adds the Convert To TIFF item to the Assigned Tools section, and you can configure the tool's options in the Tool Settings section at upper right. In a similar manner, you can add the Resize and Add Watermark tools. In the context menu, you can rearrange the added tools by moving the currently selected tool up and down or removing it from the list altogether. To process the files with the tools you have specified, hit the Run button in the toolbar.
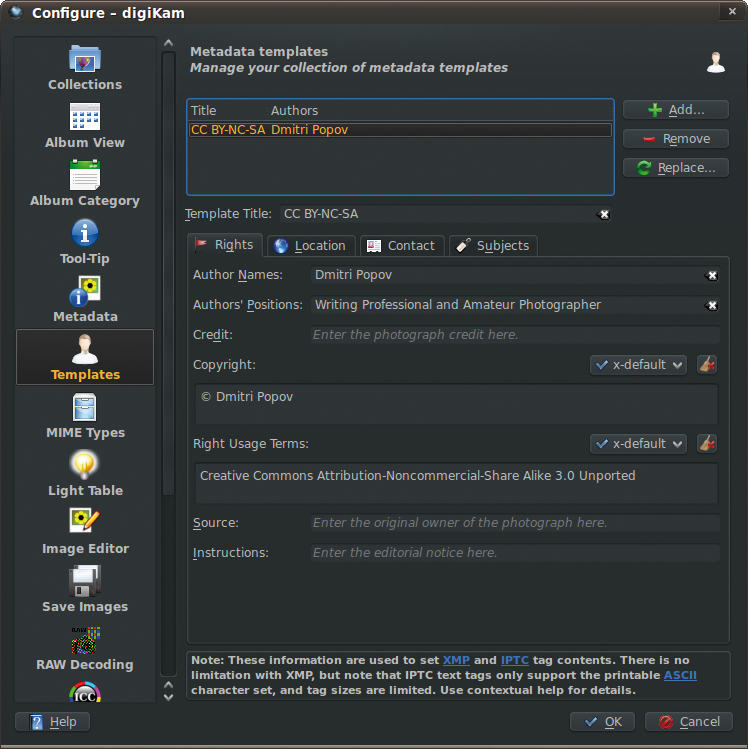
Besides excellent tagging and rating capabilities, digiKam provides a few creature comforts that make it easier to manage the metadata of your digital assets. For example, the template feature lets you create copyright templates and apply them to multiple items at once. To create a new template, choose Settings | Configure digiKam and switch to the Templates section (Figure 3). In the Template Title field, give your template a name and fill out the other fields. When you are finished, press the Add button at upper right to save the template. To modify an existing template, select it from the template list, edit the template, and press the Replace button to save the changes. To apply the template to desired items, select them, expand the Capture/Tags icon in the right sidebar, and switch to the Information tab. Select the template from the Template drop-down list and press the Apply button.
digiKam sports excellent search capabilities that can help you manage your digital assets efficiently. However, the quality of the search results largely depends on the completeness of the metadata in each item, so to use the searching and filtering features to their full potential, you should tag and rate your items and enter as much information as possible.
To find or filter files quickly, you can use the Search field and filtering options at the bottom center of the main window. Just enter the search term you want, and digiKam automatically finds items by file names, comments, or tags that match the specified criteria. Using the drop-down list, you can limit the search to specific file types; for example, you can search only RAW or TIFF files. The rating filter to the right of the search field lets you view items that match specified star rating criteria. If you select the desired number of stars by clicking with the mouse, digiKam will narrow the view to the matching files. By default, the filter uses the Greater Than or Equals condition, but you can choose between two other options - Equals or Less Than or Equals - by right-clicking on the filter.
Besides the quick search and filtering tools at the bottom of the main window, digiKam offers more advanced search features in the left sidebar. Here, you'll find a variety of search options, including the icons for the Calendar, Tags, Timeline, Searches, Fuzzy Searches, and Map Searches sections.
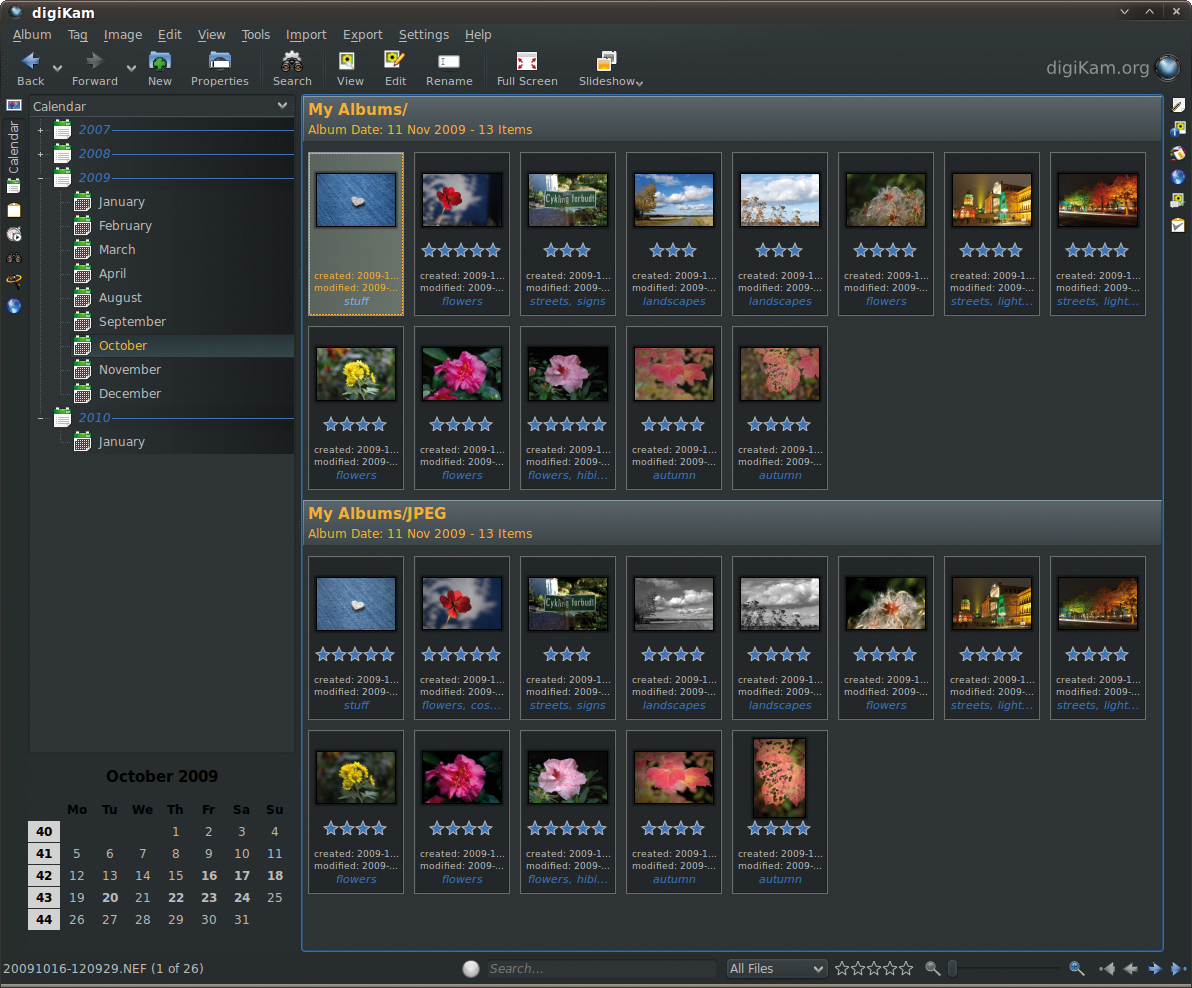
The Calendar section lets you quickly find items for a specific year, month, and date. Using the tree in the main pane on the left, you can locate the year and month you want. When you select the desired month, digiKam promptly displays related items (Figure 4). As the name suggests, you can use the Tags icon on the left to locate items containing specific tags. Besides that, this option can come in handy when you need to purge unused tags. If you select a tag and no items are found, you can delete the tag with the Delete command in the right-click context menu.
The Timeline icon offers another way to locate and view items for a specific period of time. All items here are presented as a bar chart, and you can view files for a specific period by clicking on the related bar. The Timeline section has another clever trick up its sleeve: You can save searches as virtual albums. To save the current search, give it a name in the field right below the timeline and press the Save button. This adds the virtual album to the My Date Searches list.
The Searches icon lets you perform searches in a more traditional way. When you type a search term in the Search field, digiKam automatically displays the matching items in the main pane. To make your search more precise, press the Advanced Search button. This opens the Advanced Search dialog window where you can specify additional search options. The available options are grouped into four sections: File, Album, Tags (limit the search to specific albums or tags), Picture Properties (search for photos containing the desired properties such as creation date, rating, orientation, size, file format, color depth, and file size), Caption, Comment, Title (search for specific terms in the caption, author, headline, and title fields), and Photograph Information (search Exif metadata). For example, you can search for photos with specific exposure, aperture value, ISO settings, white balance, and so on. By default, the search finds items that meet all of the specified criteria, but you can change that by clicking on the Options link at the top of the page. When configuring an advanced search query, you can at any time press the Test button to see whether it returns the photos you are looking for. Once you're satisfied with the result, press OK, then give the search a name in the Save Current Search section, and press the Save icon. Now you can run the search by selecting it in the My Searches list.
The Fuzzy searches section offers three different ways to find the items you want. In the Image tab, you can drag a graphics file from your hard disk onto the placeholder and let digiKam find similar images. The Sketch section allows you to draw a rough sketch of the image you need, and digiKam returns photos that look like your drawing. This feature is a bit hit and miss, but it can come in handy when you need to find a photo by its motif.
As the name suggests, the Duplicates section lets you find duplicate images. Before you can put this feature to some practical use, you have to create a database of fingerprints that uniquely identifies your images. Once you've done that, finding duplicate images is easy. Select the albums and tags you want to include in the search by using the appropriate drop-down lists, then specify the similarity threshold in the Similarity field and hit the Find Duplicates button.
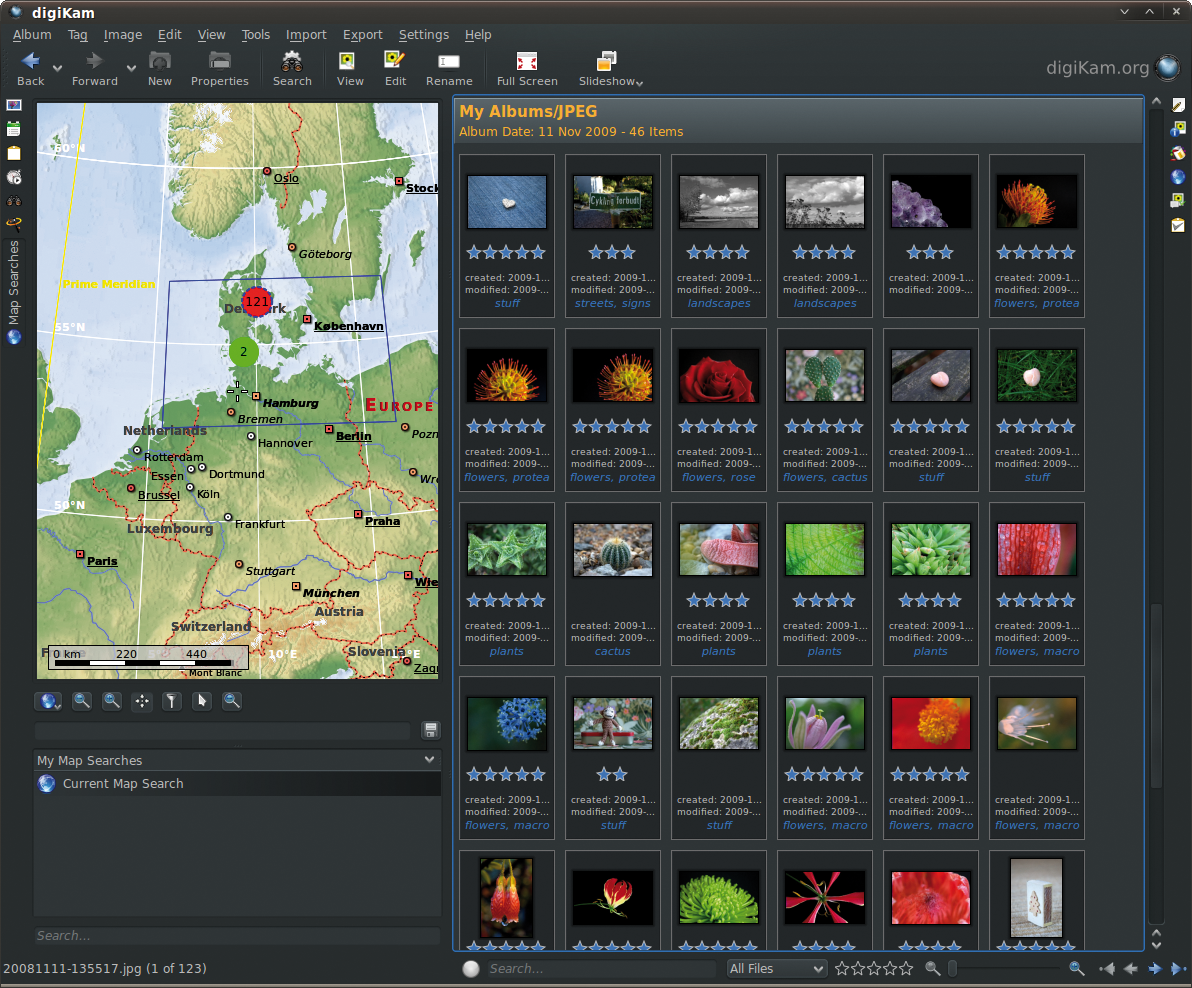
If your collection of assets contains geotagged photos, you can use the Map Searches icon in the left sidebar to find photos taken in a specific location. Just expand the Map Searches sidebar, press and hold the Ctrl key, and select the desired region on the map using the mouse. Now you should see markers on the map. Each marker displays the number of found photos in the specific location, and you can use the mouse or zoom buttons to zoom in on the map to see thumbnails of found photos in the main pane. If you press and hold the Shift key and then click on a marker on the map, digiKam will highlight all the photos belonging to this group in the main pane (Figure 5). digiKam supports both Marble and OpenStreetMap maps, so you can use the map you like for viewing the found photos in the Map Searches sidebar. In the Map Settings icon below the sphere on the left, you can switch between the Marble and OpenStreetMap maps.
In this article, I covered only a few key aspects of managing digital assets in digiKam, but this excellent app offers many other useful features that can help you to keep tabs on your assets. Among other things, digiKam sports sorting and grouping features, a comprehensive collection of processing tools, and exporting and printing capabilities. So before you go looking for a dedicated DAM solution, you might want to take a good look at what digiKam has to offer, which might well have everything you need to keep tabs on your digital assets.
| INFO |
|
[1] digiKam: www.digikam.org
|