
By Tim Schürmann
SUMO is a ready-to-run user management tool you can build into your own PHP application with just a few lines of code. Once you integrate SUMO with your web app, it will handle authentication and authorization for you. Integrating SUMO gives you a comfortable web interface to manage your users, assign them to groups, and assign rights.
The user credentials can reside in a MySQL, a PostgreSQL, or an Oracle database. As an alternative, users can also log in via LDAP, Active Directory, an existing Google Mail account, or an account with the Joomla! Content Management System.
In addition to basic login and access control services, SUMO comes with several other useful security features. (See the box titled "SUMO Security.") Admins can configure and manage SUMO through a smart web interface that uses AJAX technology to emulate a desktop environment. For good performance, you'll want to use a browser with a fast JavaScript interpreter.
Although developer Alberto Basso has been working on the SUMO access management system since 2003, SUMO has only made it to version 0.5.0. However, the low version number doesn't tell you anything about the the true functional scope and state of SUMO development. If you are interested in an assessing SUMO's stability and performance, launch the demo on the homepage [1]. SUMO is released under the GPL v2.
| SUMO Security |
|
SUMO provides several security features for protecting a website against external attacks. For example, the session IDs of logged-in users are renewed every 10 seconds, which makes it difficult for attackers to hijack and exploit a user's identity. The data submitted via the login form has to pass through a filter. This prevents cross-site scripting attacks (XSS) and blocks code injection attempts. Additionally, an IP filter counts invalid login attempts. If the invalid login count grows quickly within a short time, you can assume that somebody is trying to brute force a password. In this case, SUMO will block any queries from the IP address for a certain period of time. As an additional safeguard, you can define on a per-user basis which IP addresses a user is allowed to use for logging in. An internal Log Manager records any important system messages and errors, as well as all user actions. SUMO can store the steadily growing logfiles in a database or a flat file or mail them to the administrator if you prefer. SUMO also gives admins detailed information on the active users, including their IP addresses, country of origin, and the client apps they are using. |
As a PHP application, SUMO requires a web server that includes an interpreter for PHP 5.0 or newer. If you want to enable Google Mail-based logins later on, you also need PHP's cURL module.
For some years now, SUMO has stored its own data in a database; you can choose from MySQL version 3.23, PostgreSQL 8.3, or SQLite version 2, although you will have to do without some features if you choose SQLite. Integration with your own web application also requires some knowledge of PHP programming.
If you want to take SUMO out for a trial run, the developer recommends the latest XAMPP installation [2], which comes with all the required components. To begin, become root and type the following to unzip the prebuilt package in the /opt directory:
sudo tar xvfz xampp-<version>.tar.gz -C /opt
Then do the following to launch the servers provided by the package:
sudo /opt/lampp/lampp start
Installing SUMO is a satisfyingly quick experience. First you unzip the archive in a directory of your choice on the server - this will be sumo in this example. (If you use the XAMPP Apache distro, which comes pre-configured with MySQL, PHP, Perl, and other tools), unpack the package below /opt/lampp/htdocs.) Then you need to give the web server write access to the SUMO folders. If the user management system doesn't have write access, it will fail later on.
The second step for the user is to tell SUMO which database to use. Open the config.database.php file in the config subdirectory and modify the line starting with $sumo_db at the top (as of line 27). In the example given in Listing 1, MySQL (mysql) listens on port 3306 on the same server (localhost). Here, I want SUMO to use the theaterdb database, where it can use the tim account with a password of secret. If you have a XAMPP installation, the username is root and the password is not set. In the lower part of the config.database.php file are the templates for PostgreSQL and SQLite databases; you need to remove the hash signs to enable them.
| Listing 1: Database Configuration |
01 $sumo_db['type'] = 'mysql' 02 $sumo_db['host'] = 'localhost' 03 $sumo_db['port'] = '3306' 04 $sumo_db['name'] = 'theaterdb' 05 $sumo_db['user'] = 'tim' 06 $sumo_db['password'] = 'secret' |
SUMO typically resides in the web application database, which is theaterdb in the example given in Listing 1. The tables that SUMO uses all start with a prefix of sumo_ to prevent any overlap. If your web application doesn't use a database, you will have to create one. To do so on XAMPP, launch http://localhost/phpmyadmin, type the database name in Create new database, and then click Create.
The next step is to create the database tables that SUMO uses. A script provided in the install subdirectory handles this for you. The directory gives you a script for every supported database type. For example, MySQL users would go for the database_mysql.sql script. The details of running the SQL script differ depending on your choice of database. Some web hosting providers offer a GUI in their customer utility areas. XAMPP users will again want to launch phpMyAdmin in http://localhost/phpmyadmin. To make sure you have selected the right database, check the tab on the left, then go to the SQL tab, insert the content from the database_mysql.sql file in the large box, and press OK to submit the armada of commands. This results in no fewer than 18 new tables, all of which start with sumo_.
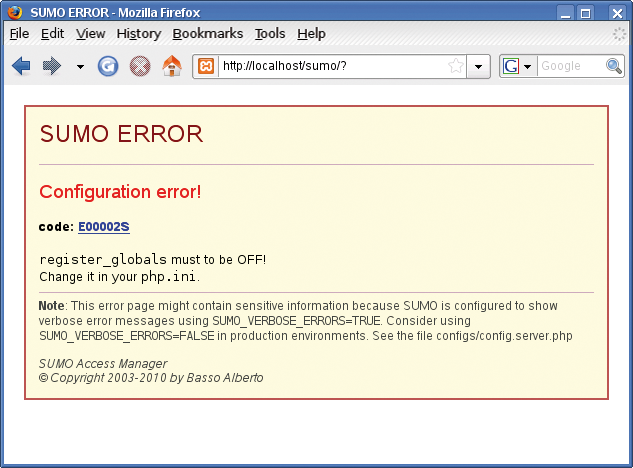
Finally, make sure the PHP register_globals setting is set to off. If not, SUMO will refuse to cooperate (Figure 1). If your web hosting provider doesn't give customers access to this setting, or if you run your own server, open the PHP configuration file php.ini (on XAMPP this is in the /opt/lampp/etc directory), look for the line that starts with register_globals =, and replace the line, if necessary, with the following:
register_globals = Off
On XAMPP, you additionally need to restart the web server:
sudo /opt/lampp/lampp restart
Now you can access the management interface at http://example.com/sumo, in which example.com is the domain name and sumo the directory in which SUMO resides: On XAMPP, this is http://localhost/sumo.
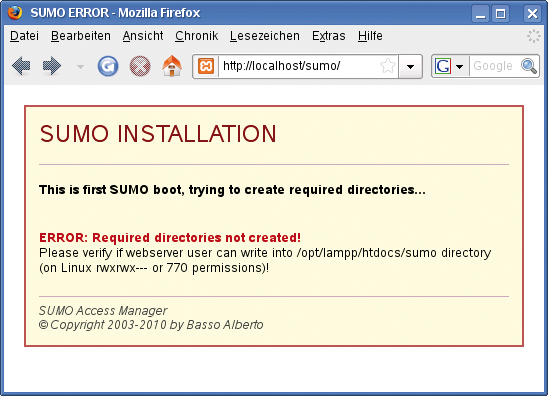
When first launched, SUMO creates a couple of temporary directories below its own folder. This can only happen if the web server has write permissions. Otherwise, you will see the message shown in Figure 2. If you do see the message, you need to modify the permissions for sumo correspondingly.
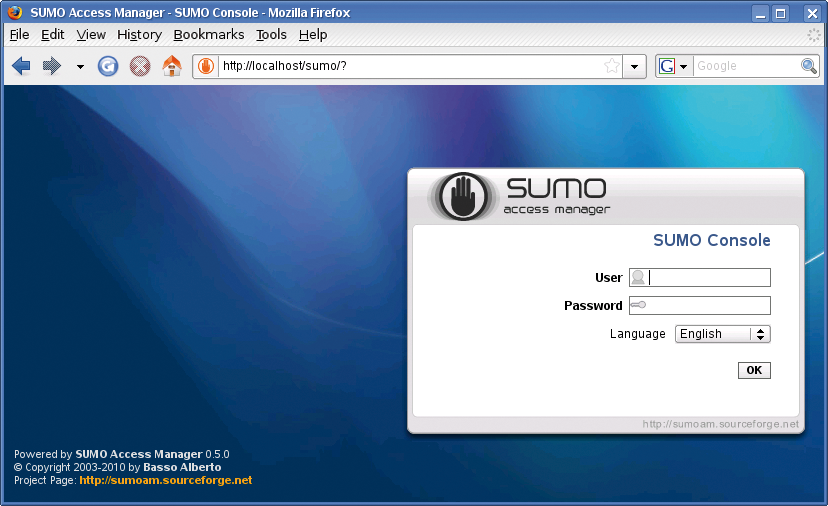
After creating the folders, you will see the success message shown in Figure 3. Click restart and you are taken to the login page that expects you to enter sumo as the username and sumo as the password (Figure 4).

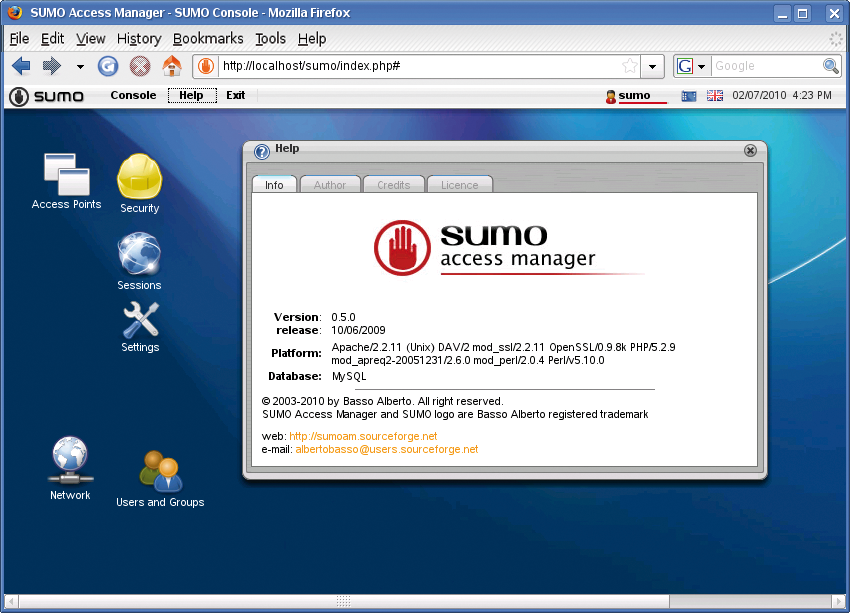
The SUMO console shown in Figure 5 will then issue a couple of notices and warnings. Yellow windows will disappear after a couple of seconds, but you need to confirm red messages explicitly. Especially when SUMO is running on an Internet server, it is a very good idea to follow the suggestions for security reasons. One suggestion, for example, is that you change the default administrator password sumo. To do so, click Change now in the red warning, and type a secure password in the two boxes that appear. Alternatively, you can access this function via Console | Users & Groups; double-click Users and click sumo, Edit, and then Security Options.
The next step is to delete the install subdirectory. If this is your first experience with SUMO, you will probably want to keep the examples directory (which I will be talking about later on); if not, you can dump this potential vulnerability in the trash can. Then check the file permissions again. The developers recommend calling chmod with 640 for files and 750 for directories.
At last you can take a look at the SUMO console with the menubar at the top. On the left-hand side, you can use the Console to change settings. Alternatively, you can double-click the icon on the desktop. Help doesn't actually take you to an online help feature but to the usual About... window. The documentation [1] area of the homepage has an incomplete manual.
Clicking Exit quits the current session. On the right-hand side, you can quickly access the settings for a user profile by clicking a name; the icon next to this cleans up the desktop, and the flag changes the language, last on the list are date and time settings.
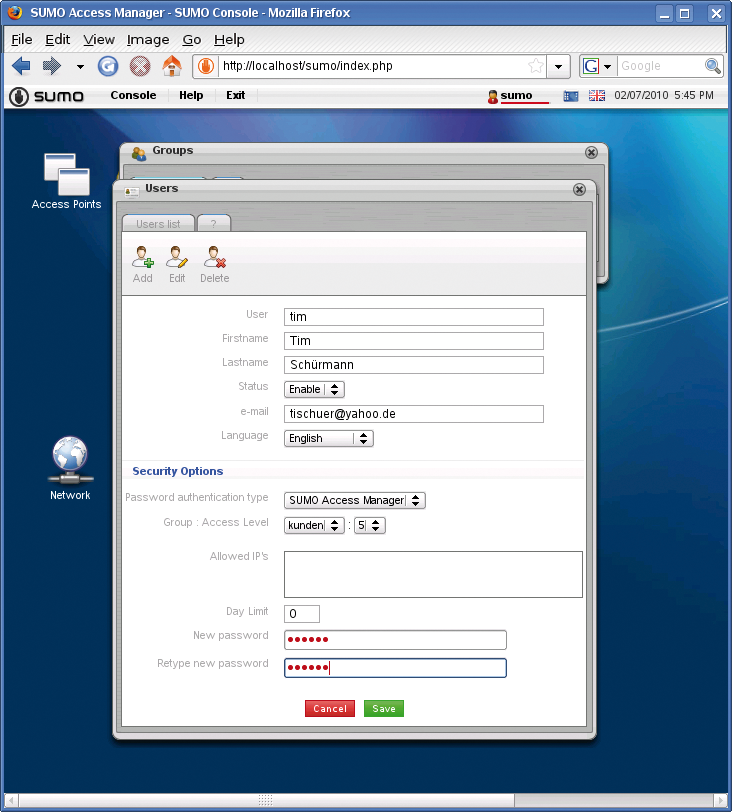
The first step is for the administrator to tell SUMO which users are allowed to access its own web application. As with most other user management systems, every user needs a unique username and will belong to one or multiple groups. For initial experimenting, a simple test user sitting on her own in a group will be just fine. To create the group, go to Console | Users and Groups, double-click Groups, and press Add: You just need a name for the group, say customers, and optionally a description. After clicking OK to create the group, you can create your test user and add the user to the group. To do so, double-click Users in the Console | Users and Groups window and press Add to get to the fairly lengthy form shown in Figure 6.
To create a user, you need to type a username (User); specify the user's real first name, family name, and email address; and set the language, which will be English in most cases. For the user to log in, you need to set Status to Enable. The Password authentication type defines the credential type or approach (see the "Alternative Login Methods" box). If you want SUMO to manage the account data, you also need to type a password in the two fields at the bottom.
Every user has certain rights. In a news portal, for instance, some users will have the right to read messages, and other users will be able to create messages. The access level, a numeric value, decides what rights a user has. Table 1 shows what access level a user needs for various tasks.
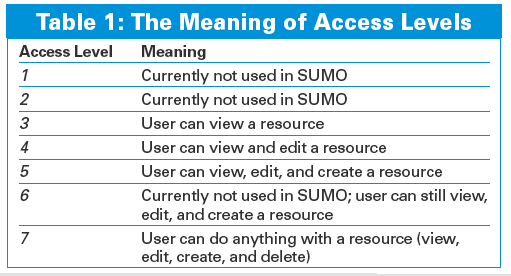
A special sumo group allows members to access the resources of all other groups. In other words, the sumo group is for the administrators. A member that additionally has access level of 5 or higher can create, modify, and delete groups via the SUMO console.
To add the new user to the customers group, select the group in the drop-down list beside the Group : Access Level heading (Figure 6). Table 1 shows you the access levels available for the user. If the test user is permitted to access the website from any IP address, leave the Allowed IPs box empty. To restrict access, type the IP addresses that are allowed to connect.
| Alternative Login Methods |
|
By default, SUMO will check to see whether a user's password is in its own database when a user tries to log on. If you want users to be able to use other services, such as a Google Mail account, you need to add this option explicitly. To do so, go to Console | Network, double-click Data Sources, and press Add. Type a description in Data source name (e.g., Google Mail-based login), then choose the required authentication type in Password authentication type - in this example, it is Google Mail Accounts. Next, fill out the fields at the bottom. SUMO typically needs access data for a database here. After pressing Save, you need to assign the new method to the lucky user by opening the user's profile (via Console | Users and Groups | Users; then, click on the user and press Edit) and selecting the required entry below Password authentication type. The user will only have this one option for logging in; the current version of SUMO doesn't give you a choice. |
After creating the test user, it's time to integrate SUMO with the web application. To do so, first locate the sumo.php file, which is in the sumo directory; on XAMPP, the path would thus be /opt/lampp/htdocs/sumo/sumo.php. The next thing to do is to find the website that SUMO will protect. In this example, the website will be confidential.php, which is directly below the web server's document root to keep things simple (this is /opt/lampp/htdocs if you have XAMPP). Following the example in Listing 2, you first need to enable sumo.php.
The second-to-last line in Listing 2 enables a logout option. If you want SUMO to protect multiple (sub)pages or PHP files, each one of them needs to integrate sumo.php, as shown here.
| Listing 2: Sample confidential.php File |
01 <?php 02 require "/opt/lampp/htdocs/sumo/sumo.php"; 03 echo "This text is confidential! <br />"; 04 echo "<a href='?sumo_action=logout'>Logout</a>"; 05 ?> |
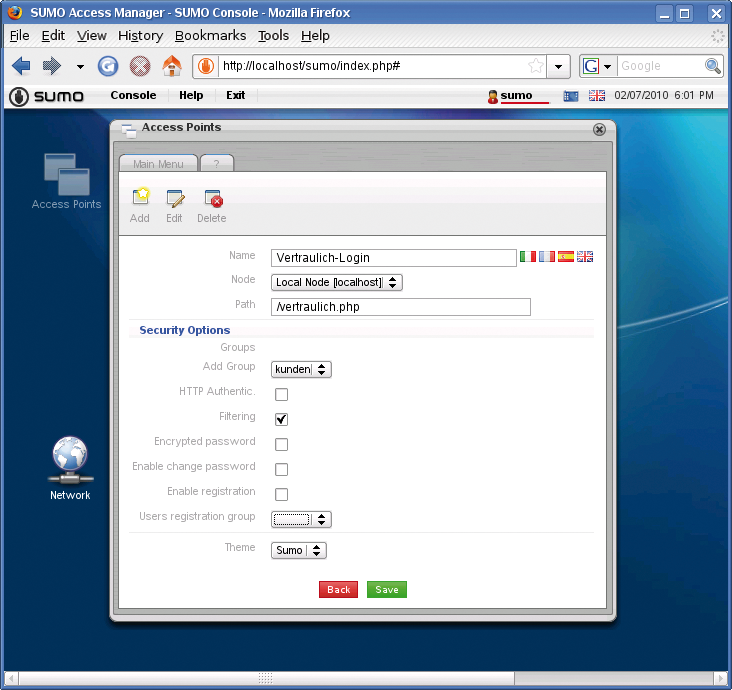
Finally, you need to tell SUMO the page on which your users can log in. SUMO refers to this location as an access point. This example has only the one page, confidential.php, so it has to double up as the access point. To use the SUMO console page as the access point, you would open the console page menu below Console, double-click AccessPoints, and press Add. In the form shown in Figure 7, type a name for the access point; the name will be shown on your own web application's login page later on. The page I want to protect is on the same server as SUMO; I can thus keep the Node setting of Local Node (see also the "One for All" box). The Path to confidential.php is /confidential.php in this example. Access to this page will be granted to all customers; to allow this to happen, you need to select the group in Add Group. After clicking Save to save the access point, you can quit the SUMO console by pressing Exit. If you didn't do so, you would be working as the administrator sumo, and the administrator will always be able to access confidential.php. Now call confidential.php in your browser as an unknown user - the address for this on the XAMPP installation is http://localhost/confidential.php.
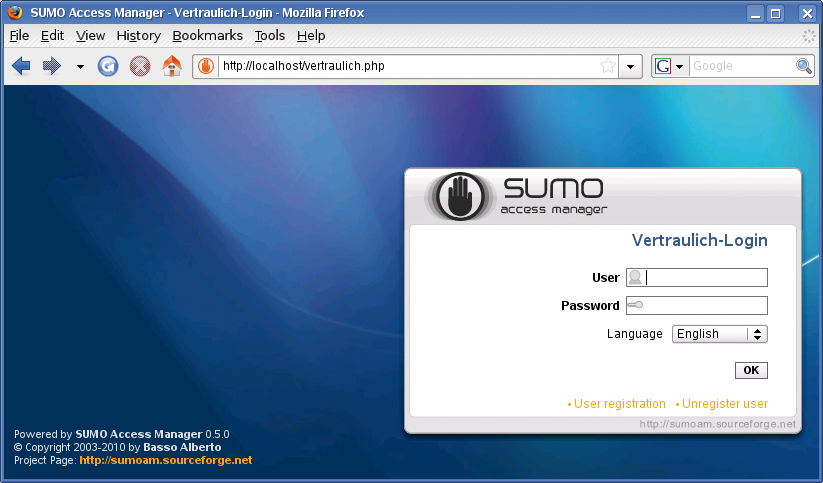
SUMO shows you the familiar login page, but this time it displays the access point name (Figure 8). Log in with your test user's credentials, and you should be able to access the confidential page (Figure 9). Clicking Logout will log the test user out.

| One for All |
|
Because multiple web applications that rely on SUMO for access management can use the same database, users can keep the same credentials to access, say, a shop, a forum, and a subsidiary company's Internet site. The SUMO network can be managed and maintained from any server running SUMO. If necessary, each node will pass its users' session data to all other nodes. In other words, a customer only needs to sign on once to use any connected service. From a technical point of view, the node creates a session ID that is unique on the SUMO network and stores the ID in a special database table.To register a node and announce it to all the other nodes, you need to launch the SUMO console and go to Console | Network; then, double-click Nodes, press Add, and fill out the form. |
Users of forums or social networks are allowed to create their own accounts. To tell SUMO to allow this, you need to access the SUMO console and go to the global settings in Console | Settings; then click Edit to pop up the Accounts dialog; check User registration, and press Save. Then go to the list of Access Points (via the Console menu) and open the settings for your access point - this is confidential-Login if you have been following my example. Press Edit to enable changes, and check Enable registration in the Security Options area. After you Save this, the login screen will have two new features: User registration and Unregister user, which users can click to create new accounts or to delete existing accounts.
SUMO passes the data for the logged-on user to a PHP application in the form of the $SUMO[`user'] array; the username is stored in $SUMO[`user'][`user'], for example. The sumo_verify_permissions($level, $group, $user) function ascertains whether the user in the $user string has access level $level and is a member of the $group group. If so, the function returns a value of true. Also, you can leave out some parameters. The instructions in the inner loop of this if construct are only executed if the user has access level 5 and is a member of the customers group:
if (sumo_verify_permissions(5, "customers"))
{
   /* ... */
}
The SUMO examples directory provides some simple and more practical examples. Working through the examples is important for any newcomer, considering the lack of SUMO documentation. If you want to customize the appearance of the login screen, the themes directory is a good starting point.
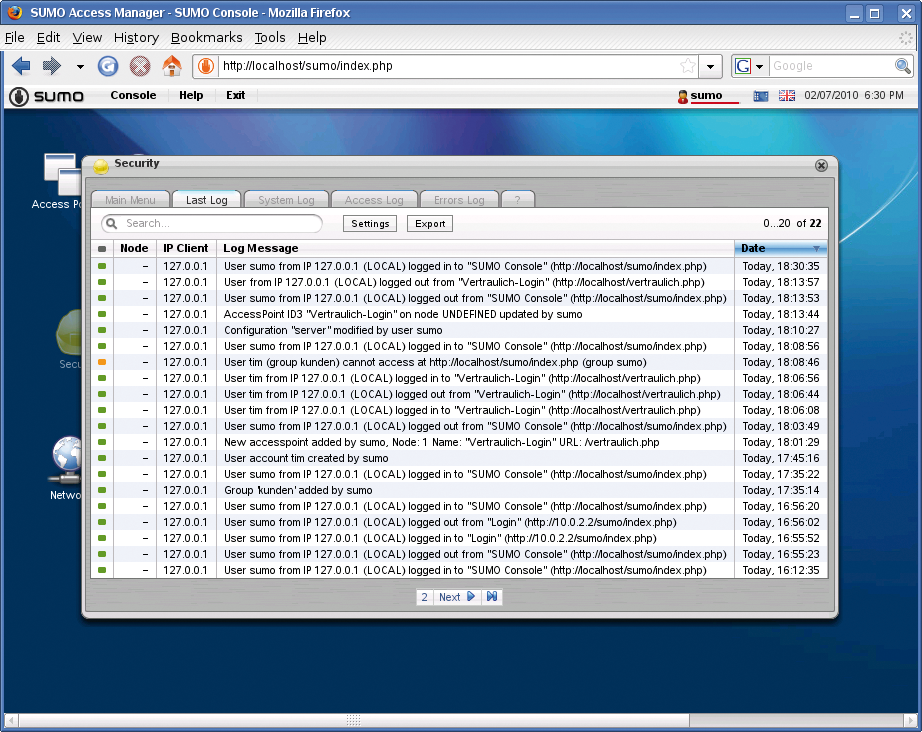
Once users start to work with the web application, you can access the SUMO console. Go to Console | Security and double-click Security to find the logfiles (Figure 10). Clicking Export lets you download the logs in Excel or CSV format. Console | Sessions shows the current activity.
SUMO lets you drop a PHP-based user management module onto a smaller web application. However, the access level model quickly shows its limitations for more complex projects: The seven default levels are not enough if you prefer a more granular management system.
| INFO |
|
[1] SUMO Access Manager: http://sumoam.sourceforge.net
[2] XAMPP: http://www.xampp.org |