
By Dmitri Popov
For most of us, personal information includes not only text snippets, but also links, photos, passwords, notes, and much more. That's why we often end up using different tools for different types of data: a photo management application for photos, a password manager for passwords, and a note-taking application for notes. Remus [1] aims to solve this problem by letting you keep heterogeneous personal information in one application.
Remus is written in Java, so the first thing you need to do is to ensure that the Java Runtime Environment is installed on your system. Just grab the latest version of Remus and unpack the downloaded archive in the directory of your choice. Then navigate to the resulting RIM directory and double-click on the rim executable to launch the application.
Remus's interface is split into three panes (Figure 1). The left pane contains two sections: Navigation (provides access to your data) and Tags (presents a list of all available tags). Additionally, a tool bar at the bottom contains the Calendar and Remote Repositories buttons. When you double-click on an item (or "information unit" in Remus parlance) in the Navigation section, the item's content is displayed in the main pane. Using the Viewer and Edit tabs at the bottom of the main pane, you can switch between the read and edit modes.
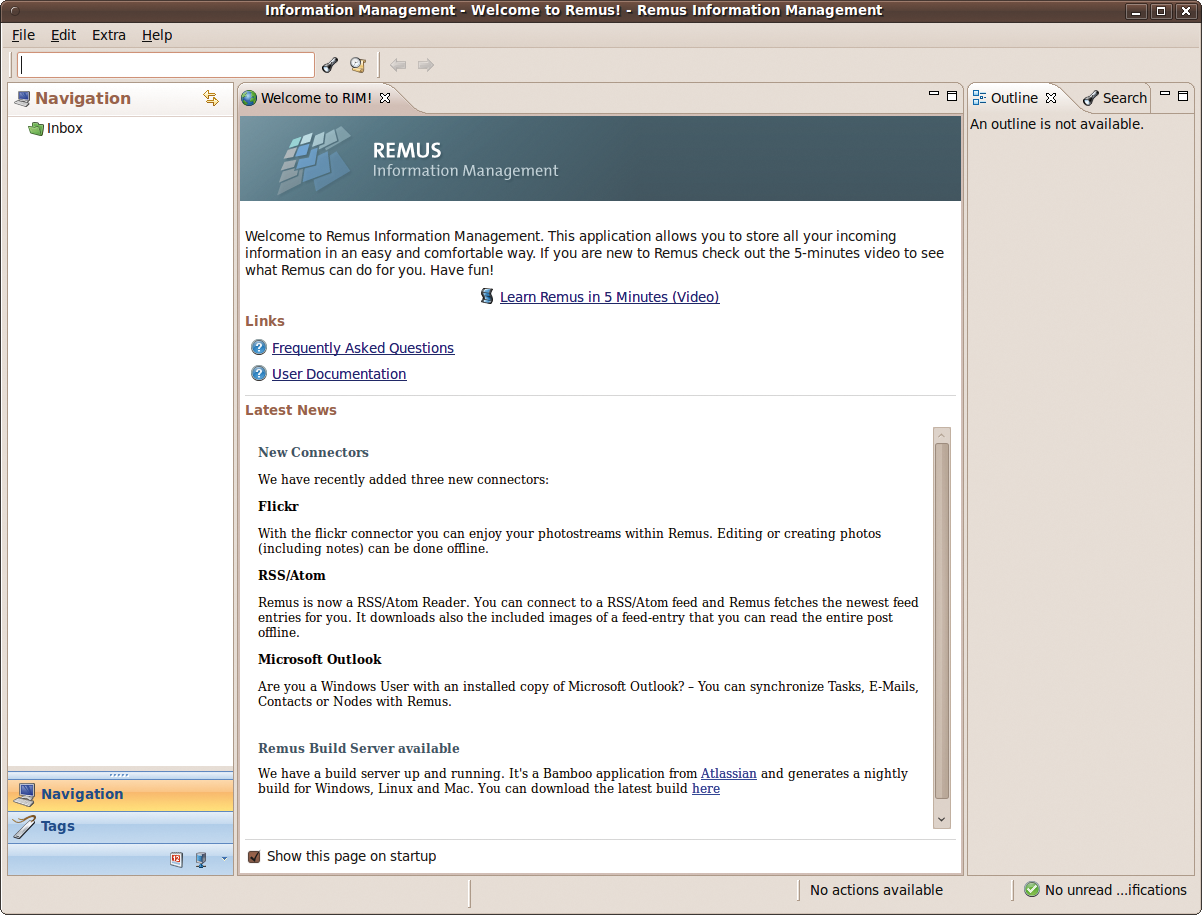
The main pane supports tabs, so you can use it to open and manage multiple information units. The right pane contains two sections: the Outline lists calendar events and links associated with the current information unit, whereas the Search section lets you perform searches.
All information in Remus is organized into so-called information projects, so the first thing you have to do is set up at least one project for storing your data. To do this, choose New | Information Project, give the project a name, provide an optional description and hit Finish. This way, you can create as many projects as you like. The next step is to add categories to the created project. Categories act as subfolders that you can use to group similar information units inside the project. For example, you can file your notes under the Notes category and bookmarks under the Links category. To create a category, right-click on the project in the Navigation section and select New | Category from the context menu, then give the category a name and press Finish.
Now you are ready to populate the project with data. Remus supports several basic types of information units, including contact, graphics, video, link, password, plain text, and source code. To start, I'll look at plain text. To add a new plain text item, right-click on the project in the Navigation section and select New | Plain text. Give the new note a name, assign relevant tags, provide an optional description, and press Finish. To edit the created note, click on the Edit tab at the bottom of the main pane.
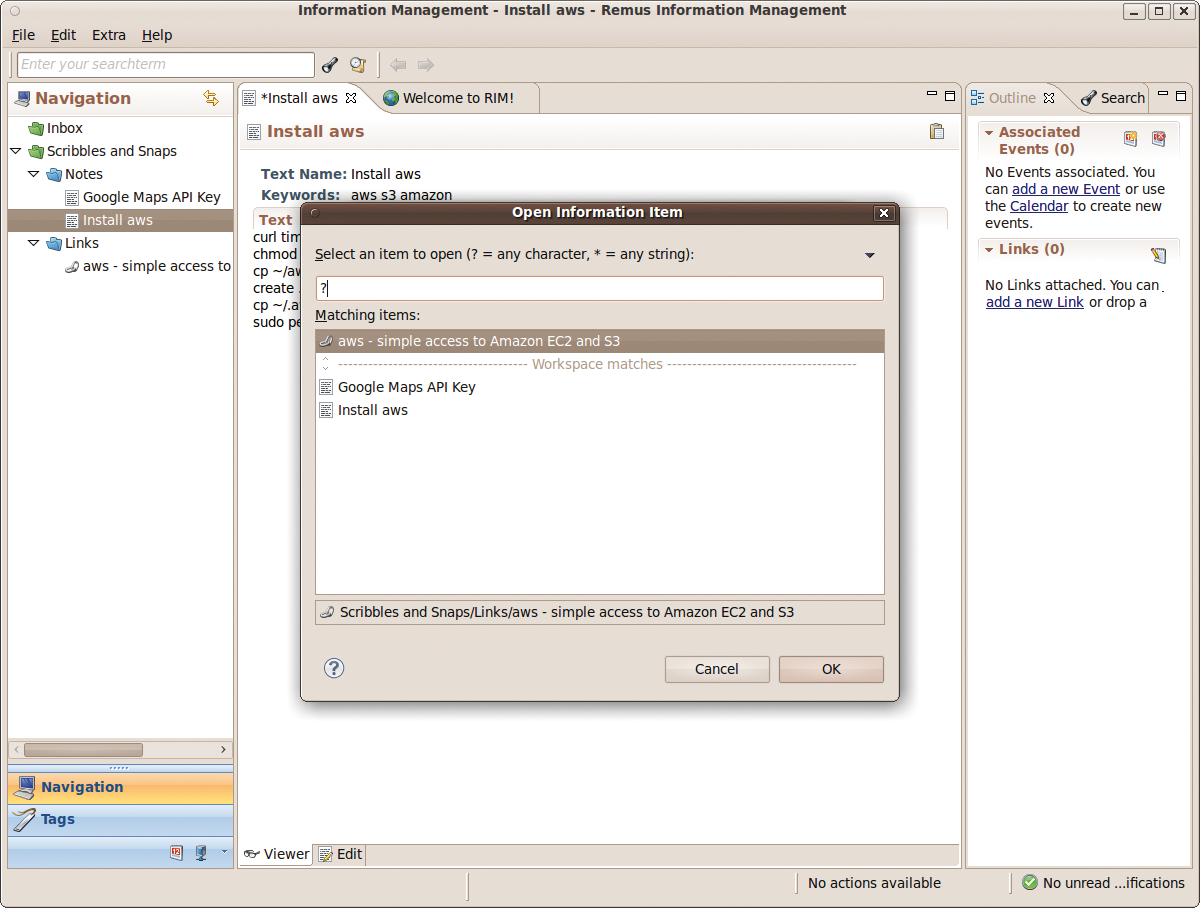
Besides grouping and tagging information units, you can link them together. Of the two ways to add a link to the information unit, the easiest is to drag the target unit onto the Links pane of the currently opened unit. If you need to add multiple links to the current unit, press the Edit Links icon in the Links section of the Outline tab and press the New button. To find the units you want, enter the desired search term, or type ? to display all available units (Figure 2). Next, select the unit you want and press OK, then repeat these steps for other units. In a similar manner, you can link the unit to a calendar entry. To do this, press the Add calendar entry icon in the Associated Events section of the Outline tab and add an event.
Besides basic information units like plain text, link, password, and others, Remus supports more complex units like rich text, meeting minutes, and tasks. To access them, right-click on the project of your choice and select New | Other. Here you can see a full list of all available information unit types.
A personal information manager (PIM) is not particularly useful if you can't find the data you need quickly and efficiently. That's why Remus sports several features that can help you to find the data bits you need with consummate ease. The search field at the top of Remus's window lets you perform quick searches (Figure 3). Just type the desired term and hit Enter, and you should see the search results in the main pane. To view all units containing a specific tag, use the Tags section. Finally, the Search tab in the right pane gives you access to advanced search features. Here you can specify complex wildcard, fuzzy, and proximity searches with the use of supported operators, or you can limit the search to specific unit types, dates, and projects.

Because Remus lets you store passwords with the password information unit, you can use the application to manage private data as well. But saving your passwords in the project where anyone can see them is not very wise. Fortunately, Remus supports so-called encrypted information projects. As the name suggests, information in these projects is stored as encrypted files.
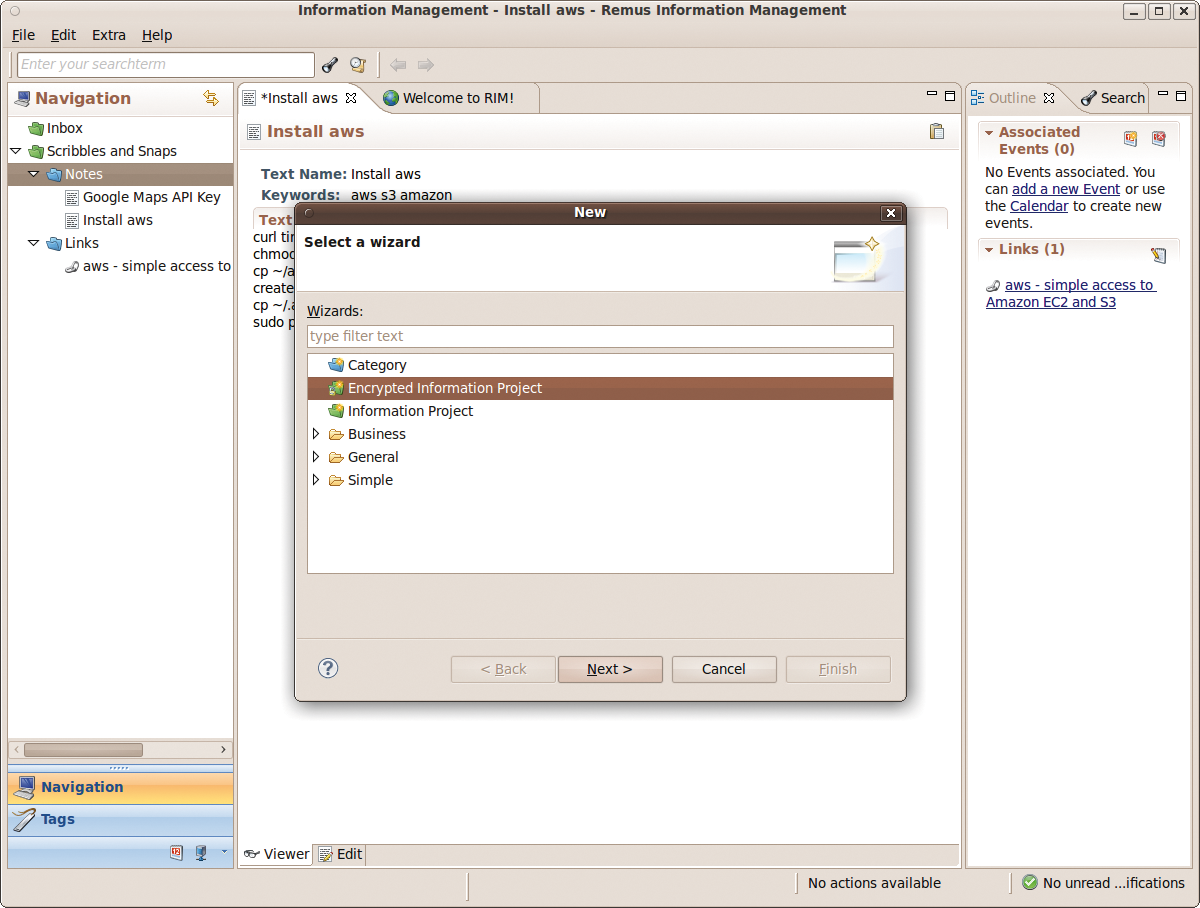
To create an encrypted project, choose File | New | Project, select Encrypted Information Project in the New Project dialog window (Figure 4), and press Next. Next, give the project a name and select the Password Protected Filestore option in the Available Security Add-ins section. Now press the Initialize Provider button, specify the desired password, and press OK.
Once the encrypted project is ready to go, you can populate it with information units in the usual manner. The next time you launch Remus, you need to activate the encrypted project to access it in the Navigation section. To do this, choose Extra | Security provider management, press the Initialize button, enter the password, and press OK. You should then see the encrypted project in the Navigation section.
As does any PIM worth its salt, Remus offers a well-rounded collection of tools for storing, managing, and searching personal data quickly and efficiently. But Remus boasts one feature that sets it apart from other PIMs. With the use of the Remote Repositories feature, you can connect Remus to a wide range of external sources. For example, you can connect Remus to your Twitter account and receive status updates directly in the application. Using Flickr? Connect Remus to your Flickr account, and it will pull your photos and store them in a project. In addition to that, Remus can handle YouTube, Google contacts, Delicious bookmarks, podcasts, and RSS feeds.
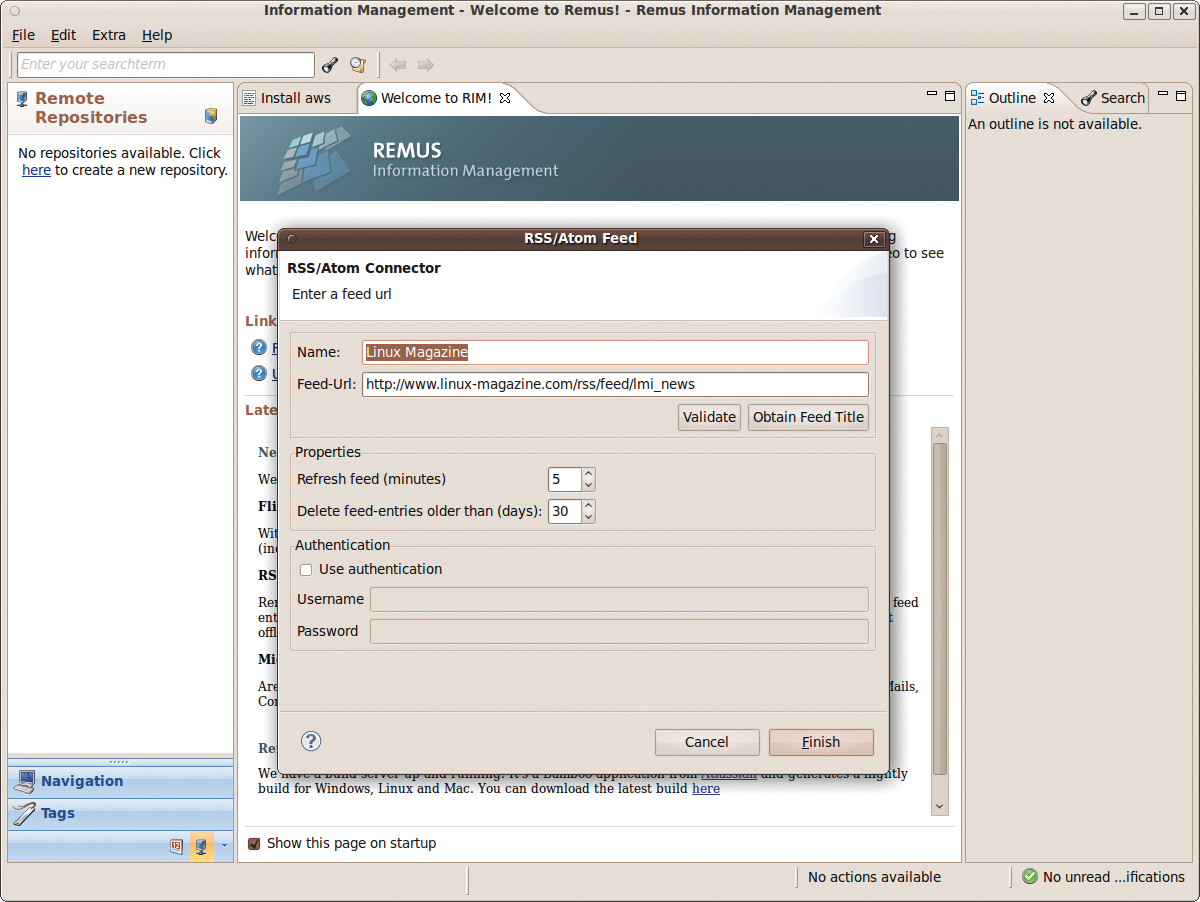
To see how remote repositories work in practice, I'll create an RSS repository that will allow you to read your favorite RSS feed directly in Remus. To begin, you might want to create a separate category like RSS Feeds under an existing project to keep things tidy. Then press the Remote Repositories icon in the toolbar at the bottom of the left pane and hit the Add New Repository button. Next, select the RSS/Atom Feed in the list of available repository connectors and press OK. In the RSS/Atom Feed dialog window (Figure 5), enter the feed link in the Feed-Url field and press the Obtain Feed Title button to grab the feed's title. Next, specify the refresh interval and the desired archive setting and press Finish. Now, you have to add the created remote repository to the project. To begin, right-click on the remote repository and select Checkout. Select the project and category you want (e.g., RSS Feeds) and press Finish. Switch to the Navigation section, and you should see the added RSS feed and its articles. When Remus imports RSS articles, it automatically indexes and tags them, so you can use the Tags section to find articles containing a specific tag quickly as well as perform searches.
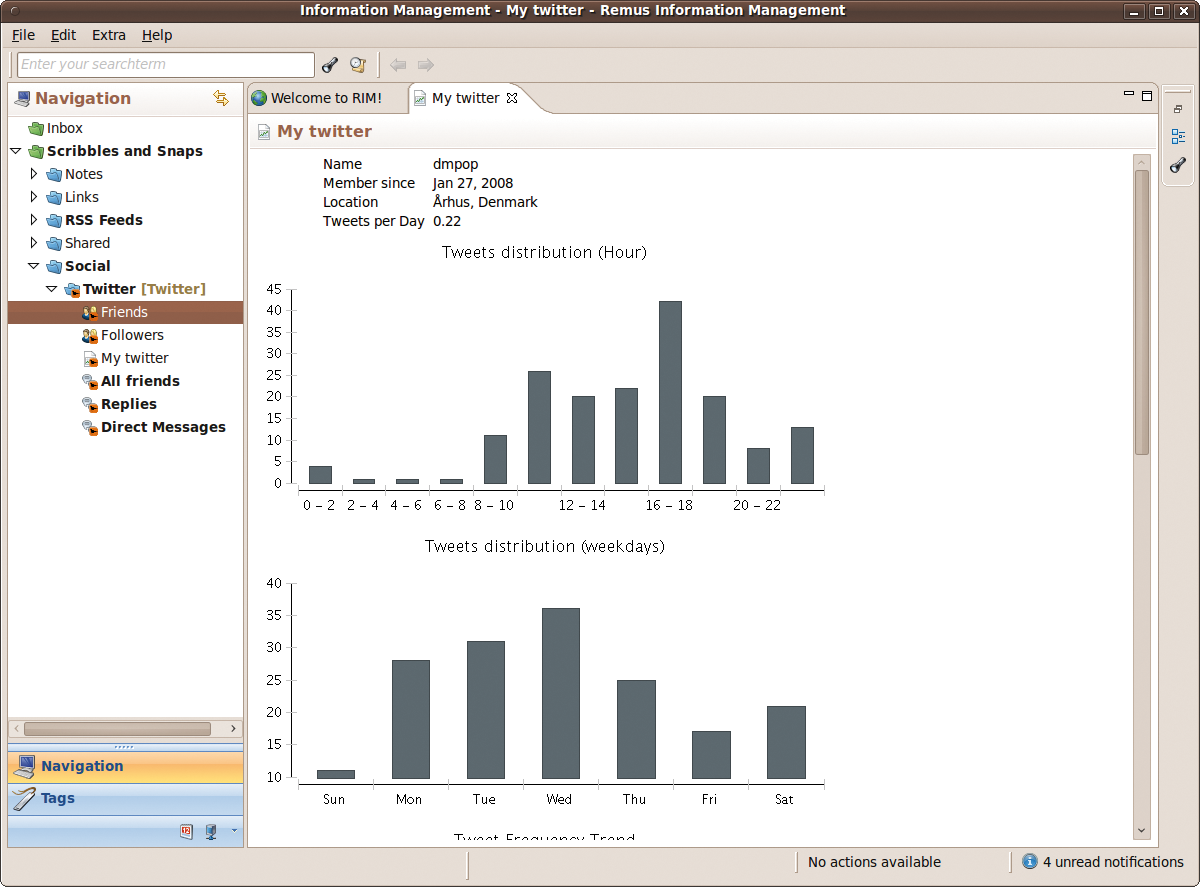
Also, you can add your Twitter account and use the service without leaving the convenience of Remus. Besides viewing and managing direct messages and status updates from people you follow, Remus lets you generate graphs based on your Twitter data. For example, double-click on the My Twitter item, and Remus generates charts (e.g., Tweets distribution, Top 10 Repliers, etc.) that you can use to analyze your Twitter habits and trends visually (Figure 6).
Remus can also use local and locally mounted directories as remote repositories, which can come in handy if you want to share files and collaborate on documents with other Remus users. Once configured, you can add information units directly to the shared directory or move them from other projects and categories. To keep data in the shared directory up to date, right-click on the shared directory and choose Remote Synchronization | Synchronize.
In many respects, Remus is a unique application among PIMs. In fact, Remus is so much more than just a mere PIM. Its ability to handle encrypted data and connect to a wide range of external sources makes it one of the most versatile productivity applications out there. Because Remus can handle heterogeneous data, you can use it to consolidate all your personal information in one application; add to this the customizable desktop panel (Figure 7), and your daily computing becomes more streamlined and efficient.

| INFO |
|
[1] Remus: http://remus-software.org/
|
| THE AUTHOR |
|
Dmitri Popov holds a degree in Russian language and computer linguistics. He has been writing exclusively about Linux and open source software for several years, and his articles have appeared in Danish, British, North American, German, and Russian magazines and websites. |