
By Juliet Kemp
With version control software, you can track the history of your project and revert any edits if you change your mind. Also, you can create and keep track of multiple versions, or branches, of your work. Software projects invariably use some form of version control, and increasingly more use Git [1]. Git was originally created by Linus Torvalds for use by the Linux kernel development team, but its flexibility, speed, and highly distributed structure has made it popular with all sorts of projects.
Git is designed to be highly distributed, very fast, and very flexible. "Distributed" means that unlike some other version control systems, such as CVS or Subversion, Git doesn't require one central definitive repository. Instead, all repositories have the same status, and any one of them can be updated against any other - which works well for highly cooperative projects [2].
One of Git's core features is that it is designed to support non-linear development: It expects changes to be merged repeatedly as they are passed around different reviewers and developers. This means that it's easy to merge branches, and even entire trees, regardless of whether they have any common ancestors. Unlike many other version control systems, Git makes it easy to merge unversioned files into an existing tree. This makes it great for projects with extremely distributed development, but it also gives it unparalleled flexibility for using on your own.
To begin, install the git-core package (on Debian/Ubuntu and Fedora) to get the basics; you might also want the git-doc package (documentation). Various other extension packages are also available, such as git-svn which allows Subversion interoperability, and gitweb, which provides a web interface. Alternatively you can install Git from source [3].
Once you've installed Git, it's easy to set up your first repository. Git's distributed nature means that each working copy carries its own repository with it (in the .git subdirectory), rather than living in a central location, as with systems like CVS and SVN.
So, if you have an existing directory that you want to put under version control, the process is incredibly straightforward:
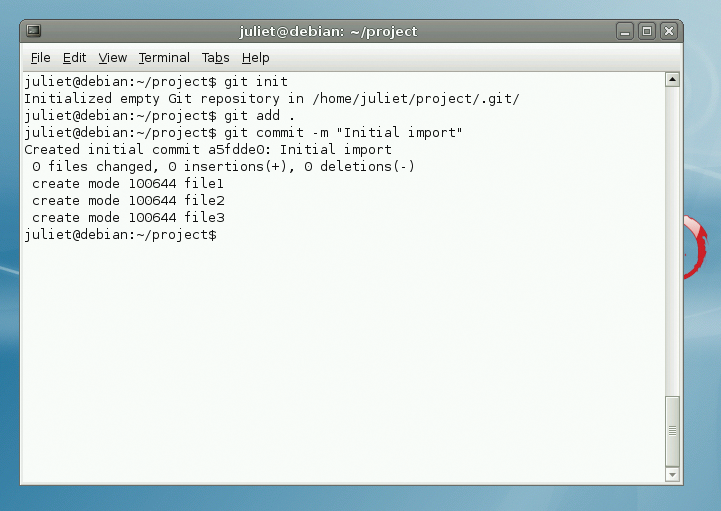
cd my_directory
git init
git add .
git commit
Once you have your Git-controlled directory (Figure 1), try adding another file (touch newfile); then, type git status. A message warns you that you have an untracked file. To add this file, type git add newfile, then git commit to commit the changes. This will open up a text editor for your commit message; to avoid this, you can instead use git commit -m "Message", which will add your message directly. The message will be recorded in the log, and it's a good idea to use a meaningful message in case you want to roll back a change later on.
To add all unadded files in a directory then commit them, type:
git add .
git commit -m "Message"
Now try editing one of the existing files, then type git status again, and you'll notice that the edited file is listed as "Changed but not updated."
Unlike some other systems, Git won't add an edit unless you explicitly tell it to. To add any already tracked files that have been changed, use either git add filename; git commit or git commit -a. This won't, however, add any untracked files (you must do this explicitly with git add).
Alternatively, you can delete your test file with git rm newfile.txt then git commit. If you've edited the file since your last commit, you'll be warned about this; to carry on with the delete anyway, use git rm -f newfile.txt.
If you type git status, it will give you the status of all files in the directory, which means that you can add any unadded files. However, you might have some files that you won't ever want to add (backup files or temporary files), which means that your git status output will always be cluttered up with files you don't need to see. These files also mean that you can't use git add . to add all unadded files, which slows down your workflow. The solution to this is to create a .gitignore text file in the current working directory with a list of the files you don't want Git to control or monitor. A sample .gitignore file might look like this:
.*.sw*
tmp
images
With these settings, files with names like .myfile.swp (temporary files that Vim uses have names like this) will be ignored, as will anything in the tmp/ or images/ directories.
If, after your experiments, you want to stop managing this directory with source control (i.e., stop it from being a Git repository), simply remove the .git directory with:
rm -rf .git
If you now type
git status
you'll be told that the directory is not a Git repository. Note that enjoying this ease of removal means that you must back up your repository!
At this point, you might see a warning message about your name and email address. All commits in Git have the committer's name and email address added to them.
Git does its best to get the information from your machine and work out these values, but they often will be wrong. To correct the information and to get rid of the warning message, set both your name and your email address manually:
git config  --global user.name Juliet Kemp
git config  --global user.email juliet@earth.li
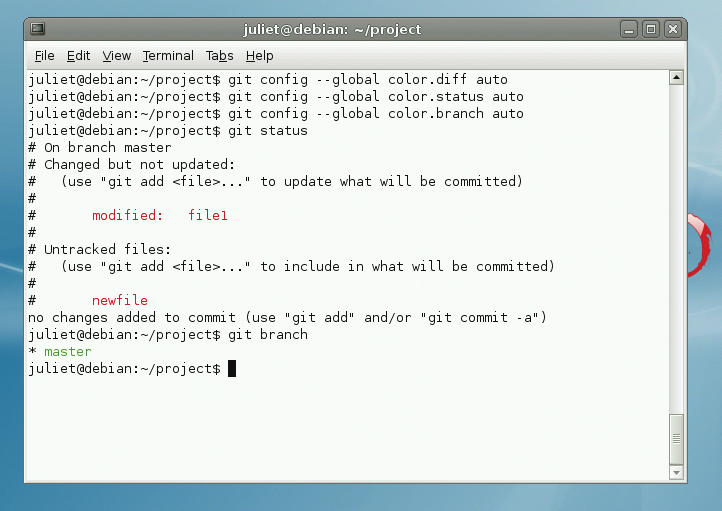
Obviously, if your repository is private, this won't matter. However, you have two good reasons to fix it anyway. First, it'll get rid of the annoying message; second, these properties are set globally. This means that once you've set them, they'll be used for all other Git repositories as that user on that machine. So, if you find yourself contributing to another project that uses Git, this will be the default username and email that identifies your commits. This can be overridden on a per-repository basis, as in Listing 1. Several other configuration settings are available. For example, you can set Git to use color in its diff, status, and branch output (Figure 2):
git config --global color.diff auto
git config --global color.status auto
git config --global color.branch auto
The user manual [4] or Git tutorial [5] has more configuration option info.
| Listing 1: Per-Repository Commit Settings |
01 cd /home/juliet/my_anonymous_repository 02 git config user.name Someone Else 03 git config user.email someone.else@gmail.com |
So far, I've looked at using Git for private projects, whether new or existing. However, if you want to get involved in an existing code project that uses Git, you'll need to import the existing code base from an external repository. Because Git is distributed, you can import from anyone's copy of a project repository, as long as they allow you access. However, most projects will, for the sake of convenience and ease of making releases, have a central repository from which you can import if you're starting out and which acts as the master version of the project.
Importing an existing project is just as straightforward as creating your own repository. To download the Linux kernel tree, for example, use the following:
git clone git://git.kernel.org/pub/scm/linux/kernel/git/torvalds/linux-2.6.git linux-2.6
(Warning: This tree is quite large and will take a while!)
Other Linux projects that use Git include GIMP, Debian, One Laptop Per Child, and Perl (see the Git page on Wikipedia for a longer list); their websites will direct you to their central repositories.
Once you have a copy of the project's repository on your local machine, you can start working on the code. Creating a branch for your changes is a good idea, and you can use git pull to update from the repository from which you originally cloned the code. Later, you might want to generate a patch of your changes to send into the project for review and inclusion. Branching, updating, and patching are all discussed in detail later in this article.
Like all version control systems, Git records a full revision history of your project by recording what was done at each commit. This means you can compare different versions, check actions in the past, and revert to an earlier version.
Several commands are available for use when looking at your project's revision history. The git show command shows the details of the most recent commit. It will tell you the revision ID, the author, date, commit message, and then a diff of the changes (Listing 2).
| Listing 2: Output fromgit show |
01 commit 351e8cf452b92ed591f19fdbd63023a68475a364 02 Author: Juliet <juliet@earth.li> 03 Date: Tue Mar 2 11:47:04 2010 +0000 04 Testing delete 05 diff --git a/newfile.txt b/newfile.txt 06 deleted file mode 100644 07 index e69de29..0000000 |
The git log command shows short lines of information about every commit in the revision history. To control which information is shown, check out the man page for options. The command git log filename can be particularly useful because it shows only commits that have touched filename. Also, you can get a much nicer one-line output with git log pretty=oneline. (Other options are short, medium, full, fuller, email, and raw.)
The commits have long alphanumeric IDs (e.g., see line 1 in Listing 2) that are the result of an interesting security feature in Git: The name of each commit is a hash calculated over the contents of that commit, which means the history is guaranteed (you can't change the contents of the commit without changing the name) and the name will be globally unique. Therefore, if you're working with others, you all know that you're referring to the same commit across all of your repositories. This can make revision numbers a little awkward to work with, but Git will autocomplete for you if you give the first few characters of the revision name, or you can cut and paste.
The git diff command shows differences between the most recently committed version and your current version. To see the differences between two previous commits, use git diff commitID1 commitID2. To revert (i.e., to cancel) a commit, use git revert commitID. Or, to restore your whole tree to the last revision, use git checkout. (Warning: This will overwrite all your changes!)
Git is hugely flexible, and the possibilities for branching and merging are almost endless. Branching (creating multiple "copies" of the same repository) means that you can separate out a set of changes while you're experimenting with them or create different versions of a project, without affecting the main tree. Branching in Git is quick and easy, and it's equally easy to merge back into the main tree, so it's worth doing whenever you're working on something new.
The basic branch commands are:
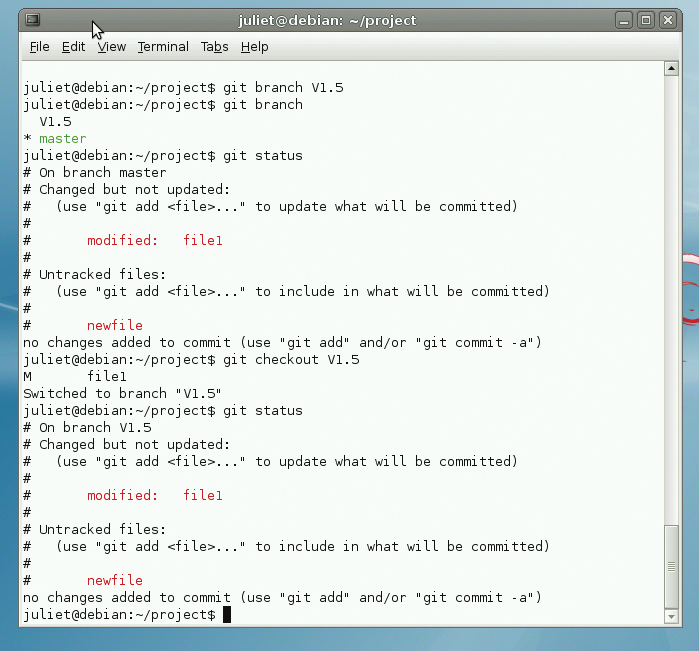
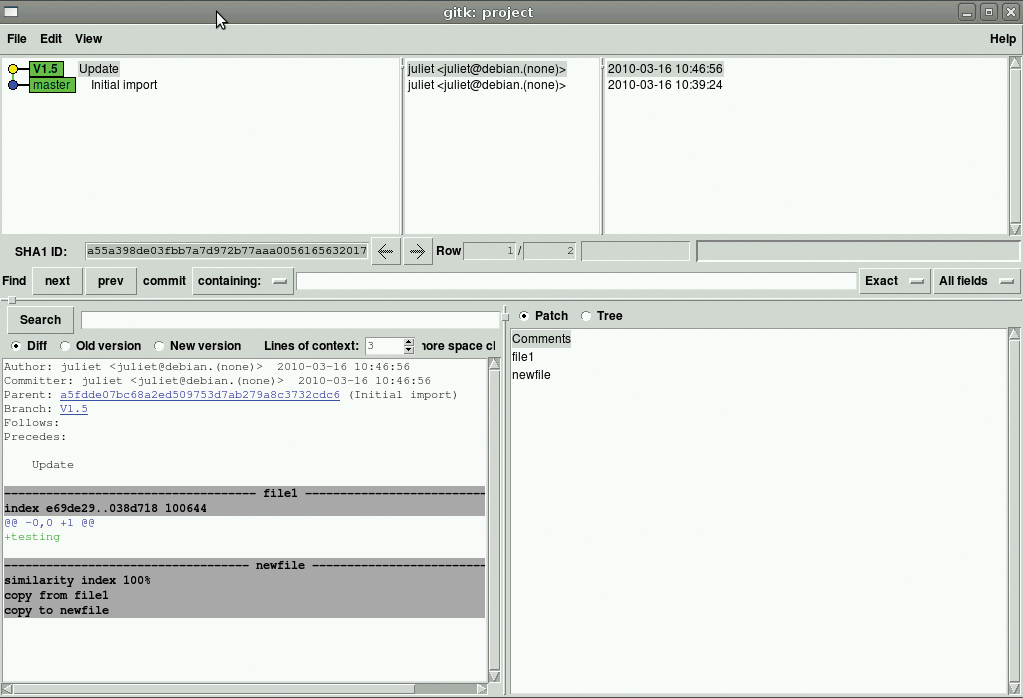
Say you want to create a new branch of your project and call it V1.5. The first thing to do is to create the new branch: git branch V1.5. Your repository now has two branches, but your current working directory still corresponds to the master branch (automatically named master). If you type git branch, you can see this - all existing branches will be listed, with an asterisk by the one currently in use (Figure 3).
To switch to your new branch and start working on it, type git checkout V1.5. The git status command will now show you this branch name with an asterisk by it. Make a change and commit it as normal, then use git checkout master to switch back to the master. Your change will no longer be visible. Switch back to the branch, and there it is again.
To merge branches back together, use git merge BranchName. This will merge BranchName back into the current branch (in the current working directory). So, in this example, switch back to the master (git checkout master), then type git merge V1.5 to merge the branch changes back into the master branch. V1.5 and the master branch are now identical, but git status will show you that the other branch still exists. Now you can go back and do more development work on V1.5!
Note that Git won't do a merge if you have uncommitted changes, because the merge will overwrite the existing working directory. (If you're not ready to commit, you can use git stash - see "Stashing Changes.")
When merging, if it's possible, Git automatically completes the commit for you. However, sometimes there are conflicts in files (i.e., changes that affect each other). In this case, the merge will fail, with information about which file(s) are problematic. git status also lists these files as unmerged. To resolve the conflict, open the problem files in a text editor. The relevant sections will be marked as in Listing 3.
Both versions of the file are shown, and you can choose how you solve the problem. Once you've editing the file, run git add file.txt for each conflicted file, then git commit to finish the merge commit. Alternatively, use git commit -a to automatically mark all conflicts as resolved. Make sure they really are resolved before you do this!
| Listing 3: Merge Conflicts Marked in a File |
01 test 02 <<<<<<< HEAD 03 this is the master branch 04 ======= 05 this is the V1.5 branch 06 >>>>>>> V1.5 |
If you are working with other people, you have a couple of ways to share your changes with them. One option is for them to import or merge directly from your tree. However, the usual approach is to generate a patch (a text file describing your changes to the project tree) and share that over email. Happily, the Git patching system makes this very easy.
Before you even start creating your changes, you should create a new branch to store them in - for example, with git checkout -b MyBugFix. Now you'll be working on the MyBugFix branch. (See the git stash command in the next section if you've already started working on the master branch.)
Once you've made and committed your changes, you need to make sure that your local repository is up to date with the rest of the project. Switch back to the master branch with git checkout master, then use git pull to update it from the repository from which you originally cloned your code base. Now switch back to the branch with git checkout MyBugFix, and type git rebase master. This will apply any changes that have occurred in the master branch to the MyBugFix branch. This updates the history so that your branch originates from the most recent version of the master branch. Of course, you might need to fix conflicts if they exist.
Now you're ready to create your patch:
git format-patch master --stdout > mybugfix-patch.diff
This compares the current working branch (here, MyBugFix) with the master branch and finds each commit that doesn't occur in the master branch. It outputs one patch per commit to stdout and then directs them all to the mybugfix-patch.diff file. Instead, you can use git format-patch master to generate one patch per commit in the current working directory or git format-patch master -o patchdir to save them in the patch directory. The patches are all formatted as email.
To apply someone else's patch, you can use git am. Again, create a new branch with git checkout -b SarahsPatch, so you don't confuse the patch with your changes. (Branches are easy to make and merge with Git, so use them!) Then, type git am sarahspatchfile.diff to merge the change, so you can have a look at it. With externally managed projects, you probably won't want to merge the change into your master branch until it's been accepted centrally (when you'll get the update the next time you do git pull). But, if it's a small project with just you and Sarah working on it and if you're happy with the patch, you can just merge the branch back into the master branch with git checkout master; git merge SarahsPatch.
Note that git am can also deal with patchfiles that have arrived in email. Just dump all your patches into a mailbox (in standard Linux mailbox format), then run git am mailboxfile to apply all the patches in the mailbox to the current branch. It uses the From: line of each message for the commit author name, the Date: line for the time, and the Subject: line for the title of the commit. The commit message will be the Subject: line plus the body of the email (up to the start of the patch). This format is used for git format-patch saves.
Another useful tool when generating patches or working on complicated projects is git stash, which is designed for those moments when you want to shuffle your changes off your existing tree, but you don't want to lose them (so you don't want to just revert to the previous commit) or to switch to another branch.
To save all your changes to the "stash" and return the project to the state of the last commit, use:
git stash save "work on project foo"
Make the minor fix and commit it as usual, then use git stash pop to put your saved changes back in.
The git stash command can be useful if you find yourself halfway through a big change then suddenly find a separate minor bug. To save out your changes, make the minor fix, commit that, and generate a patch, you can use git stash save "work on Big $Thing", then use git stash pop to return your saved changes to the tree. As you will have seen, git stash and git branch overlap - just think of the stash functionality as a lightweight kind of branch.
If you realize you've been working on the wrong branch, you can also use git stash. In this case, save the changes to the stash, switch branches, then pop the changes back off the stash into the new branch.
The git tag command enables you to attach tags, or labels, to particular commits. Tags are most often used to mark release points, but you can use them for anything you want. To see the list of tags in your current working directory in alphabetical order, just type git tag. To look for particular patterns, try git tag v1.* for tags that start with v1..
To add your own tag at the current point, use git tag -a:
git tag -a "April" -m "Start of April"
This tags the most recent commit with the name "April" and the tag message "Start of April" (leaving out the -m will fire up an editor for you to type your message). Typing git tag now shows you the tag name, and typing git show April shows you the tag information and the details of the most recent commit.
If you have a GPG private key, you can use this to sign the tag. Just use -s TagName instead of -a TagName, and you'll be asked for the passphrase for your key. To verify the signature on a tag, use git tag -v TagName.
Additionally, you can create a lightweight tag with git tag April that doesn't store a message or GPG signature. The git show April command will then show only the commit information, with no tag information. This can be useful if you just want a quick reference for a particular commit, rather than a long-term and more informative marker.
Finally, you can tag a commit other than the most recent by specifying the start of the commit ID. To find the ID, type git log, then use
git tag -a March -m "Start of March" ad829ce
to tag the commit whose ID starts with "ad829ce."
In this article, I've covered the basics of working with Git to the stage where you can usefully use it for your own projects or participate in bigger projects that use Git. Much more power is available, though! All the commands mentioned above are very flexible, and a wide range of options are available for all of them - check out man git-[tool] (e.g., man git-add for more information). All of the examples here have worked with the most recent commit or set of commits, but many commands take ranges of commit IDs.
Other nifty features for you to investigate include:
Be warned that, unlike a centralized system, Git doesn't provide any kind of "Backup Lite" solution: If you accidentally delete your working directory, your revision history is gone as well. (However, you shouldn't be relying on Backup Lite anyway; back up your data properly and regularly!) In a distributed project, though, other people will have the backup history.
Git is fast, usable, and incredibly flexible. If you're working on a highly distributed project with no definitive central repository, only published stable versions that can be treated as a particular branch or tag, it's particularly good, but it's also great for working on your own.
| INFO |
|
[1] Official Git website:http://git-scm.com/
[2] Email from Linus Torvalds discussing the advantages of a distributed system:http://lwn.net/Articles/246381/ [3] Git download: http://www.kernel.org/pub/software/scm/git/ [4] Git User's Manual:http://www.kernel.org/pub/software/scm/git/docs/user-manual.html [5] The official Git tutorial:http://www.kernel.org/pub/software/scm/git/docs/gittutorial.html [6] A Subversion-to-Git crash course: http://git-scm.com/course/svn.html |
| THE AUTHOR |
|
Juliet Kemp has been a sys admin for nearly a decade and is the author of Linux Systems Administration Recipes (Apress). She is a big fan of version control and has recently become a Git convert. |