By Nathan Willis
The buzzword du jour for movie theaters and home theater showrooms is "3D." Many Linux users are familiar with the professional-level 3D animation tool Blender; however, many animators don't want or need the complications of three dimensions. In fact, most of the animated content on television and the web - from children's programs to prime-time cartoons - is based on 2D animation, and Blender's 3D framework simply is not designed for supporting a 2D animation workflow. The data models, design tools, and rendering pipelines are completely different. So what's an animator to do?
For robust 2D animation, the open source Synfig Animation Studio [1] is the answer. Synfig was originally a proprietary program developed by Robert Quattlebaum for internal use at his animation house, Voria Studios. The Synfig project went open source in 2005, and it has since developed into a top-notch extensible app with a loyal user community. With Synfig, artists can create native 2D animations as easily as they can draw.
Synfig lets the artist focus on drawing key frames at strategic points in the timeline. The key frames position elements on the canvas as one would with a storyboard. The rendering stage generates all of the intermediate frames, smoothly interpolating between the key frames on the timeline. Synfig's editing tools work primarily in vector graphics, much like Inkscape, sK1, or Karbon14, but you can also import raster graphics, for everything from stationary backgrounds to animated elements. Sophisticated layer effects are also possible, such as blending, blurring, and masking.
Synfig is a Gtk+ application with no unusual package dependencies. The project website provides installers for 32- and 64-bit platforms in Debian and RPM formats and versions for Windows and Mac OS X. Many popular desktop Linux distros provide Synfig packages through their package management systems.
When you install Synfig, make sure you install the synfig and synfigstudio packages; synfigstudio is the graphical application, and synfig is a command-line-only tool that renders animations unattended. The latest version of Synfig is 0.62, released in October 2009.
Synfig Studio's interface has four main windows (Figure 1). The toolbox contains the drawing tools, File and Help menus, and color selector. Also included in the main view are a pair of palette windows. In typical usage, the vertical palette holds the Layers tab, Tool Options, Undo History, and other auxiliary tools, whereas the horizontal palette holds the Parameters tab and the Timetrack. In fact, you can drag and rearrange the placement of all of these tabs and windows; the default layout takes into account the ease of working with the parameters and Timetrack in a horizontal layout.
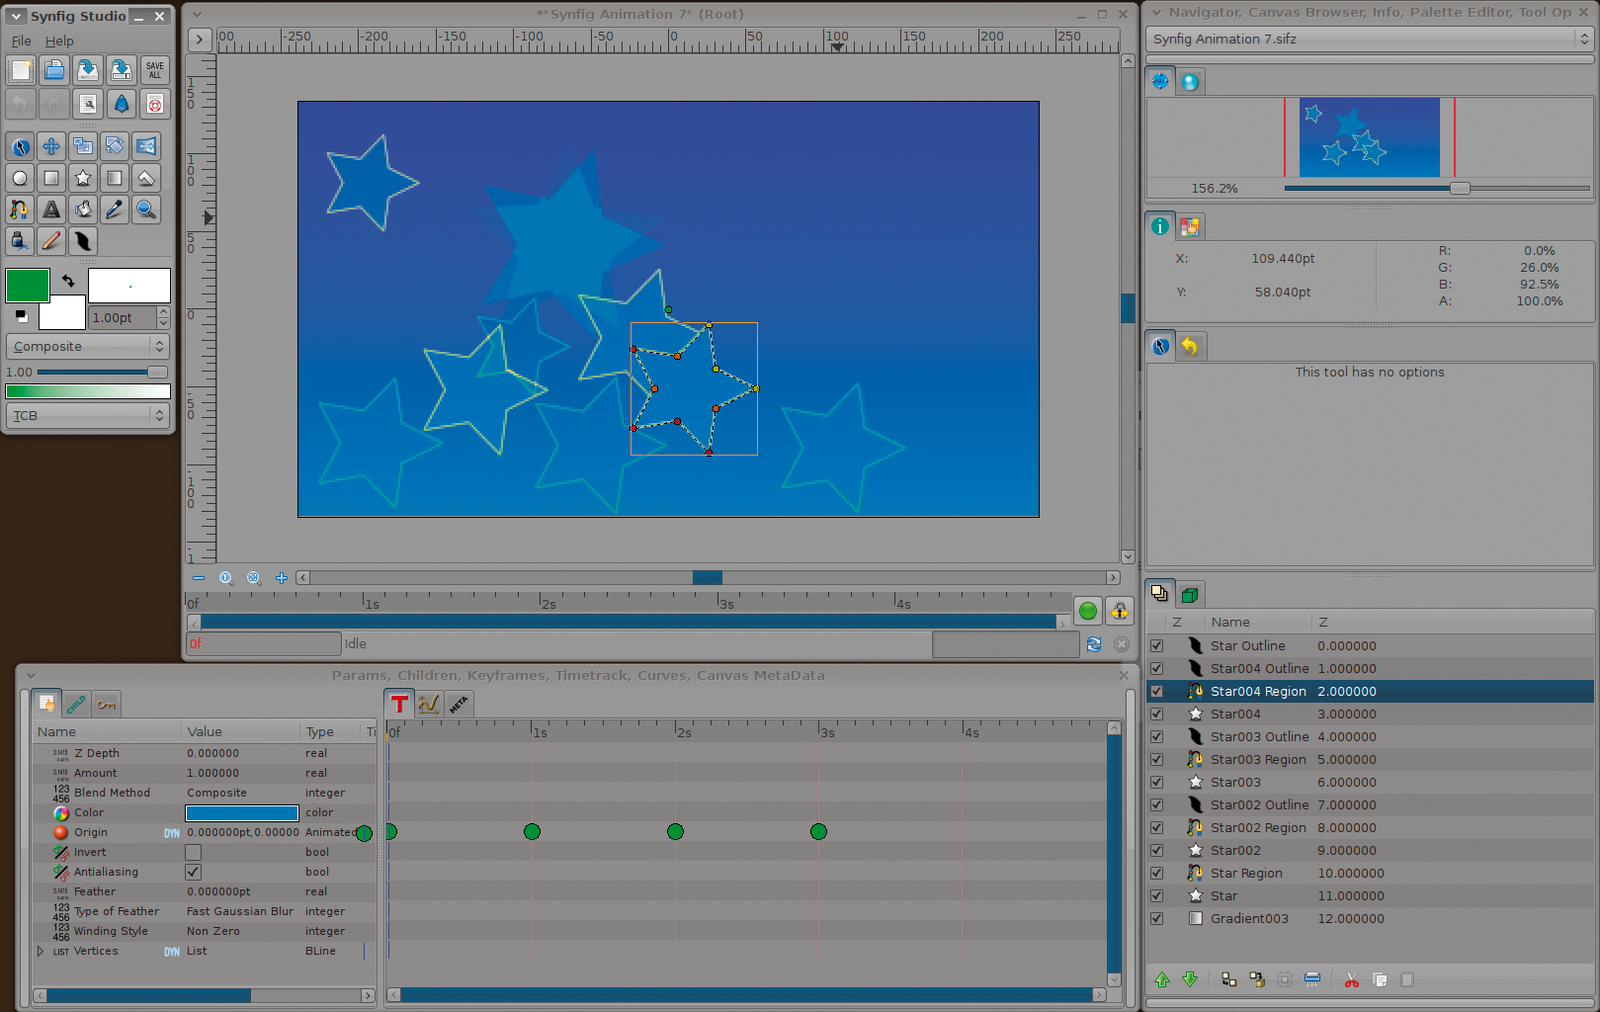
The final window is the canvas, where you draw and edit the images that appear in the animation. The canvas has rulers and zoom tools just as in GIMP or other image editing programs, but it also has a miniature timeline view across the bottom. This timeline displays an orange marker at the current frame location, so you always know where in the animated sequence you are making changes. By default, Synfig starts with a five-second timeline; you can alter this setting in Edit | Properties.
The tools include all of the basics you have come to expect from working in a vector editor: circle, rectangle, polygon primitives, spline, pen and pencil drawing tools, gradient, fill, and text, plus object adjustment tools like scale, flip, and rotate. Because Synfig is vector based, whenever you add an object, you will see not only the shape of the object as drawn on the canvas, but also the control points (or as Synfig names them, ducks) that define it; for example, a circle is defined by two points: one at its center, and one on its circumference. By grabbing one of the ducks and moving it, you can alter any previously added object.
The currently selected object is outlined on the canvas, and its parameters are displayed in the Parameters tab. In addition to its coordinates, these parameters include things like line width, fill color, and blend method. When you get to the animation stage, Synfig can change any of these parameters across key frames, so animation can control not just object movement, but shifting colors, fade-in, fade-out, blend, and other effects (Figure 2).
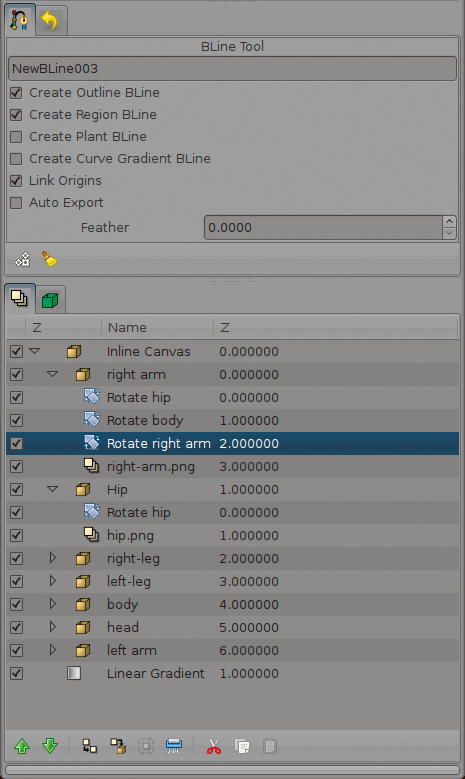
Synfig does have some editing quirks that differ from a static vector editor like Inkscape. For starters, every object you draw on the canvas becomes its own "layer" that you can manipulate and re-order in the Layers tab. In addition to object layers, you can add effects layers that alter the layers beneath them - adding blur or distortion and changing the color, opacity, or almost any other image feature. When animating your creation, you can manipulate these layers on the timeline. Synfig lets you encapsulate layers together so that effects applied to them do not affect every layer in the image, and you can link layers to ensure that they are not accidentally moved out of alignment.
In most vector drawing apps, a spline- or path-based object has both an outline and an interior, filled region. Not so with Synfig. Because Synfig's animation features might need their parameters adjusted separately, the Bline tool (which creates spline-based objects) creates outlines and interior objects as separate layers. The tool options allow you to toggle each type of layer on or off separately, in case you need just one or the other.
Once you are familiar with the drawing tools, you are ready to move on to animation. In general, Synfig's vector-editing capabilities are not as diverse as those of Inkscape or other full-featured editors, but they are quite powerful. The chief stumbling block is that complex drawings in Synfig generate long and potentially confusing lists of layers. Start off on the right foot by renaming your layers in meaningful ways, and learn to encapsulate and link the layers for greater clarity (Figure 3).
Old-fashioned "cell-based" animation required the artist to draw every frame or re-draw the moving elements in each frame. Synfig eliminates this process by asking the artist to draw only the critical frames (as in the start and stop points of motion). These critical frames are called key frames.
When you work on the canvas in drawing mode, you will see a green indicator button in the bottom-right corner of the window next to the timeline. Clicking on this button switches you to animation editing mode, in which you can make changes to the canvas tied to specific key frames on the timeline. The indicator turns red to remind you of the editing mode switch. To define an animation sequence, begin by creating your initial scene in drawing mode, then switch to animation editing mode and re-shape the elements to their desired positions at the critical frames.
The simplest form of animation is translating an object's position from one point to another. This cutout animation is a powerful technique that you will find in a number of animated creations, from TV's South Park to Terry Gilliam's surreal sequences from Monty Python. To animate a drawing with this technique, click on the Keyframes tab in the horizontal palette window. Right now, it is empty and the buttons are grayed-out. To enter animation editing mode, click on the toggle button in the canvas window; when you do so, the Add New Keyframe button will light up.
Clicking on the Add New Keyframe button makes Synfig add a new key frame to the list corresponding to the location of the marker in the canvas window's timeline. By default, whenever you are in drawing mode, this marker stays at the beginning - 0 seconds, 0 frames - but look to be sure before you add a key frame. If you have accidentally clicked elsewhere in the timeline, your new key frame could end up in the wrong place. Next, drag the marker to the end of the timeline, then add another key frame.
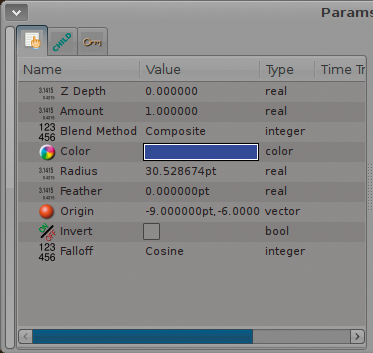
Next to the Keyframe tab in the horizontal palette is the Timetrack. The Timetrack is like the timeline in the canvas window, but it shows considerably more detail. Key frames are denoted by a vertical line at the appropriate time point. More importantly, if you select an object that undergoes any changes during the animation, the Timetrack will show you exactly which of its attributes change, and by how much.
To see an example, click on the Object Parameters tab. A circle will list nine parameters: Z Depth, Amount, Blend Method, Origin, Color, Radius, Feather, Invert, and Falloff. If you moved the circle between key frames, the Origin parameter will have a green bullet next to it in the list, and its Type will be Animated. The Timetrack tab shows these bullets as well on the same row as the affected parameter. Translating a circle to a new position only affects its origin, but if you also alter the color, radius, or other parameters, you can see the changes are marked in the Timetrack as well (see Figure 5).
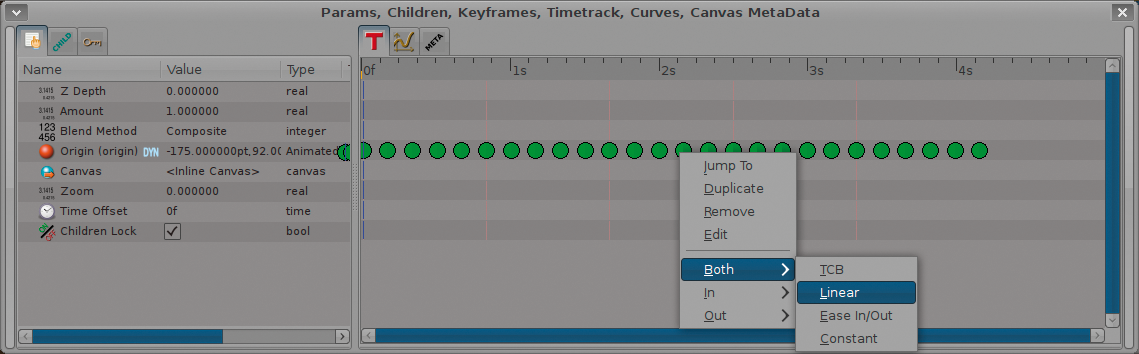
The bullets are called waypoints, and you can adjust them on the Timetrack to tweak the behavior of any particular change in the animation. Right-clicking on a waypoint changes its interpolation method (smooth, sudden, linear, etc.). Dragging it to the left or right adjusts when it takes effect. For even more control, you can create additional waypoints from the right-click menu and place them between key frames; this allows precision changes on important parameters without the need to create new key frames for the entire drawing.
| Jump! |
|
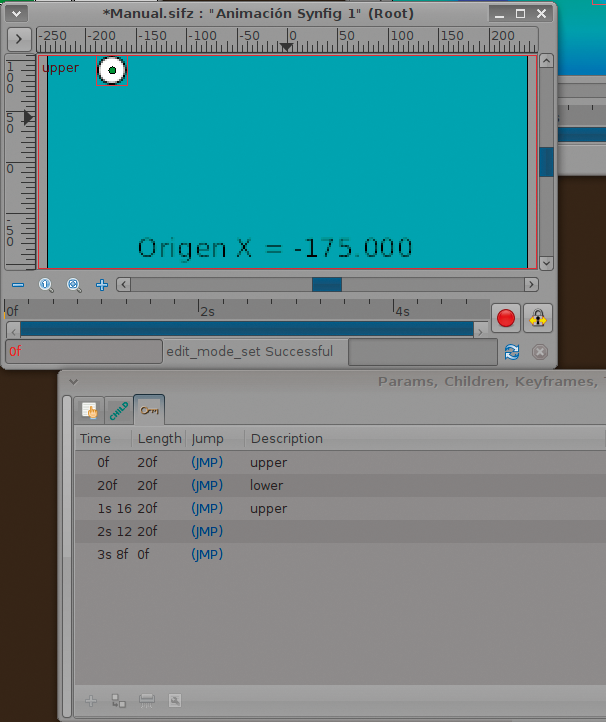
Jump links are shortcuts you can use to navigate quickly between frames (Figure 4). If you click the JMP link beside the last frame, any changes you make to objects in the canvas will be pegged to this key frame. To move an object, grab it with the mouse and drag it to its new position. When you jump to the starting key frame to check your starting position then click on any point in the timeline, Synfig will calculate the correct position between the key frames and show you the result. To watch a low-resolution preview of your newly minted creation, choose File / Preview from the canvas window. |
As much fun as cutout animation is, it is hardly state of the art. What is more interesting is to create animations that move with fluidity; morphing the size and shape of vector objects in a more realistic manner. For this, Synfig features several advanced tools and techniques.
Most complex animated drawings are likely to be composed of spline objects, rather than geometric primitives. Synfig allows you to encapsulate and group splines together for easier editing and allows you to link them, so when one moves, the others move with it. Synfig's choices in parameters - which might look odd for those used to editing still vector artwork - are designed to facilitate animating effects. For example, the Amount parameter controls what is usually referred to as an object's alpha transparency.
The same goes for the decision to implement blur and distortion as separate layers, rather than as effects applied to an object. By making the effect a layer of its own, you can manipulate the parameters in the Timetrack independent of other objects, which allows you to "fade in" a blur effect, perhaps to simulate a changing depth of field. Synfig can also display an "onion skin" view of the canvas, which renders semi-transparent overlays of the animation key frames to help align complex movements.
Sometimes direct morphing between start and end points of a movement is not the most natural motion. Synfig lets you map a layer's movement to a spline, thus giving it the power to move in arbitrary directions. Also, you can define motion in terms of arbitrary mathematical expressions - any layer's parameter can be "exported" as a variable, which you can then incorporate into expressions in the Parameters tab. A good example of this technique is the Parabolic Shot animation tutorial on the Synfig wiki [2].
Synfig's workflow is based around a single canvas, which corresponds more or less to a single "shot" in a longer animated piece. But Synfig can combine multiple animations into a single composite file, even overlapping playback so it functions as a down-and-dirty video editor.
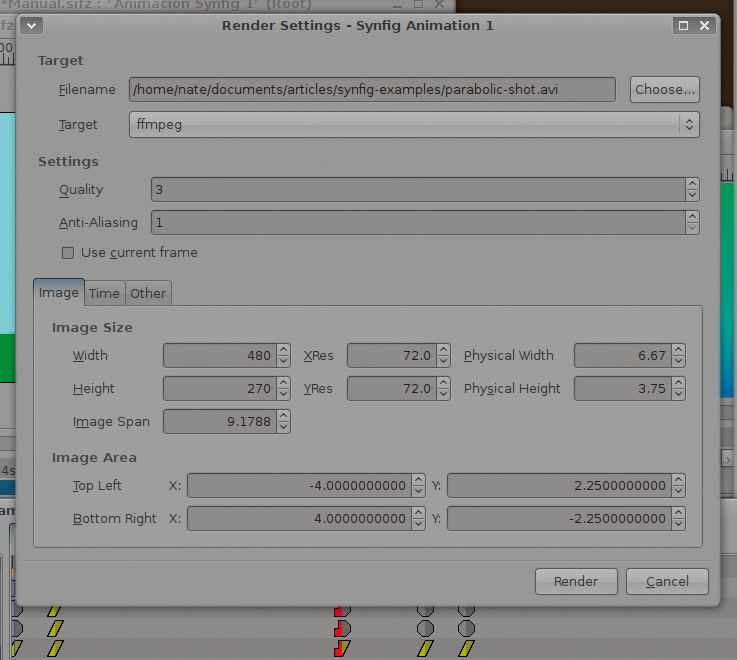
To see the end result of your work, you need to render it. The Preview option mentioned earlier can only give a rough idea of timing and visual effects - final output is always higher quality. Synfig supports about 15 different output profiles, targeting several distinctly different use cases. For video, you can use FFmpeg or libav to create MPEG, AVI, QuickTime, or Flash video files. Synfig can also produce raw DV video, which is useful for further editing in a non-linear video editor.
Synfig can also create animated graphics, including animated GIFs, animated PNGs, and MNGs. Additionally, it can export still frames in a wide variety of formats, from TIFF and JPEG to less common options like the high-dynamic range OpenEXR format created by Industrial Light & Magic for their production needs.
In any case, rendering output is not a one-click affair. Because Synfig's graphics are vector-based, you can (and indeed must) specify an output size at the rendering step. To achieve different aspect ratios, Synfig can crop the output dimensions at render time without altering the original animation (Figure 6). Additionally, you can control the frame rate, which is helpful if you are targeting a particular medium for your output.
Finally, although you can combine your video output with an audio track in another application, Synfig can also do it for you at the rendering stage. Support is still lacking for editing audio during the animation editing process, but if your audio and video are synchronized, you can pull the audio into your final product when you render it from Synfig.
Even on fast computers, rendering long sequences can take a considerable amount of time. Although it does not have to do as many floating point calculations as a ray tracer or other 3D renderer, Synfig does render and composite multitudes of vector objects and effects for every frame.
The latest release was the first to support multi-threaded execution, which can speed up rendering, but some users have reported bugginess when using the feature. To save time, you can also use the command-line version of Synfig or run multiple render sessions separately on different files.
Synfig has a growing community of artists and developers contributing to its continued evolution. The project hosts an active web discussion forum and two mailing lists. Recent additions to the code base have added support for creating and animating particle systems, panning and zooming the "camera" view, and controlling the timing of interpolation.
The project wiki is a source of excellent documentation; a user's manual, command and tool references, and more than a dozen in-depth tutorials are available online to help new users learn their way around the drawing tools and Synfig's animation techniques.
The site also has resources that focus on the creative aspects of working with Synfig. One of the discussion forums is dedicated to artist talk, and the main website regularly features news items showcasing finished products produced with the application. Some of these products are animated shorts uploaded to YouTube or other video-sharing services, and others are large-scale, professional-caliber work. One such noteworthy effort is the Morevna project [3], which involves a team of artists and developers creating feature-length anime based on a Russian folk tale. Also, you can find examples showing how to use Synfig to create simple animated logos for use on the web.
Regardless of what your needs or creative aspirations are, the odds are that someone else is doing something similar with Synfig. The best news is that even if you have never done any 2D animation, Synfig's model for drawing art and manipulating animated effects is easy to learn, leaving you to focus your energy on creativity.
| INFO |
|
[1] Synfig home page: http://synfig.org
[2] Parabolic shot tutorial: http://synfig.org/wiki/Parabolic_Shot [3] The Morevna Project: http://morevnaproject.org |
| THE AUTHOR |
|
Nathan Willis is a freelance journalist who writes about Linux and open source. |