
By Dmitri Popov
Some applications are easier to classify than others. For example, OpenOffice.org Writer falls neatly under the word processor category, whereas GIMP is a classic example of an image editor. But some applications can be tricky to categorize - case in point: TreeLine [1]. This hybrid application combines the features of a traditional outliner and a free-form database, which might sound like an awkward mix, but it offers a unique way to store and manage all kinds of data, such as addresses, bookmarks, research notes, and everything in between. Using TreeLine's outlining capabilities, you can easily group and manage the heterogeneous data stored in the database.
To install TreeLine on Ubuntu, you can get the version available in the Universe software repository with the Synaptic package manager or via Ubuntu Software Center or by executing sudo apt-get install treeline. After it's installed, the application is available with Applications | Other | TreeLine. Note that the Universe repository contains the older version of TreeLine, so if you want to install the latest and greatest version, you have to do this manually.
Fortunately, installing TreeLine is not particularly difficult. TreeLine is written in Python, so make sure that Python is installed on your machine. Besides Python, TreeLine requires a few extra software packages, including Qt, PyQt, and an XML parser. To install TreeLine, download the latest tarball and unpack it. In the terminal, switch to the resulting directory and run the python install.py command as root. This installs TreeLine, and you can launch the application by running the treeline command.
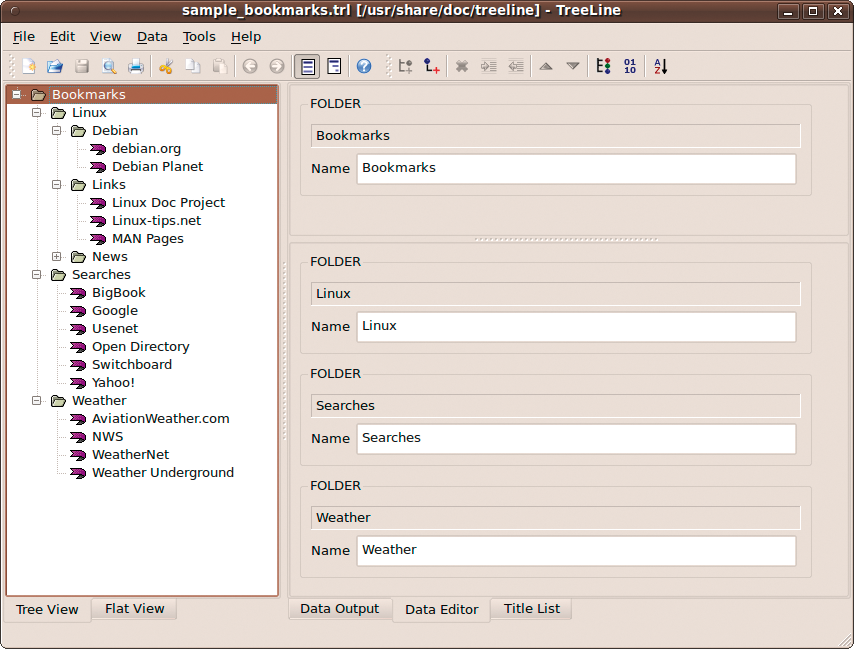
Despite its deceptively simple interface (Figure 1), TreeLine is a rather complex application, and the best way to come to grips with it is to examine a few bundled sample files. In TreeLine, choose File | Open Sample and open the sample_bookmarks.trl file. To start, I'll take a closer look at the interface. The application's main window is divided into two panes. The View pane to the left displays the records as a hierarchical tree, similar to an outliner, or as a flat list. By clicking on the Tree View and Flat View tabs at the bottom of the pane, you can switch between the two viewing modes. The main pane features three modes of its own. In Data Output, you can view records according to a user-defined output layout. The Data Editor mode allows you to edit records, and Title List mode lists all records in a specific folder. To switch between the different modes, use the tabs at the bottom of the main pane.
If you've ever worked with an outliner, using TreeLine won't be a problem. Each record in the database acts as an outline item, and all records are organized into a hierarchy of nodes. This approach provides a simple yet flexible mechanism for organizing data in the database. Using the Edit | Add Child command, you can add a record to the currently selected node. For example, if you want to add a bookmark to Linux - Debian, select the node and choose Edit | Add Child (or use Ctrl+A). Alternatively, you can select any bookmark in the node and choose either Edit | Insert Sibling Before or Edit | Insert Sibling After. Using the available commands, you can also move records up and down as well as indent and un-indent nodes.
Once you've familiarized yourself with TreeLine, you are ready to take the next step and create a database from scratch. For this exercise, I'll create a simple article tracking database that you can use to keep tabs on your article assignments.
In TreeLine, create a new database file by choosing File | New. Select the Default - No template - Single line text item from the template list and press OK. The created database contains only one default node named Main, so the first order of business is to define additional data types. To do this, choose Data | Configure Data Types.
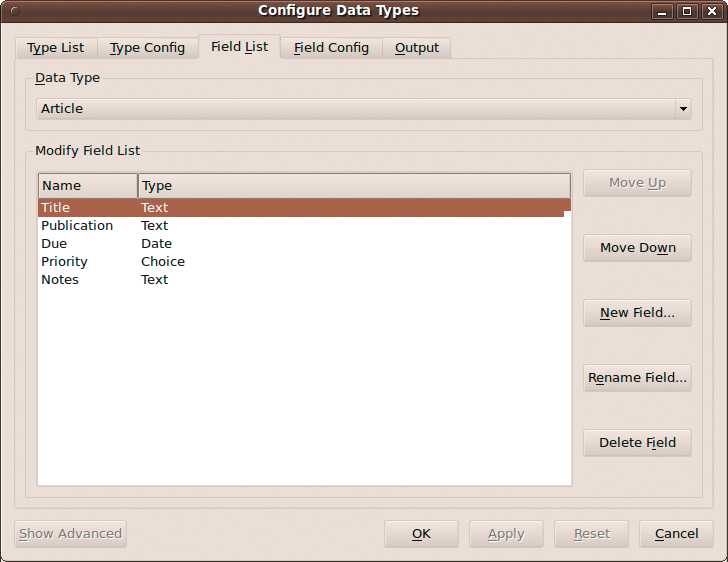
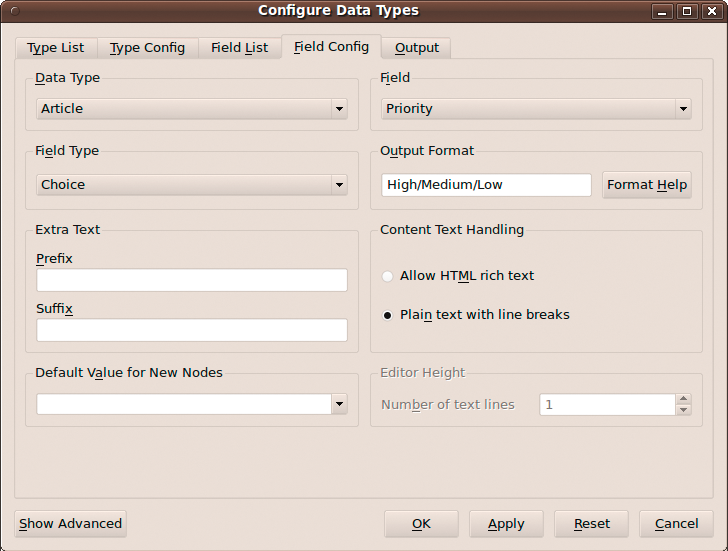
For starters, you have to create a new data type, Article, that contains several fields to keep track of your article assignments (e.g., Title, Publication, Due, Priority, and Notes). To create the Article data type, press the New Type button in the Type List section, give the new data type a name (e.g., Article), and press OK. Next, you have to add fields to the created data type. Switch to the Field List section, press the New Field button, give the new field a name, and press OK (Figure 2). Repeat these steps to add other fields. By default, every new field's type is set to Text, which works fine for fields like Title, Publication, and Notes. But TreeLine offers other field types, including Date, Time, Choice, URL, Email, Picture, and more. This lets you create rather flexible data types. For example, you can set the Priority field to the Choice type, containing the Low, Medium, and High items. To do this, select the Priority field, switch to the Field Config section, select Choice from the Field Type drop-down list, and specify the available list items (e.g., High/Medium/Low) in the Output Format field (Figure 3). Also, you can specify other options for each field type. For instance, you can Allow HTML rich text editing in the Notes field and set its size to 7 lines.
In the Type Config section, you can specify the default child data type for each field. This feature allows the system to set the child node's data type automatically depending on the data type of its parent. Here is how it works: Say each article can contain a number of tasks. For example, you might have a record called TreeLine article, which you can break into several tasks like Research, Draft, and Proof. First, create a new Task data type and a set of fields (e.g., Title and Completed). Second, switch to the Type Config section, select the Article item from the Data Type list, and then select Task from the Default Child Type drop-down list. Next time you add a node to the current article, the new node's type will automatically be set to Task.
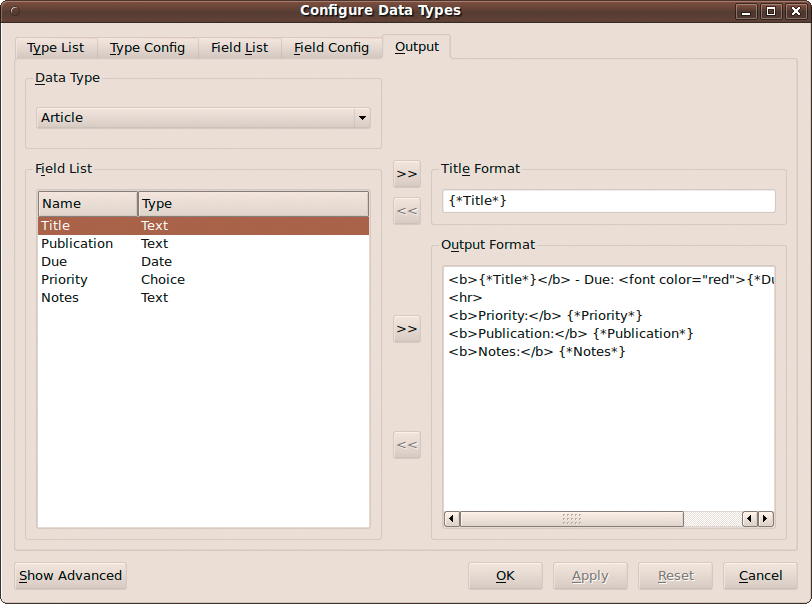
Once you're done adding fields, you might want to specify the way the content of the nodes is displayed in the view mode. To do this, switch to the Output section and create a template by moving the desired fields to the Output Format section (Figure 4). The result might look like this (note that you can use HTML for rich formatting):
<b>{*Name*}</b> - Due: <font color="red">{*Due*}</font>
<hr>
<b>Priority:</b> {*Priority*}
<b>Publication:</b> {*Publication*}
<b>Notes:</b> {*Notes*}
Later, when you click on the Data Output tab in the main pane, you'll see the content of the currently selected node formatted according to the specified template.
Your basic article tracker is ready to go, and you can start using it to manage your articles. How you organize the records in the database is completely up to you. For example, you might want to create Today, Tomorrow, This Week, and Some Day nodes and use the available command to move the articles around. Alternatively, you can create nodes for each month, or you can group your articles by their priorities.
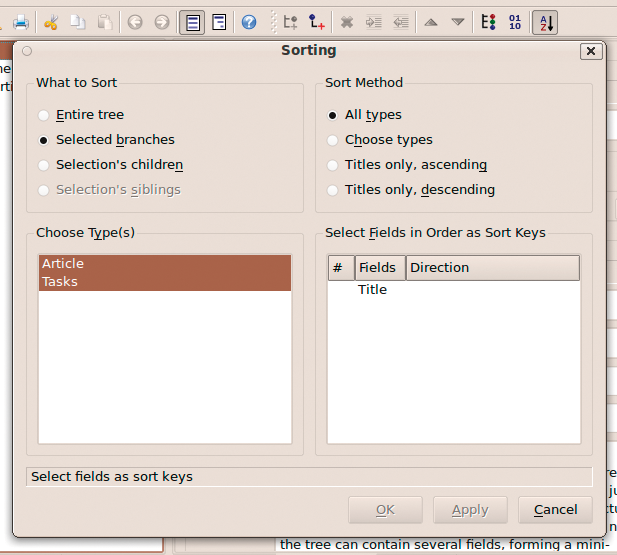
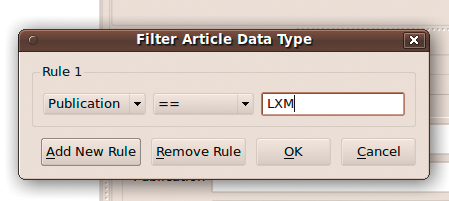
Thanks to TreeLine's sorting capabilities, you can also avoid using nodes altogether. To do this, simply add all your articles under the root node, make sure that node is selected, then choose Data | Sort Nodes. To sort the articles by their dates, select the Article item in the Choose Type(s) section, select the Priority field in the Select Fields in Order as Sort Keys section, and use the Left and Right keys to change the sorting direction (i.e., ascending or descending). Press OK to apply the specific sorting (Figure 5). The Conditional Filter feature provides yet another way to manage records. Using this feature, you can display only articles that match specific criteria. For example, to find all article assignments for a specific publication, select the root node and choose Data | Conditional Filter. Select the Article item from the Select data type drop-down list, and press OK. In the Filter Article Data Type window, define then the Title == PUBLICATION rule, replacing PUBLICATION with an actual publication (Figure 6). Hit OK, and you should see only records that match the specified criteria.
Besides the described features, TreeLine has a few other clever tricks up its sleeve. Using the Export feature, you can export your database into different formats, including HTML, ODF, tab-delimited text, and generic XML. TreeLine allows you to encrypt the file by enabling the Tools | File Options | Use file encryption option. This feature can come in quite handy if you want to store confidential data, such as passwords and account information, in a TreeLine database. The encryption mechanism in TreeLine uses the SHA hash function as a stream cipher, and it should be fairly secure. Finally, you can open a TreeLine database stored on a web server with the File | Open from web command (this opens the database in read-only mode, unless it's stored on a WebDAV server).
Because of TreeLine's rather unusual nature, you need to put some effort into learning its features, but once you've mastered the basics, you can put TreeLine to some clever uses. I've been using TreeLine for almost four years, and it still remains my preferred tool for managing personal information. Give it a try; chances are it will become an indispensable tool for you, too.
| INFO |
|
[1] TreeLine: http://treeline.bellz.org
|
| THE AUTHOR |
|
Dmitri Popov holds a degree in Russian language and computer linguistics. He has been writing exclusively about Linux and open source software for several years, and his articles have appeared in Danish, British, North American, German, and Russian magazines and websites. |