
Use your Linux system to watch TV, record home movies and listen to FM radio.
Yes, François, that is me—20 years ago, but still me. What are you smiling about? I don't look quite that strange. Yes, I've been told that I look like I am doing a Carl Sagan impression, but that was simply the way I spoke, mon ami. Stop smirking. Our guests will be here any moment and with this issue's feature on community networks, I am going to need you to take good care of them.
Ah, but they are already here. Welcome, mes amis! François—to the wine cellar. The 2000 Cabernet Sauvignon Stellenbosch from South Africa is drinking quite nicely right now. Please fetch it, tout de suite. Please, everyone, sit and make yourselves comfortable.
I was showing François a tape from a documentary I did a number of years ago with some friends. I used to volunteer at the community cable station where I operated the cameras and worked the video board from time to time. It was a great deal of fun. One summer, with the equipment from the station, my friends and I produced a documentary that I wrote and narrated. For years, I've had the tape floating around, and now, using this issue's feature as a springboard, I thought it might be nice to convert it to a more permanent, digital format.
Playing video from an analog source can be done with the use of a TV tuner card. The card I used is a Hauppauge WinTV card, based on the btv878 chipset. You can ignore the card's name safely, mes amis. It works quite well with any recent Linux kernel. The card I bought is well supported, and a driver for it was loaded automatically on my Mandrake 9.1 test system (it also worked beautifully on another Debian system). The Linux bttv kernel module, or driver, supports a large number of TV tuner cards. A quick look at the CARDLIST file in the kernel documentation (/usr/src/linux/Documentation/video4linux/bttv/) will give you an idea.
Welcome back, François. Please pour for our guests...and quit smirking, it isn't that funny. You see, mes amis, my faithful waiter is amused by the sight of myself all those years ago. Ignore him and enjoy the wine while I show you how this works.
Watching television is obviously the point, but these TV tuner cards sometimes have FM radio receivers as well. Watching television while you are trying to work might qualify as distracting. Listening to the radio isn't as problematic. An FM radio program that caught my eye is Gerd Knorr's frightfully simple radio program (bytesex.org/xawtv). This is an ncurses-based program that comes as part of the xawtv source package. I make a point of specifying source here, because the package, called radio, is separate from xawtv when you work with RPMs.
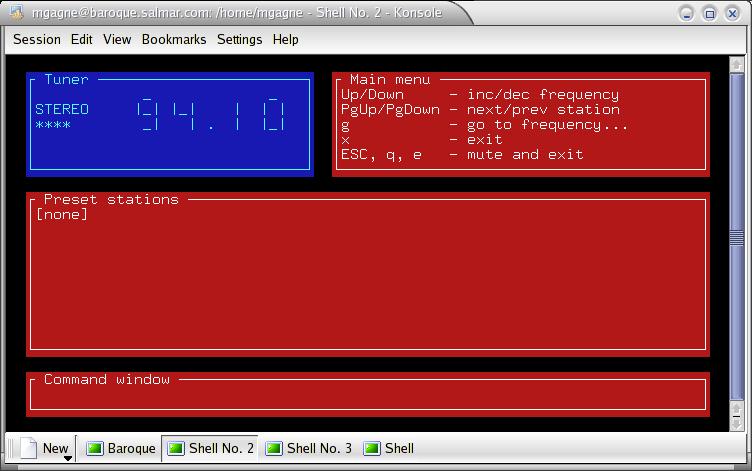
Figure 1. radio: Simple and ncurses-Based
From the command line, type radio -s. With the -s option, the program displays the frequencies it visits while looking for stations, then starts unmuted. If you use the -i option instead, the program writes a .radio file in your home directory with the stations and frequencies it identified. Then, you can go back and edit this text file to give more interesting names to the stations. You also can start the radio on a favorite station by passing the -f option (radio -f 99.10).
There you are, a local community network broadcast on that most venerable of medium, radio. I should point out that I did run into some interesting problems here. My Hauppauge card did not play sound directly. It was possible to plug my speakers right into the card's audio out port, but I wanted the control in the system. To do this, I had to use the accompanying cable to connect the tuner card to my system's sound card. I then used alsamixer to raise the levels of my line-in and all was well. Depending on your TV tuner card, you may have to do the same. This will be particularly important when we start talking about recording.
Another radio project you should have a look at is GQradio, created by John Ellis (gqmpeg.sourceforge.net/radio.html). GQradio features a slick graphical interface, autotune, station presets and more. The site offers Red Hat RPMs as well as source. Compiling the program requires the GTK+ and gtk-pixbuf libraries. Beyond that, it's the classic extract and build five-step:
tar -xzvf gqradio-0.99.0.tar.gz
cd gqradio-0.99.0
./configure
make
su -c "make install"
If you run the gqradio program from the command line, you'll notice something interesting the first time:
$ gqradio
Creating dir:/home/mgagne/.gqradio
Creating dir:/home/mgagne/.gqradio/skins
The program creates an initial directory for its configuration as well as for skins. That's right, the program is skinnable. Not only can you download skins, but GQradio comes with a built-in skin editor so you can unleash your creative spirit. Right-click on the GQradio GUI for a drop-down menu that lets you modify the program at will.
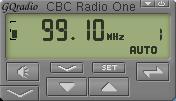
Figure 2. GQradio with the Presets Display Open
Next, we turn our attention to the world of video broadcasts and my own early community network brush with television reporting. François, perhaps you had better pour me a glass as well. After all your laughter, it occurs to me that I may need a little courage.
For the impatient among you, most Linux distributions come with a television viewing application called xawtv by Gerd Knorr (of ncurses radio fame). If you simply start up the xawtv program, you'll likely find that you get nothing but a blank screen, particularly if you are in North America. The program defaults to the PAL format among other things. To lock xawtv into some saner settings for your particular location, you need to edit the $HOME/.xawtv configuration file. Here's what mine looks like:
[global]
freqtab = us-bcast

[defaults]
input = Television
norm = NTSC

[vcr]
channel = 3
key = 3
The file is broken up into sections, denoted by a title inside square brackets (for all the possible settings, do a man xawtvrc). The global and defaults section are the most important ones, because they allow us to set our local transmission standards as well as the input device. The [vcr] section is one I added. Quite simply, it represents channel 3, the output from my VCR.
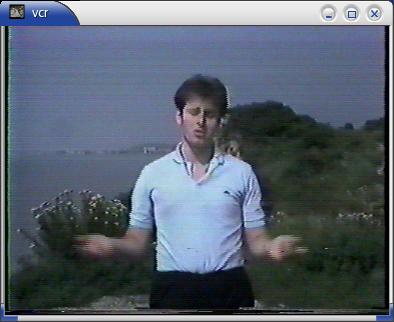
Figure 3. Future Linux Chef?
Many programs are available for watching TV. MPlayer (www.MPlayerHQ.hu) is a popular, do-it-all kind of player. Once again, check your distribution—you may already have a copy. Using codecs, it can play all those AVI or MPG files you have floating around. You may know this already, but MPlayer also can handle a TV tuner card. Here's how:
mplayer -tv \
on:driver=v4l:channel=3:input=0:norm=NTSC\
:width=640:height=480
The backslashes in the above command are there because I couldn't fit the entire command on one line. You can type it as one, unbroken line, if you prefer. To use the MPlayer GUI, use gmplayer instead. The driver parameter selects the video4linux driver (v4l). The channel setting is obvious, and the norm setting lets me choose the NTSC broadcast standard for North America. The final settings are for height and width.
These programs are great ways to watch TV on your Linux system, but if you are like me, you've looked with some amount of envy at the entertainment systems your friends with digital cable have a nasty habit of showing off. With their TiVos and their PVR (personal video recorder) units, they have access to on-screen displays of upcoming shows, which they can schedule and watch whenever the mood takes them. Well, envy no more, mes amis. To have an entire video entertainment system under the control of your Linux system, look no further than MythTV, a full-featured personal video recorder and television master control.
Imagine if you will, a digital video recorder that lets you view live TV, with instant replay so you can pause, rewind and fast-forward through the action. MythTV lets you program shows on a timer and view on-line television listings on which you can do string searches—looking for a particular episode of a Buffy rerun? Combine this with support for multiple TV tuner cards, multiple simultaneous recordings and a distributed system so you can set up different MythTV boxes on your network. Wrap it all up in a slick, themeable package and you are starting to get an idea of what I am talking about.
Does this sound like something you can't wait to get your hands on? Then, head on over to www.mythtv.org and pick up the packages. RPM packages are available for different distributions, as are Debian packages and Gentoo ebuild and digest files. Check out the “Software” section of www.mythtv.org/docs/mythtv-HOWTO-3.html for links to prebuilt packages. This fine package is also available in a source archive bundle.
MythTV is a very cool package, but making it run requires some work and that you install a few prerequisites. Most of these are development libraries comprising of freetype2-devel, XFree86-devel, qt-devel, lame and libexpat. MythTV recommends that you get the latest libexpat from sourceforge.net/projects/expat. Finally, to use MythTV's XMLTV channel information grabber and scheduling tool, you definitely need Perl and a handful of modules. It also is possible to use an infrared remote with MythTV (using lirc), but that is one nuance I did not sample.
You may find, as I did, that you need a few additional modules to get XMLTV actually working. These modules are XML::Twig, Date::Manip, LWP and XML::Writer. The easiest way to install them is with the perl -MCPAN -e shell command. Start the CPAN shell as root, and you'll see a cpan> prompt. If this is the first time you use CPAN, you'll encounter a question-and-answer session to help the software identify your local CPAN mirrors. Then, enter the following at the cpan> prompt:
cpan> install XML::Twig
cpan> install Date::Manip
cpan> install LWP
cpan> install XML::Writer
cpan> exit
This is all you need. There are also a handful of recommended modules, which you will be told about when you install the xmltv package. The installation is typical for Perl packages and not unlike the standard extract and build five-step:
xmltv-0.5.10.tar.bz2
cd xmltv-0.5.10
perl Makefile.PL
make
su -c "make install"
As part of the XMLTV installation, you'll be asked about listings for your area, so pay attention to the messages at this stage. You're almost there. Because MythTV uses MySQL to store its information, you need to set up a database for it. You also should have the qt-MySQL package loaded (look for qt-mysql or libqt3-mysql). Even if you have MySQL set up properly, you may get an error similar to QMYSQL3 driver not loaded if you run without this. Now, make sure MySQL is installed and running, then use the provided schema file:
cd database
mysql -u root < mc.sql
Depending on your distribution, you may not need the -u root above. Now, we still have a couple of database things to attend to here. At this point, only the localhost address is allowed to access the MythTV databases. In my case, I wanted to provide access to all users in my 192.168.22.0 private subnet:
$ mysql -u root mythconverg
mysql> grant all on mythconverg.* to \
mythtv@"192.168.1.%" identified by "mythtv";
The percent sign above is used as a wild card. Consequently, if you want to allow all domains in (probably not what you want), remove the subnet portion and leave only the percent sign.
Aside from taking several steps, the installation was pretty easy. That said, I did run into a couple of minor problems. For instance, with qmake, part of the Qt development package, the configure script didn't seem to be able to locate the program, so I created a symbolic link for it in /usr/bin. Then, I ran a make from the MythTV distribution directory, and all was well.
Now that you've compiled and installed the software, in the MythTV distribution directory, you'll see a directory called setup, and in that directory, an executable by the same name. Run the command as follows: setup/setup.
You'll see a screen with four options labeled General, Capture Cards, Video Sources and, finally, Input Connections. Go through each of these to configure MythTV for your local system setup. Your input connections (number 4) should basically be set up already as part of selecting your video sources. Pay attention to the on-screen help messages and guides as you go through this process. When you are done with all the setup steps, press Esc.
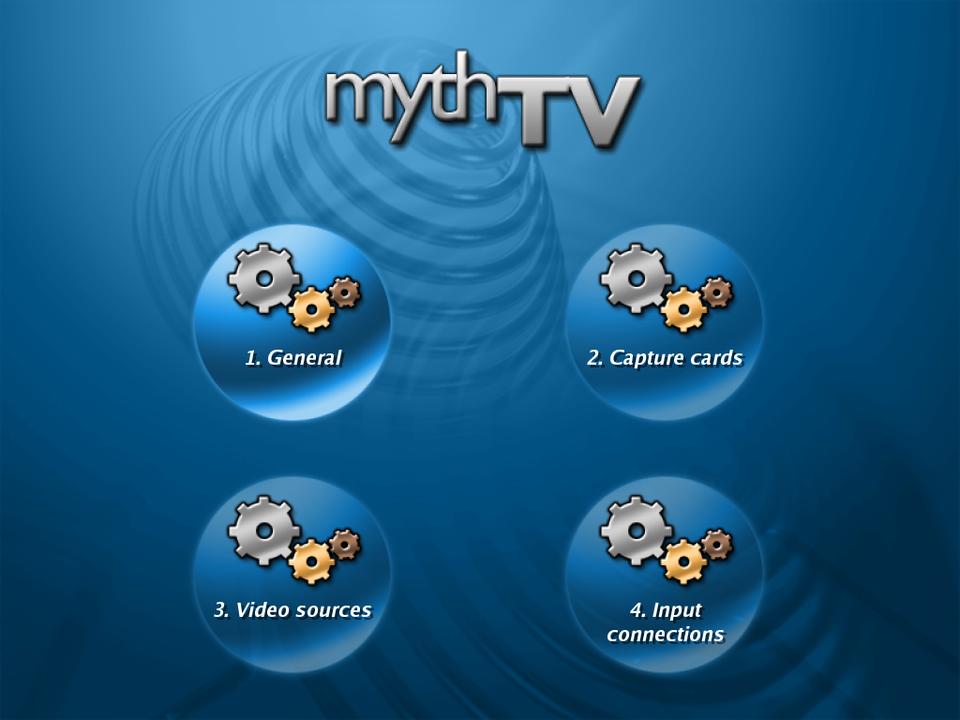
Figure 4. Setting Up the MythTV Front End
Now, run mythfilldatabase to pick up your television listings. If this is the first time, you may encounter an error because your local xmltv configuration file may not exist:
/usr/bin/tv_grab_na --configure
You'll be asked for your ZIP or postal code to help identify a local provider for the TV guide listings. From that list, you also will be able to decide for which channels xmltv will gather listings. Being one for spice in my life, I opted for maximum variety and accepted every channel. Filling the database with program information is certainly something you will want to do with a cron job.
The next step is to start the mythbackend program. I chose to run it as a dæmon by using the -d option (you can add this to your rc.local start-up scripts if you like).
Finally, as a regular user, run mythfrontend to start up the MythTV interface. At this stage, you have two options on the graphical screen, setup and TV. Use your cursor keys to navigate the screen. Choose TV, and you'll be able to select from watching TV now, scheduling a recording or watching a previously scheduled recording. You also can browse the Program Guide for current or upcoming programs (Figure 4).
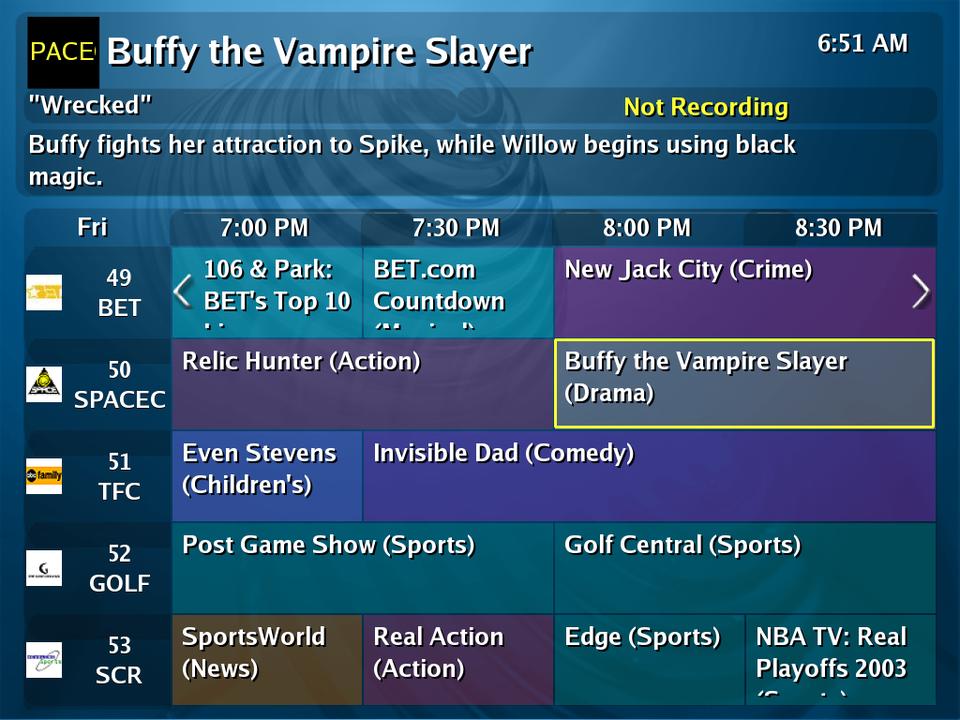
Figure 5. Searching through the MythTV Program Guide
Another option is to record embarrassing programs from your youth, such as my early documentary of the 1984 Tall Ships Festival, “Romancing the Sail”. Select the appropriate channel for your VCR, pop in the tape and record those memories.
MythTV is an excellent package with a great deal of energy and promise. In addition to the obvious television playing and recording aspect of the package, additional modules are available, which I don't have time to cover here. They include MythWeb, which allows control of MythTV through a Web page; MythGallery, for photos and slideshows; MythMusic, for ripping, storing and playing music files; and MythWeather, for weather information.
Well, mes amis, the hour is growing late and we must soon close the doors. As late as it is, after tonight, you will have no worries about missing your favorite programs, non? In the meantime, François happily will pour you another glass of wine—perhaps we should make it two glasses, and you can pretend you never saw that old Marcel video. There is surely something to be said for growing up. Until next time, mes amis, let us all drink to one another's health. A vôtre santé! Bon appétit!
